

We know how daunting it can be to use sewing patterns for the first time. No worries! We are here to help. Today, we are diving into the basics of how to read a sewing pattern. Follow along as we review the basic info you will need, as well as tips to keep in mind.
Let’s Begin!
Start by looking at the instructions section of the booklet or file. This section is loaded with information such as helpful tips before getting started and the best material to use for your project.
Find the Style Lines
When you open up your new pattern, look at the flat, drawn designs to get a better idea of whether this project is the right one for you. It’s a more accurate representation of what you will be sewing and less distracting than the 3D image usually shown at the front of the kit.
Think About Your Sewing Level!
Many patterns will indicate a level of difficulty for example if you’re a beginner, lean towards projects marked as “easy” because these will have a better guide on how to construct your project. They’ll indicate the right tools for each step and showcase how to properly do certain steps. For those that have more experience and feel they’re above the “easy” patterns, there are many options to choose from as well.
As you continue to grow your sewing skills, you’ll be able to explore more advanced patterns. We recommend checking out nearby sewing classes and checking out construction books to help! Don’t rely on one thing to grow. Continue to find different ways of creating projects through blogs, classes, and social media.
Check Out Fabric Suggestions
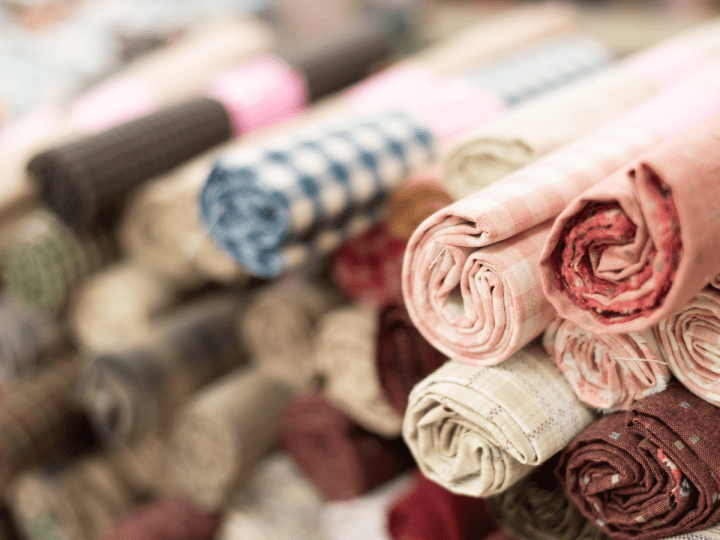
The best part about patterns is many give you the layout for what tools you’ll need on your new project. Many will suggest a fabric that is well suited to the pattern, whether it be because of durability, stretch, or material feel. Using the encouraged fabric will also get you closer to the desired look.
Once you have more experience in sewing, feel free to experiment with different fabrics! Sometimes, leaving the path and venturing out to try new fabrics in a project that called for something different can surprise you, or at least give you a lesson on why something won’t work next time.
Keeping Up with Yardage
Pattern designers will include fabric yardages to give you an idea of how much fabric you will need. While this should account for pre-wash shrinkage, we recommend buying at least 5-10% more than you’ll need. Think of this as a safe route in case your measurement needs to be higher for your fit or you want extra fabric for accessorizing a clothing project.
A hot tip is to pay attention to the width of the fabric. While the average width is usually 60″ or 44″, you can come across narrower fabrics. When this happens, keep in mind to buy more yardage to accommodate all the pattern pieces.
Don’t Forget Your Thread and Notions!
Patterns will include a list of notions you need for your project like elastic, zippers, and more. Add these to your shopping list!
Size Chart
The first mistake many make is trying to create sizing based on what people buy at the store! Located on your pattern, you will find a size key or chart that helps you choose the right lines for your size.
Make sure to create your project off your body measurements. Don’t worry if your measurements seem off that charts, charts are only averages, and many will experience this! Remember your size is always changing and it’s best to do this every month or so. We recommend determining the size to sew using different measurements for different pieces of clothing:
• Top/dresses: Use chest (or high bust) circumference
• Pants: Use the hips girth (meaning widest girth under the belt, usually around the seat)
• Skirts: Use natural waist (even if the skirt will then sit in a low or high waist)
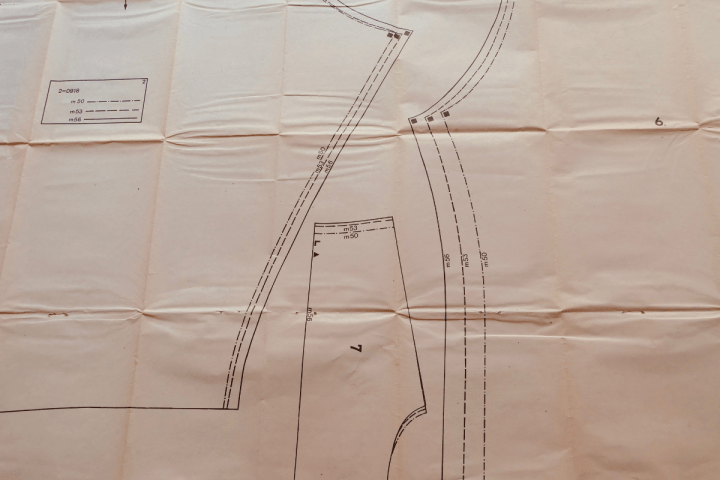
Time for the Pattern Pieces!
Check for which pieces need printing. Some patterns may include pieces for simple shapes that you cut by measurement only.
Read Your Symbols
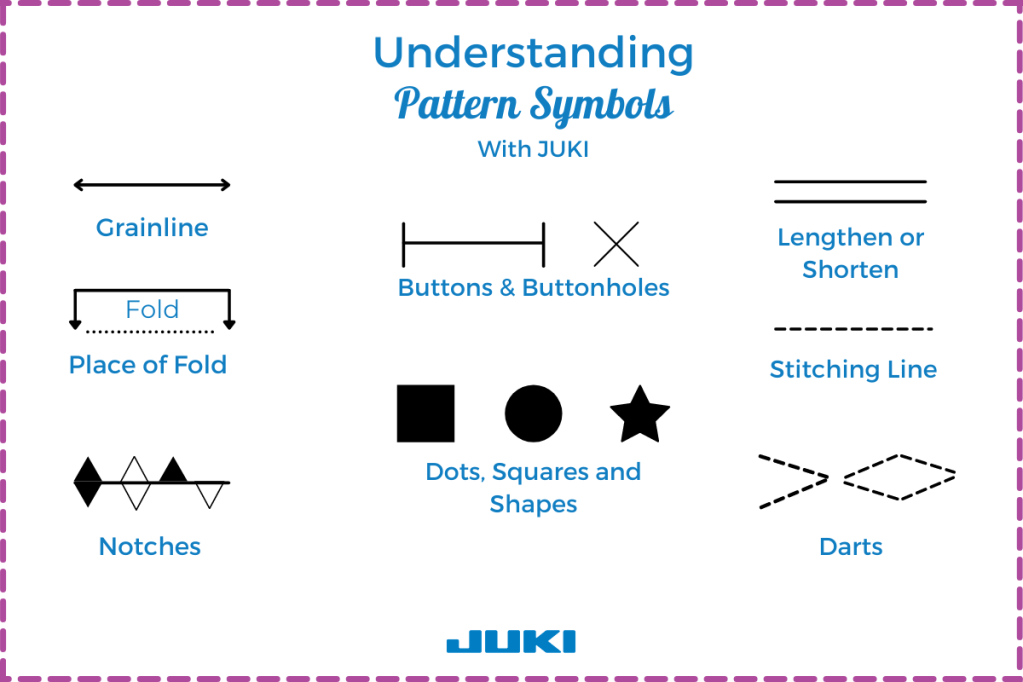
Symbols are how the designer communicates with you through their patterns! These symbols will show you how to place the pattern, access where the grainline is, what pieces need to align, and more. Refer to the symbol chart and mark when transferring the sewing pattern onto the fabric.
Let’s get to Cutting!
Now there are two ways you can cut. One method is by placing the pieces on top of the fabric and cut from there. However, many times this technique can waste a lot of fabric! Another way to do this is simply to place your cut-out pattern pieces on top of the fabric and play a game of Tetris by fitting the pieces. Make sure to follow the lines, and you’ll save fabric while getting the project done.
We hope this helps you the next time you decide to pick up a pattern book. Don’t forget to tag us on social media when you create a project using your favorite pattern book!

Thank you, I’ve recently been hunting for details about this topic for ages and yours is the best I’ve found so far.
LikeLiked by 1 person
Hi to every single one, it’s truly a good for me to pay a quick visit this
web site, it consists of helpful Information.
LikeLiked by 1 person