It’s almost time for spooks and candy JUKI Lovers! For today’s blog, we will share our top 5 favorite Halloween projects you can begin creating this weekend. So whether you’re going trick-or-treating, or staying at home, follow along below for ideas you can start today!
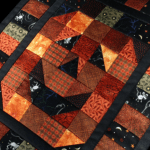
Halloween Patchwork Quilt
Stay warm this fall and create a Halloween patchwork quilt! Using a variety of Halloween fabric pieces, think witches, pumpkins, and ghosts, you can begin making your very own patchwork quilt. Quilts are the perfect accessory to any home, used and loved by everyone.
We recommend checking out your local quilt shop for holiday quilt bundles. Great options when you want to create a patchwork quilt, and don’t have the scraps, are browsing charm bundles, jelly rolls, and mini-charms! Also, don’t forget to grab batting for your quilts and have fun by bringing texture to the surface using free-motion quilting techniques.
The perfect addition to so many costumes, a cape can be used for various characters ranging from royals to superheroes. To use this cape multiple times, create your piece using basic colors like white, red, or black so you can enjoy this project through the years.
For creating a cape, we recommend having fabrics like stretch velvet, fleece, or wool! Usually, you’ll use about 2 yards of fabric for an adult cape and 1 yard for a child’s cape. This is an excellent apparel project for a beginner to try their hand at. For more advanced sewers, you can add features like trims and a hood for a more finished and professional look.
We recommend having aCording Foot on hand if you plan to attach a string inside for the cape hood. Also, use a Decorative Stitch Presser Foot to add designs on your cape’s ends for extra personalization!
Spooky Placemats and Table Runner
Decorate your home with a spooky table runner and matching placemats! A fun and easy home project, you can accessorize and personalize your kitchen and dining table with fun fabric designs and colors.
When creating placemats and table runners, we recommend having some tools on hand. Inside your placemats and table runner, you’re going to place a fleece or batting; this will stabilize your project. Spray glue is an excellent adhesive for this! Once you’ve pieced together your mat, you can choose to leave it as is or add designs with free motion quilting.
For yardage, we recommend 2-3 yards of fabric. With one yard, you can create up to 8 basic-sized placemats, and with your other yards, you can create your table runner depending on your table length! Keep a ¼ presser foot on hand when you’re ready to complete your project, so you can quickly finish the edging.
Halloween Garland
Decorate your archways and doorways with a fun garland! Easily created with less than a yard of fabric for the hanging pieces and string, this décor piece is the perfect touch. For the hanging details, we recommend using backing fabric for stabilization.
For this project, keep your ¼” presser foot nearby! Perfect for creating a clean edging on each hanging piece and the edging on the hanging string, this accessory can be the only foot you need for the project.
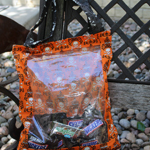
Trick–or–Treat Bag
Lastly, don’t forget to have your trick-or-treat bag ready! Wishing you a happy spooky season, download our free instructions for our see-through trick-or-treat bag here. With a finished size of 14″ x 16″, this bag will carry all those treats home!
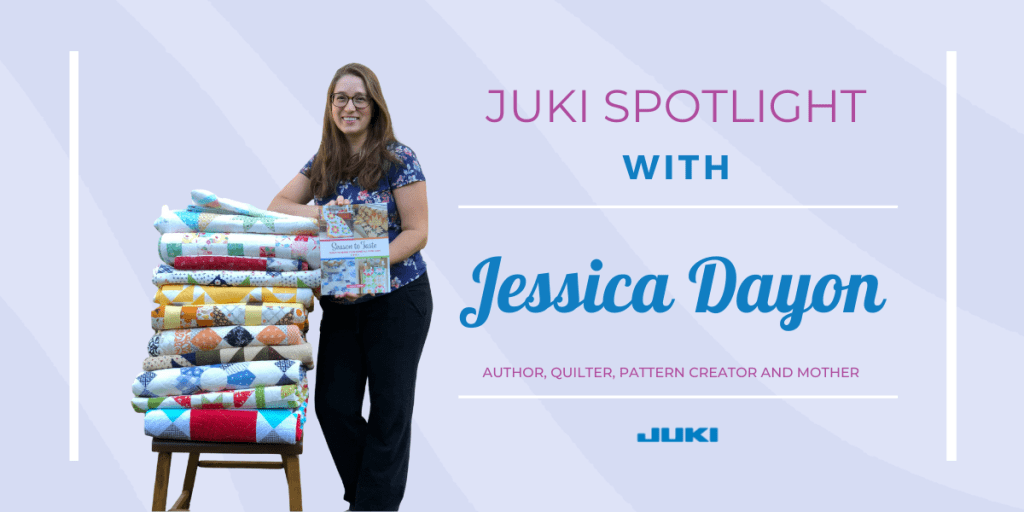
From her days in biochemistry and biology to becoming an author, quilt creator, and pattern designer, we’re so excited to introduce Jessica Dayon! Author of three pattern books; ‘A Year in Solids’, ‘Season to Taste: Quilts to Warm Your Home All Year Long’, and the upcoming ‘Precut Parade’, releasing August 1st, we’ve asked Jessica to join us and talk about her life in quilting, and journey in becoming a pattern author.
Like so many of our readers, Jessica’s journey starts with a pull towards quilting. Coming from her background as a scientist, with a degree in Biology and Biochemistry, she hadn’t tried quilting before. But, with no connections in the quilting world at the time, she decided after her 4th child to dive in! After being bit by the quilting bug in the summer of 2017, she began teaching herself and fell in love with the craft. Her first project? A table runner for a birthday, one that was never even completed! It did, however, open the door to quilting and hasn’t closed since.
“The first day I started quilting, this little fire was ignited inside of me, and it’s been burning ever since. Quilting is my passion.”
With each day that passed, she continued to work on the aspect of making a quilt and improving her skills. Pushing herself to learn new skills for the sake of learning, she attempted new methods and tricks for quilting her projects.
In 2017, Jessica also decided to open her Instagram account to document her journey and share her work. She still remembers having less than 100 followers and the excitement that came when a new one followed. To this day, she is still in awe when she sees new followers join her page. Currently, Jessica’s following topples over 76 thousand followers, a community focused on inspiring each other in their quilting journeys.
“I work hard and I love sharing and engaging with my followers. I hope they feel valued and inspired by following me. I want to share the joy of creating every day with them. I’m grateful for the community that I’ve built there.”
As her skills grew, she decided it was time to start creating patterns. Working hard to understand pattern creation, she began designing patterns after only one month of quilting.
Sitting at her computer, Jessica would design quilt after quilt, constantly creating. Thinking of the design was the easiest aspect when she began writing patterns. With hundreds of designs currently saved on her computer, it’s no wonder she went on to author and design pattern books. Within a short timeline, she found the most challenging part of becoming a pattern author has been the time constraints from publishing. Teaching her to work quickly it’s now become a strength to begin and finish a quilt quicker than she would have imagined possible when she first started.
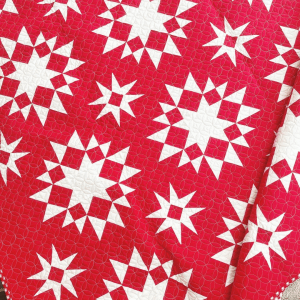
Fireworks – Contributed to Red & White II
Inspired by the freedom of creating, Jessica focuses on not pressuring herself to finish one project at a time. Instead, she allows her creativity and curiosity to flourish and wander, moving from project to project, not restricting herself to one at a time.
“When I’m at the sewing machine and I’m working on a project, sometimes my mind wanders to another block and I just have to make it. I don’t stop myself when the urge to do this arises.”
Knowing she’ll go back to her original project with a focused mind, she’s found letting herself have this freedom while creating removes pressure from her work. Even if a design doesn’t come out how she expects, she’ll just design another and another until she’s happy with the result.
Just like she creates, Jessica allows her designs to wander in style too! Not picking a distinctive style, she creates using her TL-2010Q sewing machine and a versatile collection of fabric types and patterns. Easy to take care of and use, Jessica loves recommending the TL-2010Q to quilters out there! While she chose the machine for its features and price point, she’s found the TL-2010Q to be highly reliable, accurate, and speedy.
Depending on her mood, she’ll select patterns and styles that speak to her and fill her up creatively. Instead of boxing her style and creativity, which Jessica believes would lead to burn-out, she focuses on her creative self-guide to create her designs.
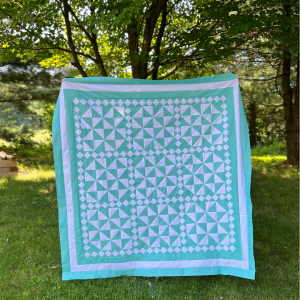
As for her pattern books, Jessica focuses on creating themed designs! Allowing her creativity to flow; her books focus on patterns that inspire her while hopefully inspiring those who use them. For example, in her pattern book, “Season to Taste: Quilts to Warm Your Home All Year Long,” Jessica focuses on quilt designs for all four seasons! Centered on the seasons, with each season having three quilt designs, you can see her creativity flourish with each pattern being different and beautiful.
Her best advice for pattern creators trying to sell their work is this, “I recommend staying true to yourself and your style. There is room for everyone who wants to design patterns. Each person is unique, and you don’t have to do things like anyone else… it’s better if you don’t! Being your own, authentic self will get you far. Hard work will get you even further.”
As a pattern creator and author, she advises creators to be mindful of the work that comes with this venture. From marketing to IT, you will be the one to do it all when you first start your business. While it can seem overwhelming at first, taking each step one at a time has been her motto. Her recommendation is to write your goals down, like a skill you need to learn or a marketing project that needs to get done and work towards each one.
As we eagerly await Jessica’s next pattern book, to be released this upcoming August, we’re excited to share she has even more in the works! Keep an eye on Jessica’s social for future quilt-alongs, new pattern books, and possibly, even classes one day.
“Quilting is a major part of my life now. It is my passion – There are so many wonderful things to do in the quilting world, and I want to do them all!”
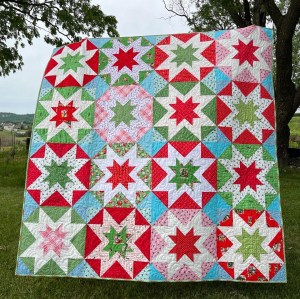
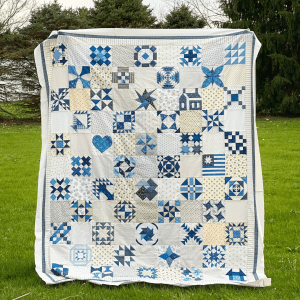
Scrappy Sampler
To learn more about Jessica, her pattern books, and her quilting journey click on the links below and join her socials today! We hope this spotlight encourages you to begin writing your own sewing and quilting patterns, and even possibly publishing them one day!
What theme would your pattern book have? Let us know down below!
Do you remember the first time you created a sewing pattern? Have you sold one yet? Pattern creation in sewing and quilting is a skill that many learn to love and participate in. Whether they’re creating quilts or their closet, pattern creation allows you the freedom to truly form an idea straight from your mind. Once others start noticing our designs and appreciating the final project, we may decide it’s time to start selling these patterns. But how do you publish and sell a pattern book?
While there are many ways to go about being published; agents, publishing houses, and book deals, we now have the option to self-publish our books thanks to the internet. Today we’re going to talk about how you can self-publish your pattern book right from home, using the right tools.
Creating Your Pattern Book
Let’s start with your pattern book. If you’re reading this, you most likely already know how to create a pattern, so let’s break down turning this into a pattern book.
Create a Theme and Outline
Before starting this journey, sit down and decide what type of patterns you’ll be focusing on (quilts, child apparel, workout apparel, etc.) From there begin drafting an outline of how you would like your book to flow.
Assign Yourself Writing Time
When it comes to creating a book, whether it’s fiction or patterns, it can be time-consuming! Make sure to set aside time in your days so that you can focus on writing your patterns. Our best tip? Set yourself an end goal date for the best results.
Ask For Help
When writing your first pattern book, it’s best to have outside assistance proofreading your work, testing your patterns, and confirming the flow of the book is understandable to the skill level you’re marketing to. For example, if your pattern book is geared towards beginners, we recommend being detailed in the little things.
Finding Your Front Cover and Book Design
Most people will judge a book by its cover, so make sure that your cover is eye-catching and true to your pattern designs. Self-publishing books still compete with other booksellers, and you want your book to garner attention.
Some will be able to create their front covers, but for those who want a more professional design, there are websites that allow you to hire creative designers for affordable prices. If you choose to design your front cover, here are some tips to keep in mind:
1. Research other pattern books and review the designs that grab your attention. Decide what works best, and what you find eye-catching, and think about how you can create a cover that will draw attention to your work.
2. Remember, your work will be sold online as a self-publisher, so the graphics used to sell your book will be minuscule. Keep this in mind when designing your cover so that you stay away from designs too busy, as that would make the image difficult to see, or using small details that would be overlooked as a thumbnail image.
3. Choose a title font that is legible for viewing and easy reading and a title that is eye-catching and captures your work well.
4. Don’t forget the spine and back cover! While not seen during online shopping, customers will see this after purchasing and we want to make sure the whole design is complete and follows your front cover.
If you choose to design your book, below are a few design programs you can consider using:
– Adobe InDesign
– Canva
– Affinity Publisher
– Shutterstock Editor
If you choose to hire a designer for your book, below are a few sites we recommend checking out that offer designers for hire.
– Fiverr
– Guru
– Reedsy
– Upwork
How and Where To Publish
The next step is thinking about how you want to sell your books. Depending on how you choose to publish, this will affect your channels of distribution and the format you sell in.
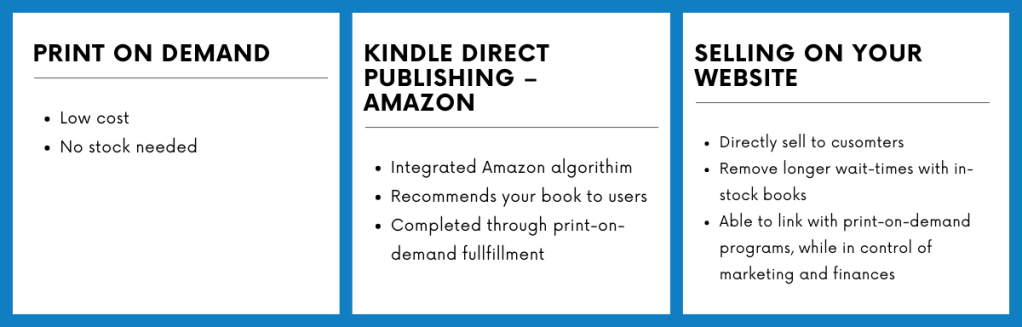
Print on Demand
A concept used by self-publishers due to its low cost, this publishing idea allows you to print books when purchased and removes the aspect of creating copies and stocking them. For example, ‘Lulu Direct’ is a self-publishing platform for printing and distributing books with a large style selection you can choose from to personalize. For other platforms, you can check out Acutrack and Blurb.
Kindle Direct Publishing – Amazon
Amazon’s self-publishing platform has seen a rise in popularity due to the ease readers enjoy while using its platform. With over 50% of the printed book market being sold by Amazon, your book has a high chance of being viewed thanks to the Amazon algorithm. Using reader’s recommendations, your book will be placed in front of new customers without your assistance.
The way amazons self-publishing works is through print-on-demand fulfillment and the option for e-book sales. E-book sales must be exclusive to Amazon if sold on their platform, but physical books are free to be sold on their site and anywhere else. Amazon will handle printing and shipping, with a percentage of royalty credited to the creator.
Selling on Your Website
If you have a website for your business, you can link your account with a program like ‘Lulu’ to begin directly selling books to customers. By integrating Lulu and a website platform like Shopify, you can sell print-on-demand books and control your shop sales and marketing with Shopify.
Another option is buying your pattern book in bulk from a print-on-demand publication and selling it from inventory on your site. This option is best for offering faster delivery instead of having a multiple-day wait time for printing.
Formatting Your Book
Once you’ve decided how and where you’re going to sell your new pattern book, let’s cover the formatting aspect. Depending on the platform you use for publishing, this will affect how you will format your book.
For example, if you choose to use Amazon’s platform they require you to create two different format downloads for sales. One is the manuscript, the manuscript must include all the pages inside your book. Next is the cover, this file will include the design covers you’ve completed for the front, back and spine of the book.
Make sure when creating your format for the pattern book you mind the margins and trim of your work. Depending on what book size you choose to publish in, make sure your book measurements transfer correctly before printing.
To start, place an introduction, cover the chapter/section breakdowns, go over the symbols you’ll use in your pattern book, and cover key details the reader should mind.
If you choose to section off your books, for example by designs, seasons, or projects, make sure to create distinct chapter marks for sewists to follow along and easily find the pattern they’re looking for. Creating a pattern book that is easy to read through will allow sewist to enjoy your work best.
Launching Your Pattern Book
Like any other product you’d sell, it’s time to start marketing and planning your selling space! Below are the steps you should take before launching your book.
Make sure your channels of sale work
Confirm that your program is in working order and receiving payments. Run a ‘test purchase’ and go through the site like a buyer, even purchasing a book if you’re working through print on demand. This is a great way to confirm your sale process is in order and will work for future sales.
Setup your website
If you don’t already have a website for yourself, make sure to get a basic one up and running! Think of your website as a ‘home’ for all your sales, products, and yourself. Here is where you will lead your social media channels and sales, to create a customer base and audience. This will make it easier for customers to get to know you.
Create an email marketing list
Building an audience isn’t easy, but one of the best ways to do this is through email marketing. Through this platform, customers can keep an eye out for future book projects, updates, and patterns. We recommend setting up a sign-up that allows visitors and customers to place their emails for your records.
Use an analytics tool
Last, but not least, keep an eye on your analytics! Website and storefront analytics is the best way to understand your audience, customers, sales, marketing goals, and more. Programs like Shopify come with a built-in analytics program, but Google Analytics is free to use and available for all.
Market and Sell Your Book!
Once you’ve created your pattern book, set up and tested your shop, and planned your marketing and website, you can begin getting your book out there! To help you find your customers, we’ve created a list of marketing ideas you can use for your new pattern book.
Share excerpts from your pattern book. Whether it’s one free pattern to bring in interest, or a section where you dive into a technique, showcasing what people can have and learn is an amazing use of attention-grabbing.
Encourage reviews! Reviews will bring attention to your books, and assist in sales since this will assist the algorithm in recommending your product to other customers.
Social media ad campaigns are exciting! Whether you decide to use Facebook, Instagram, or Pinterest, these campaigns can help you get in front of the right audience. Keep in mind that social media campaigns come at a cost, so we recommend setting aside some money for social media ad work if you choose this route.
Network and get your name out there! Whether you co-host podcasts, jump in on blog and forum spaces, or work with another sewist, bringing attention to yourself and your brand through word of mouth and others is a great way to build your credibility and expand your audience.
Need help creating a marketing plan? Visit us here to learn how to write a marketing plan today.
Keep It Going
You’ve now published your first book! The best plan is to keep promoting yourself and working on your patterns. As you enjoy the journey of creating and publishing pattern books, continue focusing on your marketing strategies, sales analytics, and building your profile and website.
Don’t be discouraged if you don’t see rocket sales when you first launch, as these types of things take time! As you continue to work on your patterns and skills, you’ll find yourself gaining a deeper understanding of the business aspect of it all. We hope this inspires you to publish your pattern book! If you created a pattern book, what type of patterns would you focus on? Let us know in the comments below!
We know how daunting it can be to use sewing patterns for the first time. No worries! We are here to help. Today, we are diving into the basics of how to read a sewing pattern. Follow along as we review the basic info you will need, as well as tips to keep in mind.
Let’s Begin!
Start by looking at the instructions section of the booklet or file. This section is loaded with information such as helpful tips before getting started and the best material to use for your project.
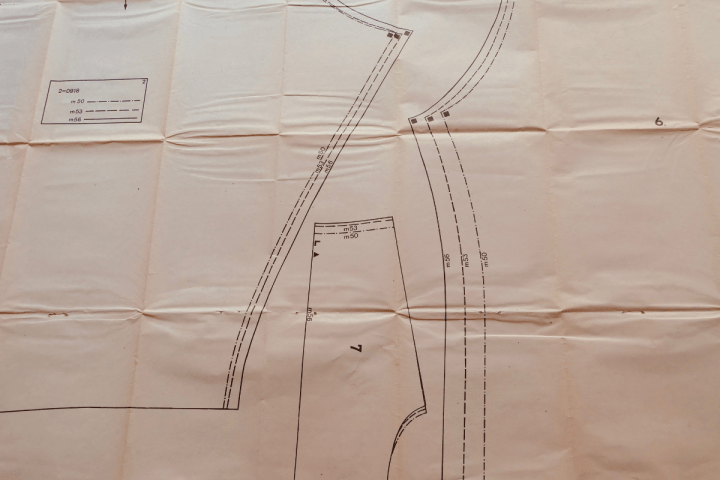
Find the Style Lines
When you open up your new pattern, look at the flat, drawn designs to get a better idea of whether this project is the right one for you. It’s a more accurate representation of what you will be sewing and less distracting than the 3D image usually shown at the front of the kit.
Think About Your Sewing Level!
Many patterns will indicate a level of difficulty for example if you’re a beginner, lean towards projects marked as “easy” because these will have a better guide on how to construct your project. They’ll indicate the right tools for each step and showcase how to properly do certain steps. For those that have more experience and feel they’re above the “easy” patterns, there are many options to choose from as well.
As you continue to grow your sewing skills, you’ll be able to explore more advanced patterns. We recommend checking out nearby sewing classes and checking out construction books to help! Don’t rely on one thing to grow. Continue to find different ways of creating projects through blogs, classes, and social media.
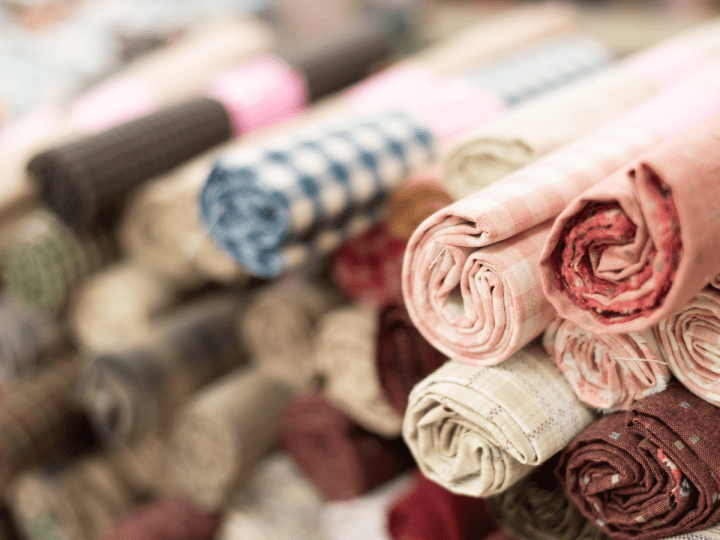
Check Out Fabric Suggestions
The best part about patterns is many give you the layout for what tools you’ll need on your new project. Many will suggest a fabric that is well suited to the pattern, whether it be because of durability, stretch, or material feel. Using the encouraged fabric will also get you closer to the desired look.
Once you have more experience in sewing, feel free to experiment with different fabrics! Sometimes, leaving the path and venturing out to try new fabrics in a project that called for something different can surprise you, or at least give you a lesson on why something won’t work next time.
Keeping Up with Yardage
Pattern designers will include fabric yardages to give you an idea of how much fabric you will need. While this should account for pre-wash shrinkage, we recommend buying at least 5-10% more than you’ll need. Think of this as a safe route in case your measurement needs to be higher for your fit or you want extra fabric for accessorizing a clothing project.
A hot tip is to pay attention to the width of the fabric. While the average width is usually 60″ or 44″, you can come across narrower fabrics. When this happens, keep in mind to buy more yardage to accommodate all the pattern pieces.
Don’t Forget Your Thread and Notions!
Patterns will include a list of notions you need for your project like elastic, zippers, and more. Add these to your shopping list!
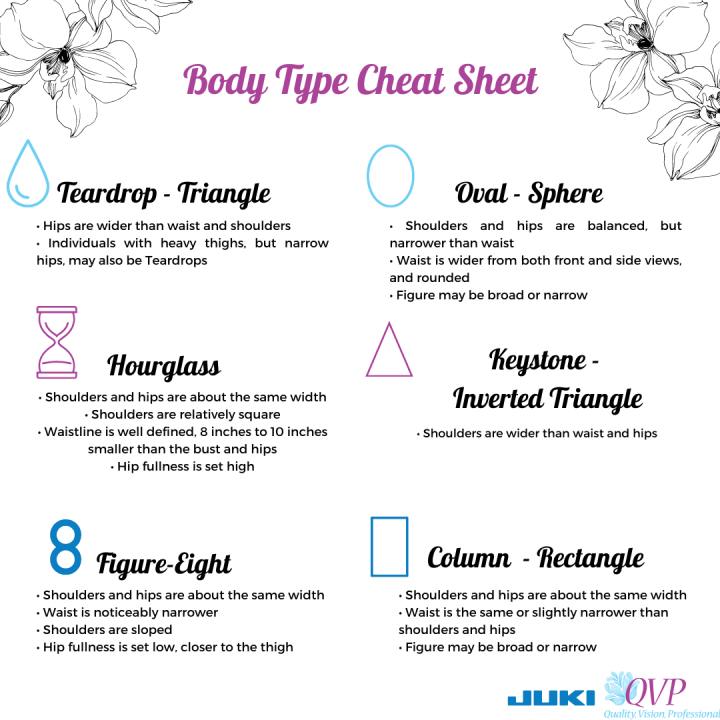
Size Chart
The first mistake many make is trying to create sizing based on what people buy at the store! Located on your pattern, you will find a size key or chart that helps you choose the right lines for your size.
Make sure to create your project off your body measurements. Don’t worry if your measurements seem off that charts, charts are only averages, and many will experience this! Remember your size is always changing and it’s best to do this every month or so. We recommend determining the size to sew using different measurements for different pieces of clothing:
• Top/dresses: Use chest (or high bust) circumference
• Pants: Use the hips girth (meaning widest girth under the belt, usually around the seat)
• Skirts: Use natural waist (even if the skirt will then sit in a low or high waist)
Time for the Pattern Pieces!
Check for which pieces need printing. Some patterns may include pieces for simple shapes that you cut by measurement only.
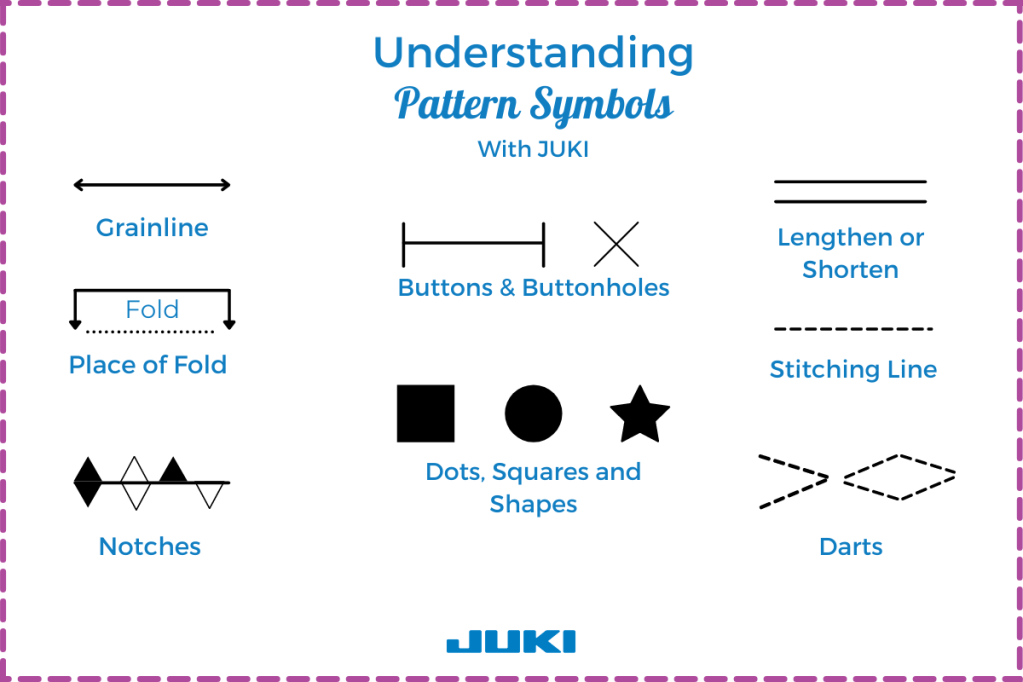
Read Your Symbols
Symbols are how the designer communicates with you through their patterns! These symbols will show you how to place the pattern, access where the grainline is, what pieces need to align, and more. Refer to the symbol chart and mark when transferring the sewing pattern onto the fabric.
Let’s get to Cutting!
Now there are two ways you can cut. One method is by placing the pieces on top of the fabric and cut from there. However, many times this technique can waste a lot of fabric! Another way to do this is simply to place your cut-out pattern pieces on top of the fabric and play a game of Tetris by fitting the pieces. Make sure to follow the lines, and you’ll save fabric while getting the project done.
We hope this helps you the next time you decide to pick up a pattern book. Don’t forget to tag us on social media when you create a project using your favorite pattern book!