From Sketch to Garment

Every sewing project starts the same way, with an idea. And, when it comes to turning that idea into something wearable, it’s especially important to have a machine that can support every step of the process.

In this blog, we’re going to talk about the journey of garment creation from ideas to planning and construction, and how to do it with JUKI by your side. Our sergers and sewing machines are created to help you conquer each step with ease and create an outfit you’ll love to wear. But before we get to the features that help you create, let’s start with the base of your project.

Start With the Vision

Before the first stitch, garment creation starts with a concept. This is the stage where everything starts to take shape. Fabric choices, patterns, colors, and fit can all come together before you even sit down at the machine. Some sewists prefer sketching out full designs, while others gather inspiration from fashion trends, social media, or ready-to-wear pieces they want to reinterpret.

It also helps to think through how the garment will actually be worn in real life. Is it an everyday piece, something more structured and tailored, or something soft and flowy with movement? Fabric choice plays a huge role here, since the same pattern can feel completely different depending on the material you use.

A few key things to think about at this stage:

  • Fit adjustments and shaping
  • Thread color and weight choices
  • Closures like zippers, buttons, or hooks
  • Seam finishes and interior details
  • How the garment will actually be worn

Taking a little extra time here can make a big difference later. We recommend pre-washing fabric, organizing pattern pieces, testing stitches, and planning your steps ahead of time. All these steps can help make the sewing process smoother once you begin construction. Even small details like topstitching placement can elevate the final look.

This is often one of the most creative parts of the process; it’s where your idea starts becoming something real, long before the first seam is sewn.
Building with the DX-2000QVP

Once you have your concept design, it’s time for everything to start coming together. Fabric pieces turn into structure, seams start forming shape, and your idea becomes something you can actually try on.

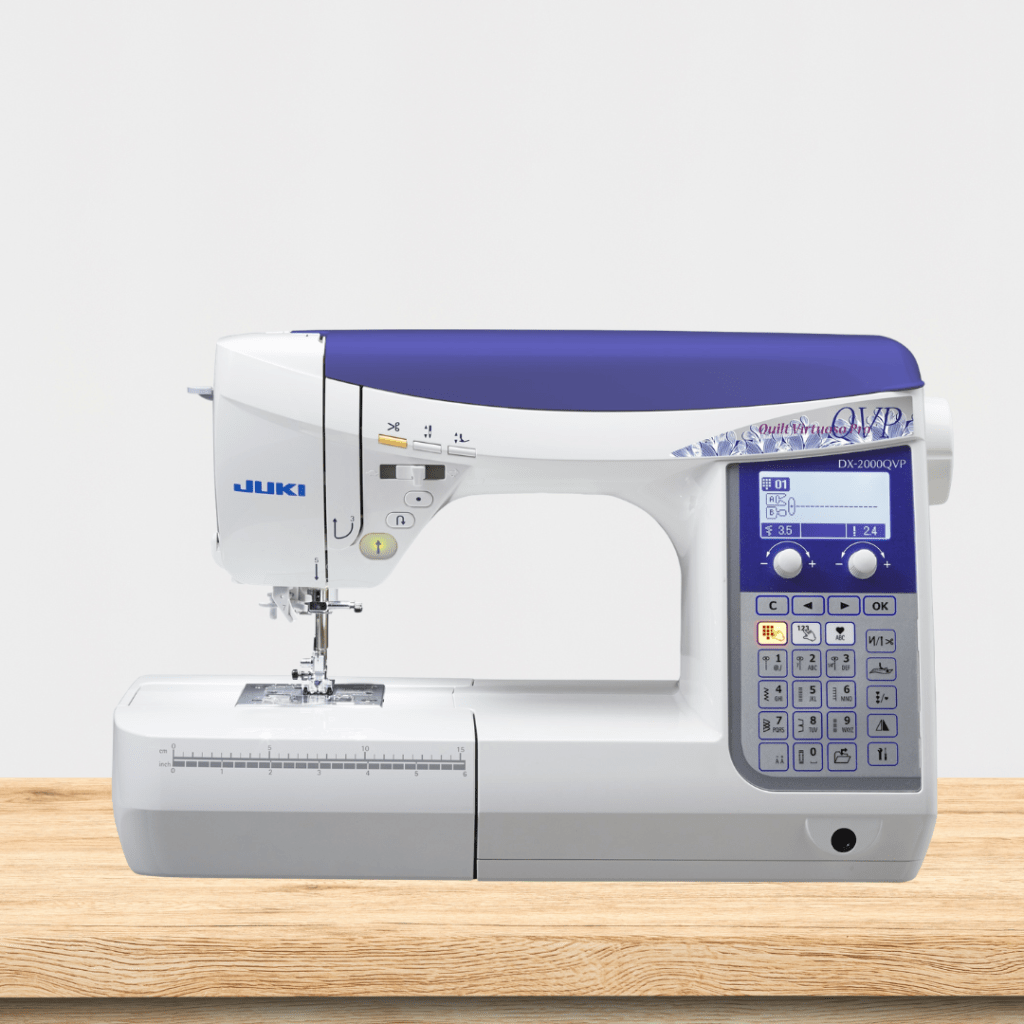
One machine we want to highlight for garment creators is the DX-2000QVP. This machine was created to support you through that entire construction process. From straight seams to curved stitching, it handles a wide range of garment work with steady control. Whether you’re piecing together a fitted bodice, attaching sleeves, or working through multiple layers, it helps keep stitching consistent so you can focus more on the construction itself.

It also gives you flexibility as you move through different steps of garment-making. You can go from utility stitches to zipper insertion, buttonholes, and decorative topstitching without constantly overcomplicating the setup. That makes it easier to stay in the flow of your project instead of stopping to adjust settings every few minutes.

From structured jackets to everyday dresses, shirts, and skirts, the DX-2000QVP supports the full build process while still giving you space to add personal details and creative touches along the way.

Finishing with the MO-2000QVP

Once your garment is fully assembled, finishing is what brings everything together and gives it that clean, professional look.

With an Air Serger like the MO-2000QVP, each step feels more approachable and efficient. For example, its air threading system helps make setup quicker and less of a hassle, so you can move straight into finishing your seams and edges.
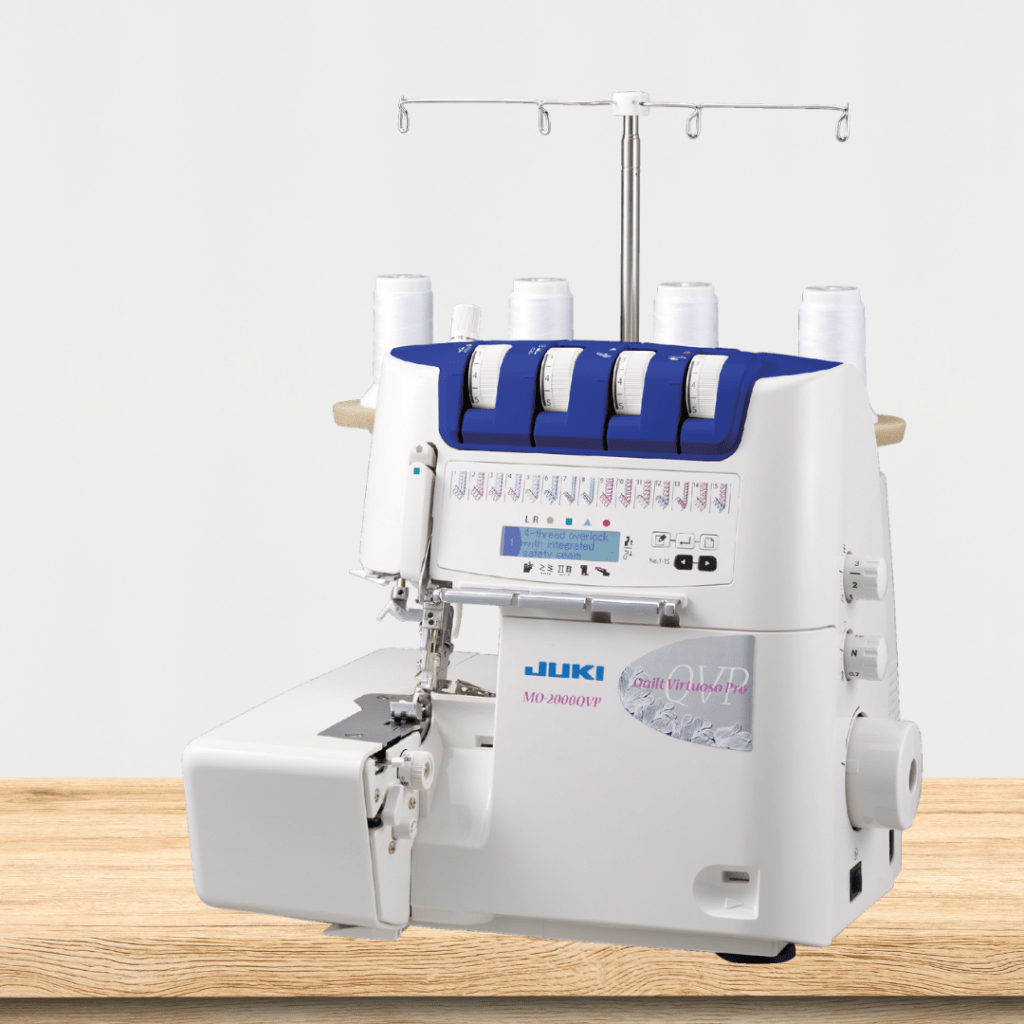
It also works smoothly across a variety of fabrics, which is especially helpful when you’re sewing garments that combine different materials or weights. Whether you’re working with lightweight cotton, stretch fabrics, or more structured textiles, it helps keep seam finishes consistent and clean.

Here is where you can add touches like rolled hems to seam finishing and clean edge work, really bringing your garment to life. Once you’re on a serger, it’s not just about construction anymore; it’s about refining the inside and outside so the finished piece feels intentional and wearable.

Bringing It All Together

From the first sketch to the final seam, garment making is really about watching an idea evolve step by step. What starts as inspiration slowly turns into pattern pieces, then structure, then something you can actually wear and use in life.

The DX-2000QVP and MO-2000QVP work together through that entire process in different ways. One supports the construction and shaping of your garment, while the other helps you finish it with clean, polished edges that bring everything together.

When you step back and look at the finished piece, it’s not just about the final result; it’s everything that happened along the way. The planning, the adjustments, the small creative decisions, and the finishing details all come together to turn an idea into something real.

That’s the part that makes garment sewing so rewarding: every project starts the same way, but no two finished pieces ever tell exactly the same story. Looking for a new partner in your sewing journey? Take a look at our full collection to see which machines are right for your fashion needs at JUKIQuilting.com.
Sew the Heavy Stuff

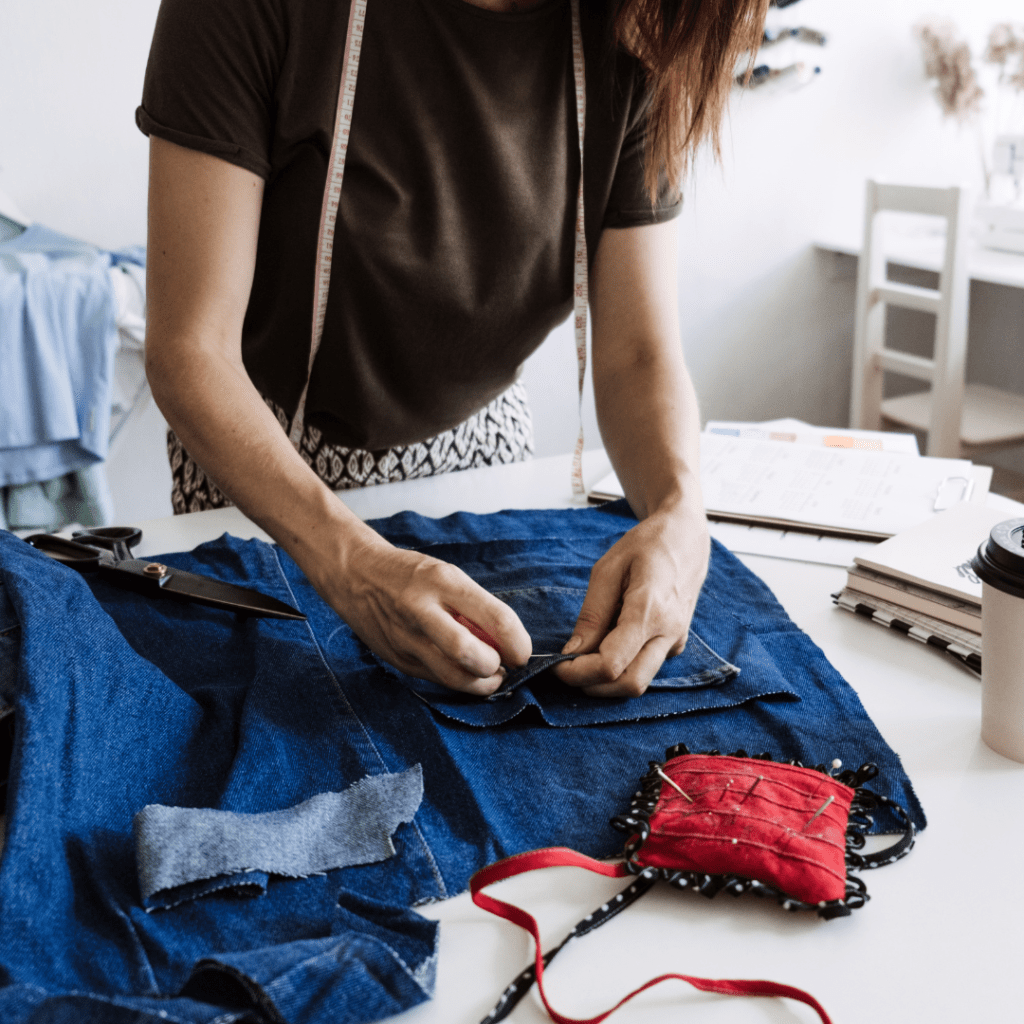
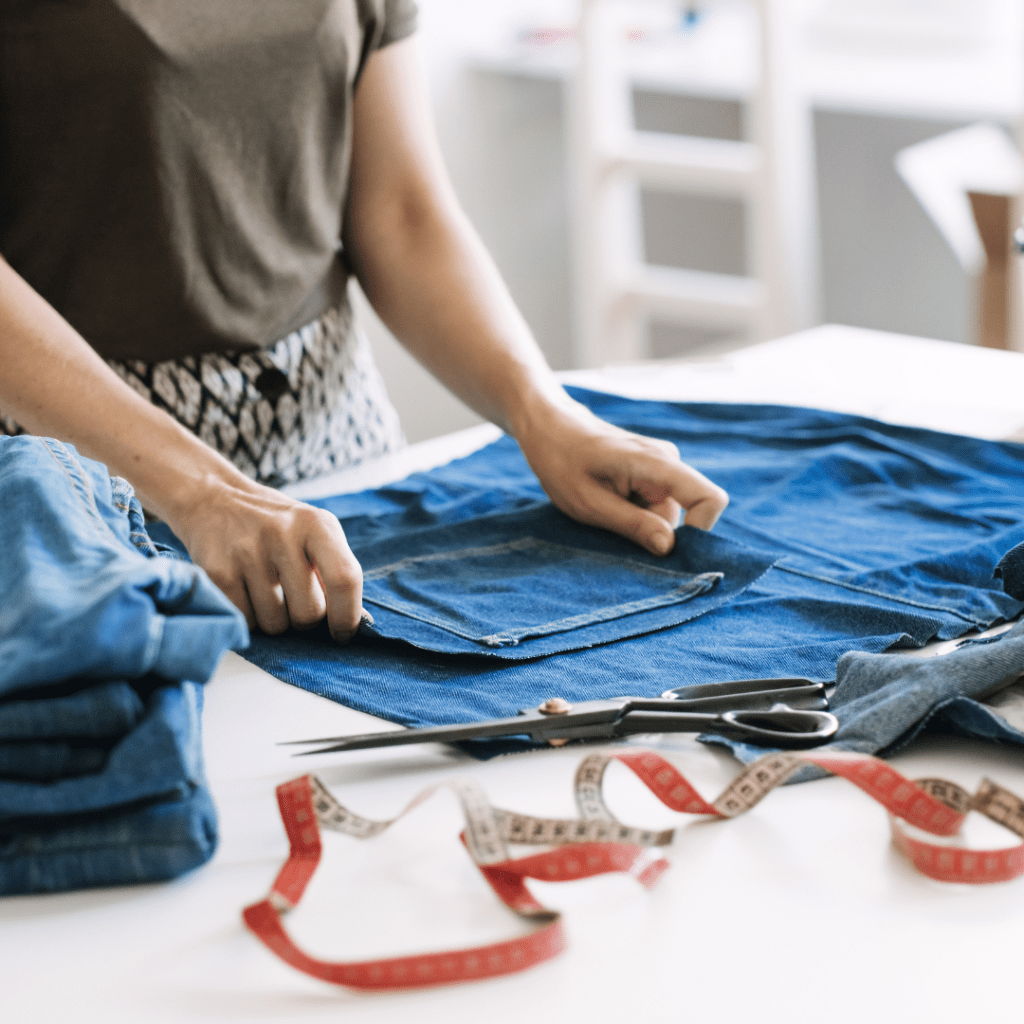
Heavy fabrics like denim, canvas, and upholstery-weight materials don’t just feel different in your hands; they behave differently under the needle. Their density creates more resistance as you sew, seam allowances stack into bulk quickly, and every layer adds pressure that can affect stitch quality and control. Understanding how these materials move and respond is the key to getting clean, professional results without frustration.

Whether you’re building structured garments, durable bags, or home décor pieces, working with heavy fabrics is all about control, preparation, and the right machine setup from start to finish.

This blog will cover why heavy fabrics behave differently, how to prepare and set up your machine for thicker materials, ways to manage seam bulk and resistance while sewing, and how to finish heavy-duty projects cleanly for long-lasting results.

Why Heavy Fabrics Feel Different

Heavy materials don’t simply weigh more. They respond differently under the presser foot, through feed dogs, and across seams. Fabrics like denim and canvas are dense, less flexible, and often layered during construction. That means your machine works harder to move the fabric evenly while maintaining balanced stitches.

Seam bulk is one of the biggest challenges. When multiple layers stack at hems, pockets, or intersections, the thickness increases quickly and can affect how smoothly the fabric feeds. Without proper preparation, this can lead to uneven stitches, skipped stitches, or difficulty moving over thick areas.

Resistance is also higher in heavy fabrics, especially during long seams or layered construction. Managing that resistance through proper setup and technique is key to consistent results.

Choosing the Right Needle and Thread for Heavy Fabrics

When working with denim, canvas, and upholstery-weight fabrics, your needle and thread selection play a major role in stitch quality and durability.

Needle Sizes for Heavy Fabrics

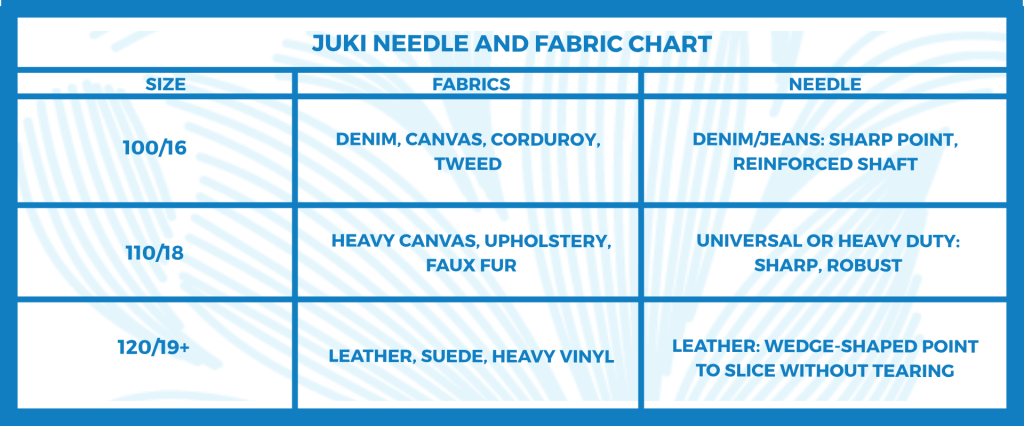
  • 100/16 – A great starting point for denim, twill, duck cloth, and lighter canvas projects
  • 110/18 – Better for heavyweight denim, thicker canvas, upholstery fabrics, and bulky layered seams
  • 120/19+ – Usually used for extra-thick upholstery projects, industrial-weight canvas, or really dense seam intersections, depending on your machine setup

Needle Types

  • Denim/Jeans needles – Built for dense woven fabrics
  • Sharp/Microtex needles – Clean stitching on tightly woven materials
  • Topstitch needles – Best for visible seams with heavier thread

Thread Recommendations

  • Bonded polyester thread – Strong, durable, and versatile for heavy sewing
  • Heavy-duty polyester (Tex 40–70) – Common for denim and structured projects
  • Topstitch thread – Used for bold, decorative seam lines

Matching thread strength to fabric weight ensures smoother stitching, fewer breaks, and better long-term durability.

Setting Up the TL-15 for Heavy Fabrics

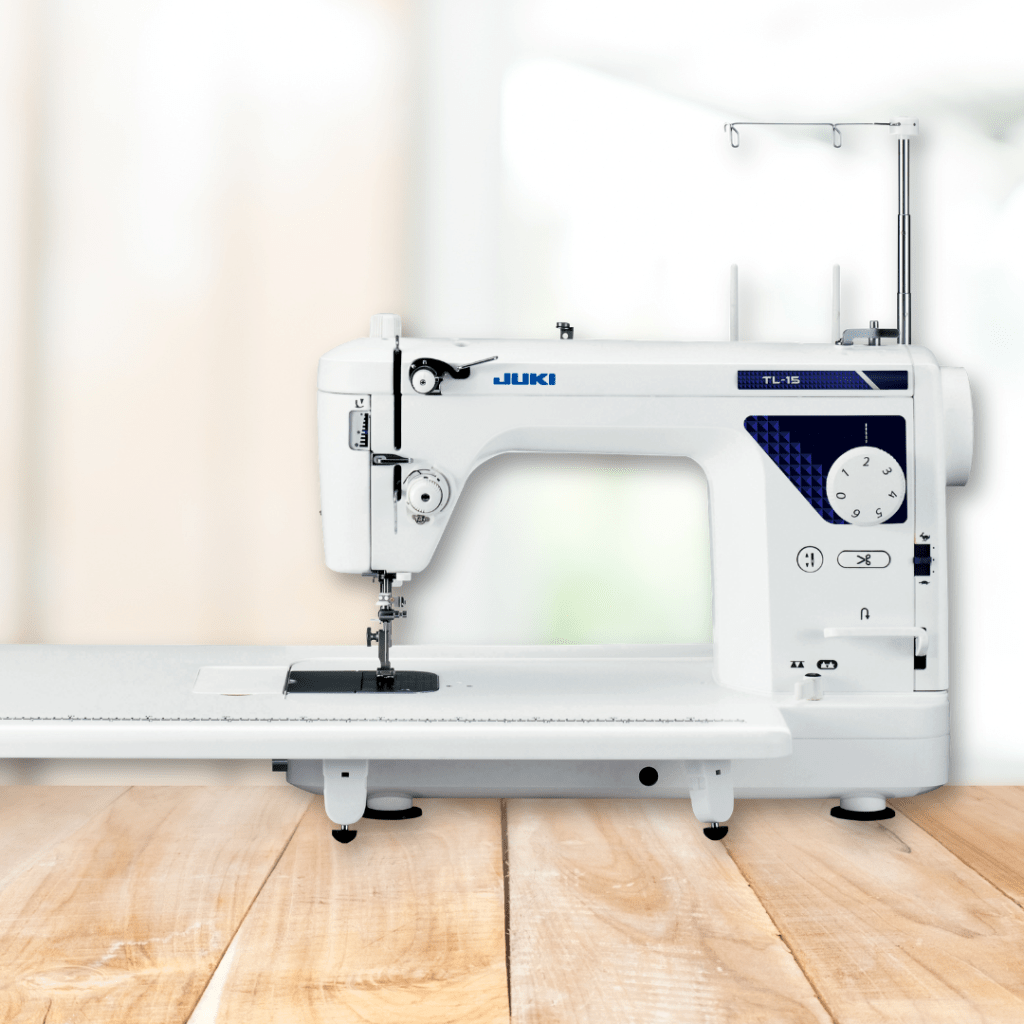
The JUKI TL-15 is designed for controlled, high-quality straight stitching on these types of materials. Proper setup helps you get the most out of its precision when working with heavy fabrics.

  1. Start with the correct needle-and-thread combination before sewing. A fresh heavy-duty needle can be essential for clean penetration through thick layers.
  2. Test tension on fabric scraps before starting your project to ensure balanced stitches on both sides. Adjust gradually if needed, depending on fabric thickness and thread weight.
  3. When sewing, let the machine feed the fabric naturally and slow down when approaching bulky seams. Supporting the fabric without forcing it helps maintain consistent stitch quality across layered sections.

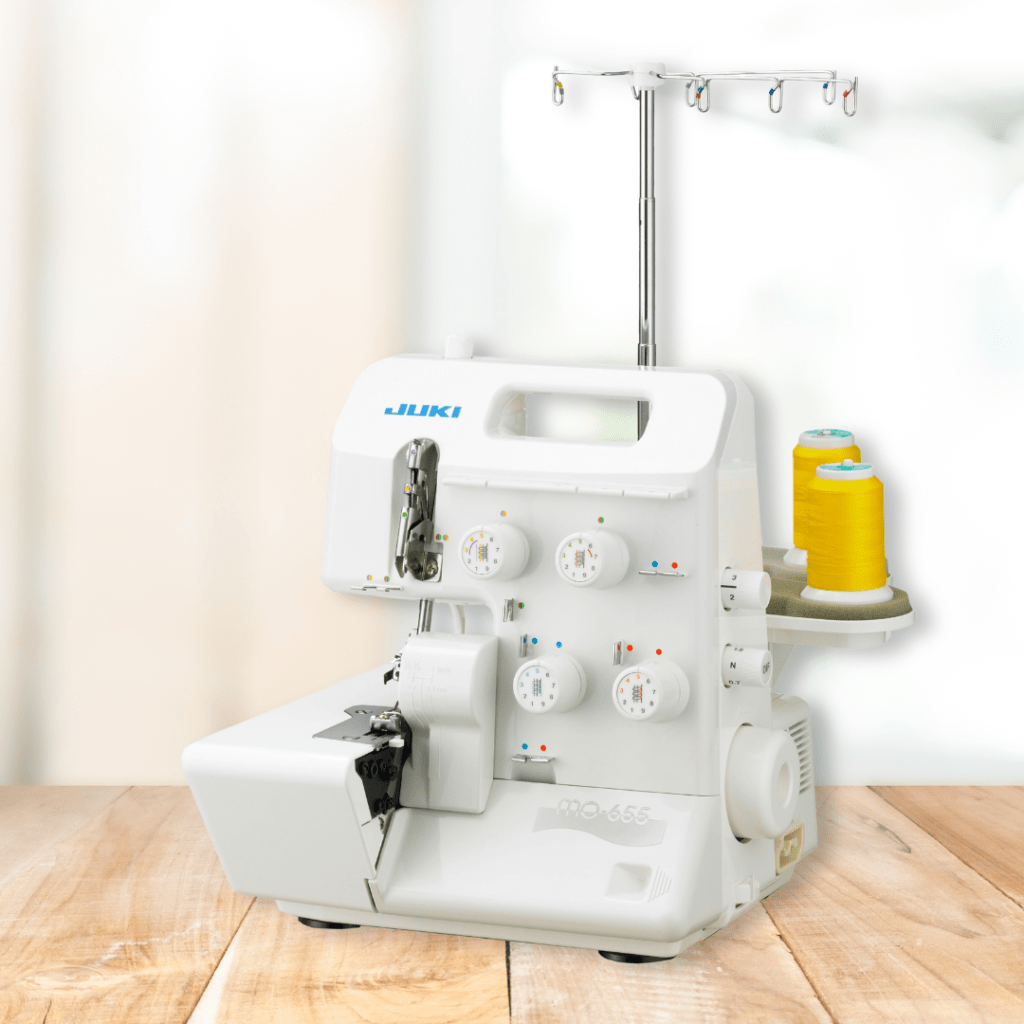
Finishing Heavy Fabrics with the MO-655

A strong serger like the JUKI MO-655 can be essential for turning heavy fabric projects into clean, durable finished pieces. After construction, finishing seam edges properly helps reduce bulk, prevent fraying, and improve long-term wear — especially in fabrics like denim and canvas that can naturally unravel over time.

Heavy fabrics often create thick seam allowances that can become bulky inside garments, bags, and structured items. Serging helps refine those edges, enclosing raw fibers while reducing excess material that can add unnecessary weight inside the project.

One of the key advantages of the MO-655 is its ability to handle a wide range of fabric weights, making it useful when a project combines different materials. Whether you’re working with a canvas outer layer and cotton lining, or mixing denim with lighter interior fabrics, the serger helps keep finishes consistent across all sections.

In high-stress areas like bag handles, corners, waistbands, or reinforced seams, serging adds durability by locking fibers in place and preventing fraying after repeated use. This strengthens the structure of the project without adding stiffness or unnecessary bulk.

The differential feed also helps maintain smooth, even stitching when transitioning between thick and thin sections, ensuring a clean finish even on uneven seam allowances.

The result is a more refined interior that feels intentional and professional, where every seam is clean, controlled, and built to last.

Ready to Sew Heavy Fabric Projects?

From strong, controlled construction on the JUKI TL-15 to clean, durable finishing with the JUKI MO-655, heavy fabric sewing becomes much more manageable with the right setup and workflow.

Whether you’re working with denim, canvas, upholstery fabrics, or layered structured projects, having the right machine setup can make the entire sewing process feel smoother and more controlled. Explore the machines, accessories, and tools that fit your sewing style by visiting JUKIHome.com to find your local JUKI dealer and discover the right sewing partner for your next heavy fabric project.

Update Your Wardrobe with JUKI

Before you think about buying something new, take a closer look at what’s already in your closet, because with a few sewing updates, you can completely transform the clothes you already own into pieces that feel new again. In this blog, we’ll explore why upcycling matters, walk through five easy wardrobe refresh projects, and show how the JUKI HZL-DX7 and JUKI MO-114 can help you reshape, rebuild, and finish garments so they feel wearable again instead of forgotten.

Here is where your closet might be more useful than you think. Instead of tossing out clothing that no longer fits your style, upcycling gives you the chance to reshape, refresh, and reuse pieces you already own. From turning oversized denim into a fitted favorite to giving worn garments a cleaner finish, sewing can help extend the life of your wardrobe while giving every piece a more personal touch.

Upcycling has become a growing trend for sewists looking to reduce waste, save money, and create one-of-a-kind clothing and with the right sewing machine and tools, those updates become even easier.

Upcycling with JUKI

Upcycling projects often involve more than a quick hem or simple repair. You’re reshaping existing garments, working around old seams, sewing through uneven layers, and trying to make everything look clean and wearable again. Having sewing machines that can handle those transitions smoothly makes the process feel much more approachable, especially when you’re transforming clothing instead of starting from scratch.

The JUKI HZL-DX7 is especially helpful when you start altering clothing that already has structure and history. Upcycling isn’t about starting with perfect fabric; it’s about working with what’s already there. The adjustable presser foot pressure helps you move between lightweight knits, worn cotton shirts, and heavier denim without constantly fighting the fabric. That flexibility matters when you’re taking in seams on jeans, reshaping a jacket, or working through multiple layers where old stitching has already created bulk.

When you’re rebuilding a garment, control is everything. The HZL-DX7’s smooth, consistent stitching helps you stay accurate when you’re adjusting silhouettes, like tapering sleeves, adding darts, or reshaping side seams on oversized pieces. You also have features like automatic thread trimming that keep the process flowing, so you’re not breaking focus every few minutes. It’s especially useful when you’re turning something outdated into something wearable again, because you can take your time refining the fit without worrying about uneven stitching or stop-and-start interruptions.

Once the shape is right, the JUKI MO-114 steps in to finish the job. Upcycling often means working with fabrics that have already been worn, washed, and stretched over time, which means it may be time to update those edge details. The MO-114 helps you encase raw edges quickly and evenly so your garment doesn’t just look updated, it actually holds up to everyday use.

The differential feed is especially helpful when working with reclaimed fabrics. Old seams, stretchy materials, or uneven cuts can easily pucker or stretch out of shape, but this feature helps everything feed through smoothly. That makes it easier to finish side seams on refashioned jeans, clean up inside edges of reconstructed dresses, or stabilize cut sweatshirt hems without distortion. Instead of fighting the fabric, you’re guiding it into a clean, consistent finish.

Together, these two machines create a natural upcycling workflow: the HZL-DX7 helps you reshape and rebuild garments with precision, and the MO-114 helps you refine and finish them so they feel intentional, durable, and ready to wear again.

5 Upcycle Projects to Try

One of the best parts about upcycling is that even small changes can completely transform how a garment looks and feels. Whether you’re resizing, reshaping, or rebuilding from scraps, these projects are a great way to give older pieces a second life while practicing practical sewing techniques along the way.

1. Resize an Oversized Denim Jacket: Take an oversized jacket and bring it in through the body and sleeves using the HZL-DX7 for clean, controlled seam adjustments. Once the fit is right, use the MO-114 to finish interior seams so the heavier denim layers stay neat and durable.

2. Turn Old Jeans into a Skirt: Rework worn jeans by opening the inseam and reshaping them into a skirt. The HZL-DX7 helps manage thick seam transitions, while the MO-114 keeps raw denim edges from fraying after reconstruction.

3. Crop and Refresh Sweatshirts: Cut and reshape oversized sweatshirts into cropped or fitted pieces. Add structure back in with new seams, then finish edges with the serger for a cleaner, more intentional look.

4. Patchwork Tote from Scrap Fabrics: Combine leftover fabric pieces into a structured tote bag. Use the HZL-DX7 to piece everything together evenly, and the MO-114 to secure inside seams so the bag holds up with daily use.

5. Modernize Dresses with Simple Alterations: Shorten hems, adjust waistlines, or reshape sleeves to bring older dresses up to date. The combination of precise stitching and clean finishing helps the garment feel refreshed instead of just “altered.”

Sew More, Waste Less

Upcycling is about seeing potential in what you already own. Small changes can completely shift how a garment fits, feels, and functions in your wardrobe. With the right tools, those changes become easier to execute and more satisfying to wear!

Visit JUKIHome.com to explore more sewing inspiration, machines, and project ideas for your next wardrobe refresh.

Dive Into Summer Savings with JUKI

This summer, we’re celebrating creativity, craftsmanship, and community with unbeatable promotions on some of our most popular and compact machines! Whether you’re upgrading your studio, shopping for your first serger, or searching for the right machine that can bring your creations to life, JUKI has something special waiting for you. Let’s take a closer look at the deals heating up this month!

Get a FREE JUKI Trolley Bag with the MO-3000QVP Air Serger!

The Akane MO-3000QVP is not your average serger! This machine features air threading technology for both loopers, making setup quick and frustration-free. The wide throat space, intuitive touchscreen, and automatic tension adjustment give you professional-quality finishes on everything from delicate knits to heavy denim.

Whether you’re finishing edges, creating rolled hems, or adding decorative touches to garments, the MO-3000QVP offers industrial precision in a home sewing package!

Bonus: This is your last month to receive a FREE JUKI Trolley Bag with your MO-3000QVP purchase! Designed for mobility and protection, it’s ideal for transporting your serger to classes, retreats, and sewing meetups.

Available at participating JUKI dealers.

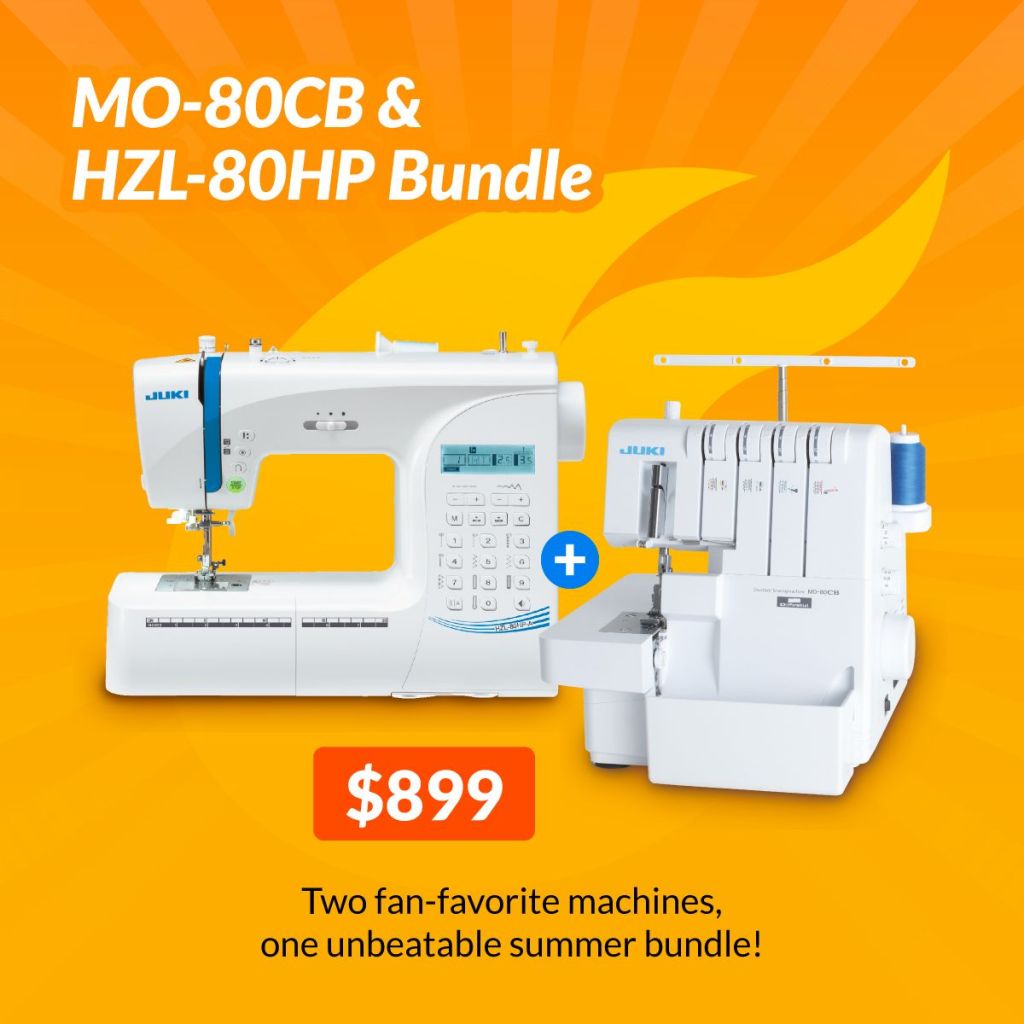
The MO-80CB Serger + HZL-80HP-A Sewing Machine Combo is Just $899!

Ready to build your dream sewing setup or gift a powerful starter bundle? Look no further than this dynamic duo!

The MO-80CB is a 2/3/4 thread serger with differential feed, easy color-coded threading, and precise cutting capabilities. It handles a variety of fabrics and helps you achieve clean, strong seams with a polished look.

Paired with the HZL-80HP-A, a lightweight yet powerful computerized sewing machine, this bundle brings creativity to life! With 197 stitch patterns, including buttonholes and decorative stitches, plus adjustable speed control and needle stop positioning, the HZL-80HP-A is great for both beginner sewists and seasoned hobbyists looking for reliability and flexibility.

This month only, get both machines for just $899! It’s an incredible value, available exclusively at participating JUKI dealers.

For a Limited Time, the DX-4000QVP Expert Edition

Searching for a machine that combines smart design, advanced features, and elevated style? The DX-4000QVP Expert Edition, known as Kokochi (meaning “good feeling” in Japanese) is your perfect match.

With a generous 12″ sewing area, 7″ touchscreen with WiFi, and 368 built-in stitches, this limited-edition powerhouse is ideal for quilting, crafting, and garment sewing.

What’s more, it comes with a matching trolley bag, premium scissor set, and a stunning platinum finish, making it a standout in both function and style. Available in limited quantities.

Ready to Create Something Beautiful This Summer?

Whether you’re upgrading your equipment, starting fresh, or treating yourself to something truly special, JUKI’s summer promotions are here to support your creativity. From professional sergers to beginner-friendly bundles and limited-edition showstoppers, there’s a machine for every maker and every kind of project!

Stop by your local participating JUKI dealer to explore these offers while they last, and make this summer your most inspired season yet.

Quilting Your Memories with JUKI

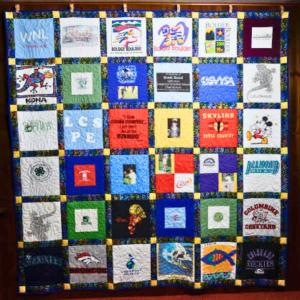
Today, we’re going to talk about memory quilts and how they’re more than just cozy blankets but tangible pieces of our personal histories! Transforming old T-shirts, jerseys, and other sentimental clothing into quilts creates unique keepsakes that celebrate special moments and memories. In this guide, we’ll discuss the process of crafting a memory quilt, from gathering materials to the final stitches, and how to use the advanced features of JUKI sewing machines to bring your vision to life.

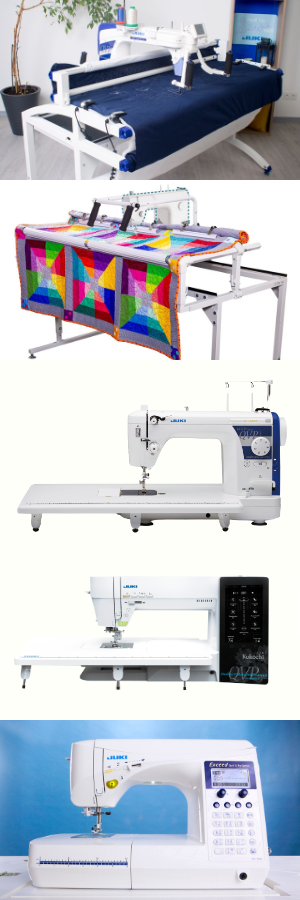
Many JUKI machines can help you create the perfect memory quilt, so here are a few of our favorites! For larger machine space options, the Miyabi J-350QVP offers a spacious work area up to a king quilt and precision stitching capabilities, which are ideal for handling large quilt tops and intricate designs. The Q-Zone Hoop Frame provides the stability and ease needed for quilting. It’s compatible with multiple JUKI machines and ensures your finished quilt will be beautiful and durable.

For smaller workspaces, the TL-18QVP offers the strength of our JUKI Industrial machines, with features like the automatic needle threader and float function for quilting. We also have computerized sewing machines like the F series and DX QVP series that offer various stitch options for decorative stitching and free-motion quilting.

Step 1: The Memories

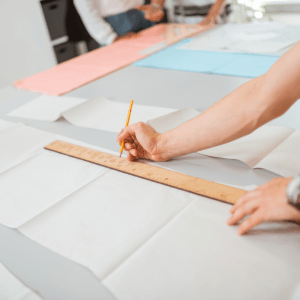
Let’s start planning your memory quilt by deciding what pieces of clothing items have sentimental value! Think of your T-shirts from memorable events or team shirts from sports teams. Give these items a quick wash and check they’re in good condition, like stains or excessive wear.

If any pieces are damaged but meaningful, consider using the undamaged portions. Pay attention to the fabric type and weight; it will affect how you prepare and stabilize the fabrics. Understanding the differences will help you plan the quilt layout and choose the right material for your project.

Keep in mind the fabrics you select. You can aim to coordinate solids, patterns, or themed prints or make a theme like sports, traveling, or interests. Consider using neutral tones like white or black to frame and balance more vibrant pieces. At this stage, consider the backing fabric, ensuring it complements the front and is durable enough for regular use. Cotton is popular for its softness, but flannel or themed prints can add a personal touch. These additional fabrics will help unify the overall design and enhance the quilt’s aesthetic appeal.

2. Preparing the Clothing

Cutting: Start by laying your clothing items flat on a cutting mat; this will help ensure accuracy and consistency in your cuts. Using a rotary cutter, carefully cut the clothing into uniform squares or rectangles; 12″12″ is a common and manageable size for quilt blocks if you’re unsure where to start.

If your clothing items feature logos, graphics, or designs you want to highlight, center them within your cut pieces. Using a clear acrylic ruler to guide your cuts is also helpful, ensuring straight edges and precise measurements.

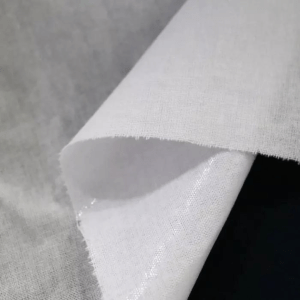
Stabilizing: Stretchy fabrics like those found in T-shirts require extra care to ensure they don’t warp or lose shape during quilting. To stabilize, apply fusible interfacing to the back of each piece before cutting it to size.

Fusible interfacing is a lightweight material that, when ironed onto the fabric, provides additional structure and reduces stretch. Once stabilized, these pieces will be easier to work with, allowing for more precise cutting and sewing. This will result in a quilt that lies flat and retains its shape over time.

3. Designing the Quilt Layout

Plan Your Layout: We recommend starting your memory quilt by arranging your pieces on a flat surface, like a large table or the floor, and experimenting with different quilt layouts. This allows you to visualize how the colors, patterns, and clothing designs will work together.

Balance the colors and the placement of significant items, like logos or graphics, to ensure they are well spaced out across the quilt. This step is key to achieving a harmonious and aesthetically pleasing design!

Create a Mock-Up: Once you’ve settled on a layout you like, consider creating a mock-up to finalize your design. You can use design software like Adobe Illustrator or quilt-specific programs to digitally recreate your layout, allowing for easy adjustments and precise planning.

If you prefer a hands-on approach, sketch your layout on paper, noting the position of each piece! This mock-up will be a valuable reference during the assembly process, ensuring that your final quilt matches your envisioned design. It also helps you spot any potential issues with spacing or alignment before you start sewing.

4. Assembling the Quilt Top

Sewing Pieces Together: Begin by sewing your fabric pieces into individual rows. Align the edges carefully as you sew to ensure even rows and minimize fabric shifting. Once your rows are complete, join them, matching the seams where they meet.

Pressing Seams: After sewing each row, pressing the seams is important to create a smooth quilt top. Depending on your preference and the thickness of the fabric, you can either press the seams open or to one side.

Pressing seams open reduces bulk and helps the quilt top lie flatter, especially if multiple seams intersect. Use a hot iron and apply firm pressure to set the seams, ensuring that the fabric lies evenly and without puckering. Properly pressed seams will make the quilting process easier and contribute to the overall polished appearance of your finished quilt.

5. Adding Batting and Backing

Choose Batting: Find a batting material that complements your quilt’s desired thickness, warmth, and overall feel. Batting comes in various materials, such as cotton, polyester, wool, or blends, offering different loft levels and insulation.

When making your choice, consider how you intend to use the quilt—whether it’s for warmth, display, or as a lightweight throw. Cotton batting is popular for its breathability and smooth finish, while polyester offers more loft and is lightweight!

Cut Backing Fabric: Once you’ve chosen your batting, it’s time to prepare the backing fabric. Cut the backing fabric slightly larger than your quilt top, typically adding a few extra inches on all sides. This extra fabric allows for any shifting during the quilting process and ensures full coverage. Lay the backing fabric flat and smooth out any wrinkles before cutting to ensure a precise fit.

6. Quilting with JUKI

Layering: Next, lay out the quilt layers on a flat surface. Position the backing fabric with the wrong side facing up, followed by the batting layer, and finally, the quilt top with the right side facing up. Carefully smooth out any wrinkles or folds in each layer to ensure a smooth surface.

Once aligned, baste the layers together using your preferred methods, such as safety pins, basting spray, or hand stitches. This step secures the layers, preventing them from shifting during quilting.

Quilting: With your quilt layers basted together, you’re ready to begin quilting! Choose a quilting method that complements your design, such as straight-line quilting for a clean, modern look or free-motion quilting for more intricate and personalized patterns.

Take your time to work evenly across the quilt, starting from the center and moving outward to avoid any puckering or uneven tension. Depending on the design, you should stitch in the ditch (along the seams) or create an all-over pattern that adds texture and visual interest.

7. Binding the Quilt

Trim Excess: Once the quilting is complete, trim the excess batting and backing fabric to match the edges of your quilt top. Use a rotary cutter and ruler to achieve straight, clean edges, ensuring the quilt’s perimeter is uniform.

Attach Binding: Attach the binding to the edges to finish your quilt. Binding seals the raw edges and adds a polished frame to your quilt! Start by sewing the binding to the front of the quilt, then fold it over to the back and hand-stitch or machine-stitch it in place. Take care to miter the corners for a clean, professional look.

8. Finishing Touches

Final Press: After attaching the binding, give your quilt a final press to smooth out any wrinkles and set the seams. Be sure to press both the front and back of the quilt, paying extra attention to the binding edges for a neat finish!

Creating a memory quilt is a heartfelt way to preserve and celebrate cherished moments through fabric. You can craft a beautiful quilt that tells a personal story by carefully selecting your materials, preparing your clothing, and following each step from layering to finishing.

For the perfect quilting machine to bring your projects to life, be sure to check out JUKIQuilting.com to find the right fit for your needs. Additionally, explore our JUKIHomeSewing YouTube page for inspiring projects and helpful tutorials. Take advantage of our detailed memory quilt project guide at this link to help you get started on your own special creation! Happy Sewing!