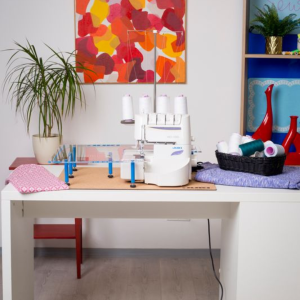
Welcome to the world of serging! Whether you are an experienced sewist or just starting your journey, a serger, also known as an overlock machine, is an invaluable tool that can elevate your sewing projects to a professional level. In this blog, we’ll explore the basics of sergers, their functions, and the creative possibilities they offer, focusing on JUKI sergers, renowned for their quality and reliability!
What is a Serger?
A serger is a specialized sewing machine designed to enhance the finishing of sewing projects by performing multiple functions in a single step. Unlike traditional sewing machines, which usually stitch using one or two threads, a serger ranges from two to five to create overlock stitches.
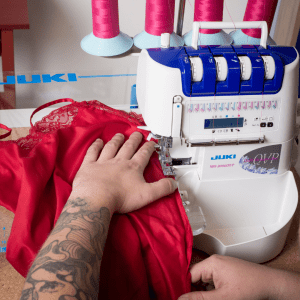
The primary function of a serger is to trim seam allowances and enclose the raw edges of the fabric inside a thread casing. Overlocking is achieved through loopers and needles that work together to form secure, stretchy seams that prevent fabric from fraying. Sergers simultaneously trim, stitch, and overlock your projects to save you time and effort. This makes sergers indispensable for achieving professional-quality finishes on a variety of fabrics!
The overlocking capability of a serger is a unique advantage, especially when working with knit or stretch fabrics! Using multiple threads and loopers allows the serger to produce strong, flexible seams that stretch without breaking, which is essential for garments and projects that require elasticity. Additionally, the clean, finished look of overlocked seams adds a level of polish to any sewing project, whether it’s clothing, home décor, or accessories. By effectively preventing fraying and unraveling, sergers ensure the longevity and durability of finished items, making them a valuable addition to any sewist’s toolkit!
Features Found on a JUKI Serger
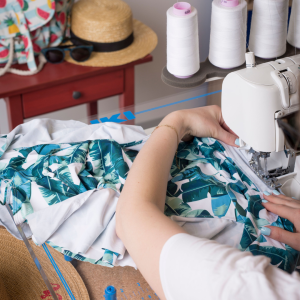
One of the standout features of JUKI sergers is our innovative air thread technology, which revolutionizes the threading process and enhances the overall sewing experience. This technology uses a jet of air to effortlessly thread the loopers, eliminating the frustration often associated with manually threading the machine. It is perfect for those who have trouble threading their needle. With the push of a lever, threads are instantly guided through the machine, significantly reducing setup time and allowing sewists to focus more on their creative projects!
Air thread technology simplifies the threading process and ensures consistent and reliable performance. It minimizes the risk of threading errors, leading to skipped stitches or thread breakage, ensuring smooth and uninterrupted sewing. This feature is great for those who work with multiple thread changes or different types of fabrics, creating a hassle-free and efficient way to prepare the machine for various projects! You can learn more about the differences between traditional and air thread sergers by visiting our past blog here.
Our sergers also offer multiple thread capability, allowing for 2, 3, 4, or even 5 threads to be used in various combinations, providing a wide array of stitch options. This versatility is ideal for different types of fabrics and sewing techniques.
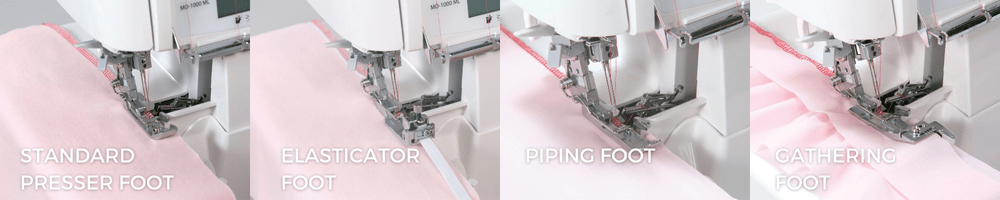
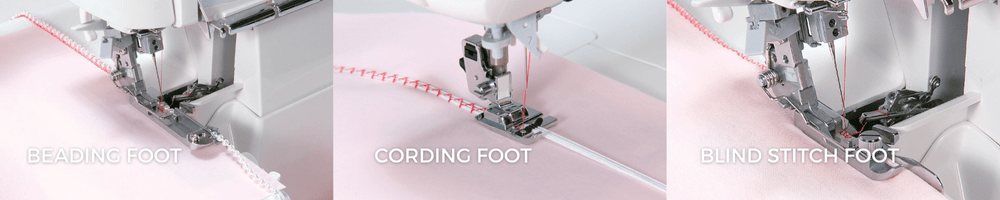
Other important features are
- Differential feed: this ensures smooth and even stitching on various fabrics, preventing issues like puckering or stretching.
- Automatic rolled hem function: This function makes it easy to create professional rolled hems without changing the presser foot or stitch plate.
- Adjustable stitch length and width: this allows customization to suit specific projects.
- Color-coded threading guides: This simplifies the threading process and makes it accessible to beginners.
Basic Functions of a Serger
Understanding the basic functions of your serger is crucial for getting the most out of it. Here are the core capabilities:
- Overlocking: A serger’s primary function is to create secure seams that prevent fabric fraying. Overlocking stitches are formed by multiple threads and loopers that encase the raw edges of the fabric, producing a neat, professional finish. This is particularly useful for finishing seams on garments, ensuring they are durable and long-lasting.
- Seaming: Sergers combine fabric with a durable, stretchy seam. This is especially important for knit and stretch fabrics, where flexibility is needed. The strength and elasticity of serged seams make them ideal for activewear, lingerie, and other garments that require a high degree of movement!
- Hemming: Sergers can create clean, professional edges using various hemming techniques. Rolled hems are perfect for lightweight fabrics like chiffon or silk, while narrow hems are excellent for casual wear. Blind hems provide an invisible finish, making them suitable for dress pants or skirts. The automatic rolled hem feature on many JUKI sergers simplifies this process, allowing you to switch between different hem types effortlessly.
- Edge Finishing: Sergers provide excellent edge finishing for single layers of fabric, such as lightweight or sheer materials. This prevents fraying and gives the fabric edges a polished look, making them ideal for scarves, blouses, and other delicate items. The differential feed ensures that even the most challenging fabrics are handled smoothly.
- Decorative Stitching: Beyond functional seams, sergers can also be used for decorative stitching. By using decorative threads and adjusting the stitch settings, you can add a stylish touch to your projects. This can include creating eye-catching edges on garments, adding decorative trims to home décor items, or incorporating unique design elements into your accessories.
Learn more about the stitch options available on a serger by visiting here. (https://sewinwithjuki.com/2023/04/01/stitching-on-your-juki-overlock-serger/)
Creative Possibilities with a JUKI Serger
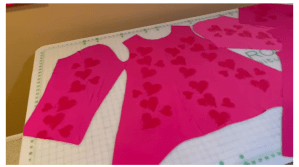
Fashion: Sergers are valuable in garment construction, providing professional-looking seams and hems! The serger’s ability to create solid and stretchy seams ensures that your garments are not only durable but also comfortable to wear. From T-shirts and leggings to dresses and activewear, a serger can help you create it all, giving your homemade clothing a polished, store-bought appearance.
Quilting: While sergers are not usually associated with quilting, they can be a valuable tool in the quilting process! Using a serger to piece quilt blocks adds a nice touch to your quilting projects, creating firm, finished edges that are less likely to fray. This technique can help make quilted garments, bags, or home décor, where durability and a clean finish are essential due to heavy use! You can also serge the edges of quilt blocks before assembly to make the quilting process faster and more efficient.
Home Décor: Create a living space with beautifully handcrafted home décor! Sergers are perfect for helping you create durable and personal finishes on home pieces like pillowcases, tablecloths, and curtains. For example, the overlock stitch prevents fraying and adds a clean, professional edge to your projects. You can use your serger to add decorative touches, like ruffles or piping, and enhance the aesthetic appeal of your home décor style!
Accessories: Creating accessories with a serger ensures your projects are sturdy and chic. Bags, pouches, and other accessories benefit from the serger’s ability to produce neat, fray-free edges and strong seams. Whether making a tote bag, a make-up pouch, or a laptop sleeve, a serger can help you achieve a professional finish that withstands daily wear and tear.
Upcycling: Create something new with old clothes by using your serger to alter and embellish them! Serged seams and decorative edges can transform your wardrobe into trendy, personalized pieces. Try adding ruffles to an old skirt, convert a pair of jeans into shorts, or create a patchwork jacket from fabric scraps! The possibilities are endless, and upcycling with a serger saves money and supports sustainable fashion practices.
Investing in a JUKI serger can help you expand your skills and enhance your sewing experience! They offer efficiency, versatility, and professional-quality finishes, whether you’re making clothes, home décor items, or accessories. Embrace the potential of your JUKI serger and explore the endless possibilities it brings to your sewing ideas.
Learn more about JUKI’s Serger lines by visiting us here and here. Happy serving!