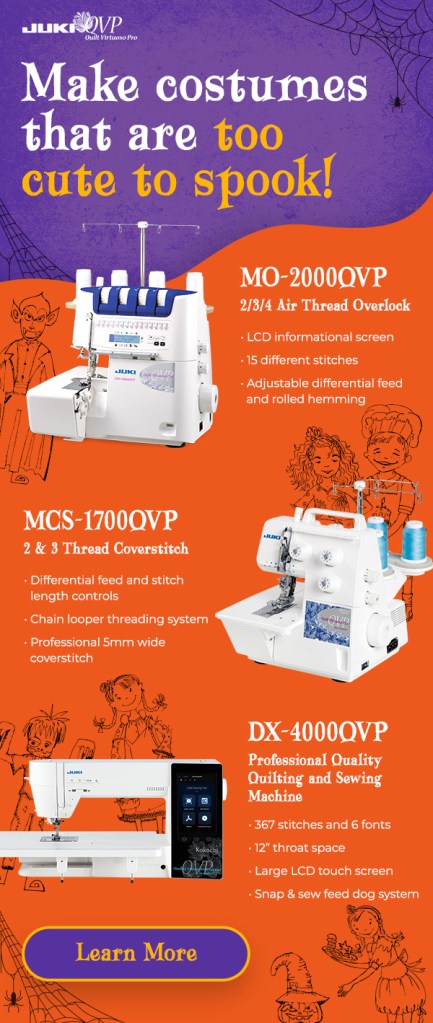
Are you ready for Halloween this year? Check out our JUKI Machines this Fall and find the right machine to create your spooky Halloween costumes this season!
To check out our collection of sergers and sewing machines today, visit a JUKI dealer near you and locate them on our website here.
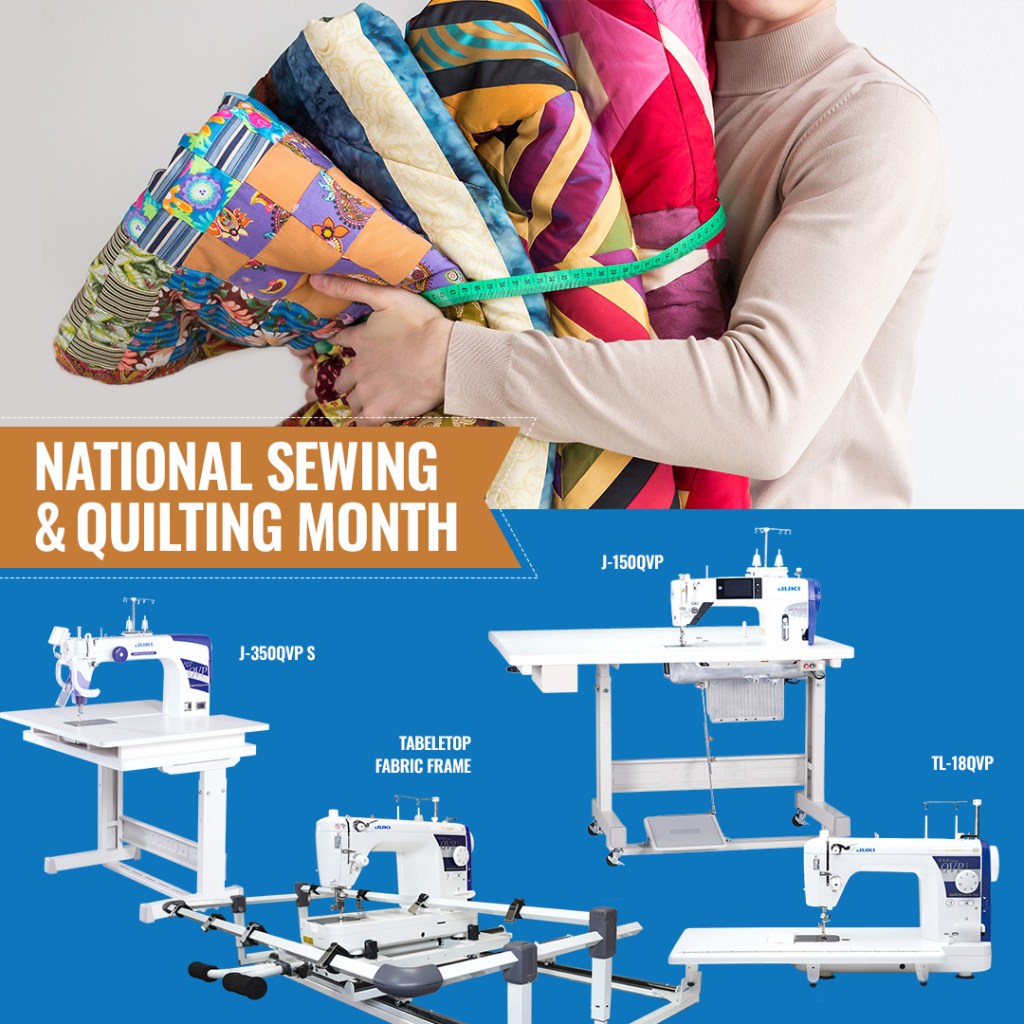
Join us as we celebrate National Sewing and Quilting Month! Check out our favorite quilting and sewing machines, and learn about what’s new at JUKI by visiting us here today!
As we celebrate the summer coming to a close, let’s go over some great and fun projects you can create that will follow you into the fall! Whether you’re going to the beach or back to school, these projects will always be handy.
Glasses Case
Whether they’re protecting your eyes from the sun or helping you see, keep those glasses covered with a glasses case! With the ability to be versatile in your case designs, this project is perfect for letting your creative side shine. You can create using cotton, leather, canvas, and more fabrics and decorate with applique, quilting, or embroidery.
What we recommend keeping on hand for this project are notions, fasteners, or closures! These are best for keeping your glasses secured in their case and resistant to falling out; possibly getting scratched. Another fun add-on is a bag snap-clip! Use this when you’re on the move, and want to keep your glasses in easy reach or for a child’s glasses case to keep attached to their backpack.
For the inside of your glasses case, make sure to use a material that won’t affect the glass! We recommend sticking to cotton or a material that has a lovely soft touch to it, like velvet.
Lastly, we recommend keeping a Smooth Presser Foot nearby! This machine accessory is perfect for sewing those protective fabrics you love like vinyl or leather, as these materials can commonly cause issues when sewn with a standard presser foot that it might stick to.
Bucket Hats
A bucket hat is a perfect accessory to fight off those UV rays from hiking, the playground, or the waterpark! Fun and simple to create, a bucket hat pattern is an excellent choice for your wardrobe. We recommend using medium to the heavy-duty fabric. The material you use should be stiff to hold the shape of the hat.
We recommend fabric options like tweed, denim, or canvas. If you want to create with a thin fabric, you’ll need to use fusible interfacing. Fusible interfacing will help your fabric hold its shape and firmness while preventing fraying on your fabrics.
Some notions to keep in mind that you will want to purchase for that finished look are eyelets and a drawstring cord. Adding a cord to your bucket hat now allows you to adjust the sizing, making this a great gift! Also, the eyelets will help improve ventilation and makes wearing hats more comfortable, especially on those hot summer days!
Don’t forget to have your machine accessories on hand and ready! Since bucket hats have lining around the brim and top area, we recommend using a ¼” Guide Foot! This is a perfect tool for achieving those even spirals around the bucket hat brim and sides, allowing you to create something beautiful while securing the hat has that professionally finished look.
Scrunchies
Fun to personalize and easy to create, you can never go wrong with making some scrunchies! Whether you’re using them to accessorize or simply pull your hair back, this project is fast, easy, and perfect for beginners.
Inexpensive, this project can be completed with scrap fabrics or upcycled from old clothes! As a fashion and functional piece, this project only requires straight stitching, fabric, and elastic. We recommend using elastic size ¼ for basic scrunchies and moving up if you’d like to create jumbo ones.
Keep in mind fabric size and elastic size before being created. We recommend 8 to 9 inches of elastic and using a 3″ x 22″ fabric piece for best outcomes!
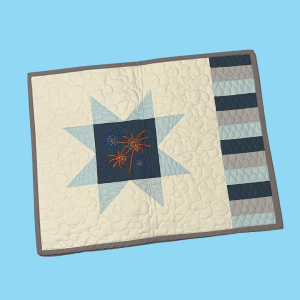
Table Runner and Mats
Re-vamp your home in time for the new season! Great project quilters can create matching table runners and mat sets, perfect for decorating your home and creating a quick and easy project. So whether you’re decorating for the holidays or looking to freshen up the living room with new colors and patterns, these accessories can bring a room together.
Some fabric recommendations we have for this cotton! Easy to wash and create with, this fabric is available in a multitude of options and allows you to use it with comfort, knowing you can throw it in the washer when those accidents happen. For fusing, there are a few main qualities you want to look for since this project will be washed often. Find interfacing with a low or no percentage of shrinkage, low thickness, and whether it’s fusible. Fusible interfacing will create a better project experience and is easy to use.
A great way to design your table runner and mats is by using free motion quilting! Whether you’re working on a compact machine or a long-arm quilt, adding in designs can genuinely bring your fabric to life and add texture. Keep in mind accessories for your machine like a Quilt Presser Foot (for ruler) and Quilting Rulers when you want to create intricate shapes and designs and need a little help!
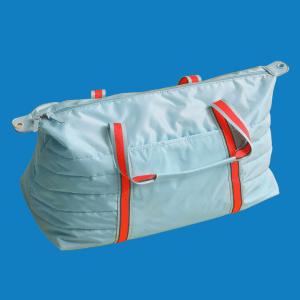
Travel Bags
Whether we’re going to the beach, or after-school activities, having a travel bag fitted for your needs is a must! Travel bags allow you to add storage spots, secured or hidden pockets for valuables, adjustable straps, embroidered names, and so much more.
For bags you’re going to use often, we recommend finding durable fabrics and ones that can hold weight well. Some options to keep in mind are canvas, nylon, mid-weight woven, tweed, or leather. Depending on what perks you’re looking for, like using nylon fabric that can handle water for a gym bag, make sure to find a fabric that can withstand your lifestyle!
Notions to keep on hand when you build a travel bag are closure notions like zippers and spring snaps, snap hooks for attaching accessories like your keys or holding your scrunchies, and strap adjusters for weight changes. These pieces will help your bag have that professional finished look you’re going for, and create a longer-lasting project.
Other fun pieces you can add to your bags are applique, embroidery, or printed fabric to bring out your personality. Add-ons like mesh pockets or water bottle holders to personalize the bag for your needs are also excellent choices when wanting to expand on your skills.
Don’t forget to have the right accessories on hand! Using a foot accessory like the Decorative Stitch Presser Foot is perfect for adding in those personal touches like your name and decorative designs. Add your name to the inside of your child’s bag or your gym bag, and enjoy seeing your finished product!
Whether you’re creating on a computerized machine like our HZL series or quilting on your TL machine, these projects can be made easily. Want some inspiration on other projects you can create? Join us on our JUKI Home Sewing page on YouTube today for future and past projects!
When we think of creating a business, our mind often jumps to brick-and-mortar shops or online shops that sell creations. However, there is another type of business many tend to overlook, and that’s their expertise!
One of the most popular ways to sell your expertise in a skill is to offer online courses that new crafters can purchase and use on their journey. These online courses can be pre-planned and downloadable or offered as live sessions with scheduled classes for students to attend. The pro of providing a service like this is that instead of a physical product like your quilts and apparel, which require multiple steps like creating, shipping and processing, an online course allows you not to worry about things like that.
Do you feel like you have expert knowledge that others can learn from? Have you built a platform showing friends and followers tips and tricks on your machines? Creating an online course is about taking that knowledge plus your skills in teaching that offers you the chance to compress your expertise and showcase it to new crafters like yourself.
Follow along today as we go over some steps you can follow to create your online course today.
Let’s Talk About Online Courses
In our day and age of technology, online courses have risen in popularity. From education on how to run a business to classes on sewing, online courses have broadened our ability to learn new skills worldwide.
Online courses can take much time to create and require much planning and direction. However, this is a single product that you can sell multiple times without you having to re-create. There is no product inventory or packaging cost; instead, customers can easily buy this service with a few clicks. Besides purchasing a few subscriptions to create and host your course and purchasing the equipment necessary to film and edit your videos, your central budgeting will go towards marketing and hosting your course after creation.
Online courses can also offer high revenue. After you’ve completed the costs that go into your original course creation and production equipment, the rest of your revenue can be profit. Whether you choose to update the course once in a while or leave it as is, this product can be seen as passive income and is a perfect addition to many businesses.
Building Your Course
Let’s jump into the steps to building your online course! As we know, there are many educators out there who are offering online courses in their fields of expertise. The best way to stand out from others is to find your niche in skills and build on a topic that you’re uniquely good at. Think of your course as a solution to new sewer needs, and choose a topic where you have credibility, expertise, and of course, passion! Follow along as we go over steps to keep in mind while building your course.
Research Your Future Customers
Before you can jump into creating your course, let’s discuss who you’ll be teaching and selling to. Below are some tips to keep in mind when researching your audience.
– Learn what your audience wants to know! Are you constantly asked how to create a handbag? Finish a sleeve? Free motion quilt designs? These questions are essential to note, so when you make your course, you can find what common questions, and more complex ones, can be addressed. In addition, students want to feel accomplished when they attend your class, so learn what skills and projects can achieve this while working on your course design.
– Find the solution! When new students find your course, they often have a problem they’re looking for a solution to. Your course can be that problem solver! Make sure when creating your course that you offer efficient and quick ways of teaching skills and sharing your knowledge.
– Learn your audience. It’s best to know your target audience, whether you are selling to new sewists who have little knowledge or experts who want refresher courses or to learn more complex skills. Then, when it’s time to promote and sell your class, you have a clear message for students to read and understand, so they choose the right course for their needs.
– Don’t forget to put yourselves in their shoes! When creating a course for a student, put yourself in the students’ shoes and make sure you’re covering the essential details. You don’t want to attend a class and leave with more questions than you came with, so have friends and family test the course and find what pieces can be removed or should be added.
Need help deciding what subjects and problems to cover? Do some research in your field! We recommend googling trends, browsing community forums, and roaming social media to see what questions and concerns are being brought up in your community that you can answer with your course! Keep in mind what problems you have solutions for, what goals your students have, and how you can help them achieve their goals.
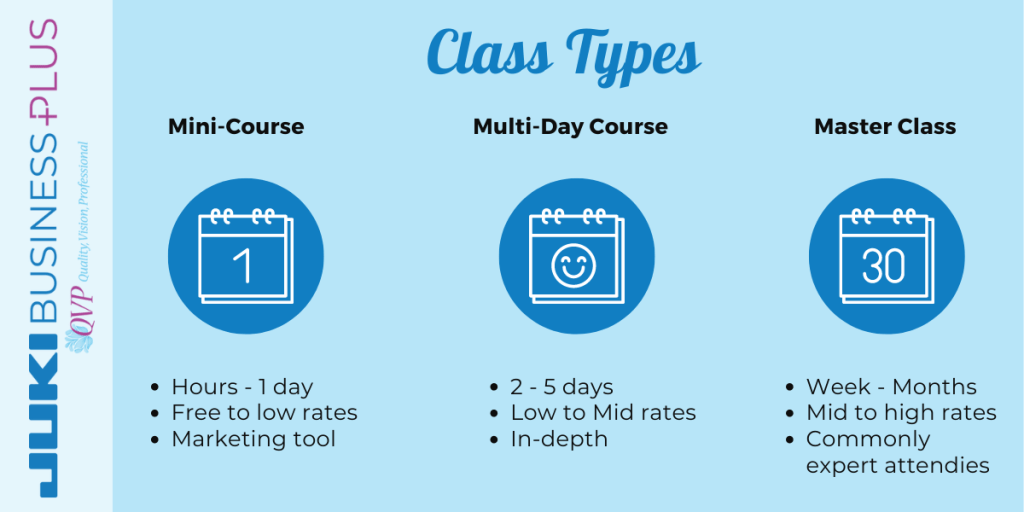
Choosing a Class Type
There are multiple formats for your online course that you can choose from. Depending on how you plan to structure your class and how many days you believe a student will need to learn your material, you can create a template for students to follow when downloading your course.
Mini-Course
These courses can take up to a few hours or one day. These classes can be formatted as a video, blog series, and more. Generally, in the lower cost sector, these courses are offered at low rates or free as a marketing tool if you’re trying to sell a higher-end course later. Mini-courses are perfect for those treading the waters of starting an online course and can give you an idea of what plans and efforts are needed to create a multi-day course.
Multi-Day Course
Generally, a multi-day course takes a few to several days of work to complete. Broken down into chapters or modules, these courses break down the lesson plan into multiple segments where a student can gain more in-depth knowledge of a skill. In addition, a multi-day course will often include add-on material for teachings like a project or worksheets. Falling into a higher cost range, these courses can range from $300 – $2500. A great way to sell this course for newcomers is offering that mini-course we mentioned beforehand as a sneak peeks at what’s available. A mini-course is also helpful in validating your expertise before a more significant purchase, like a multi-day course.
The Master Class
A master class should offer in-depth knowledge and skill teaching for your customer base from weeks to months. Generally offered for those already in the field looking to expand on their current skill set, these classes can go up to $5,000 in charge. We don’t recommend creating a master class as your first or even third course, but it is something that can be worked towards if you enjoy teaching!
Master Classes have a way of succeeding when they start becoming communities. When creating a master class, look into creating a community forum or group page for your students to interact. This is a great way to encourage communication between you and your customers while creating a loyal customer base that will want to return and learn new skills and talents from you.
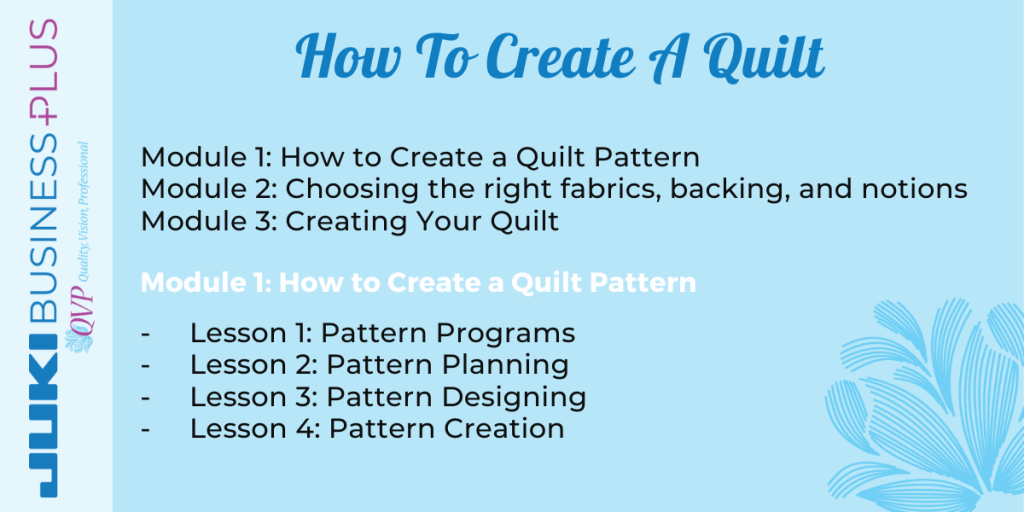
Breaking Down Your Course
Once you’ve decided what your course will be focused on and what format you want to create yours in, it’s time to break down your ideas and start planning! Again, put yourself in the student’s shoes, and work from end to beginning to see how you’ll plan out your lesson. Remember, the point of your course is to provide a solution for someone’s problem, in this case, their lack of knowledge or expertise on a skill or project.
Below is an example of a course breakdown:
Once you have an idea of your outline, depending on how many days your course is and how much time you expect your course to take, it’s time to start planning the content for the lessons and what formats you’ll need to create those in. Besides text, below are examples of content formats you can use in your online course.
Video Content: portray those stitches, curves, feet replacing tricks, and more using video as a tool.
Screencasts and Walkthroughs: if you’re working on a program, like the Tajima Sai Writer, for example, screen record your directions and how-to’s and place those in your course so students can follow along and build with you. Using screencasts and walkthroughs is a great way to show step-by-step instructions when using programs that new users are unfamiliar with.
Downloadable content: Here is where you can place patterns, worksheets, to-do lists, and more that correlate with your lesson plan. Creating interactive work for your lesson plan is a great way to keep the student involved and have them learn these skills hands-on.
Before setting up your content, research what formats other courses use that you find helpful and find out what content students feel most comfortable learning with. Your content will solely focus on your audience group and their needs, so think about what you would like to work with if you were learning.
Setting Those Prices
Pricing will always vary on course cost, but your format is the first step. For example, free and low-cost are recommended if you choose to do a mini-course. On the other hand, high costs are expected if you do a masterclass. Other things to keep in mind when playing with the cost are who your audience is (think of what they’re willing to pay), and your expertise and credibility (the more expert you are in a skill, the more people will want to pay.)
Research your competitor’s pricing and their expertise levels to get an idea of pricing. Don’t sell yourself short, but be realistic when placing pricing. Make sure to set a goal for yourself to decide how many students will need to sign up for your course each month to meet that goal.
Choosing a platform
Once you’ve planned, created, and priced your course, it’s time to choose students who can access the platform. Follow along as we go over a few options you can consider before choosing your venue.
– Udemy: to keep it easy and simple when creating your first online course, we recommend checking out Udemy! With over 50 million current students, their platform can offer you the chance to get your name out there. To create a course, you must first follow the process of being approved as a ‘premium instructor,’ and then you’ll follow easy step-by-step directions on how to set up your first mini-course! With multiple support options for new teachers and programs you can join to up your business game, Udemy is excellent for beginners in the online course world.
– Thinkific: Beginner-friendly, Thinkific is simple and offers ready-to-use templates for those creating their courses. Feel free to follow along with the template and tweak it to your liking as it recommends specific cue points like quizzes, instructor notes, downloads, and more. Created to make your life simple, Thinkific works towards simplifying the creative process so you can enjoy your course faster.
– Skillshare: Those looking for creative skills in crafts tend to float towards Skillshare when it’s time to learn something new! Free to sign up and publish a course. This is a great way to practice creating mini-courses and getting comfortable with building your skills in teaching. Keep in mind that your classes will be accessible here unless listed on Skillshare’s premium catalog.
Getting Your Name Out There
Now that your course is up and running begin marketing your expertise! Work on that email marketing campaign, share your class with your social media pages, encourage others to join and share too, appear in content relevant to your audience and niche, and consider paid ads. It takes time to find the right marketing tools for your audience and see what brings in the right customers, but tests and trials are the perfect way to bring in those students and get your class running.
Don’t forget to ask for reviews and testimonials that can be shared on your sites so new prospective students can get an idea of what your course can do for them! Remember, your course’s goal is to help students accomplish their goals. So don’t take feedback to heart, and listen to your students’ needs as you tweak and perfect your course for future customers.
Let’s Get Started!
Now that you’ve planned and set up your course let’s make it a reality! If you’ve been able to teach yourself and teach others, creating an online course that follows your passion is a great business to look into. Teaching others your passion can be an enriching journey while setting you up to earn money through your expertise and skills! So, if you were to start an online course today, what would you teach?
Interested in starting your business today? Visit us here to see how JUKI can help you start today!
Choosing the right brand name can be the stepping stone to a successful business. A brand name that is memorable and catchy can give you an advantage when it’s time to market your business. When potential customers hear your brand name, you want them to remember you and think about your small business, setting you up for long-term success.
When you’re starting your business, we know how hectic it can be to think of a name on top of what you’re selling, who, and how. So follow along as we show you some tips and tricks to choosing your business name that will help you stand out from your competitors.
Best Shop Name Generators
Sometimes we need a little help or inspiration picking our company name. While it may feel like all the excellent store names have been taken, there are still many options out there!
Using a name generator is helpful for two reasons. First, it can help you come up with your business on the spot and create the perfect representation you need. Or two, it will give you ideas that you can later on work with and make your name. Below are some generators you can visit to help you create your business name.
As a small business having the correct name is crucial to your success in the e-commerce world. Having the right name can bring attention and new shoppers to your site and showcase your individuality to customers. Remember, choosing the right name will lead to success in branding and awareness on search engine sites. Below are some tips to keep in mind when choosing your name:
Creating a short and simple name is the right choice for a few reasons. For example, you’ll have less mispronunciation from customers, it will fit in your marketing campaigns, whether it’s physical business cards or social media posts, and it’s memorable.
Finding the right name can be challenging, especially with companies popping up daily. However, don’t let this discourage you! It’s a big world with many niches in the market and finding the right name for your business and niche only pushes you to be creative.
If you’re having trouble creating a name, follow the steps below.
Keep it Short and Simple.
Combine different words that relate to your industry, and keep them short. Try to aim for words that rhyme or that alternate.
Tweak an existing word or create one of your own! Many companies like Skype and Häagen-Dazs began as gibberish and are now household names. Don’t be afraid to be different and have fun when creating.
Be personal. Create a company name that relates to you on a meaningful field like an old nickname, family pet name, or other nicknames that resonate with you. These quirky names can be the perfect title for your business and create that personal touch many customers love.
2. Dare to be Different
Research your competitors and see what popular names are out there in your industry or niche. Then, be different and avoid familiar rhymes, gimmicks, or phrases. This way, when it’s time for someone to look up a company in your niche, your individuality will show. Do the same when thinking of your slogan or mascot if you choose to have one, as each difference will help you stand out even more.
3. Is it Available?
Keep in mind to research your ideas before sticking to one. By heading to your favorite search engine and researching your company name ideas, you can see what companies out there might have the domain already attached to their business, pushing you to either tweak yours or choose another from your list. You want your domain to represent your brand and make an excellent first impression.
If you’re choosing to sell on an online shop platform like Amazon or Etsy, review what shop names are out there already. This will help you succeed by confirming that your name is not lost in the pool of shop hosts and also help you edit your shop name to avoid confusing future customers between your shop and others.
4. Finding your Inspiration
If you’re having trouble finding a name so far, think of themes that you can focus on for your business and work from there. Trends, nostalgia, fandoms, and even other languages can be inspiration when thinking of your shop name.
Think of what’s around you in day-to-day life that can be used as a catalyst for your creativity! Follow along with conversations, pay attention to your day-to-day sayings and jokes, your hobbies. All these things can give inspiration if you look close enough, helping you personalize your shop and create a name that represents your brand and yourself.
Why the Name Matters
Finding the right name for your brand goes beyond just putting a few words together. While this might seem like a difficult task at first, it can also be an enlightening and fun experience describing yourself and your company in a few or even one word. Put the time and effort into this as you would everything else in your shop, for a shop is only as strong as its name! Your name is how customers recognize you, so make sure it’s a name you are proud of. Remember that word of mouth is free, and you don’t want to miss out on that.
What advice would you give to those deciding on their company name? Let us know down below!