5 Quilting Project Ideas for You!

Celebrate National Quilting Month by bringing out your favorite charm squares, jelly rolls, and sandwiches! Whether you’re creating for friends and family or your small business, we’ve put together a few fun ideas for projects you can quilt next. 

Wall Hanging

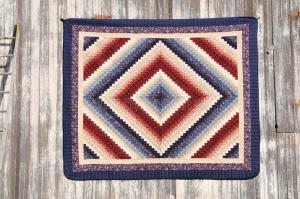
Decorating new office spaces or livening up current homes is easy with wall hangings. Projects like these are perfect because you can create smaller designs than quilts and use them for seasonal purposes. With the ability to create on a large or small scale, you can try new techniques like adding embellishments and accents (for example, cording) that you wouldn’t have thought of using before. This project is excellent for when holidays and birthdays come around since it can brighten up any room, from a nursing home to your kid’s college dorm. 

Accessories like the Couching Foot are perfect when creating wall hangings. They allow you to add three-dimensional textures to your projects, bringing in an extra element that will make your design pop. Use decorative threads like yarn and cord or other thicker threads that don’t fit your needle. 

Pillows 

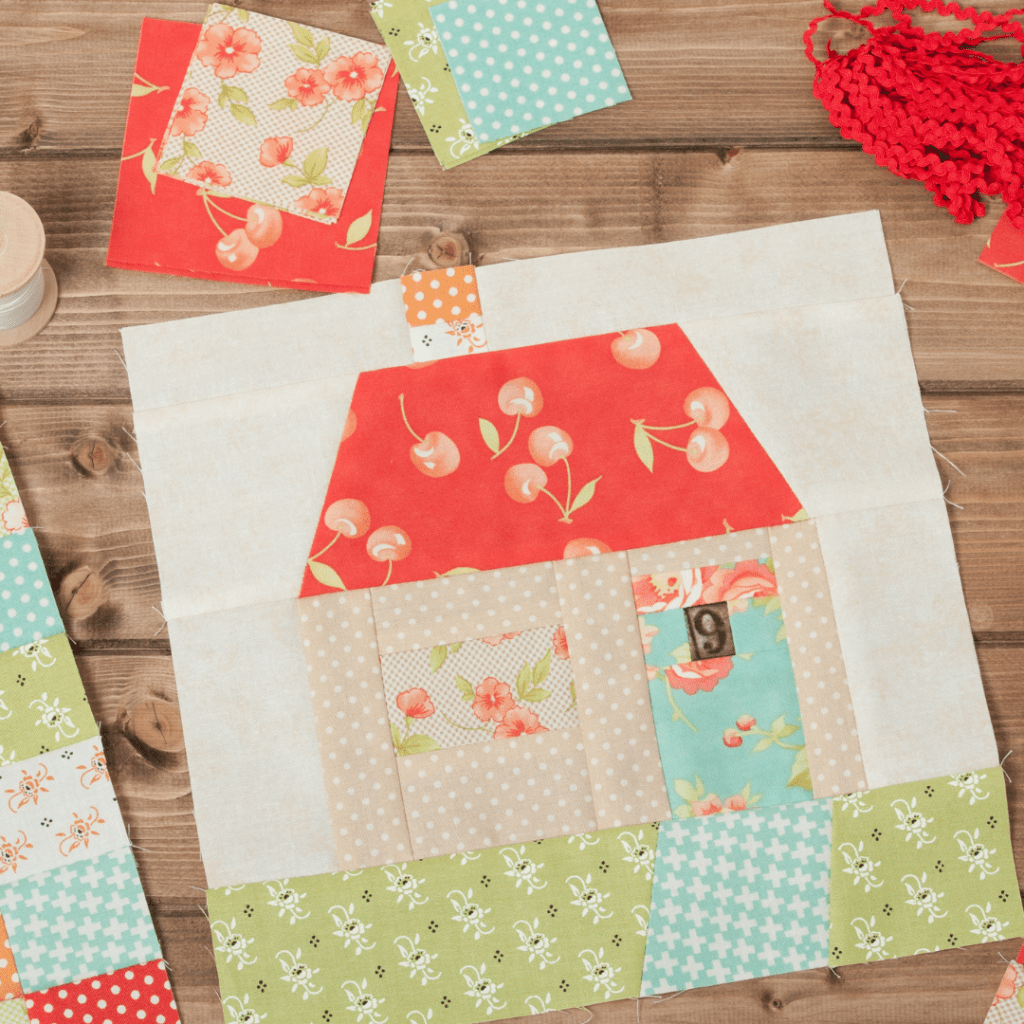
Pillows are great for many reasons:

  1. You can create beautiful personalized décor and treat pillows like a small sample for a quilt idea you have by making that one block you need. A pillow allows you the freedom of creation like a quilt, with less fabric and space required.
  2. You can treat pillows as an add-on to your quilts and create matching or complementary designs.
  3. Creating simple add-ons like pillows is a great way to increase your revenue if you have a small business. 

Look into an accessory like the Glide Foot when creating décor like pillows. This foot can help you glide along with applique, and other three-dimensional textures, allowing you to get creative and add more personalization to your projects. 

Table Top Décor

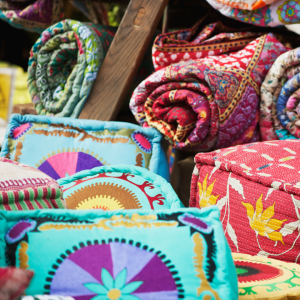
Have holidays motivated you to create new table runners? Have the seasons changed, and do you want to brighten up your home for spring? Table décor is a great way to bring color to your home! Create pieces like table toppers, table runners, dresser décor, storage covers, and so much more. Perfect for protecting your furniture while bringing in color and a theme to your rooms, these patterns are great for anyone who wants a touch of color in their home. 

If you want to add fun shapes and lines to your designs, look into quilting rulers like our JUKI Ruler Set. You can create different textures from straight lines to circles and waves and bring your designs to life.  

Totes, Pouches, and More!

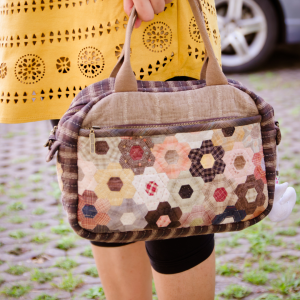
Bring your artwork outside your home by creating beautiful travel gear! Show off your quilting skills by creating pieces that can hold your money, electronics, or clothing. Work in matching sets like wallets and handbags or traveling sets like make-up bags and carrier totes to brighten up your trips. The possibilities are endless when it comes to hitting the road with your creations. 

Tools like Grip and Stitch are great to have one hand when you’re quilting those detailed projects. They make free-motion quilting fun and easy and allow you to easily add on fun designs like spirals, feathers, and more. 

Quilts and More Quilts

Whether your project was created for comfort and lounging, or décor that can bring in bright colors, quilts will never be out of style. Quilts can be so versatile when we step outside of the box. Decorate your home by placing quilts on racks and ladders, use them to upholster chairs and love seats, toss them on white couches for pops of colors. Whether you’re using them for comfort or because the pattern was just suitable for your aesthetic, you can never go wrong with creating a quilt. 

Look into extension poles when quilting more significant projects for a more effortless and more fun experience! By adding extension poles, you can easily design quilts from twin to king-size on your stand-up quilting machine like the Miyabi J-350QVP.

While quilts may have started off as a necessity in the past, they’ve become their own form of artwork for current generation quilters. So branch out and try your skill in new quilting projects like the ones mentioned above the next time you start on a new project! What are your favorite inventive ways to use your quilts?

How To Read A Pattern

We know how daunting it can be to use sewing patterns for the first time. No worries! We are here to help. Today, we are diving into the basics of how to read a sewing pattern. Follow along as we review the basic info you will need, as well as tips to keep in mind.

Let’s Begin!

Start by looking at the instructions section of the booklet or file. This section is loaded with information such as helpful tips before getting started and the best material to use for your project.

Find the Style Lines

When you open up your new pattern, look at the flat, drawn designs to get a better idea of whether this project is the right one for you. It’s a more accurate representation of what you will be sewing and less distracting than the 3D image usually shown at the front of the kit.

Think About Your Sewing Level!

Many patterns will indicate a level of difficulty for example if you’re a beginner, lean towards projects marked as “easy” because these will have a better guide on how to construct your project. They’ll indicate the right tools for each step and showcase how to properly do certain steps. For those that have more experience and feel they’re above the “easy” patterns, there are many options to choose from as well.

As you continue to grow your sewing skills, you’ll be able to explore more advanced patterns. We recommend checking out nearby sewing classes and checking out construction books to help! Don’t rely on one thing to grow. Continue to find different ways of creating projects through blogs, classes, and social media.

Check Out Fabric Suggestions

The best part about patterns is many give you the layout for what tools you’ll need on your new project. Many will suggest a fabric that is well suited to the pattern, whether it be because of durability, stretch, or material feel. Using the encouraged fabric will also get you closer to the desired look.

Once you have more experience in sewing, feel free to experiment with different fabrics! Sometimes, leaving the path and venturing out to try new fabrics in a project that called for something different can surprise you, or at least give you a lesson on why something won’t work next time.

Keeping Up with Yardage

Pattern designers will include fabric yardages to give you an idea of how much fabric you will need. While this should account for pre-wash shrinkage, we recommend buying at least 5-10% more than you’ll need. Think of this as a safe route in case your measurement needs to be higher for your fit or you want extra fabric for accessorizing a clothing project.

A hot tip is to pay attention to the width of the fabric. While the average width is usually 60″ or 44″, you can come across narrower fabrics. When this happens, keep in mind to buy more yardage to accommodate all the pattern pieces.

Don’t Forget Your Thread and Notions!

Patterns will include a list of notions you need for your project like elastic, zippers, and more. Add these to your shopping list!

Size Chart

The first mistake many make is trying to create sizing based on what people buy at the store! Located on your pattern, you will find a size key or chart that helps you choose the right lines for your size.

Make sure to create your project off your body measurements. Don’t worry if your measurements seem off that charts, charts are only averages, and many will experience this! Remember your size is always changing and it’s best to do this every month or so. We recommend determining the size to sew using different measurements for different pieces of clothing:

•          Top/dresses: Use chest (or high bust) circumference

•            Pants: Use the hips girth (meaning widest girth under the belt, usually around the seat)

•            Skirts: Use natural waist (even if the skirt will then sit in a low or high waist)

Time for the Pattern Pieces!

Check for which pieces need printing. Some patterns may include pieces for simple shapes that you cut by measurement only.

Read Your Symbols

Symbols are how the designer communicates with you through their patterns! These symbols will show you how to place the pattern, access where the grainline is, what pieces need to align, and more. Refer to the symbol chart and mark when transferring the sewing pattern onto the fabric.

Let’s get to Cutting!

Now there are two ways you can cut. One method is by placing the pieces on top of the fabric and cut from there. However, many times this technique can waste a lot of fabric! Another way to do this is simply to place your cut-out pattern pieces on top of the fabric and play a game of Tetris by fitting the pieces. Make sure to follow the lines, and you’ll save fabric while getting the project done.

We hope this helps you the next time you decide to pick up a pattern book. Don’t forget to tag us on social media when you create a project using your favorite pattern book!