5 Projects you can create this Spooky Season!

It’s almost time for spooks and candy JUKI Lovers! For today’s blog, we will share our top 5 favorite Halloween projects you can begin creating this weekend. So whether you’re going trick-or-treating, or staying at home, follow along below for ideas you can start today!

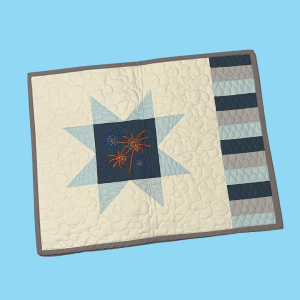
Halloween Patchwork Quilt

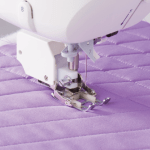
Stay warm this fall and create a Halloween patchwork quilt! Using a variety of Halloween fabric pieces, think witches, pumpkins, and ghosts, you can begin making your very own patchwork quilt. Quilts are the perfect accessory to any home, used and loved by everyone.

We recommend checking out your local quilt shop for holiday quilt bundles. Great options when you want to create a patchwork quilt, and don’t have the scraps, are browsing charm bundles, jelly rolls, and mini-charms! Also, don’t forget to grab batting for your quilts and have fun by bringing texture to the surface using free-motion quilting techniques.

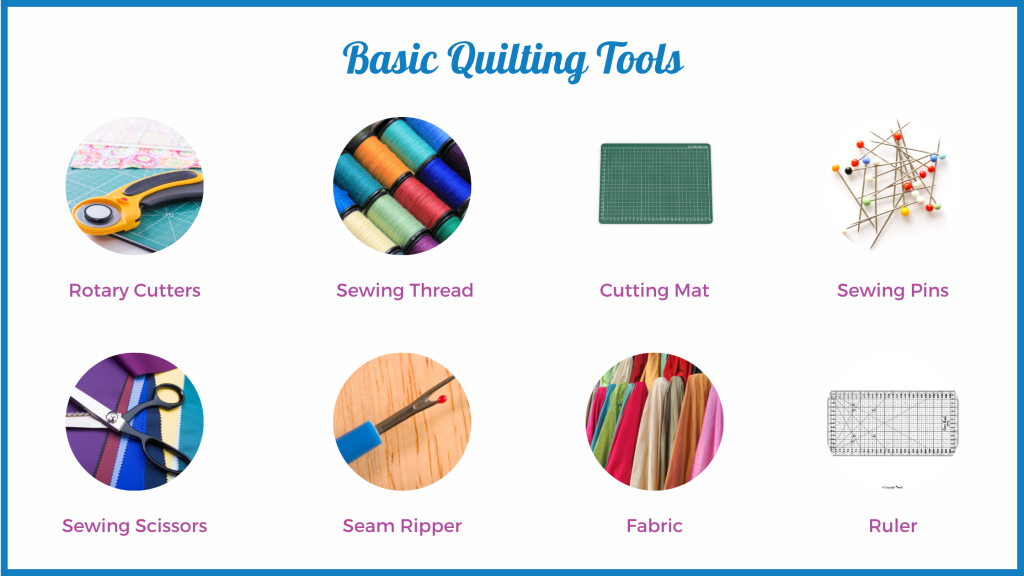
Some great tools to have when quilting is your Open Toe Quilting Presser Foot, Quilting Rulers, and a ΒΌ” Presser Foot for finishing.

Costume Cape

The perfect addition to so many costumes, a cape can be used for various characters ranging from royals to superheroes. To use this cape multiple times, create your piece using basic colors like white, red, or black so you can enjoy this project through the years.

For creating a cape, we recommend having fabrics like stretch velvet, fleece, or wool! Usually, you’ll use about 2 yards of fabric for an adult cape and 1 yard for a child’s cape. This is an excellent apparel project for a beginner to try their hand at. For more advanced sewers, you can add features like trims and a hood for a more finished and professional look.

We recommend having a Cording Foot on hand if you plan to attach a string inside for the cape hood. Also, use a Decorative Stitch Presser Foot to add designs on your cape’s ends for extra personalization!

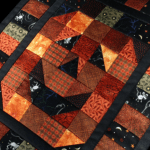
Spooky Placemats and Table Runner

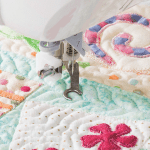
Decorate your home with a spooky table runner and matching placemats! A fun and easy home project, you can accessorize and personalize your kitchen and dining table with fun fabric designs and colors.

When creating placemats and table runners, we recommend having some tools on hand. Inside your placemats and table runner, you’re going to place a fleece or batting; this will stabilize your project. Spray glue is an excellent adhesive for this! Once you’ve pieced together your mat, you can choose to leave it as is or add designs with free motion quilting.

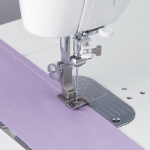
For yardage, we recommend 2-3 yards of fabric. With one yard, you can create up to 8 basic-sized placemats, and with your other yards, you can create your table runner depending on your table length! Keep a ΒΌ presser foot on hand when you’re ready to complete your project, so you can quickly finish the edging.

Halloween Garland

Decorate your archways and doorways with a fun garland! Easily created with less than a yard of fabric for the hanging pieces and string, this dΓ©cor piece is the perfect touch. For the hanging details, we recommend using backing fabric for stabilization.

For this project, keep your ΒΌ” presser foot nearby! Perfect for creating a clean edging on each hanging piece and the edging on the hanging string, this accessory can be the only foot you need for the project.
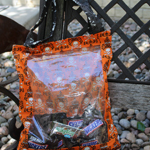
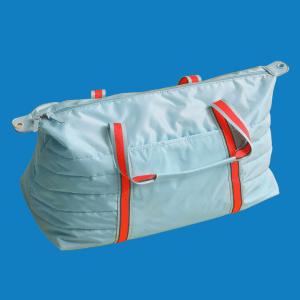
Trick–or–Treat Bag

Lastly, don’t forget to have your trick-or-treat bag ready! Wishing you a happy spooky season, download our free instructions for our see-through trick-or-treat bag here. With a finished size of 14″ x 16″, this bag will carry all those treats home!

Happy Halloween, JUKI Lovers!

Catching Up with Rob Appell

You may recognize this month’s spotlight from “Michael Miller Fabrics Making It Fun” or “Man Sewing,” we’re so excited to spotlight our JUKI Ambassador, Rob Appell, during National Sewing and Quilting month! In today’s blog, we get to speak with Rob about his journey in quilting, his passion for the craft, and how he came to be where he is today.

Robs journey in quilting began when he moved back home from college, spending his free time outside and snowboarding. His mother, the manager and eventual owner of the local quilt shop brought Rob into the business, where he started as a clerk. When his mother began bringing in machines to sell, Rob eventually shifted to machine repairs, and here is where he started falling in love with sewing!

Creating fun Hawaiian shirts as his uniform for the quilt shop, he found himself having fun making them and eventually began looking into patchwork quilting. A fun and easy way to pick up quilting, he began testing his skills in free motion quilting his projects. Again, finding himself loving the hobby. The rest, as they say, is history!

Since he began to quilt, Rob has accomplished a published quilt book, starred in and hosted multiple quilting YouTube shows, created a community for his teachings, and so much more! His videos encourage new quilters to be creative and enjoy their projects! With a focus on basic techniques, his hope when he’s creating for viewers is that they find something they can take away from his lessons and learn how to make their versions.

Recently starring in β€˜Michael Miller Fabrics’ Making it Fun,’ you can follow along with his high-energy videos and view the different patterns and free motion quilting techniques Rob uses. While he offers some design patterns and templates for quilters, his work mainly focuses on organic creation. Going with the flow, his work often doesn’t follow design patterns; the finished design patterns he has sold usually come from these organic works he’s completed after the fact!

β€œThe Free Motion Quilting, I prefer to go freestyle, no pattern, sometimes a plan, but usually pretty random and free.”

Quilting didn’t take him away from the outdoors he loved. Combing two of his favorite things, Rob is known for his landscape quilts. These beautiful pieces focus on nature and showcase views in bright colors. In fact, in 2009, Rob created 12 different quilts that featured faces of endangered species. Using the patterns from his work, he was able to fundraise and advocate for these species through sales that went toward endangered species charities.

He also authored a pattern book, “Making Waves … Adventures of a Surf Quilter,” a self-published print book featuring his landscape and seascape quilts. Early in his quilting journey, Rob was known for his scenic creations. Then, using free motion quilting and applique, he would add fun designs like fish, coral, rocks, lighthouses, ships, and more! Then, bringing in his love for surfing, he created a piece that intertwined surf terms with quilting terms, going above the average and setting himself apart.

Now, as someone who’s been quilting and creating those quilting videos we love for years, we asked Rob what keeps him going. β€œVideos are free and can be viewed over and over again if you’re learning from them. I love to present my passion for quilting.” Rob likes to focus on basic quilting techniques because he’s often reminded of how many new quilters have emerged in the community over the years. Thanks to video cameras and social sites like YouTube, where Rob hosts, he can teach how to construct quilts and the basic skills all quilters want to know. Keeping himself motivated with fun fabrics and the creative process has pushed him to bring that energy into each episode’s studio. Thankful for the following he’s gained on YouTube that keeps him going!

Rob at his studio with the J-350QVP & J-150QVP

He recently created a new quilt, the “Synergy Remix,” designed by Kristie J. Smith in her pattern book, “Splice Magic,” that he loved! Always excited to try out new and different quilting techniques, like he encourages his viewers, Rob locked himself in the quilt shop, Stitchin’ Heaven, his latest collaboration where he’ll be hosting new quilting episodes, and went to work! In one night, he created a quilt and video, maligning the entire project and finishing it. Yet, this project places a smile on his face when he thinks about it.

While Rob has gone on to try other ventures, like his work in textile design with Free Spirit Fabrics, he vouches for his love of quilting. Sharing his love of fabric and free motion quilting, he focuses on his desire to quilt the top to push him through the construction process. Recently, he’s begun focusing on improving his precision in his patchwork! By creating little half-square triangles and trimming them up, he’s found joy in practicing his skills.

Always learning and growing, Rob has begun a new journey in his quilting career with Stitchin’ Heaven! As their new YouTube manager and Content presenter, he’ll be able to create a team of quilt lovers like himself who can share their passion for the craft while teaching others worldwide. Stepping back from handling all processes by himself, he’ll now have quilting friends who will help him create new and exciting projects for viewers like you. We’re excited to see the different techniques and quilting styles that will emerge from this new partnership!

β€œThe thing I love most about the quilting industry is that there is so much for everyone.”

With the quilting community constantly growing as new members find their passion for the hobby, we asked Rob what advice he has for JUKI Quilters. “Get to know your machine, spend 7me learning the nuances, understand what the different feet do and when to use them. Then, remember – this is a hobby, not a race. Please slow down to enjoy the process.” When you enjoy the steps to what you’re creating and take a moment to appreciate each technique you’ve picked up, you’ll truly enjoy the finished project. As Rob mentions, so many people need something positive in their lives. Take the time to find your passion, teach and work with others in your quilting community, and enjoy the process.

We hope you enjoyed learning more about Rob with us, and we hope this inspires you to join him on an online video one day and check out quilting! A hobby for everyone, we hope everyone enjoys National Sewing and Quilting month with a fun new project!

Quilting Basics with JUKI

Today we’ll go over some essential tools and presser feet you’ll need to create a quilt from start to finish. When we start a hobby, we might want to grab every item we see at the shops, so follow along as we share the important ones you should grab first!

Tools to Have in Your Kit

Rotary Cutter: Shaped like a pizza cutter, the rotary cutter is perfect for cutting out your fabric pieces. If you’re using patterns for your work, using a rotary cutter is an easy and quick way to correctly cut the fabric piece to the size and shape you need. These come in different sizes, ranging from small cutters that are great for tight cuts and a large one for big projects! For quilting, we recommend purchasing a medium-sized one.

Scissors: Besides your rotary cutter, ensure scissors are designated for cutting fabric. You want to keep these separate, so they stay sharp for cutting thread and fabric cleanly. So often, when we mix our scissors and cut items like paper, cardboard, or more, this dulls the blade, fraying your material in the long run when you use them.

Seam Ripper: Make sure to keep a seam ripper on hand for those mistakes! Advanced and beginner quilters benefit from this in their tool kits since it is perfect for fixing those little mess-ups.

Self-Healing Cutting Mat: Keep your workspace safe from scratches and find yourself a self-healing cutting mat! This will allow you to use your rotary cutter safely and can be found in many different sizes.

Fabric: Sewing isn’t complete without fabric! There are many options out there for quilters to choose from. You can choose to buy fabric by the yard or purchase bundles! We recommend sticking to 100% cotton. Choose from mini charm packs, jelly rolls, jolly bars, and more, depending on the size of the quilt you want to create and what form of designs you envision.

Thread: Like your fabric, look for a thread that suits your project, like 100% cotton for quilting. Look for options that are durable and not too cheap. Here you’ll want to find a thread that won’t birds nest on you in the creative process while sticking to your budget. For quilters, we recommend Aurifil! Like we use in our JUKI Studio when creating, Aurifil is 100% Egyptian cotton and comes in many colors, perfect for your project needs. We recommend purchasing neutral colors when you begin, like tan, white and black; this way, you can easily bind most of your projects without worrying about the thread color.

Pins and Pattern weights: When you want to keep your fabric in place, using quilting pins and pattern weights is a great solution! Use quilting pins when piecing your quilts to keep the fabric from moving, and use pattern weights when cutting out the fabric with your rotary cutter! These two accessories will make your cutting and sewing experience easy and help you create a professional finished product.

For pins, try and look for longer options, as this will help you hold the fabric better when sewing through those thick pieces, and they are also much easier to grab! You can also purchase safety pins, which come straight and curved for the finishing stages of your quilt process.

Rulers: Clear-gridded rulers are important in quilting because measuring correctly matters! Helping you quickly and accurately cut fabric for your project, rulers come in an array of size options suited for your needs.

Presser Feet for the Average Quilter

While your machines will come with presser feet, let’s go over some basic presser feet you should have on hand when quilting and what they’re for!

1/4″ Presser Foot

Essential for piecing your quilts together, the 1/4″ Presser Foot allows you accurately piece your quilts together quickly and efficiently. This accessory is perfect for when you’re piecing and don’t have time consistently mind the bottom measurements on your plate.

Walking Foot

A Walking Foot is basically used for putting a set of feed dogs on top of the quilt sandwich, working in conjunction with the bottom feed dogs, and evenly helping you pull your quilt through the sewing machine. Quilting with a standard presser foot on thick fabric or hard-to-feed material like the ΒΌ” Presser Foot, for example, could lead to tucks and uneven stitches; this is why we use a Walking Foot!

Free Motion Quilting Foot

Want to add designs and texture to your quilts? You’re going to want a Free Motion Quilting Foot! With a Free Motion Quilting Foot, you will drop, or lower, your feed dogs and begin moving your quilt under the foot, free motioning the design yourself! While it takes practice using free motion quilting and controlling the quilt yourself, it can be an enjoyable and rewarding skill to learn!

We recommend checking out an Open Toe Foot when looking for your Free Motion Quilting Foot. With a small space left open on the presser foot, you’ll have a better eye on the needle and be able to easily create your designs!

Get To Quilting!

As you begin your quilting journey, research what tools you’ll need when creating! These listed are perfect for setting up your workspace and machine, so keep these in mind while you’re at the shop. If you’re an experienced quilter, what presser feet and tools do you think quilters should keep on hand? Let us know down below!

From Summer to Fall, We Love These Accessories!

As we celebrate the summer coming to a close, let’s go over some great and fun projects you can create that will follow you into the fall! Whether you’re going to the beach or back to school, these projects will always be handy.

Glasses Case

Whether they’re protecting your eyes from the sun or helping you see, keep those glasses covered with a glasses case! With the ability to be versatile in your case designs, this project is perfect for letting your creative side shine. You can create using cotton, leather, canvas, and more fabrics and decorate with applique, quilting, or embroidery.

What we recommend keeping on hand for this project are notions, fasteners, or closures! These are best for keeping your glasses secured in their case and resistant to falling out; possibly getting scratched. Another fun add-on is a bag snap-clip! Use this when you’re on the move, and want to keep your glasses in easy reach or for a child’s glasses case to keep attached to their backpack.

For the inside of your glasses case, make sure to use a material that won’t affect the glass! We recommend sticking to cotton or a material that has a lovely soft touch to it, like velvet.

Lastly, we recommend keeping a Smooth Presser Foot nearby! This machine accessory is perfect for sewing those protective fabrics you love like vinyl or leather, as these materials can commonly cause issues when sewn with a standard presser foot that it might stick to.

Bucket Hats

A bucket hat is a perfect accessory to fight off those UV rays from hiking, the playground, or the waterpark! Fun and simple to create, a bucket hat pattern is an excellent choice for your wardrobe. We recommend using medium to the heavy-duty fabric. The material you use should be stiff to hold the shape of the hat.

We recommend fabric options like tweed, denim, or canvas. If you want to create with a thin fabric, you’ll need to use fusible interfacing. Fusible interfacing will help your fabric hold its shape and firmness while preventing fraying on your fabrics.

Some notions to keep in mind that you will want to purchase for that finished look are eyelets and a drawstring cord. Adding a cord to your bucket hat now allows you to adjust the sizing, making this a great gift! Also, the eyelets will help improve ventilation and makes wearing hats more comfortable, especially on those hot summer days!

Don’t forget to have your machine accessories on hand and ready! Since bucket hats have lining around the brim and top area, we recommend using a ¼” Guide Foot! This is a perfect tool for achieving those even spirals around the bucket hat brim and sides, allowing you to create something beautiful while securing the hat has that professionally finished look.

Scrunchies

Fun to personalize and easy to create, you can never go wrong with making some scrunchies! Whether you’re using them to accessorize or simply pull your hair back, this project is fast, easy, and perfect for beginners.

Inexpensive, this project can be completed with scrap fabrics or upcycled from old clothes! As a fashion and functional piece, this project only requires straight stitching, fabric, and elastic. We recommend using elastic size ΒΌ for basic scrunchies and moving up if you’d like to create jumbo ones.

Keep in mind fabric size and elastic size before being created. We recommend 8 to 9 inches of elastic and using a 3″ x 22″ fabric piece for best outcomes!

Table Runner and Mats

Re-vamp your home in time for the new season! Great project quilters can create matching table runners and mat sets, perfect for decorating your home and creating a quick and easy project. So whether you’re decorating for the holidays or looking to freshen up the living room with new colors and patterns, these accessories can bring a room together.

Some fabric recommendations we have for this cotton! Easy to wash and create with, this fabric is available in a multitude of options and allows you to use it with comfort, knowing you can throw it in the washer when those accidents happen. For fusing, there are a few main qualities you want to look for since this project will be washed often. Find interfacing with a low or no percentage of shrinkage, low thickness, and whether it’s fusible. Fusible interfacing will create a better project experience and is easy to use.

A great way to design your table runner and mats is by using free motion quilting! Whether you’re working on a compact machine or a long-arm quilt, adding in designs can genuinely bring your fabric to life and add texture. Keep in mind accessories for your machine like a Quilt Presser Foot (for ruler) and Quilting Rulers when you want to create intricate shapes and designs and need a little help!

Travel Bags

Whether we’re going to the beach, or after-school activities, having a travel bag fitted for your needs is a must! Travel bags allow you to add storage spots, secured or hidden pockets for valuables, adjustable straps, embroidered names, and so much more.

For bags you’re going to use often, we recommend finding durable fabrics and ones that can hold weight well. Some options to keep in mind are canvas, nylon, mid-weight woven, tweed, or leather. Depending on what perks you’re looking for, like using nylon fabric that can handle water for a gym bag, make sure to find a fabric that can withstand your lifestyle!

Notions to keep on hand when you build a travel bag are closure notions like zippers and spring snaps, snap hooks for attaching accessories like your keys or holding your scrunchies, and strap adjusters for weight changes. These pieces will help your bag have that professional finished look you’re going for, and create a longer-lasting project.

Other fun pieces you can add to your bags are applique, embroidery, or printed fabric to bring out your personality. Add-ons like mesh pockets or water bottle holders to personalize the bag for your needs are also excellent choices when wanting to expand on your skills.

Don’t forget to have the right accessories on hand! Using a foot accessory like the Decorative Stitch Presser Foot is perfect for adding in those personal touches like your name and decorative designs. Add your name to the inside of your child’s bag or your gym bag, and enjoy seeing your finished product!

Whether you’re creating on a computerized machine like our HZL series or quilting on your TL machine, these projects can be made easily. Want some inspiration on other projects you can create? Join us on our JUKI Home Sewing page on YouTube today for future and past projects!