

Adding a name or phrase to a design can add a nice custom, personal touch to any project! This tutorial shows how to add text on the JUKI Tajima Sai in 10 easy steps.
- Open Tajima Writer Plus Software.
- View > turn on Hoop > a check mark will appear when hoop is activated.
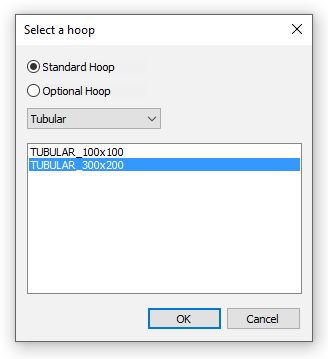
- Edit > Select Hoop. You will have two options, Standard or Optional. Standard is the two hoops that came with the machine. Optional will show you all the hoops available for the machine.
Select Standard Hoop > Tubular > Tubular 300 x 200 > OK.
- Fit to screen.

5. Click on the drop down arrow under the “T”. Click on the “T”. The word text will appear on your screen. On the right side of the screen is a white arrow, click on this arrow to open the Properties box.

6. In the Properties box on the right, click on Text and type in your name or wording. Click on height to change the size or click on Select Tool > select the text > click and hold the corner box to change the size of the text. Click on the directional arrows icon to move text around. Click on the curve arrow icon to rotate text.
7. Click on the drop down arrow beside Font to see all the built in options for font styles.
Note: For true type fonts, click on the down arrow under the “T” and select

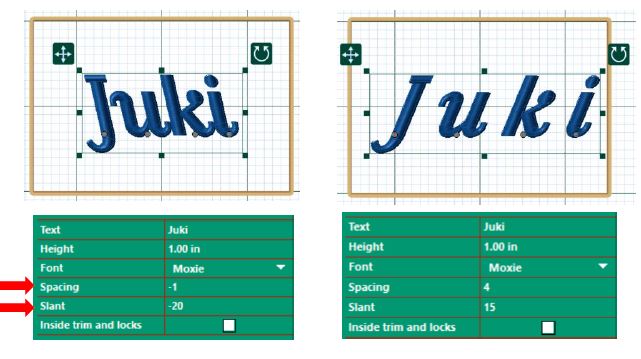
8. Spacing > move each individual letter closer or further apart.
9. Slant > change the angle of the text.
10. Underlay > choose the type of underlay you would like to use or choose no underlay at all.

There’s certainly a great deal to know about this subject. I love all the points you’ve made.
LikeLike