Achieve Perfect Tension with JUKI

Achieving the perfect stitch on your sewing machine often boils down to one crucial factor: tension. Whether you own a machine from the TL series or the DX series, understanding how to set and adjust tension can make a difference in your sewing projects. In this blog post, we’ll explore how to balance tension on your sewing machine, offer tips for working with different fabrics, and address common tension issues. Plus, we’ll guide you to our YouTube page, where you can find detailed video tutorials to help you along the way.

Understanding Sewing Machine Tension

JUKI TL TENSION

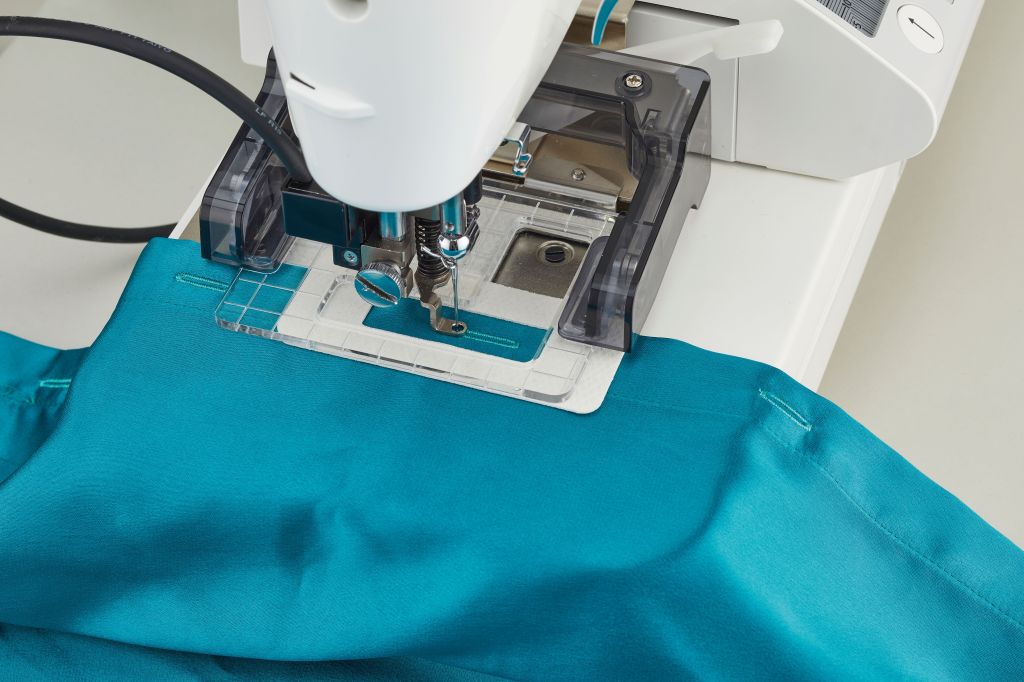
Tension refers to the amount of pull on the thread as it passes through the machine. Proper tension ensures that your stitches are even and secure on both sides of the fabric. Both the TL and DX series come with easy-to-adjust tension settings, but knowing when and how to tweak these settings is key.

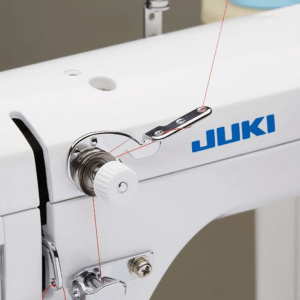
The TL series typically includes a manual tension dial on the front panel. This dial allows for precise adjustments of the upper thread tension. It’s ideal for sewers who prefer tactile feedback and incremental changes, which are crucial for delicate fabrics and intricate stitches.

On the other hand, the DX series features digital tension settings through an intuitive interface. This system provides preset tension levels for various fabrics and stitches and allows manual overrides to achieve exact tension requirements. This digital precision is beneficial for consistent stitch quality across different sewing projects.

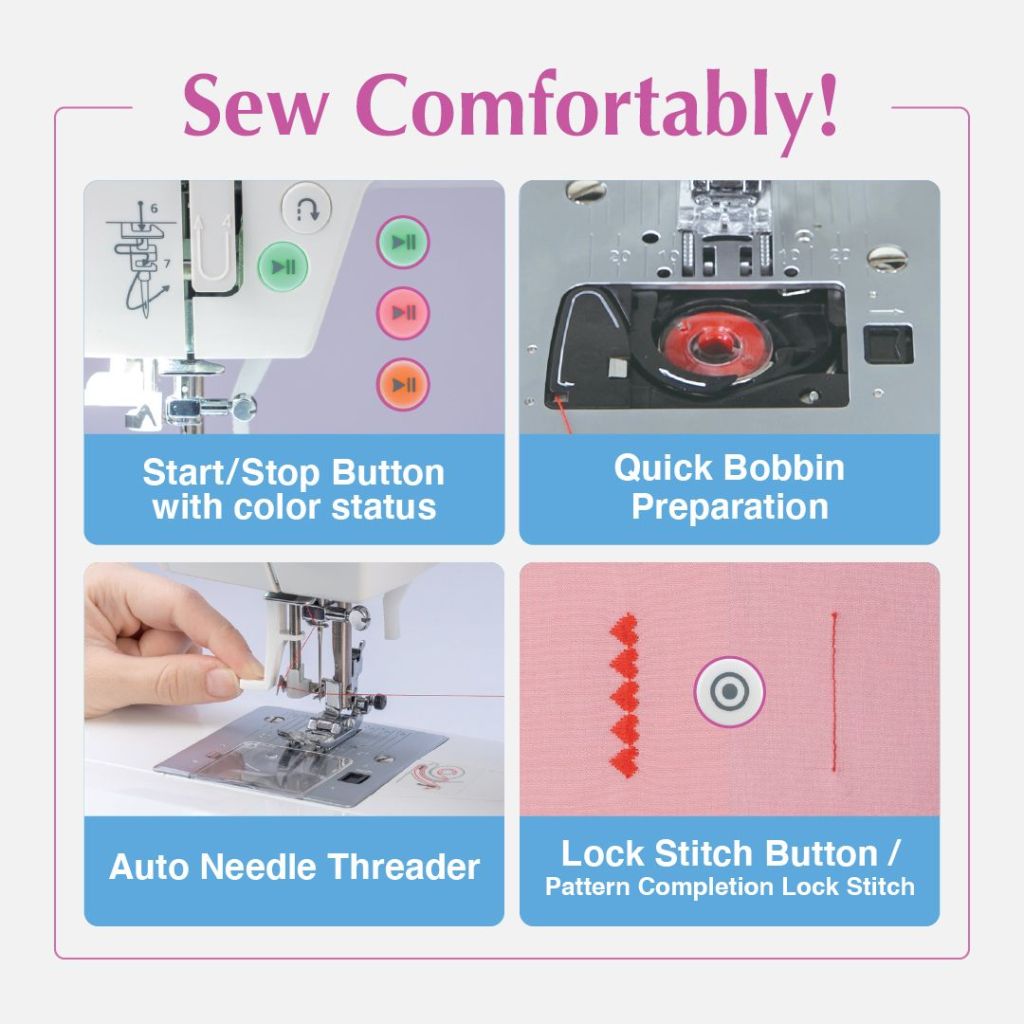
Proper tension on these machines ensures even and secure stitches on both sides of the fabric, reducing issues like puckering or loose stitches. When adjusting your sewing machine’s tension, remember that it’s built to reduce tension fluctuations while sewing, resulting in smoother and more professional-looking finishes. When you need to adjust the tension, consider these points.

Tips for Adjusting Tension on the TL Series

  1. Test on Scrap Fabric: Always test your tension settings on scrap fabric that are similar to your project material. This helps you make adjustments without affecting your actual project.
  2. Adjust in Small Increments: Turn the tension dial in small increments and test after each adjustment. A small change can make a big difference.
  3. Check the Bobbin Case: For the TL series, the bobbin case tension might also need adjusting. Ensure the bobbin thread pulls out smoothly with slight resistance.
DX SERIES TENSION SETTINGS ON SCREEN

Tips for Adjusting Tension on the DX Series

  1. Digital Adjustments: The DX series often features digital tension settings, making precise adjustments easier. Use the machine’s manual to navigate the digital interface.
  2. Preset Tension Settings: Utilize preset tension settings for different types of stitches and fabrics. These presets are optimized for common sewing tasks.
  3. Manual Overrides: For specialized projects, manually override the presets to fine-tune the tension.

Tension for Different Fabrics

Different fabrics require different tension settings:

  • Lightweight Fabrics (silk, chiffon): Lightweight fabrics are delicate and prone to puckering if the tension is too tight. To prevent this, reduce the tension on your sewing machine. Lowering the tension allows the thread to flow smoothly through the fabric without pulling too tightly, resulting in even stitches and a smooth finish.
  • Medium Fabrics (cotton, linen): Cotton and linen are versatile and commonly used for various sewing projects. A medium-tension setting usually works well for these fabrics. Medium tension balances the thread pull, ensuring stitches penetrate the fabric evenly without causing puckering or loose stitches.
  • Heavy Fabrics (denim, canvas): Heavy fabrics require more tension to properly secure stitches. Increasing the tension on your sewing machine helps to ensure that the stitches are strong and durable, capable of withstanding the thicker layers of denim or canvas. Adequate tension prevents skipped stitches and ensures the thread forms tight, secure stitches.

It’s essential to adjust the tension settings when transitioning between different fabric types. For example, suppose you’re sewing a project involving lightweight silk and medium-weight cotton. In that case, you must adjust the tension dial when switching fabrics to maintain consistent stitch quality.

How Needles Affect Tension

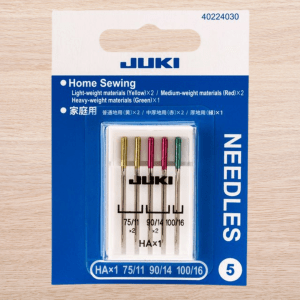
The needle plays a significant role in the sewing process, influencing how the thread interacts with the fabric and affecting tension in several ways. The needle size is crucial: for lightweight fabrics such as silk or chiffon, using a smaller needle size (e.g., size 9 or 10) is recommended. Smaller needles create smaller puncture holes in delicate fabrics, reducing the risk of puckering and allowing the thread to glide smoothly. Conversely, heavy fabrics like denim or canvas require larger needle sizes (e.g., size 16 or 18) to accommodate the thicker threads and layers. Larger needles penetrate heavy fabrics more effectively, ensuring secure stitches without strain on the machine or fabric.

Different fabrics may benefit from specialized needle types that optimize tension and reduce fabric damage. Ballpoint needles are ideal for knit fabrics as their rounded tip slips between the fabric’s fibers without causing snags or runs. This reduces tension on stretchy fabrics like jersey or spandex, maintaining elasticity and preventing skipped stitches. Sharp needles, or universal needles, have pointed tips designed for woven fabrics like cotton or linen. They penetrate the fabric cleanly, ensuring precise stitches and minimal tension adjustments.

Proper needle selection and maintenance contribute to consistent tension control. A worn or damaged needle can cause uneven tension, poor stitch quality, and potential fabric damage. Therefore, replacing needles regularly is crucial for maintaining optimal sewing performance! Always match the needle size and type to the fabric and thread you use to ensure smooth stitching and prevent unnecessary tension adjustments. Before starting a project, testing the needle and tension settings on scrap fabric is wise to ensure they produce the desired results. This practice allows you to fine-tune settings without affecting your main project.

Common Tension Issues and Fixes

  1. Looping Stitches: If you see loops on the bottom of the fabric, the upper thread tension is likely too loose. Tighten the upper tension dial slightly.
  2. Tight Stitches: If the fabric puckers and the stitches are too tight, the upper tension is too high. Loosen the upper tension dial.
  3. Uneven Stitches: Check that the machine is threaded correctly. Incorrect threading can often cause tension issues.

Visit Our YouTube Page

For more detailed guidance, visit our YouTube page here, where you can find step-by-step video tutorials on setting and adjusting tension on both the TL and DX series machines. Our videos cover everything from basic tension adjustments to troubleshooting common issues, providing a visual and practical aid to mastering your machine!

Balancing tension on your sewing machine might seem daunting initially, but with practice and the right resources, you can achieve professional-quality stitches on any fabric. Happy sewing!

Coming Soon: The New EB-1!


Coming soon, the EB-1 is an innovative computerized buttonholer tailored for semi-industrial sewing machines. Unparalleled in the industry, this accessory stands out with its 11 pre-set buttonhole patterns complete with bartack and eyelet functionality. The bartacking stitch proves versatile, accommodating tasks like pocket corner sewing, zipper end reinforcement, and belt loop attachment. Meanwhile, the eyelet function serves both functional and decorative purposes, allowing string passage and enhancing clothing aesthetics.

Elevate your garment craftsmanship with the EB-1, revolutionizing buttonhole creation on your TL machine. Whether fashioning elegant dresses or stylish shirts, this accessory lends a flawless final touch. Operating by maneuvering the presser frame with material, the EB-1 enables buttonhole pattern rotation by 90 degrees along the X and Y axes, facilitating the sewing of both vertical and horizontal buttonholes. Moreover, its impeccable design averts jamming, facilitating seamless stitching even on denser fabrics.

Facilitating precision, the EB-1 incorporates a 1 cm grid for effortless project alignment on both the X and Y axes. The transparent presser foot streamlines the initial positioning, ensuring accurate buttonhole placement. Being a computerized tool, the EB-1 empowers users to select from a plethora of buttonhole stitch patterns and intricate settings. With the capacity to input button diameter in 1mm increments, the EB-1 automates appropriate buttonhole sizing, catering to buttons ranging from 5mm to 32mm in diameter.

Features

  • Professional Level Stitch Quality
  • Beautiful buttonhole stitch
  • Buttonhole size is optimized for each type of button
  • Flexible seam button
  • Capable of creating a basting stitch
  • Accessible features

Included Accessories

  • Difference-in-Height Correction Plate: used when sewing buttonholes on multilayered parts of the material.
  • Non-Slip Sheet: can be placed on a slippery fabric so that it does not easily slip. The sheet can also be cut to adjust its length as desired.

Learn more about the NEW EB-1 at your nearest JUKI Dealer, releasing later this year, 2023. To find your local JUKI Dealer, click here today!

New Product Announcement: The New HZL-HT740!


Experience the joy of innovation with the HZL-HT740 computerized sewing machine—a fusion of precision, ingenuity, and convenience. Bid farewell to the drudgery of manual thread trimming, for the HZL-HT740 boasts automated thread trimmers that effortlessly snip upper and lower threads at the push of a button, liberating your time and energy!

With a remarkable repertoire of 116 stitch patterns and two fonts, novice crafters and seasoned artisans, can create a variety of projects thanks to its ideal stitch options. This sewing marvel encompasses rudimentary stitches, ornate designs, buttonholes, and even scripted lettering, ensuring your creations are nothing short of spectacular.

Moreover, threading frustrations become relics of the past, thanks to the HZL-HT740’s ingenious auto needle threader. The machine takes charge of threading, making the process seamless and swift. With the HZL-HT740 as your creative companion, embrace impeccable stitching, intuitive thread control, and an ensemble of user-friendly functions that redefine your sewing expedition. Whether you sew for leisure or career, this sewing marvel is your gateway to transformative sewing experiences. Embrace the HZL-HT740 and embark on an odyssey of unbounded sewing potential!

Features

  • Lockstitch
  • Needle Up/Down Button
  • Adjustable Presser Foot Pressure
  • Buttonhole
  • Elongation Patterns
  • Size of Stitch Patterns and Needle Position
  • Start/Stop Button
  • Quick Bobbin Preparation

Included Accessories

  • Standard Presser Foot 
  • Zipper Presser Foot 
  • Overcasting Presser Foot 
  • Satin Stitch Foot
  • Blind Stitch Presser Foot
  • Buttonhole Presser Foot 
  • Button Sewing Foot

Learn more about the NEW HZL-HT740 at your nearest JUKI Dealer. To find your local JUKI Dealer, click here today!

New Product Announcement: The New HZL-HT710!


Introducing the HZL-HT710 computerized sewing machine, an innovation that revolutionizes your sewing journey. Seamlessly merging cutting-edge technology with a host of user-friendly functions, this exceptional machine streamlines your sewing tasks and ensures impeccable results. The machine’s standout feature lies in its automatic thread-trimming capability. A single button press elegantly tidies both upper and lower threads, allowing you to save time and concentrate on your craft. Enrich your artistic ventures with an extensive collection of 60 stitch patterns, covering everything from foundational stitches to elaborate motifs.

Bid farewell to the frustrations of threading the needle, thanks to the in-built auto needle threader. The age-old struggle is replaced with a straightforward procedure—follow the guide, and watch the HZL-HT710 elegantly thread the needle on your behalf. Embrace the myriad possibilities that come with the HZL-HT710 computerized sewing machine. Its progressive features and intuitive design empower your creative pursuit and guarantee remarkable sewing achievements. As you invest in the HZL-HT710 today, you unlock a realm of effortless sewing, taking your projects to unprecedented heights of excellence. The journey to seamless stitching and crafting joy awaits.

Features

  • Automatic Thread Trimmers
  • Start/Stop Button
  • Quick Bobbin Preparation
  • Auto Needle Threader
  • Lockstitch
  • Needle Up/Down Button
  • Adjustable Presser Foot Pressure
  • Size of Stitch Patterns and Needle Position

Included Accessories

  • Standard Presser Foot 
  • Zipper Presser Foot 
  • Overcasting Presser Foot 
  • Satin Stitch Foot
  • Blind Stitch Presser Foot
  • Buttonhole Presser Foot 
  • Button Sewing Foot

Learn more about the NEW HZL-HT710 at your nearest JUKI Dealer. To find your local JUKI Dealer, click here today!

JUKI Tip: Working with Your TL Needle Threader

At JUKI we know how important it is to know your machine’s features and how to use them, so starting this year at JUKI we’ll be sharing monthly tips for creating on, and using, your beloved JUKI sewing and quilting machines! This month we’ll be focusing on the TL Series and its Automatic Needle Threader. Showcasing each step, and how the feature works, follow along below to view our Tip Video and breakdown.

Needle Up/Down Feature

The first step is knowing where your Needle Up/Down button is, and when to use it. Now the most important step to using your needle threader is, making sure the foot is in the down position (engaging the tension) and using your Needle Up/Down button to lower and raise the needle.

You’re going to start with having the needle in the highest position, before using your needle threader, so your machine can thread your needle.

Check out time stamp 1:42 to learn where you can find your Needle Up/Down button.

Threading Your Needle

Stopping right before the eye of the needle, we’ll be using our Needle Threader today to get our machine ready to create.

To start, your thread should be at the point right before needle-eye entry.

Next, we’re going to pull our thread off to the side and lower our mechanism all the way down. Now grab your thread and go behind that metal groove on the needle threader, and into the two grooves on the white piece of the mechanism, while holding your thread off to the side. Check out the time stamp 4:00 in our video about for an example of this section.

Now, when we raise the mechanism, you’ll see a loop formed with your thread on your needle. Once you see the loop, pull the thread carefully through the needle and to the right, completing your needle threading!

To learn more about the TL series visit our JUKI Home Sewing YouTube page here, or visit your local JUKI Dealer here.

Have questions about your JUKI machine? Let us know down below! We look forward to creating more JUKI Tips to help you bring your projects to life.