This month’s tip is all about using our T-Guage with Kelly, our JUKI National Trainer! If you like a consistent seam gauge for your seam allowances and use maybe one, or maybe even two seam allowances the T- Gauge is for you. What we’re going to do in our video below is set this up so we can follow a perfect quarter-inch seam or half-inch seam.
You’ll see this accessory can help with different seams and is easy to attach. We have a mounting plate right here on our TL-18QVP that we’re going to be working on.
To start we’re going to put the two screws in that come with our T-Guage. We’re going to put these in lightly so that we can tighten them after I put my gauge on the quarter-inch seam.
We love the accuracy of the gauge because we can use our fast speed on the TL-18QVP to sew and maintain a consistent seam every time. After you’re set-up, use your seam gauge to double-check the measurement from the needle.
In our video we’re working on the perfect quarter-inch seam! After you decide on spacing, you’re going to tighten those screws and check the accuracy again because it tends to move when you tighten that screw. Ours looks great! Now we will have a consistent 1/4 inch seam all set.
In our video you can watch as we guide our fabric right next to the seam and use the full speed setting on the TL-18QVP.
We hope you’ve enjoyed this tip on how to set up your T-Guage and when to sue it. The Haruka TL-18QVP with our T-Gauge gives you wonderful accuracy for seam allowances! thank you for joining us today and we look forward to seeing you next time on a tip or project with JUKI.
In this JUKI tip, we have JUKI Educator Kelly with JUKI America focus on the needle threader for the DX-4000QVP! This is a fabulous tool found on your DX Series machines, so let us give you the right steps to ensure that it works every time you’re ready to create.
When you thread the DX-4000QVP you’re following a numerical system. The system starts with 1 where you begin thread set up, threading your machine by the guide above the needle to number 6 where you get to the final steps to thread your needle, which are 7 and 8. This part is simple! Follow the number system as you thread your machine from top to bottom.
At Step 7 you’ll put the thread in the needle threader! Watch as we pop the thread in there, and push the needle threader lever down. This will deliver the thread through the eye of the needle and then you simply just pull the loop to the back. After your needle has been threaded, the thread cutter is number 8. Here you trim your thread by pulling the thread piece back and cutting, and you’ll be all set to begin sewing!
It’s that easy! Thank you so much for joining us today for another tip from JUKI.
Please Subscribe and we look forward to seeing you again on another tip or project!
When it comes to sewing, the magic is in the details, and nothing adds a touch of flair quite like the right decorative stitch! Whether you’re embellishing a cape or creating a statement dress, JUKI’s decorative stitches open up a world of creative possibilities. In this adventure, we’ll dive into our favorite stitches and share tips on when and where to use them to make your costume stand out!
Machine Options
Before we dive into specifics, let’s take a moment to talk about the JUKI sewing machines that offer decorative stitches. Known for their precision and durability, JUKI machines come equipped with a wide variety of stitches that cater to every sewing need, from basic to intricate projects.
JUKI HZL-F Series: The HZL-F Series are powerhouse options that can reach over 250 built-in stitches, including decorative. You’ll find everything from floral patterns to geometric designs, perfect for adding unique touches to your projects. This model also includes alphanumeric stitches, so you can personalize your creations with names or messages!
JUKI DX QVP Series: The DX QVP Series offers up to 287 stitch patterns, including several exclusive decorative stitches designed for quilters and fashion creators alike. This machine is perfect for costume accessories that require precise stitching and detailed embellishments! The machine’s advanced features, like the floating presser foot, make it easy to work with thick fabrics or multiple layers.
JUKI HZL-DX Series: Reaching up to 287 stitches, including 16 different buttonhole styles and various decorative stitches, the HZL-DX Series is ideal for those who want to experiment with various designs in one project. The machine’s intuitive controls make it easy to switch between stitches, allowing you to quickly add intricate details to your projects.
Decorative Stitches On JUKI
Now, let’s talk about some decorative stitches in your machines. These stitches are more than just pretty patterns—they’re functional add-ons that can elevate your sewing projects. Here are a few recommendations on how to make the most of these stitches in your next creation:
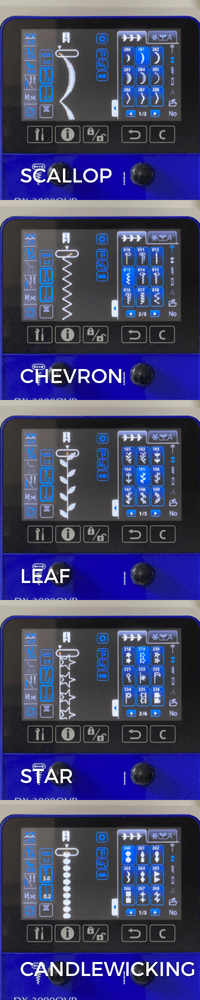
Scallop Stitch: The scallop stitch adds a delicate, feminine touch to the edges of the fabric. It’s perfect for finishing off a scarf with a soft, wavy edge or adding a whimsical border to a cape. Pair it with a contrasting thread for extra pop. It is perfect for the edges of scarves, capes, and hems.
Chevron Stitch: The Chevron stitch brings your projects a bold, geometric flair. This is a fantastic choice for accenting belts or bag straps, offering durability and a stylish design. It also works wonderfully around the brim of a hat, adding texture and visual interest. Perfect for belts, bags, and much more!
Leaf Stitch: The leaf stitch is ideal for nature-inspired designs. Imagine a flowing cape with a vine of leaves winding around the edges or a bag with leafy embellishments. This stitch adds an organic feel to your projects, making it perfect for costumes with a natural or fantasy theme. Perfect for capes, bags, and collars.
Star Stitch: The star stitch is playful and eye-catching, perfect for superhero-themed costumes. It can be used to create star-studded borders on capes, add a touch of sparkle to hats, or embellish belts and bags. This stitch is a must for any costume that needs a bit of magic. Perfect for capes, hats, and superhero or space-themed accessories.
Candlewicking Stitch: The candlewicking stitch creates a textured, almost bead-like effect on the fabric. Use it to create intricate designs on scarves or add texture to belts. It’s a great way to introduce a three-dimensional element to your accessories. It is perfect for scarves, belts, and detailed embellishments.
Bringing It All Together: Creating the Perfect Costume Accessories
Now that we’ve covered some of our favorite decorative stitches let’s talk about how to bring them together in your projects. When designing costume accessories, consider the overall theme and how the stitches can enhance it. Here are a few ideas:
Hats: Add a chevron or star stitch around the brim to create a statement piece that ties in with your costume’s theme.
Capes: Use a combination of leaf and scallop stitches to add movement and elegance to the edges.
Belts: A bold chevron or candlewicking stitch can transform a simple belt into a standout accessory.
Bags: Incorporate a variety of stitches like the leaf and star to add personality and texture.
Remember, the key to successful decorative stitching is practice and experimentation. Try different thread colors, stitch lengths, and placements to see what works best for your project.
Whether creating a full costume or adding a special touch to an accessory, JUKI’s decorative stitches offer endless possibilities. We hope this guide inspires you to experiment and have fun with your sewing projects. Don’t forget to share your creations with us—happy stitching!
Discover a simple and effective technique for gathering fabric on your JUKI MO Series serger without using the gathering foot! In this quick tip video, JUKI National Account Trainer Alba demonstrates how to achieve beautiful gathers using the MO-2000QVP. Whether you’re working on garments, home decor, or craft projects, this method is a must-know for any sewing enthusiast.
In this tip, we’re talking Sergers! Here we will show you how to gather so beautifully with nothing but what came with your serger.
Now, in order to create a gather on a serger it’s all about changing certain settings and the first one we’re going to talk about is the differential feed. The differential is how quickly those front-feed dogs move. We’re setting that to 2 so my front feed dogs are going to move at twice the speed of my rear feed dogs. My Stitch length I want to be a little bit longer so I’m at a 3 and a half. We’ll set it between the three and the four.
Now we’re going to talk about the needles and the loopers. My needles are all the way tight, so the highest number on the machine, and my loopers are set to the lowest number on the machine. This means that the threads are going to fight each other creating a gather.
Now my tip for creating a really really tight gather is putting your finger on the back of the foot and forcing that fabric to move even slower and bunch up even more. In the video you’ll see the difference between where we held our fabric and where we did not.
If you want a gentle gather you don’t want to hold that fabric back but if you want a nice tight gather you do want to hold that back!
I want to thank you for joining us and I hope you take out that serger! I hear so many people tell us their serger is still in the box, that they’re afraid of it, so please take that out and start making projects and include some really cute gathers. Let JUKI see some pictures of what you create and we’re just so glad you were able to join us, until next time bye-bye!
Do you like using gauges for your seam guides? In this tip, Kelly showcases how to set up and use our wonderful Swing Gauge by JUKI! You can set up this swing gauge for two different seam allowances. For example, if you’re using a half inch and a quarter inch you can use this fabulous tool because what it does is you can set the first gauge up for a half inch and then the second gauge up for a 1/4 inch and then swing it away when you want to use the inch seam allowance.
First, in the video, we will attach it to the machine. The swing gauge comes with two screws for the mounting plate and we’re just going to set those but not tighten them because we’re going to adjust the gauge to the seam allowances we want.
The other thing you’ll want to use is a measuring device so you’re sure it is exactly where you want it to be when you sew the seam. In this video, we’re going to swing the first part back and set the first gauge to half an inch and we’re going to use a ruler down here. We’re lining the half-inch right up with the needle and then I’m going to tighten these screws. Make sure to check it again because this is going to move around! so
Tighten with your t- screwdriver.
If you’re following along the video you’ll see it looks great! Once that is all set you can swing the second one up and adjust it to a 1/4 inch. Remember to check the accuracy of the 1/4 inch. That looks great! So now we’re going to tighten the larger screw with our t- screwdriver.
As you watch you’ll see us try the half-inch seam allowance first and it’s beautiful! We love the accuracy. Next, we’ll swing our second guide forward for the 1/4-inch seam allowance.
If you like an accurate seam gauge and change seam allowances often the swing gauge is an excellent option from JUKI! Locate your JUKI dealer for this fabulous accessory by clicking here. thank you for joining us and be sure to follow! We look forward to seeing you next time on a project or tip!