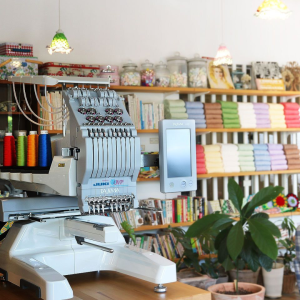
Discover the boundless possibilities of personalization with the RICOH Ri 100 direct-to-garment printer and the Tajima SAI embroidery machine! In this blog we’ll discuss how you can customize apparel and embellish accessories to show off your unique flair and individuality! With these powerful tools, get ready to elevate your sewing projects to new heights.
Designing with Tajima:
Imagine having access to a treasure trove of embroidery designs at your fingertips. Tajima’s software, Writer’s Plus, offers a diverse array of intricate patterns and motifs spanning various themes. The options are as vast as your imagination, from majestic animals to pretty flowers!
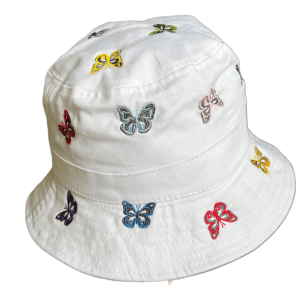
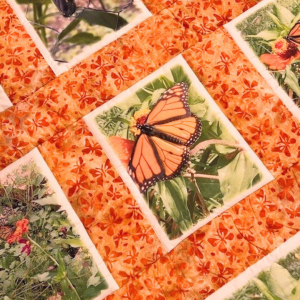
For animal lovers, the Tajima Program offers various designs featuring creatures big and small. You can find butterflies, dogs, and even wild animals like bears for your next project!
Space enthusiasts can explore the cosmos without leaving the comfort of their stitching corner. Galactic marvels like planets, stars, and more await, ready to adorn your creations with an otherworldly charm!
Rev up your sewing projects with designs inspired by the world of cars and racing. From fun family cars to exciting off-road vehicles, these designs add a dash of adrenaline to any fabric canvas.
The Tajima Software also offers a lineup of sports-themed patterns encompassing various athletic pursuits. Football, basketball, soccer, tennis – you name it. Elevate team jerseys, gym bags, or sports accessories with these spirited designs, just in time for Summer!
Step-by-Step Guide to Unleashing Tajima Magic
Now, let’s discuss the magic of the Tajima Software with a step-by-step guide on how to use these designs to create unique sewing projects.
Step 1: First, familiarize yourself with the Tajima embroidery software. Explore the design library, navigating through the various themes and motifs available. Please select your desired design and ensure it suits the dimensions of your project. You can find the size by checking the measurements of your Tajima Accessory, like your Magnetic Frame!
Step 2: Select a suitable fabric for your project, ensuring it complements the chosen design. Consider the thread colors that best enhance the design’s visual impact on the fabric. Before hooping your design, decide whether to fuse a lightweight tear-away. This can help with puckering on your designs!
Step 3: Proper hooping is crucial for achieving neat embroidery. Secure your fabric in the embroidery hoop, ensuring it’s taut and evenly stretched to avoid puckering.
Step 4: Transfer the selected Tajima Design to your USB and then to your embroidery machine. Double-check the design’s alignment and positioning on the fabric before commencing stitching.
Step 5: Prepare your machine for embroidery, ensuring the correct thread colors are loaded and the settings match the design’s requirements. Follow the instructions on the Tajima Panel and press start. Watch as the magic unfolds with each placed stitch!
Step 6: After the embroidery, carefully remove the fabric from the hoop. You can also choose to restitch your design for a more filled-in finish. Trim any excess threads and admire your masterpiece.
You can learn more about how to set up and create projects on the Tajima Sai here.
RICOH Designs:
The standout feature of the RICOH Ri 100 is its ability to print directly onto the fabric, enabling users like you to produce unique textile designs tailored to your specific vision. Whether it’s a bold pattern, a subtle texture, or a full-color image, the DTG machine delivers stunning results in a wide range of colors!
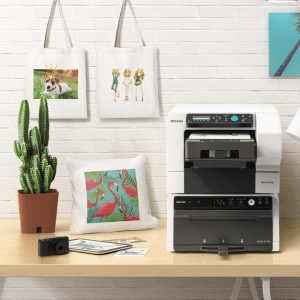
The RICOH Ri 100 empowers you to add intricate designs to your sewing projects, whether intricate artwork, fun designs, or exciting typography. The RICOH ensures that every element is faithfully reproduced with precision and accuracy.
In addition to fabric designs, the RICOH Ri 100 can print vibrant photos directly onto garments, offering a unique way to personalize sewing projects. From family portraits to scenic landscapes, the DTG machine transforms ordinary fabrics into wearable works of art, adding a personal touch to every print!
Whether embellishing accessories, customizing home decor items, or adding branding to merchandise, the DTG machine offers limitless opportunities for personalization in sewing projects. The RICOH includes a variety of designs that are ready to go right when you set her up, and you can learn more about how to set up your designs here.
Step-by-Step Guide to Using Your RICOH
- Preparation:
- Prepare your design file using the RICOH design software, and confirm the project specifications for size, resolution, and color mode.
- Fabric Preparation:
- Choose the fabric or project you’ll be printing on and pre-press it! Ensure the fabric is clean, flat, and positioned securely on the RICOH’s tray.
- Loading the Design:
- Connect your computer directly to the printer via a USB drive to load your design file onto the RICOH Ri 100. Then, use the software to adjust the design’s placement, size, and orientation as needed.
- Printing:
- Once your design is loaded and properly positioned, use the start button to initiate the printing process. Printing takes approximately 2 minutes. Just load and unload your tray—it’s that easy!
- Finishing:
- Once the printing is complete, remove the tray from the printer and transfer it to the RICOH finisher.
Curing Temperature: The recommended curing temperature typically ranges from 320°F to 350°F (160°C to 177°C). This temperature range is just right for curing the ink and ensuring its adhesion to the fabric!
Curing Duration: As a general rule of thumb, curing durations typically range from 30 seconds to 3 minutes. However, keep in mind your project and design size.
After curing, allow the fabric to cool completely before handling.
Let Your Creativity Soar
The beauty of Tajima and RICOH lies not just in their capabilities but also in their ability to infuse your personality and charm into your sewing projects. Whether creating personalized gifts, embellishing garments, or adding flair to home decor, these designs serve as your creative accomplice!
So, embrace the Tajima and RICOH Ri 100, let your imagination run wild, and create your way to a world where fabric transforms into a canvas of boundless creativity. With every stitch or print, you’re not just crafting; you’re creating stories and memories and adding a touch of your unique essence into every project.
In the realm of projects, the only limit is your imagination, and with JUKI, TAJIMA Sai, and RICOH lighting the way, the possibilities are as vast as the cosmos itself. Let your projects tell a story that’s uniquely yours. Happy creating!