JUKI Small Business Seminar: Setting Up Your Logistics

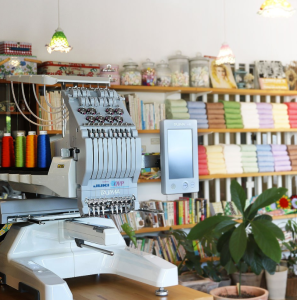
You’ve finally started your small business and have a product ready to be sold, your website should be up and running, your budget and finances should be in order, and you have those customers prepared to buy. Now that you have a start-up, let’s discuss getting your product to the customer!

Logistics is how you move materials, components, and products between your suppliers, storage locations, and customers. There are three things you should keep in mind as a seller: speed of delivery, stock of a product, and logistics cost. So let’s dive into your business and review how you create your products and how you’re getting them to the customer.

Lead Times and You

When your business begins to grow in sales, you might be reconstructing your process on where you buy supplies. Buying supplies at your local craft store for a business can be pricey, and when your sales reach a larger scale, it’s not cost-effective anymore.

When you begin to set up your logistics, consider critical lead times. For example, how long will it take for a customer to review your product, how long will it take to process an order and ship it, and how long will it take for you to receive the supplies you need for your product? Asking yourself these questions can help you plan for the cost and speed of your orders and shipments.

Knowing the lead time on the processes in your business will allow you to have smoother communication and expectation within your business and with the customer.

Shipping Carriers

When it comes to your process, shipping time to your customers should be a priority, especially in today’s society we’re shipping the same day, and overnight has become the norm. Because of this, shipping companies will work with small businesses by assisting them in maintaining good relationships with their customers and offering reasonable rates. You can also inquire about assistance provided for small businesses like logistical assistance and managing inventory. Here are the top 5 shipping companies we recommend for small businesses.

  1. United States Postal Service
  2. Sendle
  3. UPS
  4. DHL
  5. FEDEX

United States Postal Service

Ships goods both domestically and internationally, offers discounts and loyalty credits to small businesses, and delivers goods within 2–8 days on average. In addition, it provides free application programming interfaces (APIs) that allow small businesses to add shipping tools to their websites easily.

USPS shipping costs vary based on package size, delivery location, and delivery speed.

TIP: Deliveries on Sundays and holidays typically come with an added cost.

Sendle

An Australia-based small business shipping company, Sendle is best for small packages because it guarantees the best price for domestic packages up to 20 pounds. Shipping is 100% carbon neutral, and there are no subscriptions or contracts involved. They are well known for beating the price charged by major carriers for packages under 20 pounds.

TIP: packages cannot pass 20 pounds, and international shipping is unavailable.

UPS

If you ship large products, UPS will be the best option for you. They offer competitive rates (large flat rate boxes start at $18.40) and have resources for small companies that can assist in preparing your packages and information on palletizing your products if needed. They also offer same-day delivery in some cases.

Small businesses can get discounted pricing from UPS, with shipping incentives ranging from 20% to 50%, depending on the desired shipping speed and the small business’s average weekly shipping volume.

TIP: Some APIs, application programming interfaces, can’t be used on customer-facing websites.

DHL

If your business has taken you overseas, DHL Express is the best for those international shipments. They have a long-lasting history in international shipping and offer resources for small businesses that engage in global trading.

Costs vary widely based on your package’s size, whether it’s an import or export, the shipping speed, surcharges, and any optional services you choose.

TIP: DHL is known for many surcharges and optional service fees, so keep a close eye on your shipping agreement to avoid cost surprises.

FEDEX

FedEx is known for everyday shipping, even weekends, which means your product is delivered faster. FedEx can assist in shipments domestically and internationally and has a shorter lead time than others. Shipments in the US are usually 1-5 days and 3-7 for Alaska and Hawaii.

Small businesses can also benefit from their small business program, offering discounts on shipping, printing, money management tools, and more. They also provide a yearly contest where small businesses can win funds.

CON: Small package shipping costs are higher than USPS. However, they can arrive faster.

Packaging

When it’s time to package, we know how important it is that your product arrives to the customer safe and on time. The first step to completing that goal is ensuring you have the suitable packaging material for your product. One of the things to keep in mind before buying your material is knowing that purchasing in bulk will save you money down the line and is worth the investment. So follow along as we share the top things you’ll need for your packaging process.

Boxes and Mailers

Begin with deciding how you’re going to ship your product to the customer. The most popular options are boxes and mailers.

Cardboard boxes can offer the best protection for many products. Whether your product is a perfect square or an odd-shaped size, a cardboard box with the correct dimensions is an excellent choice for shipping purposes. You can choose to personalize these boxes and find them in different styles, colors, and sizes. These can be bulked orders or found at your local shipping store.

Mailers are great for small or flat products and less prone to damage. You can personalize these to your company’s brand, like cardboard boxes, coming in various colors, styles, and sizes. You can also choose to purchase mailers that come with a form of protection, whether this is internal cushioning or outer material that can handle bad weather.

Depending on your products, you can choose to keep an assortment of shipping materials available to use. However, keep in mind your product when purchasing shipping material to not waste funds on unnecessary boxes or mailers.

Cushioning and Filler

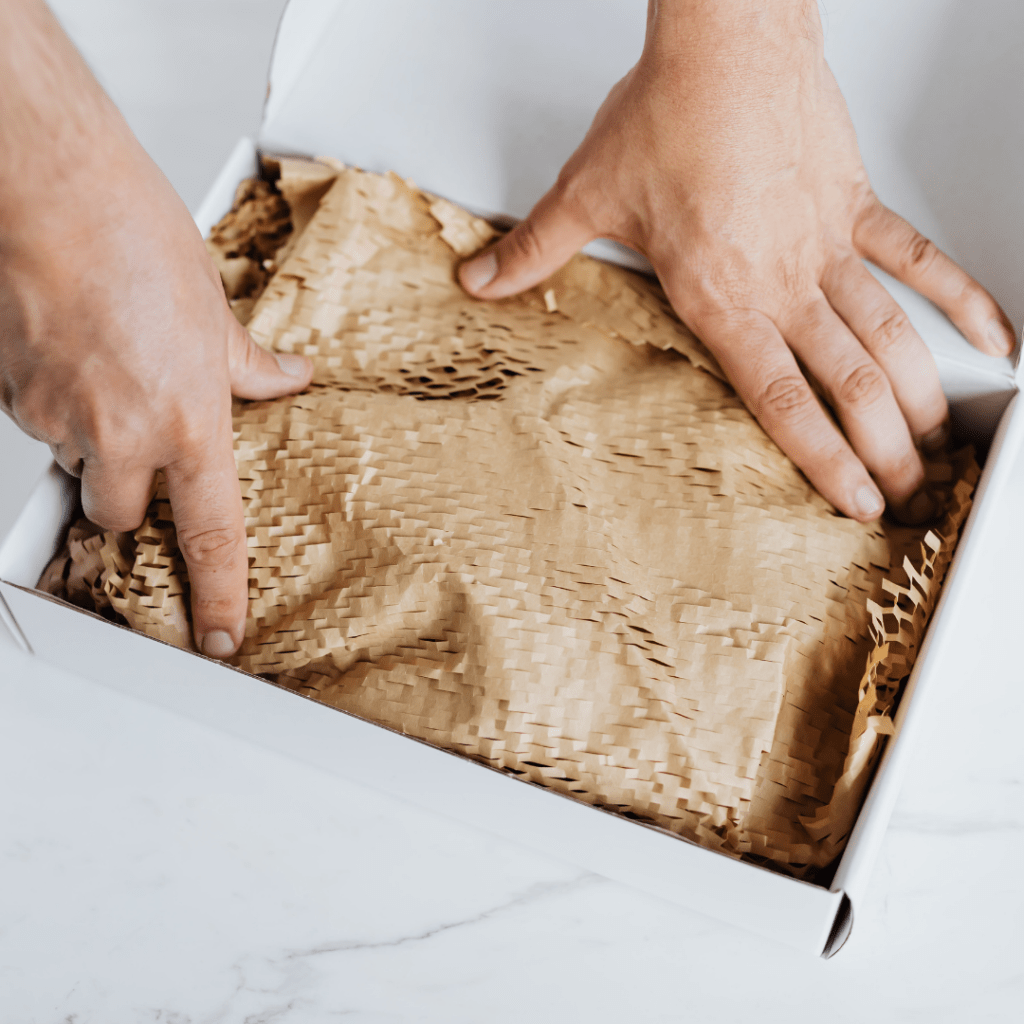
Keep your items safe and secure by purchasing cushioning and filler material. When shipping, these are crucial key material pieces as you want the product to arrive to the customer exactly how it left you.

Cushioning material is used for fragile items like glass, porcelain, or ceramic. Think of bubble wrap, foam peanuts, paper as options to keep the product from shattering or breaking in its packaging.

Void Filler can be used for any product. With material options like craft paper, air pillows, shredded paper, and others, these pieces of material will keep the item from moving around or crashing into each other if you’re sending more than one product at a time.

Keep these materials on hand at all times, as you wouldn’t want to ship products out without some filler to avoid broken or chipped products on arrival.

Labeling and Tape

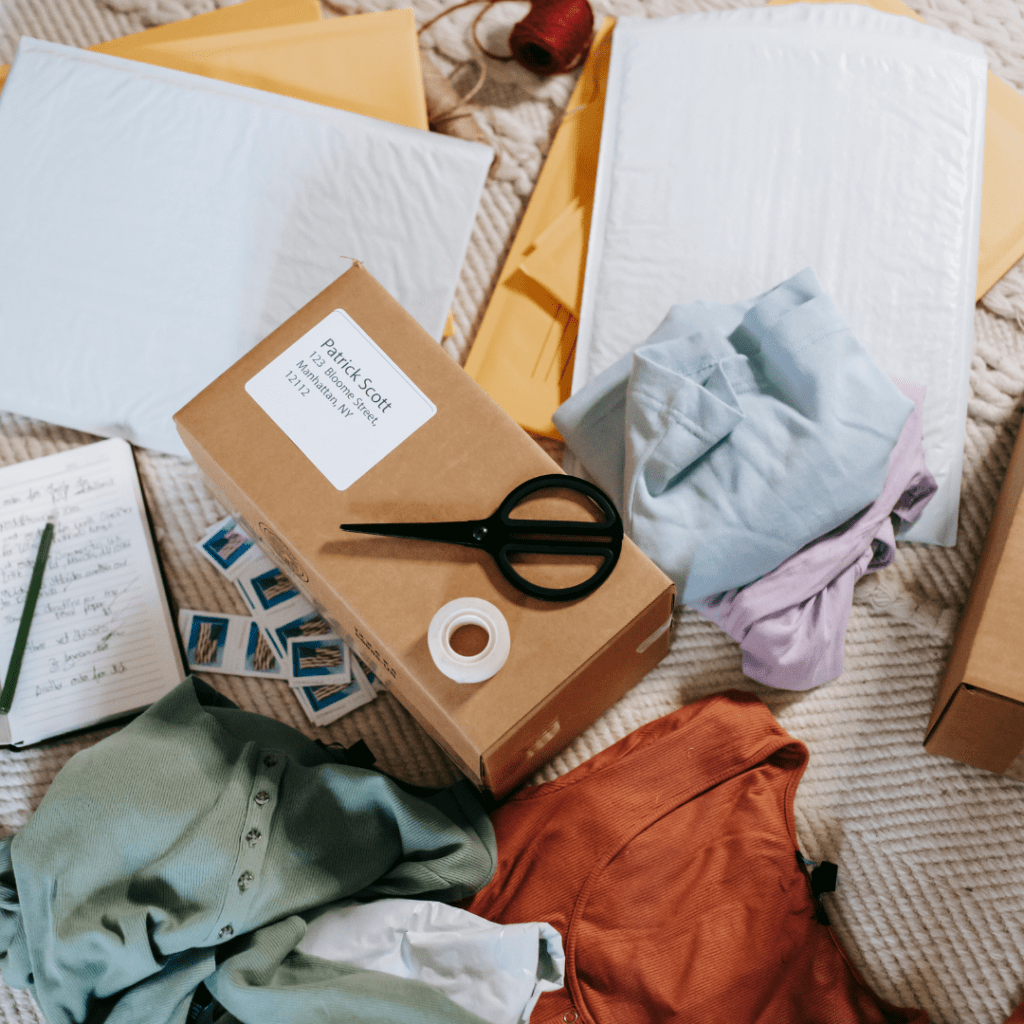
Once your package is well prepared and safe to be closed up, you’ll need to seal and address it before shipping. Using quality tape and labels is the best way to confirm your product arrives to the correct customer on time and safely.

You can even create personalized packaging tape to stand out from competitors since packaging tape comes in various colors and sizes. Having suitable tape will save your product from accidents in the shipment process. You can also choose to invest in a tape dispenser if your company sees a pickup in shipments, which can help the processing speed.

Labels are also created in different sizes and styles. Used mainly for addressing the customer, make sure to use good labels to ensure it won’t fall off in transport. Labels can also include your company logo, specialty stickers like “handle with care” and more. Keep in mind that you can personally create these labels and style them to fit your product and small business.

Get Ready to Ship!

Now that you have the basic information for shipping and handling logistics for your small business think of ways to make yourself stand out. Packaging and shipping don’t need to be boring and can be another way your company stands out from competitors!

Look into eco-friendly merchandise for shipping and packaging. Include thank you letters, promos, or small freebies to induce excitement and customer loyalty. Create an unboxing experience for customers by creating a process that showcases your brand when opening a package from you, like wrapped apparel in tissue paper with a sticker to open the merchandise.

Your package is a window into your business for customers, so make sure to focus on your packaging like you would your product!

How to Start Your Clothing Brand

In a generation where fashion has no limits, fashion brands and designs have continued to change, evolve and return over the past decade. Whether it’s fast fashion, one of a kind, or small shop drops, there is no limit to the options available for your closet. Even in this era of fashion where we can choose styles from all over the world, there is always room for new fashion and trends to grow, and that’s where you come in! If you’ve been dreaming of starting your clothing brand and apparel shop, follow along as we go over ways you can start planning your new business today. From figuring out your market to budgeting, we go over the things you should know before jumping into this journey.

Start With a Plan

Before beginning any business, it’s best to start with a plan. The fashion industry is more than the pieces being sold, but understanding its steps to sell those pieces. There are multiple options for creating apparel: Direct-To-Garment based apparel, Embroidery apparel, Ready-Made Apparel, Custom Apparel, and so much more. The world of fashion is not one skill set or technique but is filled with endless options on how to create.

Once you have an idea of the products you plan to create, you can build your business plan. Your business plan should include ideas for your brand and products, budgeting and sale goals, marketing ideas, and more. The more details and work put into your plan, the better chance you’ll have when it comes to the time to open your shop and sales.

If you’re looking for more information on how to create a budget plan and calculate profit visit our post here to begin creating your own today.

Who’s Your Market?

Let’s begin by thinking of who will wear your fashion pieces! By identifying your target audience and what they’re looking for when they want to shop apparel, you’ll be able to locate your niche and find your customer base. The better you understand your audience base, the better you’ll be at marketing your products to them.

The top two things to keep in mind when studying your audience is:

Demographics: age, gender, income, marital status, geographic location, etc.

When you understand your audience’s demographics, you’ll have a higher chance of completing a sale. For example, if you market your product to women in their early twenties, you’ll have a higher chance of gaining a sale on Instagram and Tiktok than marketing on Facebook. Likewise, by knowing your audience, you can find the correct places to push your products and not spend energy on a site that focuses on an older audience like Facebook, whose average users are in their mid-40s and higher.

Psychographics: hobbies, interests, lifestyle traits, and what problems do they have in life that your product can solve.

Knowing the psychographics of your audience is where you’ll be able to create the right products. Here is where you can learn what fabric to use (is your audience athletic and need breathable material?), what interests they have (can you design graphic tees for fan bases?), and more. With every detail you learn about your audience, you’ll be able to create products that are better suited for their wants and create a solid returning customer base.

Once you better understand your niche audience, you can begin creating a solid marketing plan. If you’re having trouble making your marketing plan, follow along here as we show you step by step how to begin yours today.

Focus On Your Brand

Now that we know what you’re going to sell and who you’re going to sell to let’s start talking about building your brand. Branding goes past your business name and logo and dives into what your values are, what your mission is, and more.

Create brand guidelines and a storyline for your products that customers resonate with and want to follow. Focusing on platforms like your website, social media pages, email marketing program, and more will build that relationship between buyers and your shop. The best way to bring your brand to life in today’s age is through marketing on social media!

The key to building your brand is being consistent in your message, constantly posting and promoting your brand and products, and making sure what you put out into the world defines your brand correctly. If you’re unsure what to post, look into examples like behind-the-scenes videos, how-to’s, fashion inspo using your pieces, and more for ideas. Have fun and be creative when it’s time to get your brand out there!

Let’s Start Development

Now that we have an idea for your brand let’s begin designing and developing your clothing line.

  1. Keep your Sketchbook on You

Any artist will tell you that inspiration hits anywhere and any time. So be prepared for when you want to design a new piece by keeping a sketchpad on you or using your phone as a digital sketchbook with apps like ProCreate, Adobe Designs, and Adobe Illustrator.

2. Create Samples

Start creating sample pieces of what you want to make for your shop. Whether you’ll be doing buy-to-make or pre-made pieces, having sample work is perfect for modeling on social media and understanding material costs for re-production.

3. Have Your Beginning Set

When you first open up shop, it’s best to not overwhelm yourself with product varieties. Instead, find your top 3-5 products you want to create and go from there as you begin building your audience base and receiving orders. Once you create more demand for your brand, you can start testing out new designs and growing your product options.

Now that we’re in the development phase make sure you have your station ready! Start by deciding what fabrics you’ll be using in your apparel shop, what style you’ll create, and what machinery and notions you’ll need to get there.

For example, if you want to open an apparel shop that focuses on couture dress-making, you would look into a machine like the MO-654DE that offers built-in rolled hemming and the HZL-DX7 which offers presser feet options like the button attaching presser foot, invisible zipper foot and more. Your fabric choices could be options like silk, tulle, satin, and more. 

By knowing what you plan to create, you’ll be able to have the right machinery, accessories, and notions on hand when it’s time to begin producing.

Start Setting Up Shop

Whether you’re setting up shop online or in person, having an online face is a great way to promote your business and gain new customers. Online shops allow you to reach new audiences! Below are some things to keep in mind when setting up shop.

Clothing Images: Take photos of your clothing that truly presents its colors, fabric textures, and closures. These photos don’t need to be professional if you’re working on a small budget; just have a simple lighting kit, a good camera and learn some tricks on taking professional fashion DIY shots.

Pricing, Shipping, and Handling: Make sure to have a plan in place for how you’ll be pricing your products. From shipping to taxes, you’ll need to make sure you price your products correctly to pay for your bills, time, workspace, etc. Learn your target audience’s price point and what they’re willing to pay for your product. Then, keep an eye on competitor pricing to confirm you’re in the suitable price range.

Website Design: Don’t forget to add your brand’s personality to your site! Set up your Social media, include graphics of your work, add an ‘About Me page, use your brand theme colors, bring in customers and build relationships.

Put Your Marketing Plan into Action

You’re now ready to begin implementing if you’ve created your marketing plan from our earlier steps! Start by setting up your shops’ profiles and deciding how you’ll be advertising. Organic advertising, meaning you do not pay and use search engine optimization like hashtags and tags, is a perfect way to start when you’re on a low budget. If you’re marketing budget includes spending for advertisements, begin setting up your ads by using the information you have on your niche. Focus on your top media sites for higher chances of receiving a sale.

Don’t forget the power of word of mouth, and research your options in ambassador marketing. By offering free items, or negotiating payments, you can bring in influencers from your target audience and work with them to promote your brands and products.

Let’s Launch!

Launching your first clothing brand doesn’t happen quickly or easily. It will take time and dedication, but you’ll create your brand soon with the proper steps! After that, you can begin selling in numerous ways, from your social media accounts to in-person artisan markets and pop-up shops. Then, finally, it’s time to get your product out there.

Now that you have an idea of where to start when it comes to opening your apparel shop and starting your brand, we hope to see your brands’ names soon! What kind of apparel would you create if you were to open your apparel shop?

How to Start Sewing Your Own Clothes

In the past few years, we’ve seen a rise in sewists pop up from all over the world, beginners starting their journey. If you recently started sewing and are interested in learning how to start sewing your own clothes, today we’re here to help you start! Follow along as we go over the basic supplies you should keep on hand, beginner machines and the machine types, and more.

What You Need to Start

The most important thing for sewing your own clothes is your tools! Having the right tools on hand will help the process go smoothly, and you’ll have better quality projects at the end of it. Below is a list of tools every sewist should have in their tool kit.

  1. Scissors

A prominent tool, but an important one! When it comes to your sewing scissor, we always recommend having one dedicated to only fabric and one for everything else. This helps to keep your fabric scissor blades sharp longer so that you don’t fray your fabric when it’s time to cut.

2. Measuring Tape

Important and handy, having a measuring tape in your kit is a need! A measuring tape is a must for any sewist, from measuring yourself when it’s time to begin creating to measuring your fabric, elastic, and more.

3. Sewing Gauges

An excellent tool for when it’s seam allowance time, the sewing gauge is a t-shape measuring stick with a slide gauge that allows you to measure the distance from your edge of the fabric to where you are stitching. So when you’re sewing apparel, this tool is perfect for hemming!

4. Thread Snips

This tool is perfect for creating apparel because it allows you to get that close thread cut on your projects without the fear of cutting your fabric. So without fear, cut close to your fabric using a thread snip on your next project.

5. Seam Ripper

Made a mistake in your stitching? Want to reconstruct a piece in your closet? It’s easier deconstructing those mistakes and projects with a seam ripper. This tool has a sharp hook that easily rips through the thread, breaking those pieces apart. Be careful, though, with its sharp end, it can also easily go through the fabric if you’re too rough.

6. Iron and Ironing Board

When you’re sewing clothes, it’s best to have your iron and ironing board nearby! When creating, there are a lot of pieces that need to be pressed, so having this is a need! If you don’t have room for an ironing board, you can always get an ironing mat. This is perfect for beginner projects and is a great place to start.

7. Pins and Clips

Whether you keep them in a jar, or a cushion, having clips and pins on hand is necessary when you’re sewing. These little tools are needed to keep fabric pieces together and aligned, ensuring your project comes out exactly as you want it to!

8. Fabrics and Threads

There is an abundance of options for choosing fabrics and threads for your apparel projects. Check out your current closet to see what fabric types you already use to better figure out what options you should buy. As for the thread, sewing is an excellent fabric/thread/needle game. Depending on what fabric you’re working with, you’ll be able to choose the right thread type and the right needle. 

We recommend looking for fabric created for apparel and 100% polyester thread which is durable and comes in every color.

9. Sewing Patterns

When you’re new to creating apparel, following sewing patterns is a great way to learn! Look at online patterns, your local quilt shops, and even antique and vintage shops when you begin browsing for your next pattern! Some pattern designers even offer step-by-step video tutorials and diagrams for the beginner sewist.

10. Sewing Machine

When you’re first choosing a sewing machine, how many options are out there can be daunting, but we’re here to help! Whether you get a machine with all the bells and whistles, or a basic straight-stitch, finding the suitable machine depends on your needs and wants. So follow along below as discuss the different types of machines out there, and what you should look for in yours.

Picking Your Sewing Machine

Let’s start by discussing the different types of machines out there! It’s important to know your options for what’s available out there and understand how each machine can help you build your project.

Mechanical Sewing Machines

JUKI Options: TL-2010Q, TL-2020PE, TL-2000Qi, TL-18QVP

JUKI Haruka TL-18QVP

A mechanical sewing machine, or electric sewing machine, has little to almost no circuitry. It has a motor that moves the needles up and down, a foot pedal to drive the motor. Some mechanical sewing machine options, like the JUKI line, also offer Free Motion Quilting, allowing you to piece and quilt.

These machines are perfect for beginners because they’re simple to use, and don’t have a lot of bells and whistles. For someone who is just beginning, and doesn’t want too many buttons or stitch options, a mechanical sewing machine is perfect.

These sewing machines are also perfect for the sewist who plans to work with heavy or thick fabrics. Our TL series, for example, is a popular choice among bag makers because it can handle multiple pieces of fabric at once and can sew through fabrics like vinyl, leather, and cork.

Computerized Sewing Machines

JUKI Options: HZL-DX7, HZL F-600, HZL DX-4000QVP

JUKI Kokochi DX-4000QVP

A sophisticated type of machine, the computerized sewing machine includes an LCD screen and offers more stitch options and functions. There are many digital features including sensor systems, pivot functions, digital tension, auto thread trimming, and more.

Some machines like, the HZL-NX7, come with features like JUKI Smart Feed, to move the top layer of your fabric in sync with the lower layer. If you’re working on apparel, this feature is perfect for stitching without the worry of shifting layered fabrics.

Computerized sewing machines, even with their selection of features, are relatively simple to use and for many make sewing an easier process.

Let’s Talk Features

Let’s go through some features you need, and features you’ll want. Knowing the options available to you will help you build a better wish list once you start looking for your machine.

  1. Know Your Presser Feet

Keep in mind the projects you plan to create and research what presser feet you’ll need to own. Some machines come with these accessories in their set, others you’ll have to purchase separately. Having the right foot is important when you start implementing techniques like gathering, adding elastics, and more.

Some feet we recommend for apparel are the Buttonhole Foot, Walking Foot, Smooth Foot, and Invisible Zipper Foot to start.

2. Stitches

Think about the type of stitches you’ll want to work with. Some machines only offer straight stitch, others will offer zig-zag. You can also find machines that offer stitches for quilting, piecing, overlocking, triple stretch, blind hem, and more.

3. Creating Buttonholes

This can take 4 steps, or 1 step depending on the machine you purchase. Some machines will offer an automatic one-step buttonhole while in others you must manually switch between the zigzag and bar tack stitches to form the buttonholes. If you’re a beginner, finding a machine that uses an automatic option is great, especially if you plan on using buttons often!

4. Built-In Free Arm

If you plan on creating apparel, a free arm is perfect for pants legs, and sleeves. This free arm will allow you to sew those narrow cylindrical or tubular items, helping you create the perfect closet.

5. Automatic Needle Threader

A small feature with a big impact, the automatic needle threader feature is great for users who have difficulty with eye-sight or shaky hands. This feature works by using a small hook to pull the thread through the eye of the needle.

Let’s Start Creating!

Now that you know what tools you’ll need and have a better idea of what machine you’ll want, you can start planning your sewing journey! Sewing your own clothes is a wondrous journey where mistakes will happen, your skills will surprise you, and you’ll constantly be learning. Pick beginner-friendly projects and patterns, research local sewing classes, and test your skills by grabbing thrifted and discounted fabric when you first start.

We recommend looking on YouTube for online tutorials and lessons when you find yourself lost, and enjoy the limitless amount of resources out on the web for sewist! We put together our top 5 tips for new sewists!

  1. Start Small

Don’t psych yourself out with big projects when you first start sewing. Pick up simple patterns and projects and start there before building your skill base and attempting larger projects. By doing this you’ll reduce the chances of burnout and have fun making mistakes!

2. Use Scrap Fabric

Don’t let those pieces go to waste! Scrap fabric is perfect for when you want to practice new stitches and techniques.

3. Read Those Patterns!

Don’t start a project before fulling reading through a pattern. Then, if you need to make adjustments, you can catch it early on and do so before you start cutting. It will also help you understand the steps you’re about to take and help you understand the entire process before you begin stitching.

4. Check, and Check Again

Test trying your outfits and projects as you sew is the perfect way to confirm you’re doing it right. Check on the stitches, make sure the length is correct, and make those adjustments.

5. Enjoy the Journey

Not many call themselves sewing experts, even those who have been doing it for years. Every time we sew and create, there’s a chance for a new technique to be learned and a new project to be created, meaning the journey is never-ending! Enjoy the process and watch yourself grow as you sew.

We hope these tips and resources help you find the right tools and machines when you start sewing! What do you wish you had known before you started sewing? Comment down below and leave tips for the new sewist!

How to Start Your Quilting Business

Do friends and family members ask for you to make quilts for them? Is someone asking where you got that pillow that you quilted yourself? Sometimes, when we get good at our craft, we find people who want to buy our work. That’s when a business starts to grow, so where do you start?

Today we’re going to dive into how you can start your own at-home quilting business. Now, a quilting business doesn’t mean you have to create projects endlessly; in fact, there are possibilities in pattern creation, custom requested works, and more. In this post, we’ve pulled together some steps to make your own quilting business and how to start.

Create Your Business Plan

While a business can start with some scribbled plans in your notes app, creating a successful one without a real plan is much more challenging. Businesses, large and small, begin to see success when some serious planning and budgeting is put into play. A business plan is a roadmap you create for your company.

Business plans should include:

  • Description of your business
  • How do you plan to manage it
  • The products and services you plan to sell
  • Market and competitor research
  • Budget and finance plans
  • Marketing and advertising plans

All of these things can be completed by you, but if you decide to build your brand and go legal, look for a professional who focuses on small businesses. They can help you decide on a business structure that’s best for your plan and are more likely to have contacts that can help you in finance and marketing matters when you need it. Need help creating your plans? Keep up with JUKI Business Plus blog posts to help you start your business here.

Getting the Right Equipment

Now that you have your business idea in motion let’s start thinking about the equipment you’ll need for your small business.

The Machines

The best thing about quilting is it doesn’t require a specialty machine. There are two basic types of machine quilting that quilters can access on most sewing machines—straight line and free motion.

Straight-Line

This type is best accomplished by replacing a regular presser foot with a walking foot and even feed foot. A walking foot is a specialized pressure foot that grips the top of the quilt sandwich, advancing it through the machine at the same rate as the quilt’s back, which touches and is moved along by the sewing machine’s feed dogs.

A machine like the TL-2010Q is perfect for basic straight stitches and piecing. However, a free motion quilting machine like the TL-18QVP or Miyabi J-350QVP is required for designs like curves and intricate patterns.

Free Motion Quilting

With free motion quilting, you’re able to create intricate designs as if you had hand-stitched them into the quilt. Learning FMQ takes time, but many resources are available that teach you to create unique designs.

For FMQ, the machine’s feed dogs are lowered, meaning nothing is in place under the quilt sandwich to guide it along. The quilter is in total control of the motion. Now your speed and how fast you run the sewing machine work together to determine stitch length. You have options on sewing feet like a darning foot or a special foot for machine quilting. Remember that special feet resemble a darning foot but have larger openings.

A machine like the Miyabi J-350QVP is perfect for free motion quilting since you have a large workspace and can use the machine bars to move and design intricate pieces.

What to Sell

If you’ve thought about opening your quilting business, you probably already have some ideas set aside on what you would sell in your shop. However, there are so many ways to make money with your long-arm or sewing machine, so let’s review some options for what you can do with yours!

Quilts Commissions

Not everyone has the skills for quilting, and that’s where quilters like you come in to help! With so many quilt lovers in the world who don’t have the time and skills to create their ideas, you can offer services for making custom quilts. A venture like this is excellent because of revenue, as shoppers pay well for handcrafted personalized items.

Mass Production

Use that machine! Mass production doesn’t have to mean creating 100’s of quilts, but instead using simple designs and creating multiples of the quilt to sell in marketplaces or e-shops. Also, not every quilt has to be unique, as many homeowners enjoy simple pieces they can add to family rooms and bedrooms.

Patterns

Owning a quilting business doesn’t mean just selling quilts. Many quilters love to try their hand at creating new projects. Create patterns and upload their PDF files onto your site! By selling physical copies to your local quilt shop, you now have a product that people can continually purchase that doesn’t require you to quilt!

Long-Arm Rentals

Do you have a long arm at home? Many quilters work on domestic home machines, meaning they don’t have that large workspace long-arm quilters have. Offer long-arm rentals to local quilters for hourly rates, and enjoy that time to work on other projects. You can also offer your skills for rent and finish quilts for others on your long arm.

Teach Quilting

If you’ve been quilting for years, attended quilting classes yourself, and find yourself teaching friends and family, look into teaching! Contact your local quilt shop’s favorite sewing brands, or start your own social media channel. There are always new quilters in the world looking for instruction, and with technology, you can offer online and in-person education.

How and Where to Sell

Now that you have an idea of what services and products you can offer let’s discuss how you will reach your audience and sell to them. In our day and age, many small businesses begin on social media platforms or e-shops.

Social Media and Sales

The best way to reach your audience is through social media platforms. Easily accessible and free to use, sites like Facebook, Instagram, Tiktok, and more have opened up new sales channels for small businesses. One of the first things you should do when starting a side-hustle is set up a business or company page. Many customers now run to social media sites to see if your company is legit before ordering. In addition, these sites offer customers the opportunity to see what kind of products and services you offer, customer reviews, and so much more.

Social media sites now offer selling points for businesses as well. Facebook marketplace, for example, is perfect for selling home goods. Anyone can post an item for sale, and you can hit niche markets easily by discovering pages and groups for specific topics. Facebook marketplace does hold guidelines that sellers must abide by when selling, and can be found here. (link guidelines)

Instagram offers its version of an e-shop now as well. With Instagram shopping, you’re able to post products for sale directly onto your Instagram account. Think of this as a digital storefront for your shop. You can include graphics, videos, shopping tags, and more to drive sales. It also allows you to place full product descriptions, advertisements, and more. However, unlike Facebook, there is an approval process for selling on Instagram’s shop. To have a shop on Instagram, you need a business page, Instagram shop approval, and a small fee is applied.

Remember that you don’t need to invest money when selling on social media off the bat. Instead, you can focus on organically growing your business by word of mouth, using engaging posts, and attaching hashtags to your descriptions.

E-Shops

If you feel you’ve outgrown selling on social media sites and want to upgrade, the next step we recommend is researching e-shops. Now there are multiple options when it comes to opening an e-shop, so we gathered a few of the top ones below:

eBay: This eCommerce site has been a go-to for sellers since 1995. With the ability to sell any form of product and service, you can sell services like finishing quilts, or you sell your hand-made projects. Their fees include non-refundable product/service listings and fee charges if you’re placing your product in multiple categories for sale. The perks of this site revolve around its popularity. With eBay constantly having high traffic, your items can easily be accessed by customers all over the country.

Etsy: Artisan-focused and highly popular, Etsy is the perfect e-shop location for someone opening their small business. This site allows you to promote and sell your handcrafted products at low fees. Listing fees are $0.20 for each item and will last for four months. This site is great for upgrading their shops but isn’t ready to fully commit to a website.

Shopify: Shopify is an excellent option for those opening their first e-shop. With Shopify, you can create a website to sell your products and customize the site to your aesthetic. This is a significant step when building your credibility as an established business! Everything is now done on this site, from placing products and selling to handling inventory and processing payments. Shopify comes with a monthly fee from a Basic package of $29 to an Advanced package for $299.

In-Person Sales

If you’re someone who enjoys selling in person, research your local farmer’s markets and artisan fairs! You can purchase a shop space and sell to new customers you wouldn’t have reached online by communicating with these event planners. These events do require a larger budget and should be planned accordingly. Keep in mind the furniture you’ll need to showcase your products, how you’ll handle money, and other variables like food, inventory, and more. ‘

Get To Work

Now that you have a basic rundown of what you need to start your new side business, it’s time to sit down and plan! Circling back to the start of our planning, it’s time to create that business plan. Remember to include your product/service plan, marketing plan, budget plan, and finance plan. Starting a business plan is like building a roadmap. Follow the roadmap, and you’ll have a much higher chance of reaching your destination, a thriving business, than trying to jump into this with a few notes written down.

We hope this has been able to help you get a clearer vision for your future quilting business! So if you’re looking to start your own quilting business, join us here to learn more about JUKI Business plus and how we can help you today!

How to Start Your Embroidery Business         

A hobby where the community is ever-growing, embroidery is forever growing in popularity around the world. Due to this, it’s no surprise so many have begun their own business in embroidery projects ranging from fashion to accessories to home décor. Thankfully it’s never been easier to set up your own embroidery business! So whether you’re starting from a corner in your room or a more extensive scale location, we’re here to explore things you need to know before starting.

What Skills Will I Need?

Before starting any business, it’s essential to understand what skills you need to know first. If you don’t know a skill, that doesn’t mean you can’t start a business; it only means it’s time to pick up a new skill! Don’t forget that you can also reach out to friends and family you want to work with who already have those skills you need.

Machine Operation:

Handling an embroidery machine is exciting, and while it comes with a small learning hill, once these machines are set up, they’re an exciting new thing to use! An embroidery machine like the Tajima Sai is perfect for businesses and hobbyists who want to upgrade. Its software, Tajima Writers Plus, converts text to embroidery data or creates embroidery data by combining registered designs and text. It’s easy to switch thread color, set embroidery positions, make adjustments, and more using its digital screen, helping new users handle the machine easier.

Design Software and Creating Art:

When opening up an embroidery business, the vital thing to keep in mind is that you don’t need to be artistic, just creative! Like the Tajima Sai, some machines come installed with their Writer Plus Software used for digitizing, editing, and font software and are accessible on its LED screen. Finding a machine with built-in software is one the best ways to start an embroidery business, as this will keep you from having to purchase another part for your machine separately.

When it comes to creating artwork, you need your PC and machine. For example, computerized embroidery machines require vector images. This can be accomplished through software like Adobe Illustrator. By designing art on Adobe Illustrator, a popular application with many guides and how-to-use references on the internet, you can create your artwork. Once it comes to downloading these new artworks onto the machine, it’s dependent on what form of software you have.

An Illustrator Embroidery Plugin is plugin software that converts a vector image into an embroidery pattern. You can also choose Embroidery Software, such as Tajima Sai Writer Plus Software, which can import your Adobe Illustrator vector image and transform it into a pattern used by an embroidery machine. Keep in mind that these programs are likely to work on the machine they’re created for and not others in choosing Embroidery Software.

What Equipment Will I Need?

The Machine: 

While this will depend on the size of your business looking to set up, you’re going to need to start with one machine. There are many different options on the market, and this will be your most valuable asset. When choosing a suitable machine it should be able to keep up with productivity (think of machine speed and consistency) and easy to operate. The Tajima Sai, for example, was created with small businesses in mind. This means it’s compact, easy to use for beginners, comes with the programs you need, and includes the accessories you need for embroidery. Finding the right package when purchasing a machine can also save money in the long run, as this will keep you from needing to buy accessories or extra programs at a later date.

Embroidery Merchandise:

There are two options you can follow when starting your business, made to order or order to be made. The concept behind these is that you can choose to have constant inventory or keep a list and only create when an order is placed. While these two things can be changed, it’s best to always have stock of items you’re going to embroider on ready to be used.

Some popular items we recommend are:

  • T-shirts
  • Polo Shirts
  • Home Décor
  • Handbags
  • Sweaters
  • Caps

When you start choosing items for your shop, think of who you’re selling to and focus on what type of items customers in your niche are purchasing embroidered.

How Do I Market My Business?

The first thing to do when marketing your new small business is to determine what your goals are. What do you want to achieve? Is it a revenue goal or a profit goal? How many sales per month do you need to generate that revenue? Having a clear idea of what success is to you will help you to define a budget.

Website:

The first thing we recommend having is a shop base like a website or Etsy shop. Think of this as the public face for your online or at-home business. Here you’ll be able to share your company message, introduce yourself to buyers, and showcase your products and services in a way that’s unique to your brand. Keep in mind ‘Key Words’ (In terms of Search Engine Optimization, better known as SEO, they’re the words and phrases that searchers enter into search engines, also called “search queries.”) Using the right keywords on your website for your product will help you show up in higher ranking on search engines.

Advertising:

Once you have your budget think of where your audience is based. Free marketing you can start with is creating social media accounts that you’re audience uses. For example, if your audience is between the ages of 30-55, you’ll have a high chance of finding sales on Facebook. If your audience is mothers, you can post on Pinterest and Instagram. Ways to be found on social media rely on hashtags, geo-location (when you tag a city or spot), and getting others to put your name out there.

Paid advertising differs, but it’s still important to keep in mind what websites and google searches your audience is doing to promote correctly. Startup businesses can look into programs like Google ads, Yahoo Ads, and paid Facebook and Instagram Ads.  

Opening up Shop

Once you have your machine, products, and website up, it’s time to start putting yourself out there! Take advantage of social media sites and use these as a platform to reach and interact with your audiences. So many people enjoy finding new items to buy on their social pages, and getting yourself on there is a great way to reach customers.

There’s a reason why embroidery businesses do well. Whether it’s the fun in personalization that’s available, or the opportunity to purchase from a small business something unique and in their interest, the market is always welcoming new ideas. To keep your company successful, focus on what you can control and make sure you choose the right equipment and programs. With these being the foundation to a long-lasting business, it’s essential to choose suitable materials.

We hope this helps give a glimpse into the beginning of opening your own embroidery business! Visit here to check out JUKI’s Tajima Sai embroidery machine to learn more about its Writer plus Software, the machine’s speed, features, and more!