JUKI Tip: Using Your Straight Stitch Plate

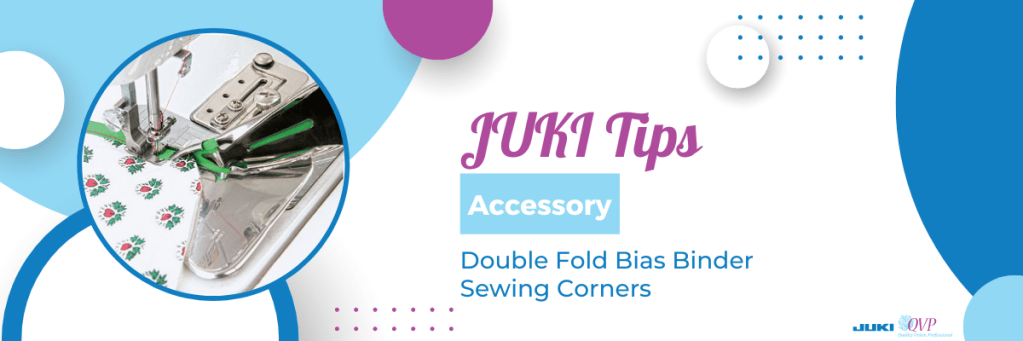
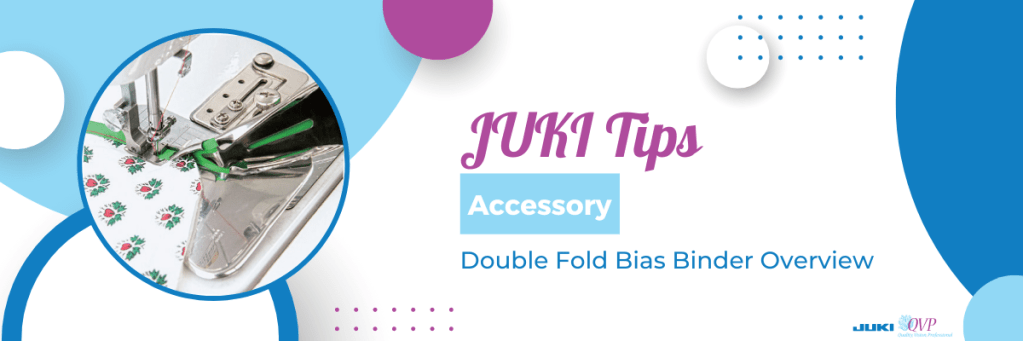
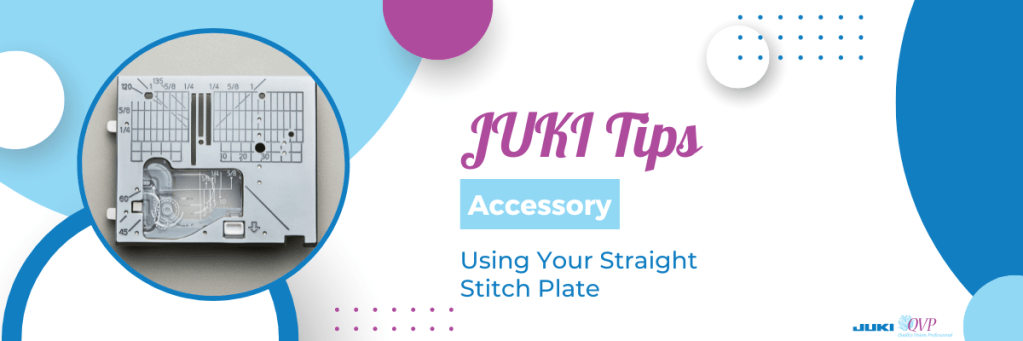
In this month’s tip, JUKI National Account Trainer Alba showcases how to use the straight stitch plate and straight stitch presser foot. Going over when, and how to use them, follow along to begin using yours on your next project. In this video, we talk about the DX series and the TL series.

Follow along below for a rundown of what Alba covers on today’s JUKI Tip!

Hello all my JUKI friends, my name is Alba, and welcome back to my studio. Today I am going over a tip, a trick, for JUKI machines, and in the last session that I did several of you asked about straight stitch plate and straight stitch foot. What are they? When do I use them? Why would I want to use them? How do I use them?

So today I am going to be showing you the straight stitch plate and foot. How they get installed, how you use them, and also some tips on when you use them and when they make your sewing easier. I will be showing you this on two machines, on the DX-2000 QVP and on the DX-4000 QVP.

Both of these machines, this goes on a little bit differently. On the DX-2000 QVP the straight stitch plate is built into the machine, so it’s a lever that you’re touching to activate this feature and I wanted to show that because it is just such a great way to do that; and on the DX-4000 QVP it is an actual plate that you’re changing out but there’s also a feed dog system that you’re switching out when you go to the straight stitch plate,

I’m really looking forward to getting up close and personal with both of these machines and showing you how to do that. Now when you use a straight stitch plate, for some people if they’re using a straight stitch on their machine that straight stitch plate is always on, and for others, it’s only on for certain scenarios that they use it. What a straight stitch plate does, is it turns a machine with lots of decorative stitches that has that sideway needle movement into a straight stitch only machine. It stabilizes that needle bar so that the straight stitch is straighter and also the opening in the plate is smaller so that when you are sewing, the fabric that you’re sewing onto, does not get pushed into the feed dogs; and if that’s ever happened to you that alone is a reason to switch out to a straight stitch plate.

Welcome back everyone just like I promised I am right in front of the machine and I wanted to get really up close, very personal with the machine, so that you could see exactly what I am doing; and I am just making sure that I am at a straight stitch because I will be talking about the straight stitch plate and feed dog. Now the first thing I wanted to do is, most of you are familiar with the straight stitch plate that has a hole that just the needle goes into as opposed to the zigzag plate which this opening goes wide across and is sometimes referred to as the shape of the Jelly Bean.

What JUKI does differently on their full-size, 12-inch throat, machines is that they give you the feed dogs that match up to the plate, so that you’re getting full contact with the foot and the plate at all times. Now, I’m going to move a little bit closer and I’m going to show you removing the plate as well as putting on the new feed dog. Right now, I do not have a foot or needle in my machine just for safety reasons and to give you the clearest view possible.

So this is the zigzag plate and this is to allow the needle to move to different positions, to do decorative stitching. And because this needle moves on a straight stitch the straight stitch plate gives it a bit more stability because its opening is only allowing for that needle drop. For no movement whatsoever. So that is the main difference between that straight stitch plate and the zig-zag plate.

Now, I’m going to zoom in on that feed dog system and I am just lifting that out and pulling it out of my machine. If you notice my zigzag plate matches up to my zigzag feed dog, that’s a nice close-up shot, and I want you to see the difference in how narrow the two are.

I am going to put in the straight stitch feed dogs, and you could see that just slid in really easily, and it just went right into place, and this allows for me to clean in between my feed dogs and also be able to get into this area for cleaning really nicely.

Now I’m gonna place my straight stitch plate on my machine and just pop it back down and it sets into place, and as you could see right here is where that needle would be dropping. So as I said, especially when you’re doing triangles and you’re doing half Square triangles, when you’re sewing right on the edge of the fabric to sew, that fabric will sometimes get pushed down into the feed dog system and because this opening is smaller that allows for that not to happen.

Now, the DX-2000 QVP does not have the plate and the feed dog system like we just saw on the DX-4000QVP. It’s a little bit different and I’m going to get into how to activate this and again I’m going to remove my foot and I’m going to zoom in so that you can see. Right now I have that zigzag opening and I mentioned that this machine has a straight stitch plate built into it and this mechanism here when I activate that plate it slides up and gives me a straight stitch plate.

Let me show you how easily that’s done. I am removing my bobbin cover and with a quick slide of that mechanism, I’m going to do this with the tweezer so that you can see that, so here it is all the way to the left and I have that zigzag opening right here where that needle drops, and when I slide that over, my looks like a stitch finger on a serger came forward and look at where my needle is dropping into and I’m going to try and get just a little bit closer and zoom a little bit more but you could see that that is allowing for stitching to take place in a smaller opening which is why you would want to use that straight stitch plate so again with the automatic this is on the DX-2000 QVP and the changing of the plate was done on the DX-4000 QVP

I hope you enjoyed that demonstration of putting in a straight stitch plate, and some of the uses for straight stitch plate, and when and why you would use it. When I am piecing, and I know I’m going to be piecing for a long time, or even if I’m doing garment sewing where I’m constructing, I like to put in my straight stitch plate because as I said it just gives me that feel and that Stitch quality like a straight Stitch machine would. For any time when you’re working with very fine sheer fabrics that tend to get pulled down into that feed dog system, the straight Stitch plate eliminates that.

Until next time for the next tip and trick with JUKI, I will see you then. I want to thank you for joining me, please make comments during the video and at the end so that we know what to present and what you would like to see just like the few people who commented that they needed to understand that straight stitch plate better! I was able to do that for you, so please leave your comments and share the video with your friends.

Until next time, bye bye!

JUKI Tip: Double Fold Bias – Sewing Corners

On this JUKI tip, we use the Double Fold Bias Binder and show you how to sew corners with this accessory and create a fun sewing experience!

Follow along below for a rundown of what Alba covers on today’s JUKI Tip!

Hello all my JUKI friends, my name is Alba and welcome to another tips and tricks with JUKI! Today I am talking about the double-fold bias binder and I have one in front of me, and I wanted to show you the components of this. I did another video previously on how to load the fabric and just tips with getting it to run smoothly, but today I’m going to be showing you how to use it with quilts and doing those mitered corners.

I wanted to show you the binder itself so that you could get a little bit familiar with this tool. First, it comes with the foot that’s very short allowing you to really get a nice top stitch onto that, and also two thumb screws. Now this pivots and opens up and this section here with that wide opening is where you would put your thumb screws, to screw it right into the bed of the machine.

Now there’s also a set of screws right by where you feed your bias, and this allows you to move closer and further away from your foot, depending on the machine, depending on the material that you’re using, and likewise, that big screw allows you to move left and right to get this positioned perfectly.

Now with this I feed my bias in, and I just pushed that fabric that I got it all the way into there, and I have it being held by my needle right now. So as I am sewing this I want to make sure that I’m holding my quilt right into that corner and as I’m coming to a stop I want my needle to be right at the edge of the fabric. You will see where my needle is, and where my fabric is, I went right to the edge; and I am touching my scissor button and what I will be doing is releasing enough of that bias and I want to give that a little finger press. I am going to move this fabric closer to me and you want to make sure that you have enough to be able to work with. What I am going to be doing, again with that finger press, I am going to open this up and kind of force that bias.

This will allow me to pull that tape back through, and a long silk pin would come in really handy for just holding that in place. In fact, I am going to put a pin into that corner to hold it; I have that nice miter, and I’m going to put my pin right in there and I am going to bring that fabric all the way towards me.

I am going to position this right underneath the foot so that my needle catches that very corner. Now with my stiletto, I’m using tweezers here, I’m making sure that my fabric is tucked all the way in, and I am going to sew. You would do this on all four of your Corners.

Now you can see that beautiful corner that I’ve just completed, and I want you to see how beautifully that is top stitched right at the edge and it catches the front and the back beautifully, and I’m just gonna allow you to get a really close look at that.

Now at that corner, I did add a PIN to secure, you could also add some fusible web tape, that quarter-inch fusible web tape, and press that first inch and force that miter in place. But, with the bias binder, that double-fold bias binder, gives you the ability not only to do curves but to do those beautifully mitered corners.

How beautiful is that for your quilts, your crafting projects, everything that you could imagine. I really like to do this when I’m sewing garments and I am not lining like a jacket. I would do this on my inside seams and those are called Hong Kong scenes and it just gives a beautiful professional look to that garment.

Thank you for coming and sharing your time with me, what do you want to see next on JUKI tips? Lets us know down below!

JUKI Tip: Double Fold Bias Binder Overview

On this JUKI tip, we use the Double Fold Bias Binder and show you how to feed the fabric into the machine with this accessory and create a smooth sewing experience!

Follow along below for a rundown of what Alba covers on today’s JUKI Tip!

Hi, friends my name is Alba and I would like to welcome you to another tips and tricks with JUKI! Today I am talking about the double-fold bias binder and I have two sets in this video; one is a 38-millimeter and one is a 32-millimeter. The one I have on my machine is the wider of the two and I want to show you what exactly is in the package when you open this up.

I am going to open it right in front of you and I am going to pull out the binder itself and it comes with fabric and binding on it. It also comes with a little package with a thumb screw and a foot, and it comes with an instruction sheet. So what I wanted to show you is a little bit of detail, of what is in this, and as I said the one that’s on the machine is a 38-millimeter one, and what that means is how wide the fabric is that is put into the binder and how wide the finished product will come out.

For the 38-millimeter one, I used a one and a half inch strip of fabric, folded it and the completed bias is about 3/8 of an inch. Now what I like about this is you’re going to notice how short that foot is and this is really helpful as you’re sewing because that binder can get really close to the foot and allows for very little movement and of course we have our thumb screws to be able to put this onto the machine. Now what most people get confused with is they’re expecting this portion here to lay flat on the machine but as you can see in the video this accessory rests off of the machine. The thumb screw goes into the screw hole that’s on the bed of the machine, so these are intended for the industrial machines and the machines with solid metal beds, so that they could get screwed directly into the machine and a lot of people do not realize that pivot action that this attachment has.

Now I have two pieces of fabric and both of them have been cut to one and a half inches, and I’m going to show you the struggle that most people have and my tip for feeding the fabric into the machine and getting this to run smoothly. Now most people try to feed the fabric with it in the position right in front of the foot, but if you pivot this, it allows you to better see, getting that fabric in there and just puts you in a much better angle. Now as you’re noticing, I have the wrong side of the fabric facing me. Where most people have an issue is right there and I’m gonna get recommend a stylus, and with that tip, the fabric needs to go underneath its section in the video. Now this is where a lot of people have trouble trying to do that and I’m going to give you my tip for getting that done.

Now let me pull my trusty scissor out and I am going to cut a point into my fabric. By putting a point into that fabric, and you definitely want to use a stiletto, look at how easily that goes right into that fold. And as I pull this out I want to make sure that my fabric is folded, and what I do is I give this a little bit of a finger press. Now when I lift my foot and lift my needle I can move that fabric right underneath the foot and that large thumb screw will allow you to move this right and left so that when you lower your foot. Your needle is just slightly off of that edge to top stitch that edge. Now as I cut this, it was the width of fabric, and I am going to just sew away. Now watch in the video how even at that full speed, how brilliantly and effortlessly that works because this attachment is right up to the foot.

Now I am showing you sewing these pieces shut. I’m going to do a video really soon on putting um this into a quilt sandwich, and doing that mitered corner, but I wanted to show you this finished product and also some of the crafty things that you can do with these strips. You might have noticed my lanyard and I really like fun bright colors so I made my lanyard with the strip, and I happen to have made it so that it can hold my little scissors but also weaving fabric and doing that repeatedly so that you can create your own fabric and your own patterns, how cute would that be as an inset for a waistline? Or for a garment, for a tote bag. I want you to Google and search YouTube videos for fabric weaving to see all of the different things that you could do with that. I want you to stay tuned for another video that I will be doing on mitering corners and using this on quilt fabric.

Thank you for coming and sharing your time with me, what do you want to see next on JUKI tips? Lets us know down below!

JUKI Tip: Changing Your Foot Control Function Settings

Have you learned all the different ways you can use your foot controller on your computerized sewing machine? Check out our tips today to learn all 7 ways you can enjoy sewing with just the tap of your foot!

Follow along below for a rundown of what Alba covers on today’s JUKI Tip!

Today we’re going over the foot pedal and the foot switch function on the foot pedal for your machine. It has two sections to step on, the blue section for sewing, and the heel section or the white section, which on many of our machines can be programmed to do different functions.

The DX-2000 offers options to change the settings on your foot control functions for example as you’ll see demonstrated in this video. This function is normally found on our full-size machines!

To best follow along with today’s video, please refer to the section of the manual where all of this is laid out and that is on page 93! Now, the heel function of the foot pedal has six different parts we’re going to show you, and we’re going to cover what those functions are and how to get them going.

First, tap on the icon that looks like a wrench and a screwdriver; this is where we go into settings to change features on our machine. When you press that your screen comes up with different functions and we are going to tap the arrow until you reach the heel function icon. Next, press OK, and let’s start choosing our functions.

The first function is a feature already placed as a button on your machine, it is the same icon on the machine for reverse; if you select this, it will do reverse stitch. Now, when you press forward on this foot it will always sew as normal, as you tap and press on the back of the foot pedal, you’ll see your reverse stitch begin.

The second function option is a lock stitch. A lock stitch is completed when that needle goes up and down in place locking your stitch so that it doesn’t unravel. This is useful for locking in your projects and securing a quality finish.

The third function is a half stitch. The icon for this function shows as a needle with arrows up and down, and what this will do is it will take a half stitch as you come to the end of your thread. This feature is useful to secure your seam but not lock it if you do not want any build-up of threads you’re going to sew.

The fourth function will have the presser foot lifting and lowering. As you start sewing and touch that heel portion of your foot control it will leave you with the foot up and the needle down and this is really helpful if you were going to do continuous sewing or chain piecing!

The fifth function is the cutting function. The cutting function can be very helpful! When your stitch is done this function will trim your top thread and bottom thread at the same time, saving you the trouble of finding your thread scissors.

The last function is the ability to turn off all extra functions when tapping the back of your foot controller. You can turn them on and off as needed helping you create your projects with ease. Remember, the details of this are on page 93 of the instruction book for the DX series, and offer images you can follow to learn more!

Thank you for joining today’s tip, we hope this helps you create easier the next time you’re working on your machine!

Different Ways You Can Learn How to Sew!

Have you been looking to pick up sewing but need help figuring out where to start? Then join us as we’ve gathered four different ways you can begin learning today! From in-person classes to self-study, the world of sewing is now at the touch of our fingers, and we will share how you can access this information.

Passed Down Knowledge

If you have a family member, or friend, who loves the hobby and may even be the reason you’re interested in learning, don’t be afraid to reach out and ask for some lessons! Having a connection in the sewing and quilting world will help you learn techniques, allowing you to practice on their machines before purchasing your own, and a lesson on what features they commonly use that you can practice using.

Choosing your first sewing machine can be intimidating if you need to become more familiar with what machine features you’ll need or what stitches you’ll use. Practicing with a family member’s or friend’s machine will make you get comfortable with the options available and help you understand what you need to create your projects. If you’re interested in learning more about beginner sewing machines that JUKI offers, you can learn more here.

Working with family and friends will also give you the feedback you need. While attending classes and using online resources is an option, we’ll cover these options in the following sections of the blog, having a connection that can provide feedback will be extremely useful when you create throughout the day. So take the time to learn from their past projects, follow along as they show you how to use different techniques, and ask those questions you would be embarrassed to ask in front of a class.

In-Person Training Classes

The easiest and most common way of learning to sew is by researching your local area for sewing and quilting classes! Many times you’ll find these programs in your local libraries, your nearest sewing and quilting machine dealers, or at specialized locations that offer crafting classes.

For example, if you’re a new owner of the Miyabi J-350QVP, you might be looking for some training on how to use your longarm quilting machine. At JUKI, we offer the opportunity to attend a longarm training 3-day course that teaches users the basics of the machine and how to use it and shares information on the Quilter’s Creative touch. These classes are offered at select JUKI dealers and can be found here.

You can also attend quilting and sewing tradeshows to find in-person sewing classes! For example, at JUKI, you can commonly find us hosting serger classes at OSQE, with sign-up availability on the OSQE website here. These classes are offered nationwide as the tradeshow travels from coast to coast, helping new sewists hone their skills.

Check out your local community colleges and community centers for sewing class events! These programs are usually offered at low rates and allow you to learn the basics of sewing. The classes also provide an opportunity to receive feedback and ask those questions you’ve been having. Don’t worry if you can’t attend face-to-face classes; thanks to the online world, we have many more options!

Using Your Online Resources

Thanks to the internet, we can now access many videos focusing on sewing skills, projects, tutorials, and so much more. Almost any question you have can now be answered with just one search. Using this, new sewists and quilters can find free or paid online resources to teach you how to complete certain stitches, use presser feet, thread your machines, and more!

These teaching formats can come in videos, PDFs, online books, and online classes, allowing you to find different resources as you learn new skills and techniques. One of the best resources you can find content on is YouTube! On JUKI Home Sewing’s YouTube, you can find out how to operate your machines, set them up for sewing, and check out accessories and what they’re used for. You can also follow along with past projects and lives, where we demonstrate how to create a project from beginning to end.

There are countless online creators out there who are so excited to demonstrate techniques, projects, skills, and machine features for new sewists and quilters like you, and the content can be found for free or at low costs. You can, however, choose to invest in your skills and join online programs with teaching professionals who show you how to build your skills step-by-step and offer constructive feedback and knowledge you can learn from, usually offered at varying prices depending on the skill level of the instructor.

Lastly, take advantage of what influencers in fashion and quilting can teach you on their social media pages! While many creators focus on posting project-based content, many will bring it to their media outlets for learning moments. These quick snippets can explain how to use a presser foot and other accessories to keep on hand, and much more.

Hit the Books!

Let’s go back to the original days of sewing and check out the books available for quilting and sewing! Many of these books will offer resources on beginner basics for using your sewing machine, provide tips and tricks on what tools you’ll need in your studio, what presser feet are and which ones to have on hand to complete specific techniques, and even walk-throughs of a series of projects you can begin creating to start building your skill set.

There are also book resources that explain how to maintain your machines, offer beginner to advanced sewist projects where you build your skill set as you create, and so much more. Check out your local libraries or bookstores to see what’s available, and remember to browse the internet for recommended books!

No matter how you decide to learn, picking up a new hobby is a great adventure! Whether you go online and try it alone or pick up some classes at your local community center, sewing and quilting are great hobbies for letting your creativity flow. We hope today’s blog encourages you to start working on your hobby and learning new skills!