Sew Outdoors with JUKI

When it comes to creating for outdoor spaces, choosing the right materials and understanding how weather impacts your projects is essential. From patio cushions to garden accessories, outdoor sewing requires fabrics and threads that can stand up to sun, rain, wind, and wear. In this blog, we’ll explore the best types of outdoor fabrics and threads to ensure your creations last season after season.

We’ll also dive into how weather elements affect fabrics, the importance of UV resistance, and simple maintenance tips to keep your outdoor pieces looking fresh. Plus, we’ll recommend three JUKI sewing machines perfectly suited for outdoor projects! From a versatile serger to a reliable semi-industrial machine, we have what you need. Whether you’re an experienced sewist or just getting started, this guide will help you create durable, beautiful items made to withstand the great outdoors.

How Weather Affects Outdoor Fabrics

Outdoor fabrics are constantly exposed to sunlight, moisture, and wind, all of which take a toll over time! UV rays from the sun break down fabric fibers, cause colors to fade, and weaken your material’s strength. Moisture from rain, dew, or humidity can create mildew growth and lead to stains or fabric damage if your material isn’t properly treated or allowed to dry thoroughly.

Wind brings its own challenges by causing abrasion as dust and debris rub against fabric surfaces, especially around seams and edges depending on where you live. These combined weather effects mean outdoor fabrics need to be specially designed and cared for to maintain their durability and appearance through changing seasons! Let’s talk about how you can achieve that.

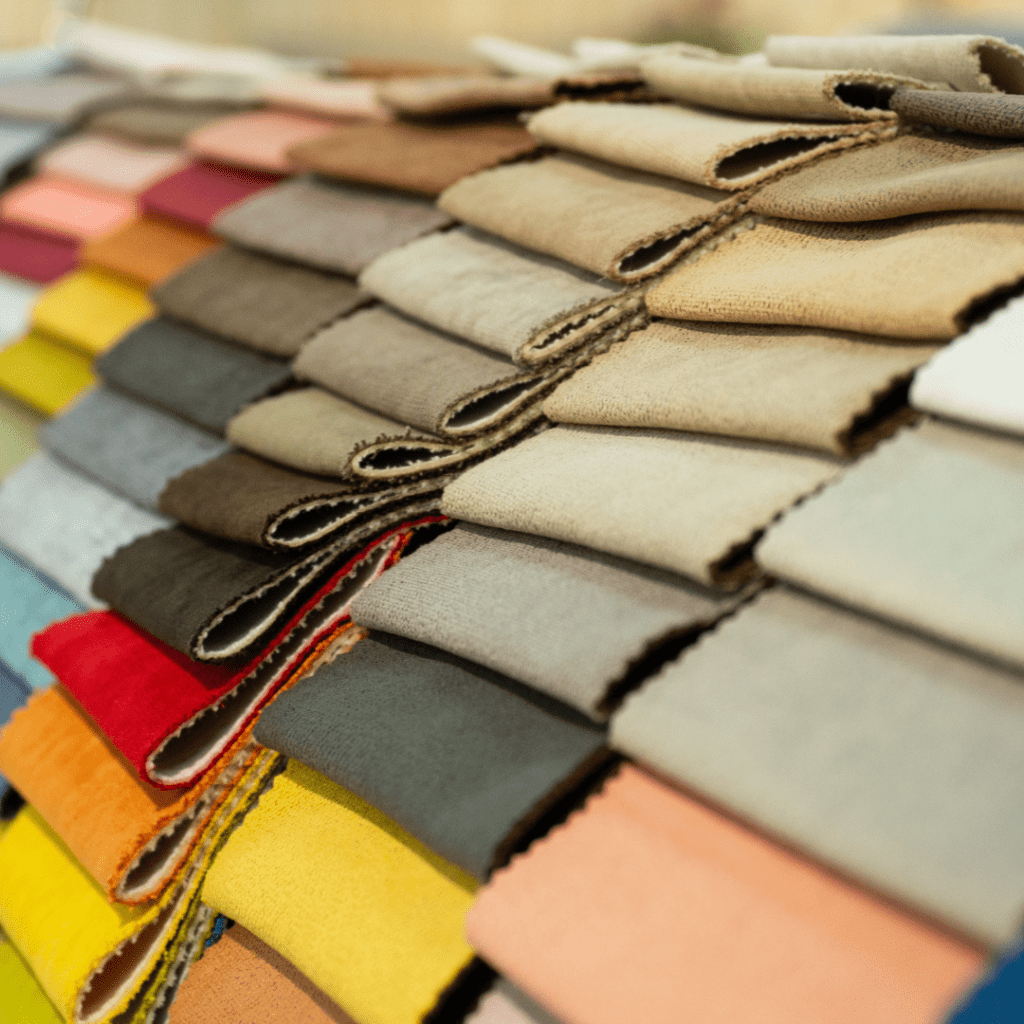
Best Fabrics and Threads for Outdoor Projects

Choosing the right materials is key to success. Outdoor fabrics are engineered for weather resistance and durability, while outdoor threads must hold up to UV exposure and moisture without breaking down or losing strength.
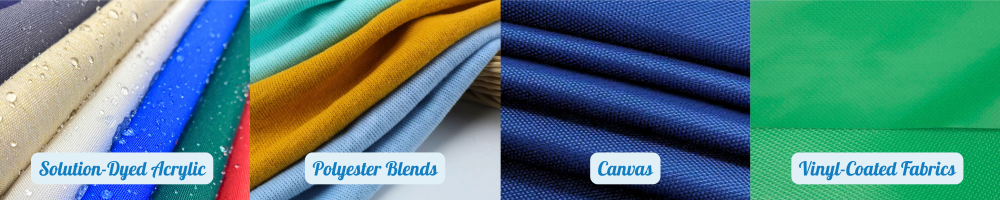
Outdoor Fabrics:

  • Solution-Dyed Acrylic: Highly resistant to UV rays, water, and mildew, this fabric is great for patio furniture cushions and umbrellas.
  • Polyester Blends: Durable and generally fade-resistant, polyester blends offer excellent protection from stretching and fading, making them a great option for outdoor pillows and covers.
  • Canvas: Thick and water-resistant, this fabric is perfect for boat covers, awnings, and heavy-duty outdoor gear.
  • Vinyl-Coated Fabrics: Generally water-repellent and easy to clean, vinyl-coated materials are usually used for tablecloths, rain gear, and protective covers.

Outdoor Threads:

  • Polyester Thread: Strong and UV resistant, polyester thread holds up well under sun exposure and moisture, making it a reliable choice for outdoor projects with heavy use like cushions and protective covers.
  • UV-Resistant Thread: Specifically treated to resist sun damage, this thread maintains strength and color over time.
  • Waterproof and Mildew-Resistant Thread: This thread can become essential for seams exposed to water and humidity since these threads prevent rot and mildew buildup. It’s perfect for projects you expect to get wet after a pool day or a rainy afternoon.

Using the right combination of these fabrics and threads will help your outdoor creations withstand changing weather conditions while keeping their appearance and function intact season after season!

JUKI Machines for Outdoor Sewing
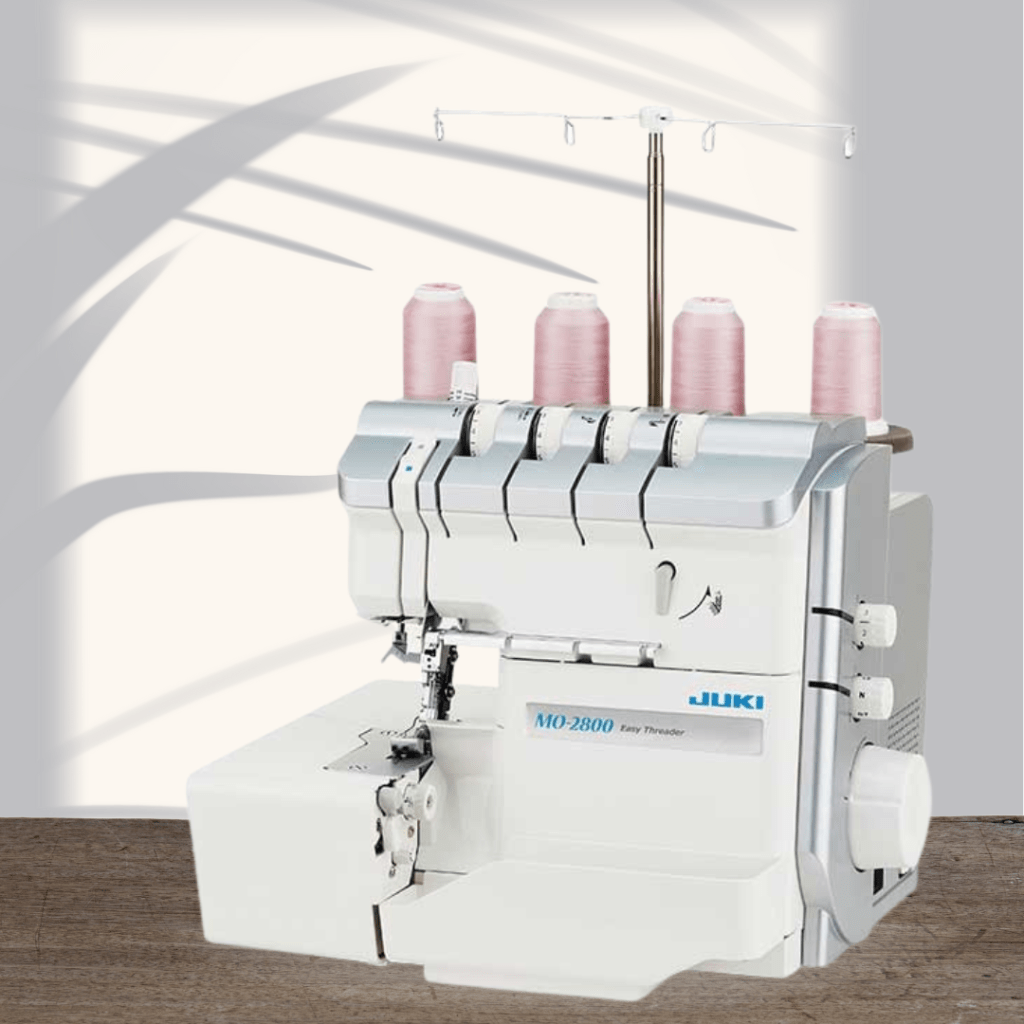
MO-2800 Serger
For durable seam finishes on outdoor gear, the MO-2800 delivers power and precision. This high-performance serger handles thick fabrics like vinyl or canvas with ease. Features include:

  • Strong differential feed for smooth, even stitching
  • Adjustable stitch length for custom results
  • Optional Binder Foot for clean, reinforced edges or piping

Perfect for: Cushions, awnings, outdoor bags, or any project needing polished, long-lasting seams.

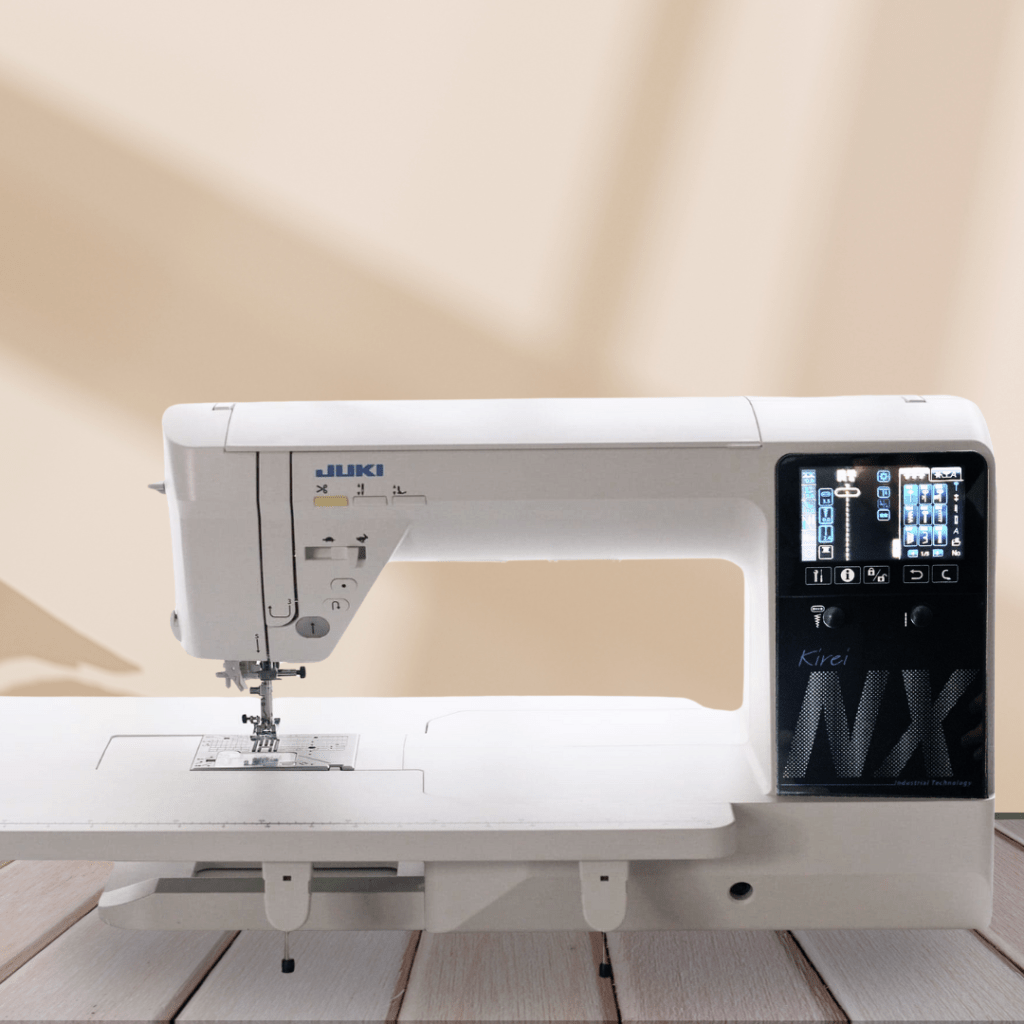
HZL-NX7 Computerized Sewing Machine
With the HZL-NX7, you’ll find versatility and precision for a wide range of outdoor sewing projects! Its computerized controls include speed adjustment, automatic thread trimming, and a large LCD screen that makes stitch selection intuitive.

Highlights:

  • 330 built-in stitches (including utility and decorative)
  • Speed control, auto thread trimming, and an LCD screen
  • Works beautifully with the walking foot accessory to handle layered outdoor fabrics
  • Perfect for: Decorative pieces, personalization, light-to-medium outdoor applications

TL-2010Q Semi-Industrial Machine
Last, we have the TL-2010Q, an ideal machine for sewing thick, tough outdoor materials like vinyl and heavy canvas.
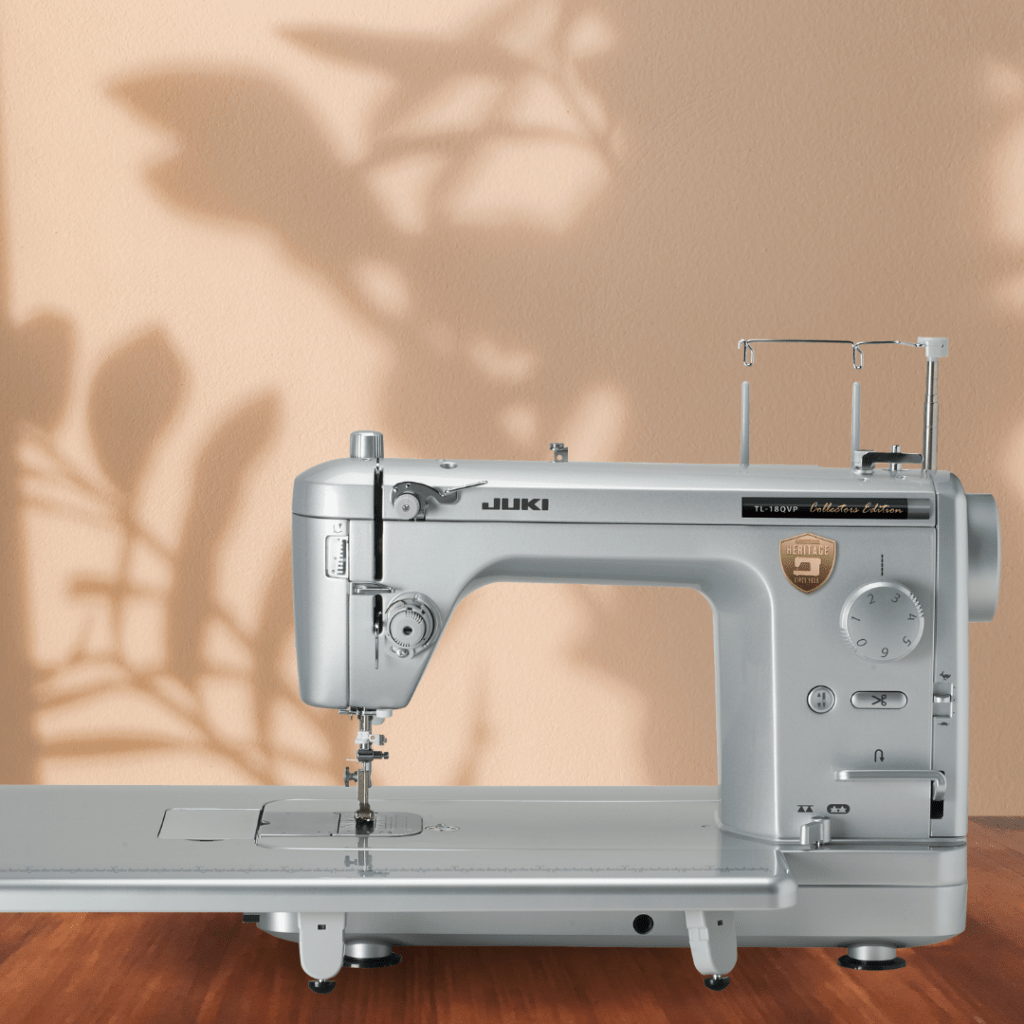
Highlights:

  • High-speed, consistent stitching through thick materials
  • Large extension table for bulky fabric handling
  • Adjustable presser foot pressure for multi-layer management
  • Recommended: Roller Foot for smooth sewing over sticky or textured surfaces

Perfect for: Vinyl, canvas, tarps, backpacks, tents, or any rugged outdoor sewing

Create to Withstand the Elements

Creating for the outdoors is about more than just style! It’s about choosing the right materials, tools, and techniques to ensure your projects last through every season. By understanding how weather affects fabrics, selecting the right materials and threads, and using the right tools, you can craft pieces that are as durable as they are beautiful.

With the help of our trusted JUKI machines, your outdoor projects can be finished with precision, strength, and confidence!

What Is a Zipper Foot?

This month, we’re talking about zippers, one of the most useful and versatile closures you can add to your sewing projects, but inserting them neatly can sometimes feel tricky! That’s where the Zipper Foot comes in. This presser foot is specially designed to help you sew close to the zipper teeth or coil without the needle hitting the foot, giving you a clean, professional finish every time.

In this blog, we’ll walk you through the basics of the Zipper Foot, share tips on working with zippers in a variety of projects, and inspire you with creative zipper projects you can try at home!

What Is It?

Let’s start with how we got the Zipper Foot in the first place. This foot was invented to address a challenge in sewing: how to stitch close to the teeth of a zipper without the needle hitting the zipper’s metal or plastic parts. Zippers themselves were first created in the late 19th century, but it wasn’t until the early 20th century that we saw them used widely in garments and accessories. As zippers started to become a common closure method, sewists needed to find a specialized tool that allowed precise stitching along the narrow edge of the zipper tape.

Early zipper feet were simple but effective attachments that could be mounted on most domestic sewing machines, allowing the needle to sew on either side of the zipper. Over time, improvements have led to adjustable feet compatible with different zipper sizes and sewing machine models, making zipper installation more accessible and professional-looking for home sewists and industrial applications alike.

Benefits and Uses

The zipper foot is an essential tool because it allows precise stitching close to the zipper teeth without interference. It also helps prevent needle breakage and skipped stitches, making zipper installation smooth and professional, right from home. Beyond zippers, this versatile foot is also useful for other detailed sewing tasks that require stitching close to bulky edges or trims.

With the Zipper Foot you can:

  • Sewing various types of zippers (invisible, separating, metal, and nylon coil)
  • Attaching piping or cording for decorative edges
  • Topstitch close to bulky trims or seams
  • Sewing along the edges of thick fabrics or multiple layers

Using the zipper foot not only improves the accuracy of your stitching but also speeds up the sewing process by allowing you to work confidently close to the zipper teeth. Its versatility makes it a valuable tool beyond zipper installation, helping you achieve professional finishes on a variety of projects.

Tips for Using the Zipper Foot

  • Sew slowly and carefully near zipper stops to avoid needle breakage.
  • Use pins or basting tape to hold the zipper securely in place before stitching.
  • Practice on scrap fabric to get comfortable with needle placement and foot adjustment.
  • Backstitch at the start and end of your zipper seam to reinforce.

Zipper Projects to Try

Ready to try your hand at using a zipper foot? Below are five zipper projects featuring video tutorials from our JUKI team!

1. Quilted Laptop Bag: Join Alba in this detailed tutorial where you’ll learn to create a quilted laptop bag using the JUKI Haruka TL-18QVP. This project includes quilting tips, adding pockets, zipper installation, and attaching a comfortable strap, perfect for stylish, functional protection on the go.

Follow along here!

2. Laptop Sleeve: Looking for a simple zipper project? This laptop sleeve tutorial guides you through making a slim, personalized cover for your laptop. It’s a great introduction to sewing zippers with style and function!

Follow along here!

3. Binder Zipper Bag: Perfect for back-to-school organization, this project uses a nylon zipper to create a handy pencil and supply holder that fits in a three-ring binder. Created on the Kokochi DX-4000QVP, it’s a practical, beginner-friendly zipper bag with lots of uses.

Follow along here!

4. Diagonal Zipper Bag: This stylish zipper bag is ideal for makeup, tickets, or toiletries and is made using the DX-2000QVP and MO-2800 serger. The tutorial shows how to sew with batting and cotton thread, perfect for an easy, functional accessory!

Follow along here!

5. Make-Up Bag: Here our Brand Ambassador Nicole Moore demonstrates how to sew a travel-friendly make-up bag with the JUKI TL Series machine, personalized with embroidery. This project is suitable for all skill levels and perfect for gifting or personal use.

Follow along here!

Zip Up and Sew with JUKI!

Mastering the zipper foot can open a world of creative possibilities, making zipper installation easier and more precise! Whether you’re sewing bags, garments, or accessories, this simple yet powerful tool can help you achieve clean, professional results every time.

Grab your zipper foot, explore the projects we’ve shared, and take your sewing skills to the next level with confidence! Visit your nearest JUKI dealer here to find the right accessories for your project today.

JUKI On-The-Go

Whether you’re heading to a sewing retreat, attending a hands-on training, or joining a workshop at your local JUKI dealer, having the right machine can make all the difference! That’s why JUKI created the HZL-HT710 and HZL-HT740, two powerful and portable sewing machines designed with travel, convenience, and creativity in mind. From dealer-hosted classes to national sewing events, these machines are the perfect companions for sewists who want flexibility without compromise.

At JUKI, we support a growing network of events and training opportunities across the country, many hosted by our knowledgeable dealers who offer immersive, skill-building seminars. Visit JUKIHome.com/events to find upcoming classes and events near you. Whether you’re learning new techniques, trying out accessories, or diving into a new project alongside fellow enthusiasts, these events are the perfect way to grow your craft! And with the HT710 and HT740, you’re ready to come along for the ride.

Meet the HZL-HT710 & HZL-HT740

Created for sewists who want performance without bulk, the HZL-HT710 and HZL-HT740 deliver smart, efficient sewing in a compact, travel-friendly package. Both models are perfect for on-the-go use—easy to transport and setup without compromising stitch quality or precision!

The HZL-HT710 offers 60 stitch patterns, ideal for basic to decorative stitching, and features an automatic thread trimmer that saves time with just the push of a button. The HZL-HT740 builds on this with an expanded selection of features, giving you additional flexibility for more advanced or varied sewing tasks—all while remaining light and travel-ready.

Both machines include a built-in automatic needle threader, ensuring quick and frustration-free setup no matter where you’re working. Whether you’re at a pop-up sewing event, a weekend workshop, or just sewing in a small space, these machines help you stay focused on your creativity.

Features That Travel Well

The HZL-HT710 and HZL-HT740 are packed with features that make sewing on the go a breeze:

  • Automatic Thread Trimming: Trim both upper and lower threads with one touch
  • Built-in Needle Threader: Skip the squinting and get sewing faster
  • Speed Control Slider: Adjust sewing speed to match your comfort and project needs
  • Start/Stop Button: Sew without a foot pedal—perfect for tight or mobile setups
  • Bright LED Lighting: Clear visibility, even in dim environments
  • Free Arm Sewing: Tackle sleeves, cuffs, and smaller projects with ease

And to make traveling with your machine even easier, pair it with the JUKI Wheeled Trolley Bag! Designed for both convenience and protection, this durable bag accommodates even large sewing machines like the Sayaka DX-3000QVP and Kokochi DX-4000QVP, making it a perfect fit for the more compact HT710 and HT740 models.

You’ll also find a front pocket for quick-access accessories and two interior mesh wall pockets to organize your foot pedal, power cord, tools, and fabrics. Machines can be easily stored through the top or front loading options, depending on your workspace and preferences. With dimensions of 23″ W x 16″ H x 12.5″ D, this trolley is built for both functionality and comfort while in transit.

Tips for Traveling with Your Sewing Machine

To keep your machine safe and ready to use, here are JUKI-approved travel tips:

  • Use a Wheeled Trolley Bag: Invest in a quality, padded trolley bag like the JUKI Trolley to protect your machine from bumps and make transportation easier.
  • Secure Moving Parts: Before you travel, remove any detachable accessories (like the presser foot or extension table) and store them in the bag’s interior pockets to prevent damage.
  • Use a Dust Cover or Fabric Wrap: If you’re not using a trolley, wrap your machine in a soft cloth or cover to protect the surface from scratches during transit.
  • Carry Essential Tools Separately: Keep bobbins, needles, thread, and small tools in a separate pouch to avoid clutter and make setup quick once you arrive.
  • Plan for Power: Bring your machine’s power cord and foot pedal, and check that your destination has the appropriate outlets and table space.
  • Label Your Machine: If you’re attending a group event or workshop, place a tag with your name and contact info on your machine and accessories to avoid mix-ups.

With the right prep and the right gear, traveling with your sewing machine can be just as enjoyable as sewing at home, and maybe even more inspiring!

Whichever sewing machine you choose, you’re getting JUKI’s trusted quality and thoughtful design, available in a travel-friendly design! Take your sewing on the road without sacrificing performance, convenience, or creativity. Explore the HZL-HT710 and HT-740 at your local dealer today and experience how effortless on-the-go sewing can be with JUKI by your side.

What is a Roller Foot?

Sewing is a craft that has evolved over centuries, and with it, the tools that make our work easier and more efficient! If you’ve ever worked with challenging materials like vinyl, leather, or suede, you know how tricky it can be to sew these fabrics without causing damage or uneven stitching.

This is where the Roller Foot comes in. This simple yet powerful tool is designed to make sewing these difficult materials smooth and stress-free. Whether you’re a seasoned sewist or just getting started, the Roller Foot is an indispensable accessory that will expand a world of possibilities for your projects!

The Roller Foot is a specialized presser foot equipped with small rollers that glide smoothly over difficult fabrics, reducing friction between the fabric and the foot. This design ensures that fabrics such as leather, vinyl, or even delicate silk move smoothly under the needle, helping to achieve even stitches and a clean finish.

Originally developed in response to the frustrations sewists experienced with sticky or heavy materials, the Roller Foot offered a solution where standard flat presser feet fell short. As synthetic and heavier fabrics became more common, it became clear that traditional feet weren’t up to the task, so the Roller Foot was born.

Since its introduction in the 20th century, it has become a go-to tool for hobbyists and professionals alike, offering improved fabric handling and reducing the risk of bunching, snagging, or skipped stitches.

The Roller Foot’s main benefit is its ability to deliver smooth, consistent stitching on fabrics that are typically challenging to sew. Its rolling mechanism glides over surfaces like vinyl, leather, plastic, and laminated fabrics without leaving marks or pulling at the material.

This makes it ideal for:

  • Outerwear
  • Bags and accessories
  • Home décor projects
  • Crafts with sticky or coated fabrics

The foot’s design also makes it great for working with slippery or delicate fabrics like silk and satin. By applying even pressure across the surface, it helps prevent puckering and distortion, ensuring your finished product looks clean and polished.

  • Always test on a scrap piece of fabric before starting your project to ensure the foot is working smoothly.
  • For thicker fabrics like leather or vinyl, use a leather or non-stick needle to prevent damage.
  • Keep a consistent stitch length (around 3.0–4.0mm) to avoid perforating the material.
  • Adjust the tension on your machine as needed, especially when sewing through multiple layers or thick fabrics.

Once you’ve attached your Roller Foot and tested it out, the possibilities are endless. Here are some fun and practical projects that highlight its benefits:

  • Faux leather bag: Glide through sticky material with ease for clean seams and a polished look.
  • Vinyl wallet or pouch: Achieve precision without puckering or dragging the fabric.
  • Waterproof tablecloth or outdoor cushions: Sew coated fabrics neatly without leaving marks.
  • Tech sleeves or phone cases: Work with durable materials without damaging the surface or distorting the shape.

The Roller Foot makes it easy to work on both everyday items and custom pieces that look professionally made.

Whether you’re creating accessories, home décor, or gifts, the roller foot expands your sewing possibilities, opening up a world of creativity! Ready to add the Roller Foot to your collection? Visit JUKIQuilting.com or check out your nearest dealer here to explore our accessories for your sewing machine!

JUKI Tip: Trimming Your Tajima SAI Thread

Don’t you hate when you’re about to start an embroidery and you have that thread tail hanging out? On this JUKI Tip video today we’re going to show you how quick and easy it is to trim that right up on the machine.

In the video above, you’ll see on the screen I am going to go to the icon that looks like four needles with arrows on either side. When you tap on this icon you can move to whichever needle you need to trim with ease, without disrupting your current project.

In our video you’ll see it’s set up on needle number one and needle number one is the one with the thread that we direct you to. You’ll see me press and hold the scissor icon, and it will cut and remove that thread from your needle.

We hope this quick and easy tip helps you the next time you’re creating on the TAJIMA Sai Embroidery machine! What tip do you want to see next? Let us know down below!