Have you been looking to pick up sewing but need help figuring out where to start? Then join us as we’ve gathered four different ways you can begin learning today! From in-person classes to self-study, the world of sewing is now at the touch of our fingers, and we will share how you can access this information.
Passed Down Knowledge
If you have a family member, or friend, who loves the hobby and may even be the reason you’re interested in learning, don’t be afraid to reach out and ask for some lessons! Having a connection in the sewing and quilting world will help you learn techniques, allowing you to practice on their machines before purchasing your own, and a lesson on what features they commonly use that you can practice using.
Choosing your first sewing machine can be intimidating if you need to become more familiar with what machine features you’ll need or what stitches you’ll use. Practicing with a family member’s or friend’s machine will make you get comfortable with the options available and help you understand what you need to create your projects. If you’re interested in learning more about beginner sewing machines that JUKI offers, you can learn more here.
Working with family and friends will also give you the feedback you need. While attending classes and using online resources is an option, we’ll cover these options in the following sections of the blog, having a connection that can provide feedback will be extremely useful when you create throughout the day. So take the time to learn from their past projects, follow along as they show you how to use different techniques, and ask those questions you would be embarrassed to ask in front of a class.
In-Person Training Classes
The easiest and most common way of learning to sew is by researching your local area for sewing and quilting classes! Many times you’ll find these programs in your local libraries, your nearest sewing and quilting machine dealers, or at specialized locations that offer crafting classes.
For example, if you’re a new owner of the Miyabi J-350QVP, you might be looking for some training on how to use your longarm quilting machine. At JUKI, we offer the opportunity to attend a longarm training 3-day course that teaches users the basics of the machine and how to use it and shares information on the Quilter’s Creative touch. These classes are offered at select JUKI dealers and can be found here.
You can also attend quilting and sewing tradeshows to find in-person sewing classes! For example, at JUKI, you can commonly find us hosting serger classes at OSQE, with sign-up availability on the OSQE website here. These classes are offered nationwide as the tradeshow travels from coast to coast, helping new sewists hone their skills.
Check out your local community colleges and community centers for sewing class events! These programs are usually offered at low rates and allow you to learn the basics of sewing. The classes also provide an opportunity to receive feedback and ask those questions you’ve been having. Don’t worry if you can’t attend face-to-face classes; thanks to the online world, we have many more options!
Using Your Online Resources
Thanks to the internet, we can now access many videos focusing on sewing skills, projects, tutorials, and so much more. Almost any question you have can now be answered with just one search. Using this, new sewists and quilters can find free or paid online resources to teach you how to complete certain stitches, use presser feet, thread your machines, and more!
These teaching formats can come in videos, PDFs, online books, and online classes, allowing you to find different resources as you learn new skills and techniques. One of the best resources you can find content on is YouTube! On JUKI Home Sewing’s YouTube, you can find out how to operate your machines, set them up for sewing, and check out accessories and what they’re used for. You can also follow along with past projects and lives, where we demonstrate how to create a project from beginning to end.
There are countless online creators out there who are so excited to demonstrate techniques, projects, skills, and machine features for new sewists and quilters like you, and the content can be found for free or at low costs. You can, however, choose to invest in your skills and join online programs with teaching professionals who show you how to build your skills step-by-step and offer constructive feedback and knowledge you can learn from, usually offered at varying prices depending on the skill level of the instructor.
Lastly, take advantage of what influencers in fashion and quilting can teach you on their social media pages! While many creators focus on posting project-based content, many will bring it to their media outlets for learning moments. These quick snippets can explain how to use a presser foot and other accessories to keep on hand, and much more.
Hit the Books!
Let’s go back to the original days of sewing and check out the books available for quilting and sewing! Many of these books will offer resources on beginner basics for using your sewing machine, provide tips and tricks on what tools you’ll need in your studio, what presser feet are and which ones to have on hand to complete specific techniques, and even walk-throughs of a series of projects you can begin creating to start building your skill set.
There are also book resources that explain how to maintain your machines, offer beginner to advanced sewist projects where you build your skill set as you create, and so much more. Check out your local libraries or bookstores to see what’s available, and remember to browse the internet for recommended books!
No matter how you decide to learn, picking up a new hobby is a great adventure! Whether you go online and try it alone or pick up some classes at your local community center, sewing and quilting are great hobbies for letting your creativity flow. We hope today’s blog encourages you to start working on your hobby and learning new skills!
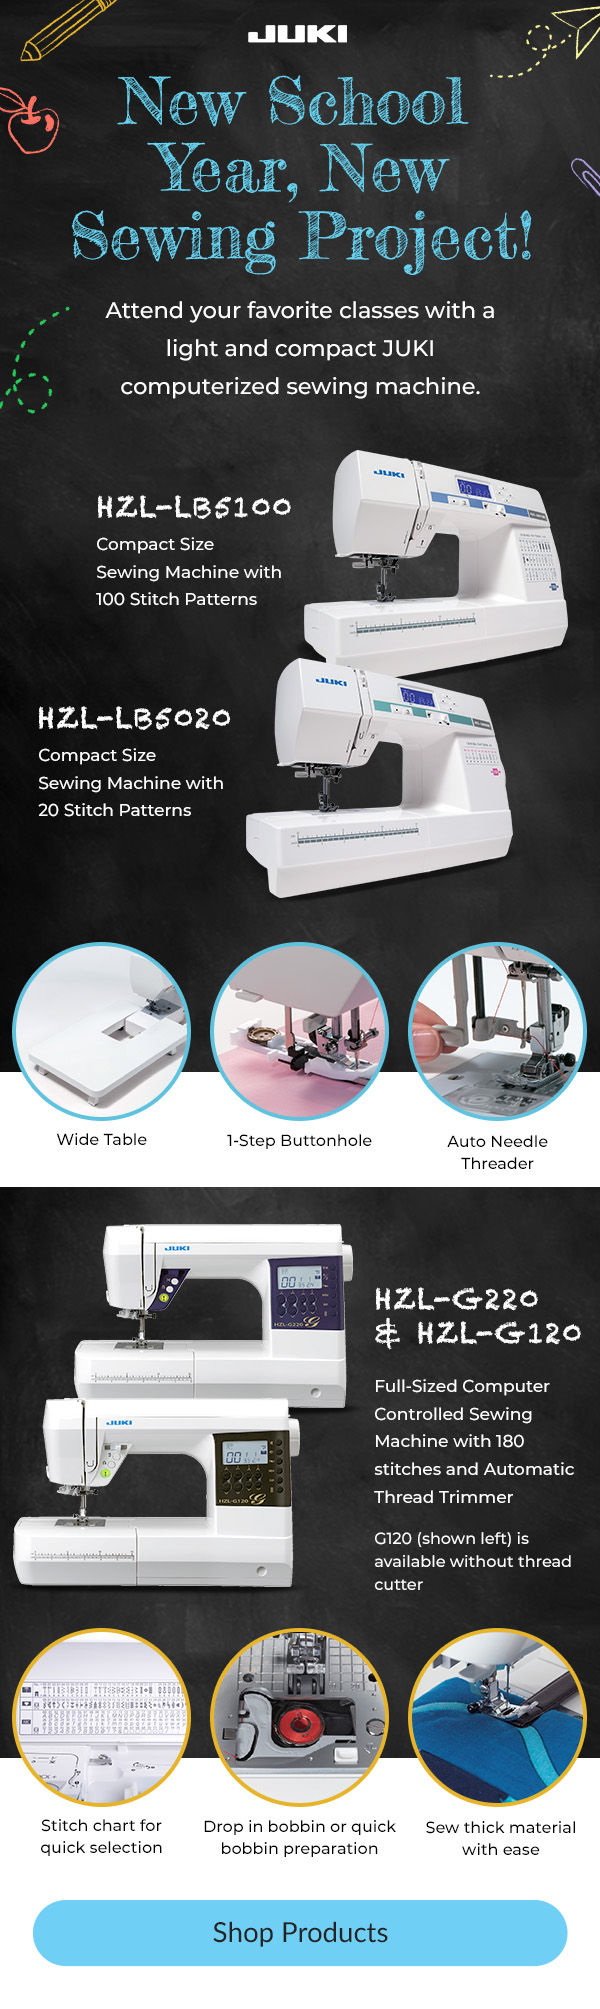
Get ready for your next sewing class and retreat with JUKI! Compact and easy to travel with, our HZL-LB Series and HZL-G series are the perfect companions for your next outing.
When we think of creating a business, our mind often jumps to brick-and-mortar shops or online shops that sell creations. However, there is another type of business many tend to overlook, and that’s their expertise!
One of the most popular ways to sell your expertise in a skill is to offer online courses that new crafters can purchase and use on their journey. These online courses can be pre-planned and downloadable or offered as live sessions with scheduled classes for students to attend. The pro of providing a service like this is that instead of a physical product like your quilts and apparel, which require multiple steps like creating, shipping and processing, an online course allows you not to worry about things like that.
Do you feel like you have expert knowledge that others can learn from? Have you built a platform showing friends and followers tips and tricks on your machines? Creating an online course is about taking that knowledge plus your skills in teaching that offers you the chance to compress your expertise and showcase it to new crafters like yourself.
Follow along today as we go over some steps you can follow to create your online course today.
Let’s Talk About Online Courses
In our day and age of technology, online courses have risen in popularity. From education on how to run a business to classes on sewing, online courses have broadened our ability to learn new skills worldwide.
Online courses can take much time to create and require much planning and direction. However, this is a single product that you can sell multiple times without you having to re-create. There is no product inventory or packaging cost; instead, customers can easily buy this service with a few clicks. Besides purchasing a few subscriptions to create and host your course and purchasing the equipment necessary to film and edit your videos, your central budgeting will go towards marketing and hosting your course after creation.
Online courses can also offer high revenue. After you’ve completed the costs that go into your original course creation and production equipment, the rest of your revenue can be profit. Whether you choose to update the course once in a while or leave it as is, this product can be seen as passive income and is a perfect addition to many businesses.
Building Your Course
Let’s jump into the steps to building your online course! As we know, there are many educators out there who are offering online courses in their fields of expertise. The best way to stand out from others is to find your niche in skills and build on a topic that you’re uniquely good at. Think of your course as a solution to new sewer needs, and choose a topic where you have credibility, expertise, and of course, passion! Follow along as we go over steps to keep in mind while building your course.
Research Your Future Customers
Before you can jump into creating your course, let’s discuss who you’ll be teaching and selling to. Below are some tips to keep in mind when researching your audience.
– Learn what your audience wants to know! Are you constantly asked how to create a handbag? Finish a sleeve? Free motion quilt designs? These questions are essential to note, so when you make your course, you can find what common questions, and more complex ones, can be addressed. In addition, students want to feel accomplished when they attend your class, so learn what skills and projects can achieve this while working on your course design.
– Find the solution! When new students find your course, they often have a problem they’re looking for a solution to. Your course can be that problem solver! Make sure when creating your course that you offer efficient and quick ways of teaching skills and sharing your knowledge.
– Learn your audience. It’s best to know your target audience, whether you are selling to new sewists who have little knowledge or experts who want refresher courses or to learn more complex skills. Then, when it’s time to promote and sell your class, you have a clear message for students to read and understand, so they choose the right course for their needs.
– Don’t forget to put yourselves in their shoes! When creating a course for a student, put yourself in the students’ shoes and make sure you’re covering the essential details. You don’t want to attend a class and leave with more questions than you came with, so have friends and family test the course and find what pieces can be removed or should be added.
Need help deciding what subjects and problems to cover? Do some research in your field! We recommend googling trends, browsing community forums, and roaming social media to see what questions and concerns are being brought up in your community that you can answer with your course! Keep in mind what problems you have solutions for, what goals your students have, and how you can help them achieve their goals.
Choosing a Class Type
There are multiple formats for your online course that you can choose from. Depending on how you plan to structure your class and how many days you believe a student will need to learn your material, you can create a template for students to follow when downloading your course.
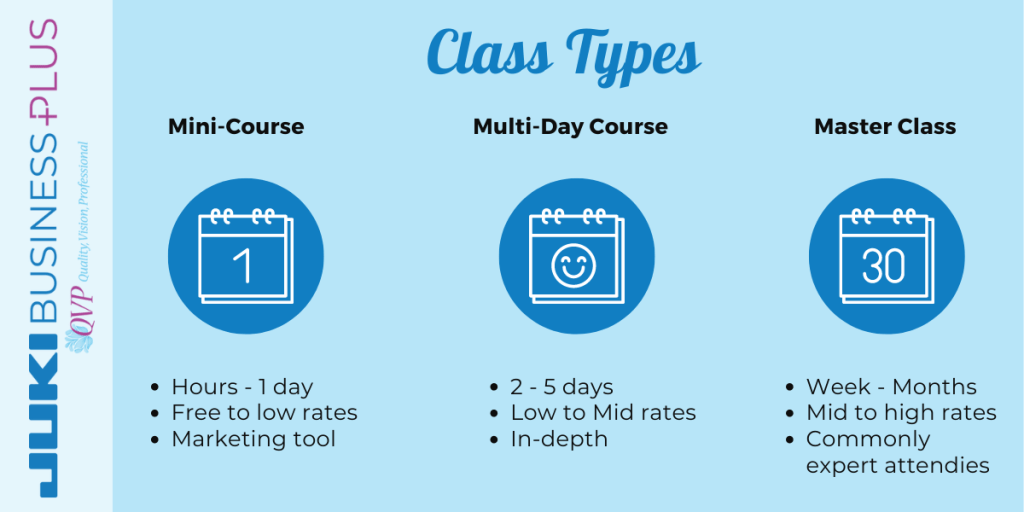
Mini-Course
These courses can take up to a few hours or one day. These classes can be formatted as a video, blog series, and more. Generally, in the lower cost sector, these courses are offered at low rates or free as a marketing tool if you’re trying to sell a higher-end course later. Mini-courses are perfect for those treading the waters of starting an online course and can give you an idea of what plans and efforts are needed to create a multi-day course.
Multi-Day Course
Generally, a multi-day course takes a few to several days of work to complete. Broken down into chapters or modules, these courses break down the lesson plan into multiple segments where a student can gain more in-depth knowledge of a skill. In addition, a multi-day course will often include add-on material for teachings like a project or worksheets. Falling into a higher cost range, these courses can range from $300 – $2500. A great way to sell this course for newcomers is offering that mini-course we mentioned beforehand as a sneak peeks at what’s available. A mini-course is also helpful in validating your expertise before a more significant purchase, like a multi-day course.
The Master Class
A master class should offer in-depth knowledge and skill teaching for your customer base from weeks to months. Generally offered for those already in the field looking to expand on their current skill set, these classes can go up to $5,000 in charge. We don’t recommend creating a master class as your first or even third course, but it is something that can be worked towards if you enjoy teaching!
Master Classes have a way of succeeding when they start becoming communities. When creating a master class, look into creating a community forum or group page for your students to interact. This is a great way to encourage communication between you and your customers while creating a loyal customer base that will want to return and learn new skills and talents from you.
Breaking Down Your Course
Once you’ve decided what your course will be focused on and what format you want to create yours in, it’s time to break down your ideas and start planning! Again, put yourself in the student’s shoes, and work from end to beginning to see how you’ll plan out your lesson. Remember, the point of your course is to provide a solution for someone’s problem, in this case, their lack of knowledge or expertise on a skill or project.
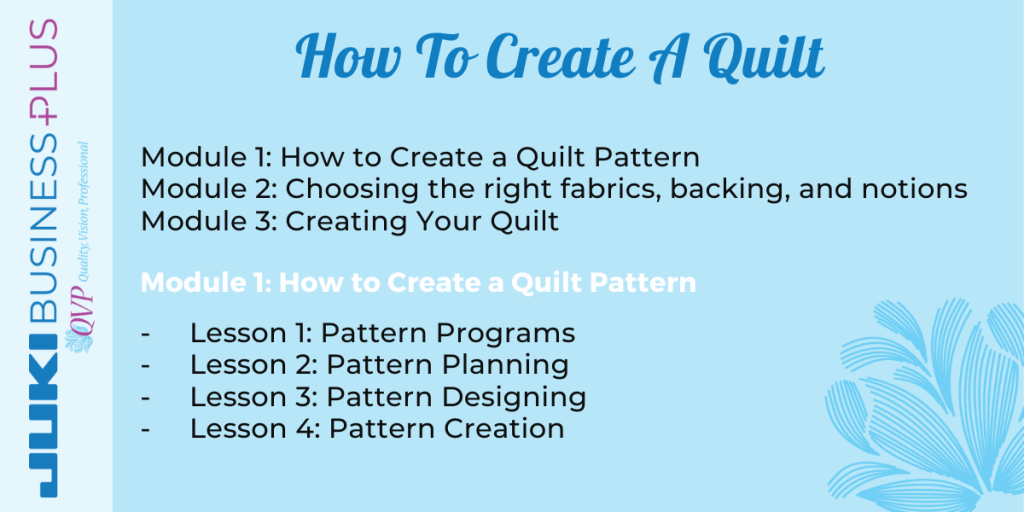
Below is an example of a course breakdown:
Once you have an idea of your outline, depending on how many days your course is and how much time you expect your course to take, it’s time to start planning the content for the lessons and what formats you’ll need to create those in. Besides text, below are examples of content formats you can use in your online course.
Video Content: portray those stitches, curves, feet replacing tricks, and more using video as a tool.
Screencasts and Walkthroughs: if you’re working on a program, like the Tajima Sai Writer, for example, screen record your directions and how-to’s and place those in your course so students can follow along and build with you. Using screencasts and walkthroughs is a great way to show step-by-step instructions when using programs that new users are unfamiliar with.
Downloadable content: Here is where you can place patterns, worksheets, to-do lists, and more that correlate with your lesson plan. Creating interactive work for your lesson plan is a great way to keep the student involved and have them learn these skills hands-on.
Before setting up your content, research what formats other courses use that you find helpful and find out what content students feel most comfortable learning with. Your content will solely focus on your audience group and their needs, so think about what you would like to work with if you were learning.
Setting Those Prices
Pricing will always vary on course cost, but your format is the first step. For example, free and low-cost are recommended if you choose to do a mini-course. On the other hand, high costs are expected if you do a masterclass. Other things to keep in mind when playing with the cost are who your audience is (think of what they’re willing to pay), and your expertise and credibility (the more expert you are in a skill, the more people will want to pay.)
Research your competitor’s pricing and their expertise levels to get an idea of pricing. Don’t sell yourself short, but be realistic when placing pricing. Make sure to set a goal for yourself to decide how many students will need to sign up for your course each month to meet that goal.
Choosing a platform
Once you’ve planned, created, and priced your course, it’s time to choose students who can access the platform. Follow along as we go over a few options you can consider before choosing your venue.
– Udemy: to keep it easy and simple when creating your first online course, we recommend checking out Udemy! With over 50 million current students, their platform can offer you the chance to get your name out there. To create a course, you must first follow the process of being approved as a ‘premium instructor,’ and then you’ll follow easy step-by-step directions on how to set up your first mini-course! With multiple support options for new teachers and programs you can join to up your business game, Udemy is excellent for beginners in the online course world.
– Thinkific: Beginner-friendly, Thinkific is simple and offers ready-to-use templates for those creating their courses. Feel free to follow along with the template and tweak it to your liking as it recommends specific cue points like quizzes, instructor notes, downloads, and more. Created to make your life simple, Thinkific works towards simplifying the creative process so you can enjoy your course faster.
– Skillshare: Those looking for creative skills in crafts tend to float towards Skillshare when it’s time to learn something new! Free to sign up and publish a course. This is a great way to practice creating mini-courses and getting comfortable with building your skills in teaching. Keep in mind that your classes will be accessible here unless listed on Skillshare’s premium catalog.
Getting Your Name Out There
Now that your course is up and running begin marketing your expertise! Work on that email marketing campaign, share your class with your social media pages, encourage others to join and share too, appear in content relevant to your audience and niche, and consider paid ads. It takes time to find the right marketing tools for your audience and see what brings in the right customers, but tests and trials are the perfect way to bring in those students and get your class running.
Don’t forget to ask for reviews and testimonials that can be shared on your sites so new prospective students can get an idea of what your course can do for them! Remember, your course’s goal is to help students accomplish their goals. So don’t take feedback to heart, and listen to your students’ needs as you tweak and perfect your course for future customers.
Let’s Get Started!
Now that you’ve planned and set up your course let’s make it a reality! If you’ve been able to teach yourself and teach others, creating an online course that follows your passion is a great business to look into. Teaching others your passion can be an enriching journey while setting you up to earn money through your expertise and skills! So, if you were to start an online course today, what would you teach?
Interested in starting your business today? Visit us here to see how JUKI can help you start today!