Don’t Miss Your JUKI National Accounts

Continuing from last week, today we’re going to introduce the final 13 shops from our JUKI National Accounts. At JUKI, we know that great feeling you get when you find your favorite sewing shop!

Whether it’s because they carry unique fabrics, accessories you need, or that JUKI sewing machine you love, they’re here to help you create. So follow along below as we finish introducing our current National Account dealers and how you can reach out to them today!

Lake Loveland Sewing Company

Located in Loveland, Colorado, come and visit the Lake Loveland Sewing Company! Offering various options from the JUKI sewing line, from long-arm machines to sergers, their team is excited to help your designs come to life with the suitable machine and accessories you need!

Check out their notions, fabrics, and classes offering the chance to learn new skills and create fun projects! To find out more about Lake Loveland Sewing Company, visit us here today.

McDougal Sewing Center

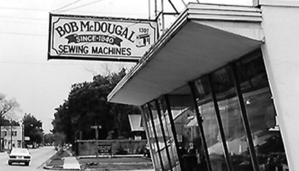
What began as a humble small store in the Houston Heights area known as Bob McDougal Sewing Machine Co. has transformed into today’s McDougal Sewing Center, one of America’s largest sewing machine dealers! Focused on building long-term customer relationships through honesty and hard work, customers can enjoy a sense of friendliness the second they walk through the doors!

On top of their customer service, their shop has benefits focused on the quilter advancing in their skills. Enjoy benefits like their no-risk, one-year trade-up program, unlimited machine usage classes, professional technical service, and more! If you’re in the Katy, Texas, area, you can visit their shop today! Check out their location and learn more about McDougal Sewing Center’s machines, services and classes by visiting our page here today.

NorCal Sewing and Vacuum

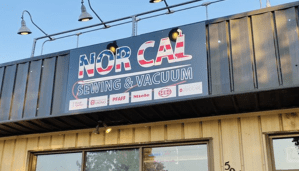
At Norcal Sewing & Vacuum Center, you’ll find a family-owned business ready to help you find the suitable machine for your needs! Offering sewing machine repair services, a diverse inventory of notions, parts, and accessories, and old fashion customer service, you’ll be able to learn more about the JUKI product line and which features and machines are best for you.

To visit Norcal Sewing & Vacuum Center and learn more about their customer benefits, visit here today!

Pocono Sew & Vac

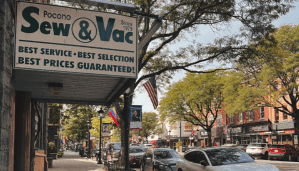
If there’s one thing Pocono Sew and Vac has, it’s an experience! After serving customers for over 40 years and with a team of over 15 people, most with 30-40+ years of industry experience, you can trust that their team is ready to help you start creating! So test-drive their extensive line of JUKIs before you buy, attend classes in their growing education department and trust that your machine is in good hands when shopping at Pocono Sew and Vac, located in the beautiful Pocono Mountains of Pennsylvania.

Need project supplies? Find 3,000 bolts of fabric from the best designers, collect your sewing notions and join their club to receive even greater savings on their already marked-down fabrics. Want to visit Pocono Sew & Vac? Visit our site here today to learn more!

Quilters HQ

To help you become the best quilter, stop by Quilters HQ the next time you’re ready to begin creating! Providing you with the best tools, notions, fabrics, and JUKI sewing or longarm machines, their team is prepared to help you get started today.

Since 2017, this family-owned and operated quilt shop has provided edge-to-edge quilting services, sewing and quilting classes, workshops, and a service and repair team ready to help you maintain your machine. Want a sneak peek of what Quilters HQ can offer? Check out their LIVE sew-along! Visit their Facebook site every Tuesday from 6 – 7 pm for tutorials, inspiration, new products, and more. To learn how you can visit Quilters HQ and meet their team, visit us here today!
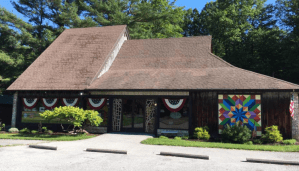
SEW-MINI Things

What was once known as Perrine Sewing & Vacuum Center in the late 1960s in Perrine, FL, has now transformed into the beloved SEW-MINI Things in Lake County, Florida! Offering a variety of our JUKI Sewing and Long-arm sewing machine line, SEW-MINI things is ready to help you find the perfect machine for your project needs.

Here you’ll be able to find a diverse collection of 3900 bolts of fabrics, grab those notions you need for your next project, and receive expert assistance from their team when you visit their shop! To find out more about SEW-Mini Things, visit our website here today.

Southeast Sewing Products

Southeast Sewing Products, also known as Sewingmachine.com, first started in 1982 with one location in Atlanta, before 1995 when owner Mel Tramell expanded the business onto the online world! With two locations in the Atlanta area and a large warehouse, Southeast Sewing Products is ready to help you find the perfect machine by offering you the chance to test-drive your dream picks.

With over 60 years of business, owner Mel Tramell is an enthusiastic leader with a knowledgeable staff ready to teach you those tips and tricks to sewing and quilting on your new machine. Learn more by clicking here today!

The Fabric Center

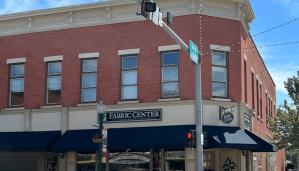
Quilters all over the Midwest know about The Fabric Center! Located in Morris, Illinois, with over 7,000 bolts of fabric choices, a large variety of JUKI products, and a large assortment of quilting patterns, books, and notions quilters like you can visit knowing you’ll find what you need! In addition, their staff is ready to answer your sewing and quilting questions and help you test-drive and find the perfect machine for your space!

Enjoy the perks of buying from The Fabric Center by using their phone and in-person technical support, attending their post-purchase one-on-one machine lessons to get you comfortable with your machine’s ins and outs, and using their authorized service center when the time comes! Whether you’re a new quilter ready to dive in or an experienced quilter looking for fun new patterns and fabrics, The Fabric Center can help your project ideas come to life. Please find out more by visiting us here today!

The Sewing Machine Shop

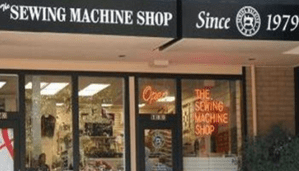
Those familiar with the San Francisco Bay Area will love The Sewing Machine Shop! Located near many cities, this shop is ready to help quilters and sewists like you find the perfect machine and tools to help your project dreams come to life. Filled with our JUKI Sewing and Long-arm sewing machine line, you’ll easily find the suitable machine for your project needs and sewing space!

Enjoy their shop showroom and experience the machine before buying by test-driving on various fabrics and machine options. Also, sign up for their sewing class to familiarize yourself with your new machine! If a repair is needed, you can return to The Sewing Machine Shop and know your machine is in capable hands with their award-winning service department. To learn more about The Sewing Machine Shop and how you can visit, click here!

The Sew’n Place

Providing the community of Fayetteville, PA, with quilting and sewing essentials since 1982, check out The Sew’n Place! Family owned and operated, their shop goal is to help all customers that walk through their front door find the perfect machine for their project needs.

Check out their large selection of premium cotton fabrics, Horn sewing cabinets, sewing notions, rotary cutting tools, quilting supplies, books, patterns, and more! Here you’ll find the tools you need and a large selection of JUKI sewing and long-arm quilting machines ready to help you start crafting. With over 30 years of experience on their staff that offers repairs services, a wide range of sewing and quilting classes, and knowledgeable support, stop by The Sew’n Place to find your next machine! Visit us here today to learn more about The Sew’n Place and how you can visit.
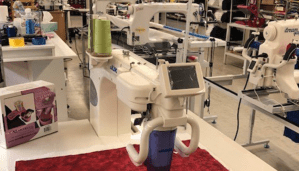
The Stitching Post

Opened in 1986, The Stitching Post is here to find suitable sewing machines and fabric for your projects! Operating out of the heart of corn country, Washington, Indiana, you’ll find a wide variety of materials, books, patterns, and notions. As Southwest Indiana’s largest quilt store, they pride themselves as a space for quilters to visit and leisurely browse its extensive fabric collection and JUKI machine line!

From our long-arm quilting machines to our sergers and even direct to-garment printer RICOH Ri 100, you’ll find suitable machines for your dream projects here.

Welcoming visitors to their version of heaven, quilting in the country, you can learn more about The Stitching Post and how to visit them by going here!

Tops Vacuum and Sewing

A community name in the sewing and quilting world, Tops Vacuum and Sewing offers eleven retail locations with certified technicians and a variety of our JUKI machine line. With Tops, you’ll receive free delivery and set-up on all long arms in the continental US, free shipping on all orders over $50 in the continental US, a free Quilt Motion lesson, and so much more! These benefits make shopping with Tops Vacuum and Sewing fun and easy!

If you’re looking for a sewing machine or thinking about purchasing your sewing machine online, check out Tops Vacuum and Sewing and learn more by visiting us here today.

Village Sewing Center

If you’re located near Santa Rosa, California, it’s time to check out Village Sewing Center! Opened for more than 40 years, this sewing center offers hundreds of options for your crafts. Whether you’re working on quilts, embroidery, or creating garments, owner John Furtado pride themselves in having the basics you’ll need to get started.

Enjoy browsing a variety of JUKI sewing and quilting machine options, browse their large collection of fabric choices, and attend one of their sewing classes to learn a new skill or build a new project! Lastly, shop with comfort, knowing this shop is ready to handle your JUKI repairs and answer any technical questions! If you want to meet Village Sewing Center’s knowledgeable staff and browse their collection visit our site here for more information!

Why Shop at a National Account Dealer?

  1. One-On-One Training: Throughout the year, JUKI trainers visit these dealers to keep their staff up to date on the newest JUKI home products to help provide you with reliable support during and after your purchase.
  2. Qualified Service Department: JUKI’s National Account Retail Dealers maintain a qualified service department, which is trained on JUKI products and has direct support from JUKI America. They’ll be able to help you keep your JUKI expertly tuned up.
  3. JUKI Access: National Account Dealers have access to the entire JUKI Home Sewing product line including direct-to-garment printing, compact commercial embroidery system, longarm quilting, and tabletop quilting along with a full line of sewing machines and sergers for you to experience.

Wherever you’re located, JUKI is working on bringing you the sewing and longarm machines you love and want! Our National Account dealers are a great place to start, thanks to their goals of being your one-stop shop offering notions, fabrics, machines, and so much more. To learn more about our National account dealers and how you can visit one, check out our site here.

Catching Up with Rob Appell

You may recognize this month’s spotlight from “Michael Miller Fabrics Making It Fun” or “Man Sewing,” we’re so excited to spotlight our JUKI Ambassador, Rob Appell, during National Sewing and Quilting month! In today’s blog, we get to speak with Rob about his journey in quilting, his passion for the craft, and how he came to be where he is today.

Robs journey in quilting began when he moved back home from college, spending his free time outside and snowboarding. His mother, the manager and eventual owner of the local quilt shop brought Rob into the business, where he started as a clerk. When his mother began bringing in machines to sell, Rob eventually shifted to machine repairs, and here is where he started falling in love with sewing!

Creating fun Hawaiian shirts as his uniform for the quilt shop, he found himself having fun making them and eventually began looking into patchwork quilting. A fun and easy way to pick up quilting, he began testing his skills in free motion quilting his projects. Again, finding himself loving the hobby. The rest, as they say, is history!

Since he began to quilt, Rob has accomplished a published quilt book, starred in and hosted multiple quilting YouTube shows, created a community for his teachings, and so much more! His videos encourage new quilters to be creative and enjoy their projects! With a focus on basic techniques, his hope when he’s creating for viewers is that they find something they can take away from his lessons and learn how to make their versions.

Recently starring in ‘Michael Miller Fabrics’ Making it Fun,’ you can follow along with his high-energy videos and view the different patterns and free motion quilting techniques Rob uses. While he offers some design patterns and templates for quilters, his work mainly focuses on organic creation. Going with the flow, his work often doesn’t follow design patterns; the finished design patterns he has sold usually come from these organic works he’s completed after the fact!

“The Free Motion Quilting, I prefer to go freestyle, no pattern, sometimes a plan, but usually pretty random and free.”

Quilting didn’t take him away from the outdoors he loved. Combing two of his favorite things, Rob is known for his landscape quilts. These beautiful pieces focus on nature and showcase views in bright colors. In fact, in 2009, Rob created 12 different quilts that featured faces of endangered species. Using the patterns from his work, he was able to fundraise and advocate for these species through sales that went toward endangered species charities.

He also authored a pattern book, “Making Waves … Adventures of a Surf Quilter,” a self-published print book featuring his landscape and seascape quilts. Early in his quilting journey, Rob was known for his scenic creations. Then, using free motion quilting and applique, he would add fun designs like fish, coral, rocks, lighthouses, ships, and more! Then, bringing in his love for surfing, he created a piece that intertwined surf terms with quilting terms, going above the average and setting himself apart.

Now, as someone who’s been quilting and creating those quilting videos we love for years, we asked Rob what keeps him going. “Videos are free and can be viewed over and over again if you’re learning from them. I love to present my passion for quilting.” Rob likes to focus on basic quilting techniques because he’s often reminded of how many new quilters have emerged in the community over the years. Thanks to video cameras and social sites like YouTube, where Rob hosts, he can teach how to construct quilts and the basic skills all quilters want to know. Keeping himself motivated with fun fabrics and the creative process has pushed him to bring that energy into each episode’s studio. Thankful for the following he’s gained on YouTube that keeps him going!

Rob at his studio with the J-350QVP & J-150QVP

He recently created a new quilt, the “Synergy Remix,” designed by Kristie J. Smith in her pattern book, “Splice Magic,” that he loved! Always excited to try out new and different quilting techniques, like he encourages his viewers, Rob locked himself in the quilt shop, Stitchin’ Heaven, his latest collaboration where he’ll be hosting new quilting episodes, and went to work! In one night, he created a quilt and video, maligning the entire project and finishing it. Yet, this project places a smile on his face when he thinks about it.

While Rob has gone on to try other ventures, like his work in textile design with Free Spirit Fabrics, he vouches for his love of quilting. Sharing his love of fabric and free motion quilting, he focuses on his desire to quilt the top to push him through the construction process. Recently, he’s begun focusing on improving his precision in his patchwork! By creating little half-square triangles and trimming them up, he’s found joy in practicing his skills.

Always learning and growing, Rob has begun a new journey in his quilting career with Stitchin’ Heaven! As their new YouTube manager and Content presenter, he’ll be able to create a team of quilt lovers like himself who can share their passion for the craft while teaching others worldwide. Stepping back from handling all processes by himself, he’ll now have quilting friends who will help him create new and exciting projects for viewers like you. We’re excited to see the different techniques and quilting styles that will emerge from this new partnership!

“The thing I love most about the quilting industry is that there is so much for everyone.”

With the quilting community constantly growing as new members find their passion for the hobby, we asked Rob what advice he has for JUKI Quilters. “Get to know your machine, spend 7me learning the nuances, understand what the different feet do and when to use them. Then, remember – this is a hobby, not a race. Please slow down to enjoy the process.” When you enjoy the steps to what you’re creating and take a moment to appreciate each technique you’ve picked up, you’ll truly enjoy the finished project. As Rob mentions, so many people need something positive in their lives. Take the time to find your passion, teach and work with others in your quilting community, and enjoy the process.

We hope you enjoyed learning more about Rob with us, and we hope this inspires you to join him on an online video one day and check out quilting! A hobby for everyone, we hope everyone enjoys National Sewing and Quilting month with a fun new project!

How to Start Your Quilting Business

Do friends and family members ask for you to make quilts for them? Is someone asking where you got that pillow that you quilted yourself? Sometimes, when we get good at our craft, we find people who want to buy our work. That’s when a business starts to grow, so where do you start?

Today we’re going to dive into how you can start your own at-home quilting business. Now, a quilting business doesn’t mean you have to create projects endlessly; in fact, there are possibilities in pattern creation, custom requested works, and more. In this post, we’ve pulled together some steps to make your own quilting business and how to start.

Create Your Business Plan

While a business can start with some scribbled plans in your notes app, creating a successful one without a real plan is much more challenging. Businesses, large and small, begin to see success when some serious planning and budgeting is put into play. A business plan is a roadmap you create for your company.

Business plans should include:

  • Description of your business
  • How do you plan to manage it
  • The products and services you plan to sell
  • Market and competitor research
  • Budget and finance plans
  • Marketing and advertising plans

All of these things can be completed by you, but if you decide to build your brand and go legal, look for a professional who focuses on small businesses. They can help you decide on a business structure that’s best for your plan and are more likely to have contacts that can help you in finance and marketing matters when you need it. Need help creating your plans? Keep up with JUKI Business Plus blog posts to help you start your business here.

Getting the Right Equipment

Now that you have your business idea in motion let’s start thinking about the equipment you’ll need for your small business.

The Machines

The best thing about quilting is it doesn’t require a specialty machine. There are two basic types of machine quilting that quilters can access on most sewing machines—straight line and free motion.

Straight-Line

This type is best accomplished by replacing a regular presser foot with a walking foot and even feed foot. A walking foot is a specialized pressure foot that grips the top of the quilt sandwich, advancing it through the machine at the same rate as the quilt’s back, which touches and is moved along by the sewing machine’s feed dogs.

A machine like the TL-2010Q is perfect for basic straight stitches and piecing. However, a free motion quilting machine like the TL-18QVP or Miyabi J-350QVP is required for designs like curves and intricate patterns.

Free Motion Quilting

With free motion quilting, you’re able to create intricate designs as if you had hand-stitched them into the quilt. Learning FMQ takes time, but many resources are available that teach you to create unique designs.

For FMQ, the machine’s feed dogs are lowered, meaning nothing is in place under the quilt sandwich to guide it along. The quilter is in total control of the motion. Now your speed and how fast you run the sewing machine work together to determine stitch length. You have options on sewing feet like a darning foot or a special foot for machine quilting. Remember that special feet resemble a darning foot but have larger openings.

A machine like the Miyabi J-350QVP is perfect for free motion quilting since you have a large workspace and can use the machine bars to move and design intricate pieces.

What to Sell

If you’ve thought about opening your quilting business, you probably already have some ideas set aside on what you would sell in your shop. However, there are so many ways to make money with your long-arm or sewing machine, so let’s review some options for what you can do with yours!

Quilts Commissions

Not everyone has the skills for quilting, and that’s where quilters like you come in to help! With so many quilt lovers in the world who don’t have the time and skills to create their ideas, you can offer services for making custom quilts. A venture like this is excellent because of revenue, as shoppers pay well for handcrafted personalized items.

Mass Production

Use that machine! Mass production doesn’t have to mean creating 100’s of quilts, but instead using simple designs and creating multiples of the quilt to sell in marketplaces or e-shops. Also, not every quilt has to be unique, as many homeowners enjoy simple pieces they can add to family rooms and bedrooms.

Patterns

Owning a quilting business doesn’t mean just selling quilts. Many quilters love to try their hand at creating new projects. Create patterns and upload their PDF files onto your site! By selling physical copies to your local quilt shop, you now have a product that people can continually purchase that doesn’t require you to quilt!

Long-Arm Rentals

Do you have a long arm at home? Many quilters work on domestic home machines, meaning they don’t have that large workspace long-arm quilters have. Offer long-arm rentals to local quilters for hourly rates, and enjoy that time to work on other projects. You can also offer your skills for rent and finish quilts for others on your long arm.

Teach Quilting

If you’ve been quilting for years, attended quilting classes yourself, and find yourself teaching friends and family, look into teaching! Contact your local quilt shop’s favorite sewing brands, or start your own social media channel. There are always new quilters in the world looking for instruction, and with technology, you can offer online and in-person education.

How and Where to Sell

Now that you have an idea of what services and products you can offer let’s discuss how you will reach your audience and sell to them. In our day and age, many small businesses begin on social media platforms or e-shops.

Social Media and Sales

The best way to reach your audience is through social media platforms. Easily accessible and free to use, sites like Facebook, Instagram, Tiktok, and more have opened up new sales channels for small businesses. One of the first things you should do when starting a side-hustle is set up a business or company page. Many customers now run to social media sites to see if your company is legit before ordering. In addition, these sites offer customers the opportunity to see what kind of products and services you offer, customer reviews, and so much more.

Social media sites now offer selling points for businesses as well. Facebook marketplace, for example, is perfect for selling home goods. Anyone can post an item for sale, and you can hit niche markets easily by discovering pages and groups for specific topics. Facebook marketplace does hold guidelines that sellers must abide by when selling, and can be found here. (link guidelines)

Instagram offers its version of an e-shop now as well. With Instagram shopping, you’re able to post products for sale directly onto your Instagram account. Think of this as a digital storefront for your shop. You can include graphics, videos, shopping tags, and more to drive sales. It also allows you to place full product descriptions, advertisements, and more. However, unlike Facebook, there is an approval process for selling on Instagram’s shop. To have a shop on Instagram, you need a business page, Instagram shop approval, and a small fee is applied.

Remember that you don’t need to invest money when selling on social media off the bat. Instead, you can focus on organically growing your business by word of mouth, using engaging posts, and attaching hashtags to your descriptions.

E-Shops

If you feel you’ve outgrown selling on social media sites and want to upgrade, the next step we recommend is researching e-shops. Now there are multiple options when it comes to opening an e-shop, so we gathered a few of the top ones below:

eBay: This eCommerce site has been a go-to for sellers since 1995. With the ability to sell any form of product and service, you can sell services like finishing quilts, or you sell your hand-made projects. Their fees include non-refundable product/service listings and fee charges if you’re placing your product in multiple categories for sale. The perks of this site revolve around its popularity. With eBay constantly having high traffic, your items can easily be accessed by customers all over the country.

Etsy: Artisan-focused and highly popular, Etsy is the perfect e-shop location for someone opening their small business. This site allows you to promote and sell your handcrafted products at low fees. Listing fees are $0.20 for each item and will last for four months. This site is great for upgrading their shops but isn’t ready to fully commit to a website.

Shopify: Shopify is an excellent option for those opening their first e-shop. With Shopify, you can create a website to sell your products and customize the site to your aesthetic. This is a significant step when building your credibility as an established business! Everything is now done on this site, from placing products and selling to handling inventory and processing payments. Shopify comes with a monthly fee from a Basic package of $29 to an Advanced package for $299.

In-Person Sales

If you’re someone who enjoys selling in person, research your local farmer’s markets and artisan fairs! You can purchase a shop space and sell to new customers you wouldn’t have reached online by communicating with these event planners. These events do require a larger budget and should be planned accordingly. Keep in mind the furniture you’ll need to showcase your products, how you’ll handle money, and other variables like food, inventory, and more. ‘

Get To Work

Now that you have a basic rundown of what you need to start your new side business, it’s time to sit down and plan! Circling back to the start of our planning, it’s time to create that business plan. Remember to include your product/service plan, marketing plan, budget plan, and finance plan. Starting a business plan is like building a roadmap. Follow the roadmap, and you’ll have a much higher chance of reaching your destination, a thriving business, than trying to jump into this with a few notes written down.

We hope this has been able to help you get a clearer vision for your future quilting business! So if you’re looking to start your own quilting business, join us here to learn more about JUKI Business plus and how we can help you today!

JUKI Spotlight: Blossoming with Flower Sew!

From quilting to bag making, Flower Sew has you covered! Today we’re meeting up with Daisi Toegel, Flower Sew’s shop owner. In 2017, Daisi founded Flower Sew only one year after learning how to sew. Flower Sew began as an idea out of curiosity for the sewing world. After watching endless videos of other sewists creating bags and projects on video sites, Daisi found herself wanting a sewing machine to start her journey in the community. A year after seeing these videos, Daisi’s boyfriend surprised her with a sewing machine to begin, and the rest was history.

Daisi went on to practice and practice some more after receiving her gift. Finally, a year after receiving her gift, Daisi began constructing bag patterns, creating and selling them. Since completely self-teaching herself, she sewed and sold bags for three years at her local craft fairs and on her online e-shop, Flower Sew, named after her now husband’s pet name for Daisi, Flower.

After three years of focusing on bag creations and patterns, 2020 changed the course of Daisi’s business. She began creating and selling masks during the pandemic, creating and designing over 2,000 masks. Daisi, later on, realized she wanted to take a step back from sewing masks and find a new craft within the sewing world. So she began venturing into the quilting world, where she taught herself to quilt, and began expanding her knowledge and business along the way.

Taking a step back from her bag-making days, Daisi jumped into the quilting world head-on. Using her social media platforms, she began sharing her progress and work with her followers, re-building her brand along the way. 

Now focused on quilting, Daisi has held six ambassador roles over the years that range from small notions to beautiful fabrics. These programs helped her not only grow her business but allowed her to make connections in the sewing and quilting community.

After discovering her passion for creating quilts, she moved on to pattern designing, a hobby she had picked up in her bag-making days. When she started patterns for her bags, she was inspired to design something different and new. Quilting was no different. She bought a design program and began drawing! Starting small, Daisi began with baby-sized quilts and built herself up through trial and error. Through this practice that she’s been able to create seven patterns; 4 on her own and 3 in collaboration with different craft and sewing magazines. Many of her patterns interwork the ambassador programs she’s involved with by including their notions and fabrics. 

As someone who’s been able to grow her business and obtain credibility from other sewing and quilting brands as an ambassador, we asked Daisi what advice she has for those out there trying to build their brand.

“Forget about money. In the beginning, it’s all about gaining value and confidence before you gain any money. If you need to give your time, work, or product for free, do it. The reward is certain, just know everything has its own time to come. Being an ambassador doesn’t involve anything but receiving products in exchange for your time and work, and it is the most wonderful experience I have had in the quilt world; it’s fun, and I learn a lot. There’s nothing that says that.”

Daisi’s brand continues to grow each day through her social media channels filled with new pattern works, projects, and her quilt progresses. What makes Flower Sew unique is the designs and patterns created by Daisi, inspired by ideas that bring her happiness and not trends. Focusing her attention on bright colors and fun designs, Daisi’s page is filled with bright fabrics and colorful looks. As she continues to grow her skills in quilting, we’re looking forward to seeing more patterns released!

The future of Flower Sew is blossoming beautifully! Daisi’s plans for her small business include more original pattern creations, with the hope for a pattern book soon, and continuing her ambassador programs with new possible positions. Currently, a sketch is in motion for membership for Daisi’s business, but we’ll have to wait and see for that one JUKI lover!

We hope you enjoyed getting to learn more about Flower Sews and its owner Daisi Togel! When you’re building your brand, learning skills like pattern designing or diving into ambassador programs are great ways to get yourself out there and grow your business. We hope reading Daisi’s story in how her business has grown and changed over the years inspires you to begin yours!

To follow along Daisi’s journey, follow along below.

Visit Flower Sew’s shop here!

Follow Daisi’s quilting journey here!

Let’s Create A Quilt Pattern

Have you been dreaming of a quilt idea, but you’re not sure how to bring it to life? At JUKI, we want to help you elevate your quilting skills, which comes with learning how to create your own quilt patterns and designs. So we created a base for you to start with different methods to make a pattern and applications that can assist.

Start from the Beginning

Before we can dive into creating a pattern, let’s touch base on the creative process it takes to get there. One of the best things you can do is begin a design journal, where you can jot down notes, attach scraps of fabrics, place photos, and more that will lead you to create the design you’re imagining.

Learn to upload your ideas into a digital surface. You can redraw and clean up your designs from their sketch versions here. Create a library and label it with a title like ‘New Patterns’ to keep up with your ideas. With this digital organization, you can keep a hold on pattern ideas and add touches as inspiration comes until you have a quilt design you’re ready to work with and bring to life.

If this is your first time designing a quilt, and a blank page seems daunting, lean into the power of self-imposed limitations. Create with quilt size in mind, limit yourself to fabrics already in your arsenal, hold yourself to only using 6 fat quarters. When you start off, creating limits on designs creates a constraint on specific variables, allowing those free variables to make you think outside the box and design quilts you wouldn’t have created otherwise.

Breaking Down A Quilt

Let’s begin by breaking up the layout.

Look at your design and find the repeating elements. Here is where we’ll start forming the blocks. Figuring out your blocks is usually an easy process; however, working more towards modern or complicated patterns can be more challenging. When you first start creating your patterns, start with repetition and begin building your blocks for the quilt and pattern from there.

As you design your quilt, figure out the arrangement style you plan to work with. While some block designs need to be in even numbers for the quilt to come out right, other times you can create symmetric blocks that allow you to use either odd or even numbers. Remember that patterns can be built with one size in mind or edited for different size options. If you’re someone who plans to sell their patterns, customers look favorably upon having the option to choose sizes.

Once you’ve determined the design and size of your quilt, you can choose between adding borders or not. Borders are an excellent addition for multiple reasons; cleaner finish, more breathing space when creating, or as an addition to the size of your quilt pattern. Depending on your design, you can widen or tighten the border size and allow those who use your pattern the option to decide what best fits them.

Keep in mind that a quilt block size averages 6″ to 18″. You have the option to create other shapes like triangles, rectangles, and more if you want to venture away from traditional squares.

Guidelines for Pattern Creating

Now that we have a design idea, we can begin writing instructions. As you start creating the instructions and erasing and creating some more, you’ll begin to build an instruction guide that others can follow along with. Here are some things to keep in mind when writing out your pattern instructions.

  • Who is this pattern being marketed to?

Break down your pattern and think about who will be trying to follow along. New quilters will need more instructions than advanced quilters that don’t need much detail. Keep this in mind as you add instructions, tips, and illustrations to your work.

  • Instructions

Patterns don’t usually have instructions on basic techniques, like baste, quilt, and bind. Still, it usually includes instructions for advanced techniques like binding corners and adding curved piecing. To keep patterns from being overfilled with instructions, you can include links to videos and blogs that dive deeper into specific techniques.

  • Keep A Pattern Piece Library

Your first pattern creation might be complex, but once you have a few under your belt, you’ll find that it’s easy to re-use previous patterns when creating new ones. If you keep up with past projects and use them as foundations for new ones, you’ll save time, and your patterns will begin advancing.

  • Be Consistent

If you’re writing patterns to share with others, make sure to be consistent in quilting terms. When it comes time to patent your patterns if you’re choosing to sell, not having the correct terms can cause you to lose the patent. The consistent format also includes focusing on writing your measurements, quilting terminology, and your action and verb tenses. Keep in mind to label your fabric pieces, like Fabric A and Fabric B, so that the instructions are easy to follow.

Breakdown the Quilt Measurements

Now that we’ve moved on to instructions, math is the most crucial factor. Follow along as we go over a quilt example to show you an easy way to calculate your quilt squares and cutting requirements.

Step 1: Quilt block and Cutting instructions

Let’s begin by breaking down the block into its individual components. Our example quilt comprises a 3 x 3 arrangement of components.

Let’s break down these pieces further! Include pieces like HST components here.

You are now at the individual fabric pieces if you’re creating a simple quilt like we’re showing here. However, if your designs are more complex and have more components, keep breaking it down until you’ve hit every piece you need for each block.

Now that we know the individual pieces needed let’s multiply the fabric pieces per block and place that in its own column. Our example quilt will have 12 blocks in a 3×4 block placement, so we will multiply by 12. Once you’ve calculated how many blocks you’ll need, your last column should showcase how many fabric pieces you’ll need for the project in total.

Now that we have the pieces planned for our quilt, let’s move on to creating cutting instructions.

A. Charm Squares: 24 are used as-is for making the HSTs (6” x 6”) and 12 trimmed for the centers of each block (5 ½” x 5 ½”).

B. Minimum background fabric required:

                1. Figure out how many pieces can be cut from a single width of fabric (WOF) strip for each of the fabric pieces:

Dividing 50” (our assumed WOF) by 5 ½” you get 9.09 so round down to 9. You can get 9 squares 5 ½” x 5 ½” from each 5 ½” x WOF strip.

Dividing 50” by 6” you get 8.333 so round down to 8. You can get 8 squares 6” x 6” from each 6” x WOF strip.

                2. Divide the number of fabric pieces needed by the number of pieces you can get per strip to figure out how many strips are required.

Our example pattern requires 48 background squares (5 ½” x 5 ½”) and you can get 9 squares per strip so 48/9 = 5.333 which rounds out to 5. In this case, to cut 48 squares, you will need 5 strips of 5 ½” x WOF.

Our example pattern also requires 24 squares for the HSTs (6” x 6”) and you can get 8 squares per strip so 24/8 = 3. To cut 24 squares (6” x 6”), you will need 3 strips of 6” x WOF.

Step 2: Let’s Add a Border!

A finished quilt looks great with a border! Let’s go over how to figure out the strips you’ll need for the border.

Here’s how to figure out your yardage for the side borders:

# of blocks x-height of blocks (unfinished) – ½ times [# of blocks -1]

To create the top and bottom borders, use this equation:

Quilt top width + side border thickness + the side border thickness – 1″ (for seam allowances).

Step 3: Find The Yardage For The Quilt Top

To calculate the yardage of background fabric needed, multiply the number of strips times the thickness of the strips for all of the strip sizes you use.

Step 4: Include Binding Fabric Measurements

Calculate the binding fabric (for a straight grain), by adding up the lengths of the 4 sides and adding 10″ of safe space before dividing by the width of fabric.

Step 5: Don’t forget the Backing!

This is a simple measurement; we recommend adding an 8″ overhang, 4″ on each side, to your quilt top width. This is basic for all quilts and what’s usually required by quilters. The best thing to keep in mind is that programs available on your phone and computer can assist with calculating these measurements. For example, Robert Kaufman has a free mobile app to calculate borders, binding, backing, and more.

Let’s Create Our Pattern Sheet

Once you’ve finalized the sizing needed and the designs you’ll create, we can begin putting together a physical pattern. There are programs available to quilters that can help you create patterns. Whether you choose to use programs you might already have, like Microsoft, or invest in higher-tech ones like EQ7 or EQ8, we broke down a few you can look into.

Design and Pattern Layout Programs

Microsoft PowerPoint: This program can be found in most electronics and is universally used. It’s great for the basics when starting off and is very user-friendly. The only setbacks are aligning blocks can be complex, and vector images aren’t accepted.

Electric Quilt (EQ8): This is an excellent program for editing quilts, and it allows you to break down quilt designs so that you can export portions at a time. However, it is challenging to create HST’s and can result in low-quality images in the export process.

Adobe Illustrator: This program is perfect for those that enjoy advanced artwork. You can create vector images and obtain high-resolution photos, and there’s an extensive resource library available for any learning curve. The cons of this program is that it does come with a fee of around $20 per month.

Adobe Indesign: This program is best for pattern layouts and offers the most professional quality. Like Illustrator, it does come with a monthly fee and learning curve.

Corel Draw: Perfect pattern designing and layouts, Corel Draw allows you to create art, export in vector files for high-quality images, and hit a lower cost point.

Images and Graphics to Include

Illustrations:

  1. Cutting: if you have an efficient way to cut, include how in the instructions
  2. Block Piecing: The majority of your illustrations will show the pieces assembled together. We recommend starting from the finished block and breaking down from there.
  3. Quilt Top Assembly: Showcase how the blocks go together into the quilt top.
  4. Optional: Include how the backing is pieced, bonus tips, and templates.

Text:

  1. Introduction/notes: Describe the pattern, inspiration mentions, and more.
  2. Material requirements: List all material requirements, including sizing.
  3. Cutting: Include the calculations and measurements needed for cutting.
  4. Block assembly: Walkthrough creating the blocks and assembling the quilt.
  5. Quilt top assembly: Walk through the instructions of piecing the blocks together and assembling the quilt.
  6. Finishing: Walk through the backing, binding, batting, and more instructions.

When you’ve completed creating a pattern, creating a PDF file is the last step. This file format is the most commonly sold in pattern networks and is the easiest to access across platforms.

Get To Testing!

Lastly, before selling your pattern creations, it’s time to go through some trial testing. Share this pattern with trusted friends and family members who can review your work and provide feedback. Request that they confirm the measurements were correct, that the pattern was readable and that they’re able to follow, and more. Use this as an opportunity to spruce up your creation for potential buyers. Then, build the pattern yourself and see what could be added or removed in your work.

Time to Publish!

Once you’ve triple-checked your pattern and decided it’s time to publish, take time to determine how you’re going to sell and where. Digital PDFs are the easiest to share and sell online, and printed patterns can be sold at markets, shows/events, and local quilt shops. Look into E-shops like Etsy and Craftsy when starting off your online shop, and if you choose to go physical, contact your local artisan markets and quilt shops for possible sale opportunities.