
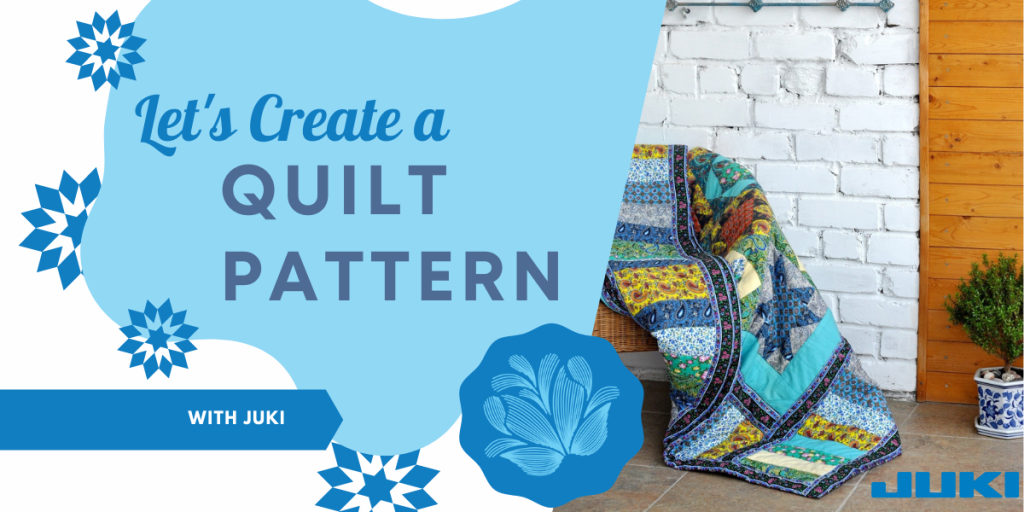
Have you been dreaming of a quilt idea, but you’re not sure how to bring it to life? At JUKI, we want to help you elevate your quilting skills, which comes with learning how to create your own quilt patterns and designs. So we created a base for you to start with different methods to make a pattern and applications that can assist.
Start from the Beginning

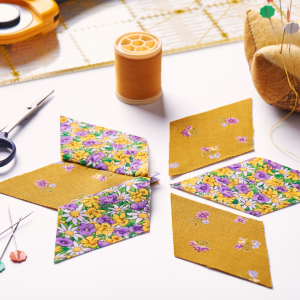
Before we can dive into creating a pattern, let’s touch base on the creative process it takes to get there. One of the best things you can do is begin a design journal, where you can jot down notes, attach scraps of fabrics, place photos, and more that will lead you to create the design you’re imagining.
Learn to upload your ideas into a digital surface. You can redraw and clean up your designs from their sketch versions here. Create a library and label it with a title like ‘New Patterns’ to keep up with your ideas. With this digital organization, you can keep a hold on pattern ideas and add touches as inspiration comes until you have a quilt design you’re ready to work with and bring to life.
If this is your first time designing a quilt, and a blank page seems daunting, lean into the power of self-imposed limitations. Create with quilt size in mind, limit yourself to fabrics already in your arsenal, hold yourself to only using 6 fat quarters. When you start off, creating limits on designs creates a constraint on specific variables, allowing those free variables to make you think outside the box and design quilts you wouldn’t have created otherwise.
Breaking Down A Quilt
Let’s begin by breaking up the layout.
Look at your design and find the repeating elements. Here is where we’ll start forming the blocks. Figuring out your blocks is usually an easy process; however, working more towards modern or complicated patterns can be more challenging. When you first start creating your patterns, start with repetition and begin building your blocks for the quilt and pattern from there.
As you design your quilt, figure out the arrangement style you plan to work with. While some block designs need to be in even numbers for the quilt to come out right, other times you can create symmetric blocks that allow you to use either odd or even numbers. Remember that patterns can be built with one size in mind or edited for different size options. If you’re someone who plans to sell their patterns, customers look favorably upon having the option to choose sizes.
Once you’ve determined the design and size of your quilt, you can choose between adding borders or not. Borders are an excellent addition for multiple reasons; cleaner finish, more breathing space when creating, or as an addition to the size of your quilt pattern. Depending on your design, you can widen or tighten the border size and allow those who use your pattern the option to decide what best fits them.
Keep in mind that a quilt block size averages 6″ to 18″. You have the option to create other shapes like triangles, rectangles, and more if you want to venture away from traditional squares.
Guidelines for Pattern Creating
Now that we have a design idea, we can begin writing instructions. As you start creating the instructions and erasing and creating some more, you’ll begin to build an instruction guide that others can follow along with. Here are some things to keep in mind when writing out your pattern instructions.
- Who is this pattern being marketed to?
Break down your pattern and think about who will be trying to follow along. New quilters will need more instructions than advanced quilters that don’t need much detail. Keep this in mind as you add instructions, tips, and illustrations to your work.
- Instructions
Patterns don’t usually have instructions on basic techniques, like baste, quilt, and bind. Still, it usually includes instructions for advanced techniques like binding corners and adding curved piecing. To keep patterns from being overfilled with instructions, you can include links to videos and blogs that dive deeper into specific techniques.
- Keep A Pattern Piece Library
Your first pattern creation might be complex, but once you have a few under your belt, you’ll find that it’s easy to re-use previous patterns when creating new ones. If you keep up with past projects and use them as foundations for new ones, you’ll save time, and your patterns will begin advancing.
- Be Consistent
If you’re writing patterns to share with others, make sure to be consistent in quilting terms. When it comes time to patent your patterns if you’re choosing to sell, not having the correct terms can cause you to lose the patent. The consistent format also includes focusing on writing your measurements, quilting terminology, and your action and verb tenses. Keep in mind to label your fabric pieces, like Fabric A and Fabric B, so that the instructions are easy to follow.
Breakdown the Quilt Measurements
Now that we’ve moved on to instructions, math is the most crucial factor. Follow along as we go over a quilt example to show you an easy way to calculate your quilt squares and cutting requirements.
Step 1: Quilt block and Cutting instructions
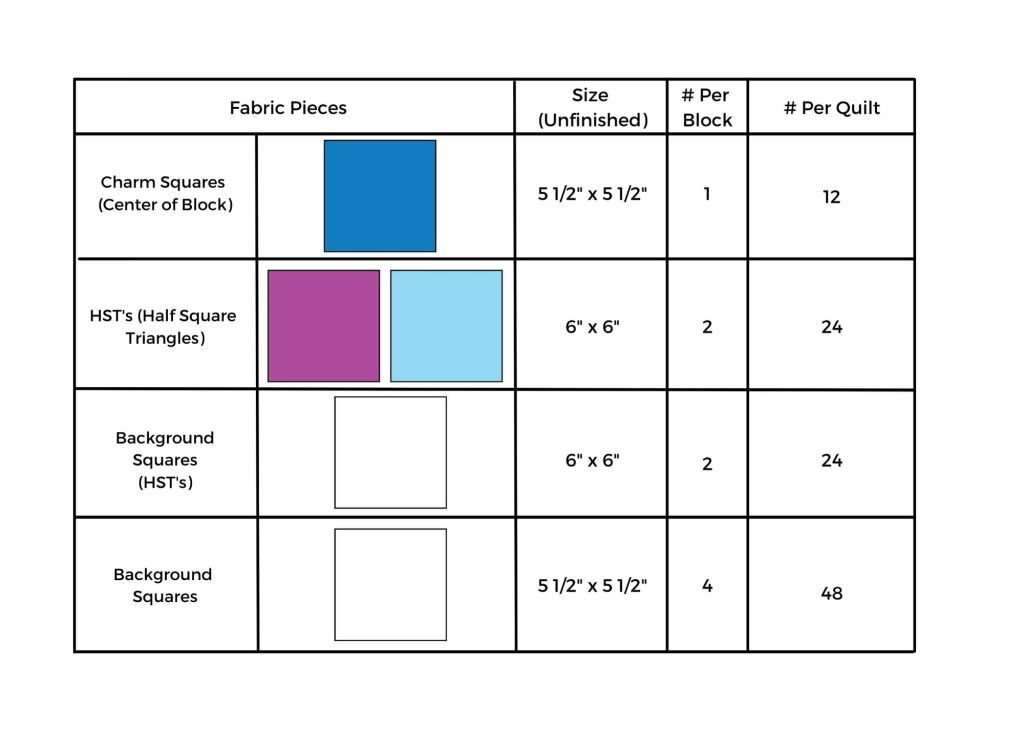
Let’s begin by breaking down the block into its individual components. Our example quilt comprises a 3 x 3 arrangement of components.

Let’s break down these pieces further! Include pieces like HST components here.

You are now at the individual fabric pieces if you’re creating a simple quilt like we’re showing here. However, if your designs are more complex and have more components, keep breaking it down until you’ve hit every piece you need for each block.
Now that we know the individual pieces needed let’s multiply the fabric pieces per block and place that in its own column. Our example quilt will have 12 blocks in a 3×4 block placement, so we will multiply by 12. Once you’ve calculated how many blocks you’ll need, your last column should showcase how many fabric pieces you’ll need for the project in total.
Now that we have the pieces planned for our quilt, let’s move on to creating cutting instructions.
A. Charm Squares: 24 are used as-is for making the HSTs (6” x 6”) and 12 trimmed for the centers of each block (5 ½” x 5 ½”).
B. Minimum background fabric required:
1. Figure out how many pieces can be cut from a single width of fabric (WOF) strip for each of the fabric pieces:
Dividing 50” (our assumed WOF) by 5 ½” you get 9.09 so round down to 9. You can get 9 squares 5 ½” x 5 ½” from each 5 ½” x WOF strip.

Dividing 50” by 6” you get 8.333 so round down to 8. You can get 8 squares 6” x 6” from each 6” x WOF strip.
2. Divide the number of fabric pieces needed by the number of pieces you can get per strip to figure out how many strips are required.
Our example pattern requires 48 background squares (5 ½” x 5 ½”) and you can get 9 squares per strip so 48/9 = 5.333 which rounds out to 5. In this case, to cut 48 squares, you will need 5 strips of 5 ½” x WOF.
Our example pattern also requires 24 squares for the HSTs (6” x 6”) and you can get 8 squares per strip so 24/8 = 3. To cut 24 squares (6” x 6”), you will need 3 strips of 6” x WOF.
Step 2: Let’s Add a Border!
A finished quilt looks great with a border! Let’s go over how to figure out the strips you’ll need for the border.
Here’s how to figure out your yardage for the side borders:
# of blocks x-height of blocks (unfinished) – ½ times [# of blocks -1]
To create the top and bottom borders, use this equation:
Quilt top width + side border thickness + the side border thickness – 1″ (for seam allowances).

Step 3: Find The Yardage For The Quilt Top
To calculate the yardage of background fabric needed, multiply the number of strips times the thickness of the strips for all of the strip sizes you use.
Step 4: Include Binding Fabric Measurements
Calculate the binding fabric (for a straight grain), by adding up the lengths of the 4 sides and adding 10″ of safe space before dividing by the width of fabric.
Step 5: Don’t forget the Backing!
This is a simple measurement; we recommend adding an 8″ overhang, 4″ on each side, to your quilt top width. This is basic for all quilts and what’s usually required by quilters. The best thing to keep in mind is that programs available on your phone and computer can assist with calculating these measurements. For example, Robert Kaufman has a free mobile app to calculate borders, binding, backing, and more.
Let’s Create Our Pattern Sheet
Once you’ve finalized the sizing needed and the designs you’ll create, we can begin putting together a physical pattern. There are programs available to quilters that can help you create patterns. Whether you choose to use programs you might already have, like Microsoft, or invest in higher-tech ones like EQ7 or EQ8, we broke down a few you can look into.
Design and Pattern Layout Programs
Microsoft PowerPoint: This program can be found in most electronics and is universally used. It’s great for the basics when starting off and is very user-friendly. The only setbacks are aligning blocks can be complex, and vector images aren’t accepted.
Electric Quilt (EQ8): This is an excellent program for editing quilts, and it allows you to break down quilt designs so that you can export portions at a time. However, it is challenging to create HST’s and can result in low-quality images in the export process.
Adobe Illustrator: This program is perfect for those that enjoy advanced artwork. You can create vector images and obtain high-resolution photos, and there’s an extensive resource library available for any learning curve. The cons of this program is that it does come with a fee of around $20 per month.
Adobe Indesign: This program is best for pattern layouts and offers the most professional quality. Like Illustrator, it does come with a monthly fee and learning curve.
Corel Draw: Perfect pattern designing and layouts, Corel Draw allows you to create art, export in vector files for high-quality images, and hit a lower cost point.
Images and Graphics to Include
Illustrations:

- Cutting: if you have an efficient way to cut, include how in the instructions
- Block Piecing: The majority of your illustrations will show the pieces assembled together. We recommend starting from the finished block and breaking down from there.
- Quilt Top Assembly: Showcase how the blocks go together into the quilt top.
- Optional: Include how the backing is pieced, bonus tips, and templates.
Text:
- Introduction/notes: Describe the pattern, inspiration mentions, and more.
- Material requirements: List all material requirements, including sizing.
- Cutting: Include the calculations and measurements needed for cutting.
- Block assembly: Walkthrough creating the blocks and assembling the quilt.
- Quilt top assembly: Walk through the instructions of piecing the blocks together and assembling the quilt.
- Finishing: Walk through the backing, binding, batting, and more instructions.
When you’ve completed creating a pattern, creating a PDF file is the last step. This file format is the most commonly sold in pattern networks and is the easiest to access across platforms.
Get To Testing!
Lastly, before selling your pattern creations, it’s time to go through some trial testing. Share this pattern with trusted friends and family members who can review your work and provide feedback. Request that they confirm the measurements were correct, that the pattern was readable and that they’re able to follow, and more. Use this as an opportunity to spruce up your creation for potential buyers. Then, build the pattern yourself and see what could be added or removed in your work.
Time to Publish!
Once you’ve triple-checked your pattern and decided it’s time to publish, take time to determine how you’re going to sell and where. Digital PDFs are the easiest to share and sell online, and printed patterns can be sold at markets, shows/events, and local quilt shops. Look into E-shops like Etsy and Craftsy when starting off your online shop, and if you choose to go physical, contact your local artisan markets and quilt shops for possible sale opportunities.


