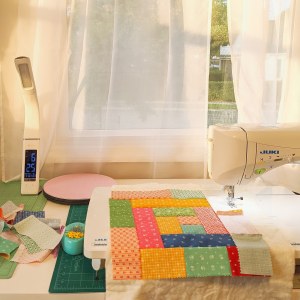
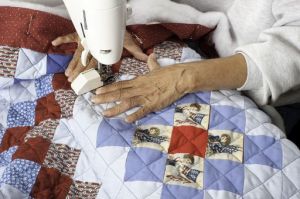
From quilting to bag making, Flower Sew has you covered! Today we’re meeting up with Daisi Toegel, Flower Sew’s shop owner. In 2017, Daisi founded Flower Sew only one year after learning how to sew. Flower Sew began as an idea out of curiosity for the sewing world. After watching endless videos of other sewists creating bags and projects on video sites, Daisi found herself wanting a sewing machine to start her journey in the community. A year after seeing these videos, Daisi’s boyfriend surprised her with a sewing machine to begin, and the rest was history.
Daisi went on to practice and practice some more after receiving her gift. Finally, a year after receiving her gift, Daisi began constructing bag patterns, creating and selling them. Since completely self-teaching herself, she sewed and sold bags for three years at her local craft fairs and on her online e-shop, Flower Sew, named after her now husband’s pet name for Daisi, Flower.
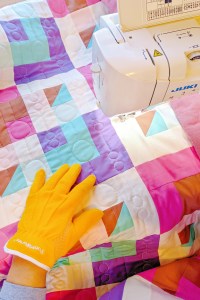
After three years of focusing on bag creations and patterns, 2020 changed the course of Daisi’s business. She began creating and selling masks during the pandemic, creating and designing over 2,000 masks. Daisi, later on, realized she wanted to take a step back from sewing masks and find a new craft within the sewing world. So she began venturing into the quilting world, where she taught herself to quilt, and began expanding her knowledge and business along the way.
Taking a step back from her bag-making days, Daisi jumped into the quilting world head-on. Using her social media platforms, she began sharing her progress and work with her followers, re-building her brand along the way.
Now focused on quilting, Daisi has held six ambassador roles over the years that range from small notions to beautiful fabrics. These programs helped her not only grow her business but allowed her to make connections in the sewing and quilting community.
After discovering her passion for creating quilts, she moved on to pattern designing, a hobby she had picked up in her bag-making days. When she started patterns for her bags, she was inspired to design something different and new. Quilting was no different. She bought a design program and began drawing! Starting small, Daisi began with baby-sized quilts and built herself up through trial and error. Through this practice that she’s been able to create seven patterns; 4 on her own and 3 in collaboration with different craft and sewing magazines. Many of her patterns interwork the ambassador programs she’s involved with by including their notions and fabrics.
As someone who’s been able to grow her business and obtain credibility from other sewing and quilting brands as an ambassador, we asked Daisi what advice she has for those out there trying to build their brand.
“Forget about money. In the beginning, it’s all about gaining value and confidence before you gain any money. If you need to give your time, work, or product for free, do it. The reward is certain, just know everything has its own time to come. Being an ambassador doesn’t involve anything but receiving products in exchange for your time and work, and it is the most wonderful experience I have had in the quilt world; it’s fun, and I learn a lot. There’s nothing that says that.”
Daisi’s brand continues to grow each day through her social media channels filled with new pattern works, projects, and her quilt progresses. What makes Flower Sew unique is the designs and patterns created by Daisi, inspired by ideas that bring her happiness and not trends. Focusing her attention on bright colors and fun designs, Daisi’s page is filled with bright fabrics and colorful looks. As she continues to grow her skills in quilting, we’re looking forward to seeing more patterns released!
The future of Flower Sew is blossoming beautifully! Daisi’s plans for her small business include more original pattern creations, with the hope for a pattern book soon, and continuing her ambassador programs with new possible positions. Currently, a sketch is in motion for membership for Daisi’s business, but we’ll have to wait and see for that one JUKI lover!
We hope you enjoyed getting to learn more about Flower Sews and its owner Daisi Togel! When you’re building your brand, learning skills like pattern designing or diving into ambassador programs are great ways to get yourself out there and grow your business. We hope reading Daisi’s story in how her business has grown and changed over the years inspires you to begin yours!
To follow along Daisi’s journey, follow along below.
Celebrate National Quilting Month by bringing out your favorite charm squares, jelly rolls, and sandwiches! Whether you’re creating for friends and family or your small business, we’ve put together a few fun ideas for projects you can quilt next.
Wall Hanging
Decorating new office spaces or livening up current homes is easy with wall hangings. Projects like these are perfect because you can create smaller designs than quilts and use them for seasonal purposes. With the ability to create on a large or small scale, you can try new techniques like adding embellishments and accents (for example, cording) that you wouldn’t have thought of using before. This project is excellent for when holidays and birthdays come around since it can brighten up any room, from a nursing home to your kid’s college dorm.
Accessories like the Couching Foot are perfect when creating wall hangings. They allow you to add three-dimensional textures to your projects, bringing in an extra element that will make your design pop. Use decorative threads like yarn and cord or other thicker threads that don’t fit your needle.
Pillows
Pillows are great for many reasons:
You can create beautiful personalized décor and treat pillows like a small sample for a quilt idea you have by making that one block you need. A pillow allows you the freedom of creation like a quilt, with less fabric and space required.
You can treat pillows as an add-on to your quilts and create matching or complementary designs.
Creating simple add-ons like pillows is a great way to increase your revenue if you have a small business.
Look into an accessory like theGlide Foot when creating décor like pillows. This foot can help you glide along with applique, and other three-dimensional textures, allowing you to get creative and add more personalization to your projects.
Table Top Décor
Have holidays motivated you to create new table runners? Have the seasons changed, and do you want to brighten up your home for spring? Table décor is a great way to bring color to your home! Create pieces like table toppers, table runners, dresser décor, storage covers, and so much more. Perfect for protecting your furniture while bringing in color and a theme to your rooms, these patterns are great for anyone who wants a touch of color in their home.
If you want to add fun shapes and lines to your designs, look into quilting rulers like our JUKI Ruler Set. You can create different textures from straight lines to circles and waves and bring your designs to life.
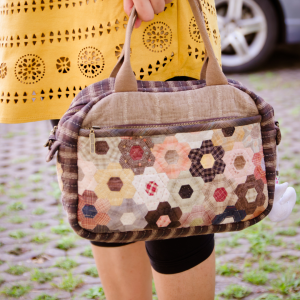
Totes, Pouches, and More!
Bring your artwork outside your home by creating beautiful travel gear! Show off your quilting skills by creating pieces that can hold your money, electronics, or clothing. Work in matching sets like wallets and handbags or traveling sets like make-up bags and carrier totes to brighten up your trips. The possibilities are endless when it comes to hitting the road with your creations.
Tools like Grip and Stitch are great to have one hand when you’re quilting those detailed projects. They make free-motion quilting fun and easy and allow you to easily add on fun designs like spirals, feathers, and more.
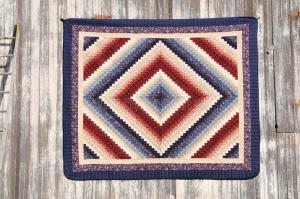
Quilts and More Quilts
Whether your project was created for comfort and lounging, or décor that can bring in bright colors, quilts will never be out of style. Quilts can be so versatile when we step outside of the box. Decorate your home by placing quilts on racks and ladders, use them to upholster chairs and love seats, toss them on white couches for pops of colors. Whether you’re using them for comfort or because the pattern was just suitable for your aesthetic, you can never go wrong with creating a quilt.
Look into extension poles when quilting more significant projects for a more effortless and more fun experience! By adding extension poles, you can easily design quilts from twin to king-size on your stand-up quilting machine like the Miyabi J-350QVP.
While quilts may have started off as a necessity in the past, they’ve become their own form of artwork for current generation quilters. So branch out and try your skill in new quilting projects like the ones mentioned above the next time you start on a new project! What are your favorite inventive ways to use your quilts?
Have you been dreaming of a quilt idea, but you’re not sure how to bring it to life? At JUKI, we want to help you elevate your quilting skills, which comes with learning how to create your own quilt patterns and designs. So we created a base for you to start with different methods to make a pattern and applications that can assist.
Start from the Beginning
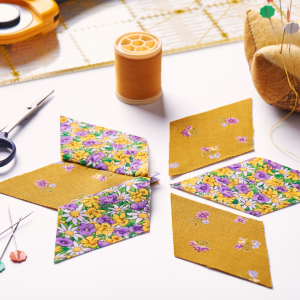
Before we can dive into creating a pattern, let’s touch base on the creative process it takes to get there. One of the best things you can do is begin a design journal, where you can jot down notes, attach scraps of fabrics, place photos, and more that will lead you to create the design you’re imagining.
Learn to upload your ideas into a digital surface. You can redraw and clean up your designs from their sketch versions here. Create a library and label it with a title like ‘New Patterns’ to keep up with your ideas. With this digital organization, you can keep a hold on pattern ideas and add touches as inspiration comes until you have a quilt design you’re ready to work with and bring to life.
If this is your first time designing a quilt, and a blank page seems daunting, lean into the power of self-imposed limitations. Create with quilt size in mind, limit yourself to fabrics already in your arsenal, hold yourself to only using 6 fat quarters. When you start off, creating limits on designs creates a constraint on specific variables, allowing those free variables to make you think outside the box and design quilts you wouldn’t have created otherwise.
Breaking Down A Quilt
Let’s begin by breaking up the layout.
Look at your design and find the repeating elements. Here is where we’ll start forming the blocks. Figuring out your blocks is usually an easy process; however, working more towards modern or complicated patterns can be more challenging. When you first start creating your patterns, start with repetition and begin building your blocks for the quilt and pattern from there.
As you design your quilt, figure out the arrangement style you plan to work with. While some block designs need to be in even numbers for the quilt to come out right, other times you can create symmetric blocks that allow you to use either odd or even numbers. Remember that patterns can be built with one size in mind or edited for different size options. If you’re someone who plans to sell their patterns, customers look favorably upon having the option to choose sizes.
Once you’ve determined the design and size of your quilt, you can choose between adding borders or not. Borders are an excellent addition for multiple reasons; cleaner finish, more breathing space when creating, or as an addition to the size of your quilt pattern. Depending on your design, you can widen or tighten the border size and allow those who use your pattern the option to decide what best fits them.
Keep in mind that a quilt block size averages 6″ to 18″. You have the option to create other shapes like triangles, rectangles, and more if you want to venture away from traditional squares.
Guidelines for Pattern Creating
Now that we have a design idea, we can begin writing instructions. As you start creating the instructions and erasing and creating some more, you’ll begin to build an instruction guide that others can follow along with. Here are some things to keep in mind when writing out your pattern instructions.
Who is this pattern being marketed to?
Break down your pattern and think about who will be trying to follow along. New quilters will need more instructions than advanced quilters that don’t need much detail. Keep this in mind as you add instructions, tips, and illustrations to your work.
Instructions
Patterns don’t usually have instructions on basic techniques, like baste, quilt, and bind. Still, it usually includes instructions for advanced techniques like binding corners and adding curved piecing. To keep patterns from being overfilled with instructions, you can include links to videos and blogs that dive deeper into specific techniques.
Keep A Pattern Piece Library
Your first pattern creation might be complex, but once you have a few under your belt, you’ll find that it’s easy to re-use previous patterns when creating new ones. If you keep up with past projects and use them as foundations for new ones, you’ll save time, and your patterns will begin advancing.
Be Consistent
If you’re writing patterns to share with others, make sure to be consistent in quilting terms. When it comes time to patent your patterns if you’re choosing to sell, not having the correct terms can cause you to lose the patent. The consistent format also includes focusing on writing your measurements, quilting terminology, and your action and verb tenses. Keep in mind to label your fabric pieces, like Fabric A and Fabric B, so that the instructions are easy to follow.
Breakdown the Quilt Measurements
Now that we’ve moved on to instructions, math is the most crucial factor. Follow along as we go over a quilt example to show you an easy way to calculate your quilt squares and cutting requirements.
Step 1: Quilt block and Cutting instructions
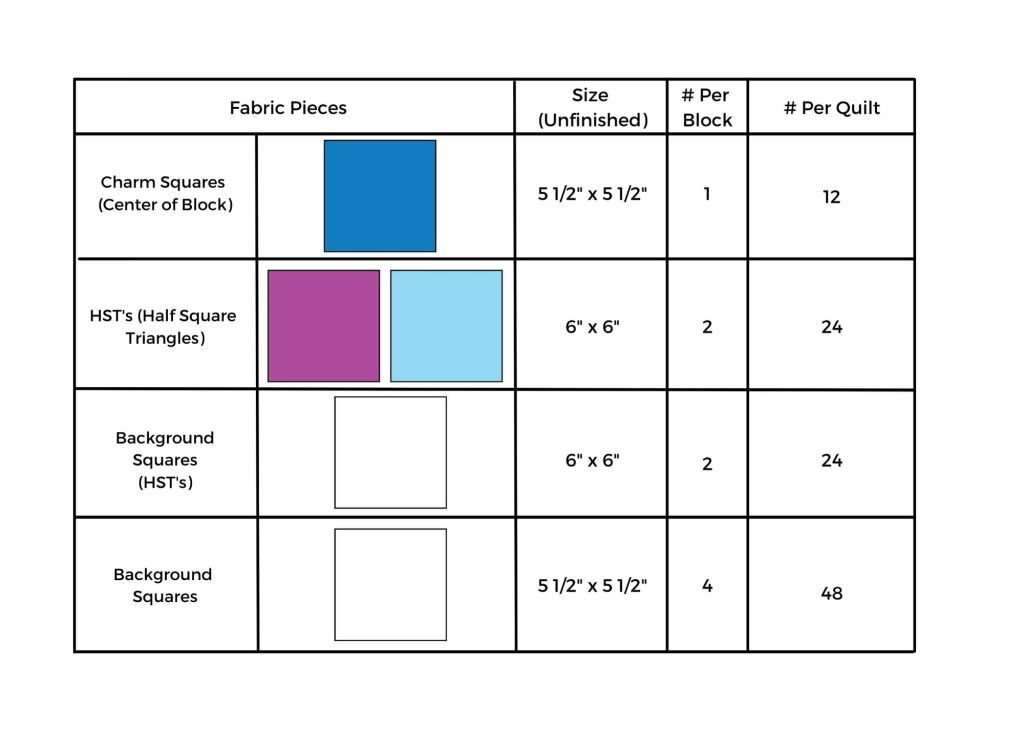
Let’s begin by breaking down the block into its individual components. Our example quilt comprises a 3 x 3 arrangement of components.
Let’s break down these pieces further! Include pieces like HST components here.
You are now at the individual fabric pieces if you’re creating a simple quilt like we’re showing here. However, if your designs are more complex and have more components, keep breaking it down until you’ve hit every piece you need for each block.
Now that we know the individual pieces needed let’s multiply the fabric pieces per block and place that in its own column. Our example quilt will have 12 blocks in a 3×4 block placement, so we will multiply by 12. Once you’ve calculated how many blocks you’ll need, your last column should showcase how many fabric pieces you’ll need for the project in total.
Now that we have the pieces planned for our quilt, let’s move on to creating cutting instructions.
A. Charm Squares: 24 are used as-is for making the HSTs (6” x 6”) and 12 trimmed for the centers of each block (5 ½” x 5 ½”).
B. Minimum background fabric required:
1. Figure out how many pieces can be cut from a single width of fabric (WOF) strip for each of the fabric pieces:
Dividing 50” (our assumed WOF) by 5 ½” you get 9.09 so round down to 9. You can get 9 squares 5 ½” x 5 ½” from each 5 ½” x WOF strip.
Dividing 50” by 6” you get 8.333 so round down to 8. You can get 8 squares 6” x 6” from each 6” x WOF strip.
2. Divide the number of fabric pieces needed by the number of pieces you can get per strip to figure out how many strips are required.
Our example pattern requires 48 background squares (5 ½” x 5 ½”) and you can get 9 squares per strip so 48/9 = 5.333 which rounds out to 5. In this case, to cut 48 squares, you will need 5 strips of 5 ½” x WOF.
Our example pattern also requires 24 squares for the HSTs (6” x 6”) and you can get 8 squares per strip so 24/8 = 3. To cut 24 squares (6” x 6”), you will need 3 strips of 6” x WOF.
Step 2: Let’s Add a Border!
A finished quilt looks great with a border! Let’s go over how to figure out the strips you’ll need for the border.
Here’s how to figure out your yardage for the side borders:
# of blocks x-height of blocks (unfinished) – ½ times [# of blocks -1]
To create the top and bottom borders, use this equation:
Quilt top width + side border thickness + the side border thickness – 1″ (for seam allowances).
Step 3: Find The Yardage For The Quilt Top
To calculate the yardage of background fabric needed, multiply the number of strips times the thickness of the strips for all of the strip sizes you use.
Step 4: Include Binding Fabric Measurements
Calculate the binding fabric (for a straight grain), by adding up the lengths of the 4 sides and adding 10″ of safe space before dividing by the width of fabric.
Step 5: Don’t forget the Backing!
This is a simple measurement; we recommend adding an 8″ overhang, 4″ on each side, to your quilt top width. This is basic for all quilts and what’s usually required by quilters. The best thing to keep in mind is that programs available on your phone and computer can assist with calculating these measurements. For example, Robert Kaufman has a free mobile app to calculate borders, binding, backing, and more.
Let’s Create Our Pattern Sheet
Once you’ve finalized the sizing needed and the designs you’ll create, we can begin putting together a physical pattern. There are programs available to quilters that can help you create patterns. Whether you choose to use programs you might already have, like Microsoft, or invest in higher-tech ones like EQ7 or EQ8, we broke down a few you can look into.
Design and Pattern Layout Programs
Microsoft PowerPoint: This program can be found in most electronics and is universally used. It’s great for the basics when starting off and is very user-friendly. The only setbacks are aligning blocks can be complex, and vector images aren’t accepted.
Electric Quilt (EQ8): This is an excellent program for editing quilts, and it allows you to break down quilt designs so that you can export portions at a time. However, it is challenging to create HST’s and can result in low-quality images in the export process.
Adobe Illustrator: This program is perfect for those that enjoy advanced artwork. You can create vector images and obtain high-resolution photos, and there’s an extensive resource library available for any learning curve. The cons of this program is that it does come with a fee of around $20 per month.
Adobe Indesign: This program is best for pattern layouts and offers the most professional quality. Like Illustrator, it does come with a monthly fee and learning curve.
Corel Draw: Perfect pattern designing and layouts, Corel Draw allows you to create art, export in vector files for high-quality images, and hit a lower cost point.
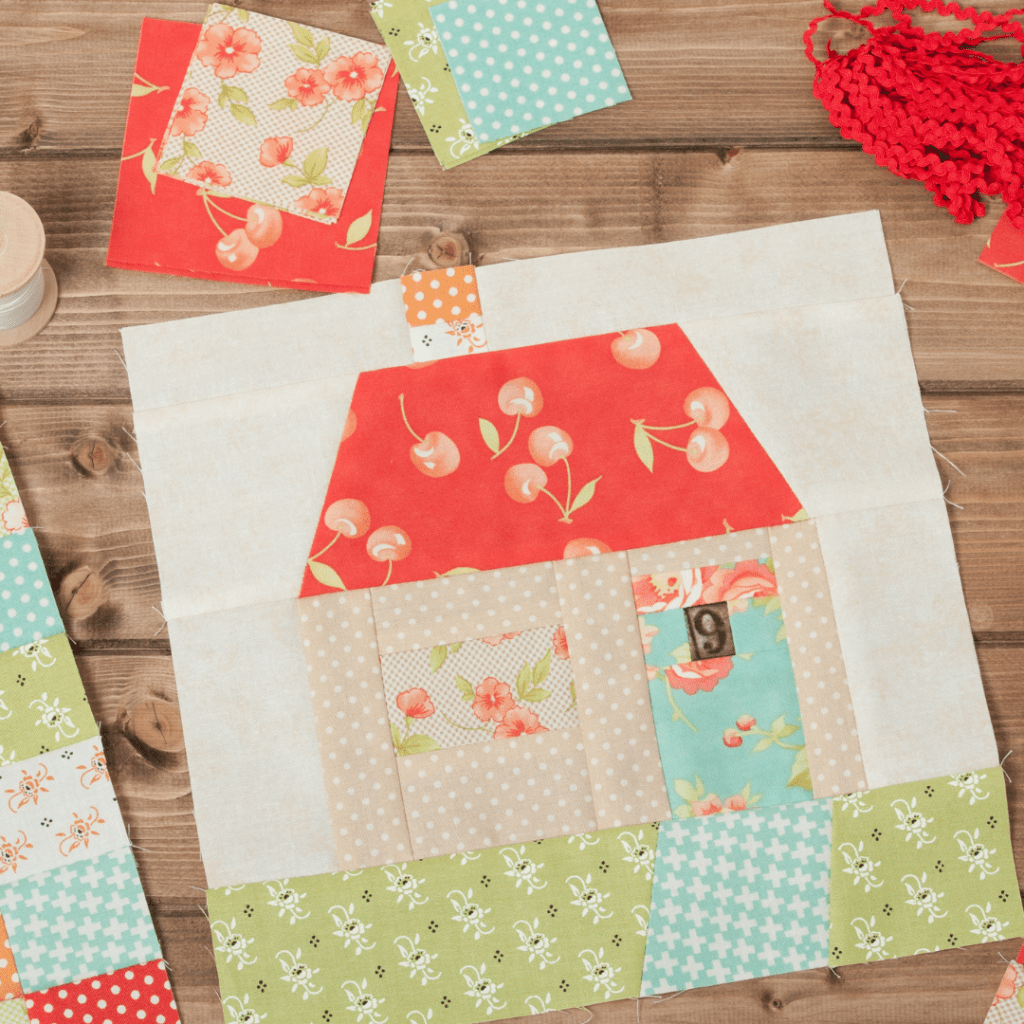
Images and Graphics to Include
Illustrations:
Cutting: if you have an efficient way to cut, include how in the instructions
Block Piecing: The majority of your illustrations will show the pieces assembled together. We recommend starting from the finished block and breaking down from there.
Quilt Top Assembly: Showcase how the blocks go together into the quilt top.
Optional: Include how the backing is pieced, bonus tips, and templates.
Text:
Introduction/notes: Describe the pattern, inspiration mentions, and more.
Material requirements: List all material requirements, including sizing.
Cutting: Include the calculations and measurements needed for cutting.
Block assembly: Walkthrough creating the blocks and assembling the quilt.
Quilt top assembly: Walk through the instructions of piecing the blocks together and assembling the quilt.
Finishing: Walk through the backing, binding, batting, and more instructions.
When you’ve completed creating a pattern, creating a PDF file is the last step. This file format is the most commonly sold in pattern networks and is the easiest to access across platforms.
Get To Testing!
Lastly, before selling your pattern creations, it’s time to go through some trial testing. Share this pattern with trusted friends and family members who can review your work and provide feedback. Request that they confirm the measurements were correct, that the pattern was readable and that they’re able to follow, and more. Use this as an opportunity to spruce up your creation for potential buyers. Then, build the pattern yourself and see what could be added or removed in your work.
Time to Publish!
Once you’ve triple-checked your pattern and decided it’s time to publish, take time to determine how you’re going to sell and where. Digital PDFs are the easiest to share and sell online, and printed patterns can be sold at markets, shows/events, and local quilt shops. Look into E-shops like Etsy and Craftsy when starting off your online shop, and if you choose to go physical, contact your local artisan markets and quilt shops for possible sale opportunities.
When it’s time to get your business out there, it’s essential to start building a marketing plan. Think of your marketing plan as a road map to help you reach those target audiences. Items like consumer trends, product sales and demand, and more can be studied through marketing trends, helping you create a more accurate business plan.
Why should you focus on marketing? The simple answer is that marketing is how customers find your business. Whether you choose to do this online or in-person, following through on marketing plans can upgrade your shop’s sales and popularity. Follow along as we go over some essential things to keep in mind once you begin creating your marketing plan.
Executive Summary
The first page will cover your executive summary when you begin your marketing plan. Here you’ll be summarizing the marketing strategy you hope to follow. Your executive summary will include the following points.
Business Details: confirm your business name and where you will be selling to the customer. This can be through e-commerce, word of mouth, storefront, etc.
What products and services you’ll be marketing: confirm the products and services your company will focus on. From here, make sure to note what advantages your products/services have over the competitors and which you think will be customer favorites.
Mission statement: this statement will become the forefront for your shop in many ways. Make sure to think of a one-sentence statement that embodies what your shop represents. For example, the Coca-Cola Company is “Refresh the world. Make a difference.”
Marketing goals: make sure to create short and long-term marketing goals. These goals can relate to growth in your return on investment (ROI), obtaining new customers, and raising retention.
Create a budget and Projections: Focus on what your Return on Investment (ROI) will be once you push your marketing plan forward. You can adequately plan for paid advertising and marketing spending by learning your estimated ROI.
Creating your executive summary will be last on your to-do list since this will embody your complete plan as a whole.
Market Research
Your first step in creating a marketing plan is conducting market research for your industry. Try to avoid assuming or overconfidence bias when creating your marketing plan, as this can lead to lower revenue than you’re expecting and cause a mishap in your financial planning.
Look into market research for your audience base. Review website analytics, social media audiences, and customer surveys to get an idea of what attracts the customers you’re aiming for and see what you can bring to the table that competitors might be lacking.
Review their demographics (location, age, and income level) to better focus your marketing efforts on markets that want your product. For example, if you focus your efforts on an audience that is too old for your product or can’t afford it, you could be wasting your efforts, resulting in low ROI levels for your business. Remember that your marketing audience can be different from your product audience. For example, while you’re creating children’s apparel, it’s the parents and adults in their life you’re marketing to.
Finding Your Strategy
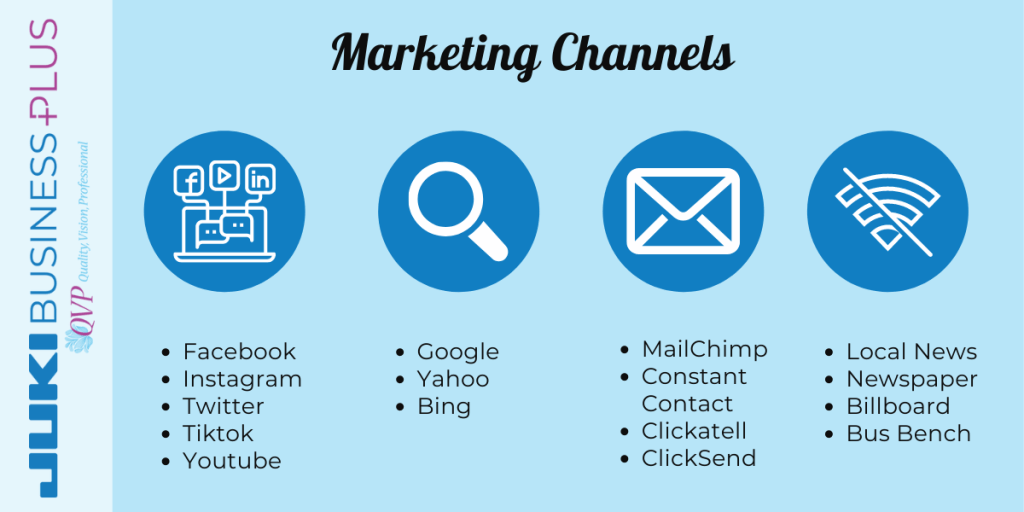
Choosing a strategy for your marketing is focused on three items: what channels you’ll be on, how you’ll format, and what your messages are.
What’s Your Channel?
These are the platforms you’ll find yourself using to promote your business, products, and services. By reviewing your target market research, you can see which best channel options are for you based on what channels your target audience can be found on. For example, if your target audience is a younger crowd, you might find yourself promoting on Tiktok or Instagram, as compared to using Facebook.
Channels to Focus On:
Social Media: Used by over 50% of the population, social media marketing is a top platform for your business. You can post for free and reach your target audience by researching sites like Facebook, Instagram, Twitter, Pinterest, and more. These sites are also a perfect platform to keep in contact with customers and build a relationship with shoppers.
Search Engines: When consumers need something, they’ll usually run to their favorite search engine. Keep this in mind when choosing where to place ads and how to create the content for your website, as search engines work off SEO (Search Engine Optimization) and follow the content you have on your site. Do this to hit your target audience when they’re looking for your product on the internet.
Email Marketing and SMS: Think of this as your direct line to your customers and those interested in your product. By using these resources, you can inform customers of deals, products, and more directly to their inbox.
Getting Offline: Marketing is not contingent on the online world. Look into channels like radio shows, billboards, TV campaigns, and more.
Once you’ve figured out what channels you’re going to market on, plan how you choose to do so. You can choose to go for organic marketing, which would mean no money involved, only your time and effort. Or, you can choose to advertise on these channels and pay for a boost on your posts. Paying for advertisements can get your product out to new crowds that usually wouldn’t see your post and can be directed to whom you choose in many cases.
Don’t stretch yourself thin with how many channels you focus on. Going too wide can be difficult to maintain and properly focus on, losing your audience in the process instead of creating a bridge between you and them. Instead, focus on your top channels, and put your effort into where your audience base can be found on. Remember that having only one channel will not assist you in the long run either, so it’s good to find your happy medium and work on those.
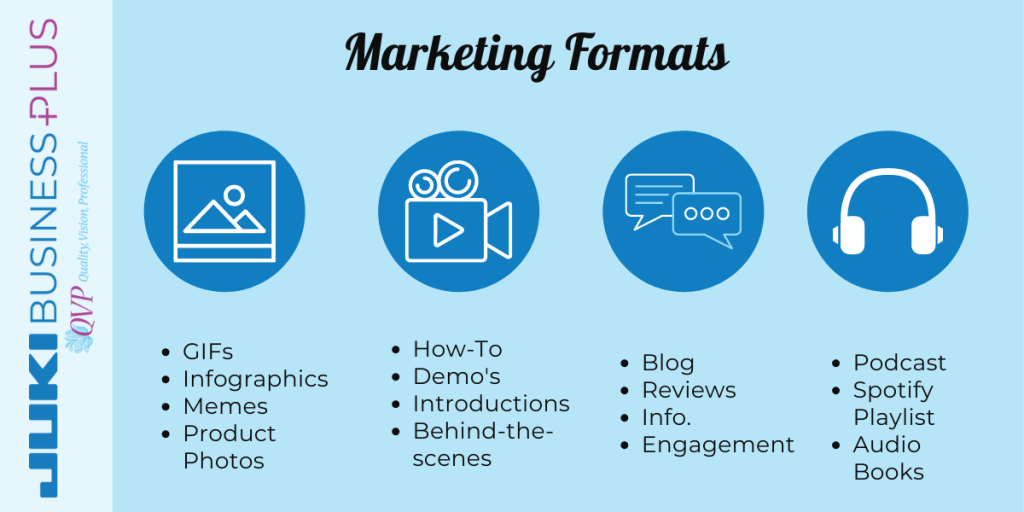
Formats to Use:
When you choose to post and advertise, think about what formats your audience would pay the most attention to.
Images: This can be GIFs, infographics, memes, product photos, and more.
Video: Use YouTube, Instagram, or TikTok to your advantage. Highlight reels, demonstrations of products, and how to use them, bring in the audiences, and create a more personal feel to your channels. This can also include introduction videos to your company, team members, and you.
Written Content: As we mentioned, search engines will find you through your SEO. One of the best ways to accomplish this is to create blogs and posts that will bring search engines to our sites and social channels. When creating content, focus on blogs, your website landing pages, and transcripts for videos.
Audio: Podcasts and Radio shows are popular forms of channels for travelers, active and sports enthusiasts, and hobbyists who enjoy listening to these forms of channels, like Spotify and the podcast app, during their activities or traffic.
When you’re marketing, you need constant content. Social media has created a world where consumers want new and fresh posts to focus on and bring their attention in. This can be demanding for a small business to keep up with, which is why we recommend researching tools that can assist with posting and scheduling like Hootsuite or Sprout Social.
Try and bring your audience in by encouraging posts with tags and hashtags to your company page. This gives you new content to re-post and helps you market your products and services in a no-cost way through your past customers. You can also partner with social media influencers who relate to your product or service, assisting you to gain brand awareness with little work on your end.
The Message
When you’re working on different channels, this doesn’t mean your message changes. Remember to keep all your post across channels consistent in what you sell, the services you offer, and everything else. You want to keep consistency to grow trust in your business.
Find your message, and use it as a catalyst for what your content centers on. For example, Walmart’s channels will always focus on them being the lowest price, no matter what content they’re producing. Finding your adjective, the comfiest, the lowest, the highest, will set a tone to what you create going forward and how you’ll center your advertising. If you’re unsure what your message is, take a moment to reevaluate your business goal and why you want people to buy from you.
In your messages, try to avoid focusing on product features and focus more on what the product can do for the consumer. For example, if you’re creating blankets, knowing the size is great, but creating a story about having the comfiest blankets perfect for a night’s sleep will grab customers’ attention more. Marketing is about the product, yes, but it is also about building that relationship with your customers and wanting them to care about your product.
Budgeting
The best thing about marketing is the option to be high or low on your budget and still do well. Marketing can be done organically and paid, allowing you to choose where your budget should go and where you can cut and still do well.
Free marketing is out there! Many social media sites do not require paying to have a page or profile. On sites like Instagram and Facebook, creating profiles and pages is free of charge and allows you the freedom to get your name out there using hashtags, geolocations, re-share buttons, and tagging. Don’t forget many of these sites also allow you to invite your peers to share and like your page, helping you get your name out there.
You can also submit your business in marketing competitions like press opportunities, awards, podcast and blog features, and so much more. Using word of mouth through these submissions allows your company to save on marketing spending while assisting your goals.
While your budget for advertising spending may be low, remember to account for the time and effort that goes into the marketing itself. From creating the content to scheduling and posting, make sure to account your salary, or workers’ salary, into your marketing budget.
What’s your goal?
Lastly, take the time to break down your marketing plan goals and how you plan to measure the success. One of the main ways is through ROI (Return on Investment), the revenue you plan to obtain after spending your budget on the marketing.
Plan your marketing budget around your expected ROI to avoid situations where your marketing has a higher price than what you’re getting back on it. For example, if you see that a marketing campaign has begun to cost more than what you’re selling of the product, plan to revise that campaign and place your funds in a different project that can better assist you.
Besides the money, you can receive from marketing, think about other goals these campaigns can accomplish for you. It’s not always the dollar price in sales we’re concerned about, but rather brand awareness, website traffic, and followers. If you can create a marketing plan that can hit your goals, whether it be a dollar sign or follower count, you’ll be able to see a higher success rate down the line.
From Planning to Marketing
Once you take that step and implement your marketing plans, you’ll finally be able to see your idea at work. You are spending that time to create your marketing plan, whether its hours or days, which will help you, in the long run, create a business with better sustainability and higher exposure.
Knowing your audience, where they are, and how to communicate with them will bring you that step closer to closing a sale each time.
Know your market.
Know your channels.
Know your message.
Know your budget.
Know your goal.
When you keep up with these five points, you’ll be able to see what your marketing is doing for you and how to elevate your company when the time comes. So keep up with your marketing and know about its unpredictability and how it can bring awareness to your company. Marketing can bring your business to new heights and is an important plan to keep nearby!
When you own an embroidery machine, you can accessorize, personalize and decorate just about anything you can get your hands on. So whether it’s the denim jacket you’ve wanted to revamp or personalize your quilt, embroidery is another form of design taken to the next level!
While embroidery machines are not new to the home sewing world, their technology advancement has passed bounds for those who want to start a small business. Starting your small business is easier than ever with the ability to find top-speed and high-quality machines for home use now. Now that the machine is in your grasp, what can you start creating to sell for your small business?
Follow along below for 5 ideas you can bring into your small business that is fun and easy to complete.
Bags and Purses
Perfect for any season, everyone uses some form of carrier. Whether it’s a tote bag for groceries, a beach bag for toys, or a purse for going out, there are so many options when it comes to personalizing bags! You can place fun sayings, eccentric artwork, or beautiful designs and create a new and fun product for bag lovers.
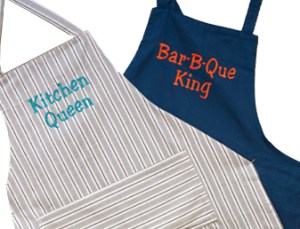
Monogrammed products
Never out of style, people love owning and gifting monogrammed pieces! Newlywed couples, or those celebrating an anniversary, can enjoy gifts like monogrammed robes, towels, and more. Sports enthusiasts can enjoy having monogrammed sweaters with their favorite teams to cheer on at the games. Readers can find comfort in monogrammed blankets for nooks! The possibilities on who can enjoy this are endless, being a perfect niche to jump into.
Embroidered Pillows
Embroidered pillows from a small shop are an excellent idea for those who love to spruce up their home with fun and exciting décor pieces! Different from those in stores, think of how your designs can bring personalization into buyers’ homes, letting them share their passions in colors, designs, and more.
Baseball Caps & Other Apparel
Whether you’re creating hats to support sports teams, your city, or your brand, baseball caps are favorites for many. Think of designing pieces with local area code numbers, fun sayings, silly designs, and more so others can show off their personality with your work! A classic go-to, baseball caps are always in style and can be worn by everyone. T-shirts, sweaters, and other apparel pieces are always popular, a classic to create and work on! Allow your creativity to flow as you create pieces with original designs, fun and sassy quotes, and more. Look into different types of clothing like jean jackets, uniform shirts, and more to get a better idea of what you want to create.
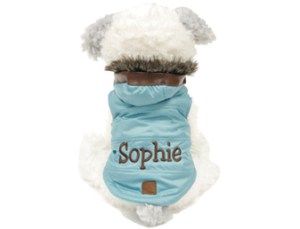
Pet Accessories
Pets are like family, so it’s no secret why creating for pets is a fun niche to jump into! Create pieces like pet beds, clothing, food mats and so much more for those furry friends. Simply embroidering pet names can be a big selling point for those who want personalized pieces, and a way to express their style in their homes. Not sure what to create? Check out our business page here for ideas!
What Will You Create?
There are so many things you can customize and create with your embroidery machine. From pieces, we talked about to other exciting ideas like jewelry, ornaments, and more, the possibility of what you can create is up to you! So keep up with JUKI as we share our project ideas through the year that you can create on an embroidery machine and others. What project would you be most excited to create on an embroidery machine?