JUKI Spotlight: An Inappropriate Quilter with Leslie Bercher

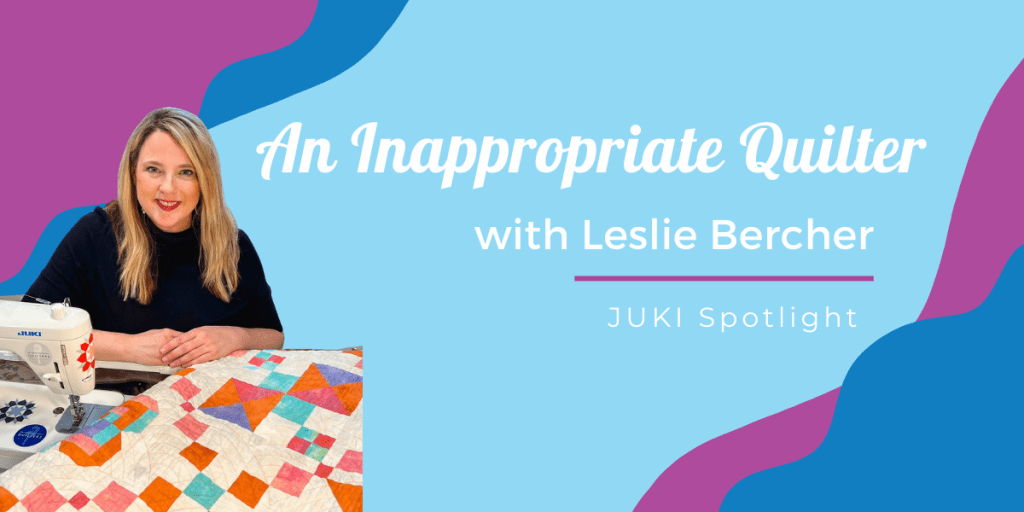
Known for creating beautiful quilts, sharing tips and tricks for your sewing rooms, and her quilting podcast with co-host Rochelle Rice, we’re excited to spotlight Leslie Bercher, Quilter and podcast host for Inappropriate Quilters! Joining us for this month’s spotlight, we got to interview Leslie about her journey in quilting, the podcast’s beginning with co-host Rochelle, and how she created her brand.

It all started with Leslie’s grandmother, Helen. Helen was a member of a church that held Auxiliary Meetings where other members would quilt, crochet, and embroider. It took Leslie several years to watch her grandmother attend these meetings and see her create beautiful projects before picking up the hobby. So it was 2018 when Leslie, with two of her best friends, decided to take a class called ‘Quilt 101’.

“My first quilt was a log cabin, and I made two immediately. That was the beginning, and I haven’t looked back.”

Leslie began sharing her work online, finding a passion for creating and taking the time to build these quilts and designs. It was after a friend recommended she create a profile on social media, explaining she was missing out by not joining the online community when she opened her account. Opening herself up to the idea, she began posting and sharing her projects, excited to see how many beautiful quilters were out there in the world.

It was online that Leslie found a supportive community in her projects and offered her the opportunity to network and build relationships with new people! Consistently supporting one another in their ideas, and encouraging those who have lost their “sew-jo,” as Leslie says, has made the community, unlike any other group she’s been a part of.

This community has also been the inspiration for countless projects she’s created, inspired by other creators on social media. While not a modern quilter, she finds inspiration in all their designs picking from their color selections, patterns, and quilting textures. She also focuses on who she is creating, letting that drive much of the inspiration.

At one of these quilt retreats with the quilting community, she met Rochelle, someone who, according to Leslie, “has never met a stranger.” Leslie and Rochelle were placed in the same group, and their group’s theme was chickens! With their organized and over-the-top decorations, they couldn’t resist having a group mascot, Leon, the rubber chicken.

One day, during the retreat, Leon went missing! Leslie convinced Rochelle was to blame for the Rubber Duck disappearance, and she took it upon herself to ‘borrow’ Rochelle’s foot controller from her machine when she wasn’t looking. The joke would fall back on Leslie when Rochelle returned to the retreat the next day after a nice early night in, unaware her controller had been taken in the first place! They were fast friends after that, bonding over jokes and laughter.

 A couple of years later, the podcast topic would come up between the two friends. During a dream quilt vacation, a sewing retreat where two of their favorites, Camille Roskelley and Angela Walters, would attend, they were having breakfast when the idea popped into Leslie’s head.

With only an idea and some research, Rochelle purchased all the equipment while on their retreat and had it shipped to her home for when they arrived back in town. Excited about their new project, there was only one thing missing, a name! But, as their friends joined in on the conversation, one name stuck out. Walking away from their breakfast table, their friend Angela turned around and offered up “Inappropriate Quilters,” the perfect name for the inappropriate duo!

“Angela was getting up from the table and casually said, ‘oh, I know what you should name it. Inappropriate Quilters.’ We looked at each other and said, “that’s it!”

From there, the show project was on! Weekly episodes, released on Saturdays, became the norm where two quilting friends could join together to discuss life and quilting. With no script in hand, the two friends meet at Leslie’s studio weekly to record before she finishes editing and schedules the episodes Saturday morning. Finding their way into other quilters’ studios through their speakers, their show focuses on just two friends who love quilting, allowing listeners to feel like they have friends in the room with them when they’re creating.

One topic Leslie loves to cover is the process of creating and organizing your studio space. As quilters and sewists know, having a space that encourages creativity and allows you to move and build your projects is important! As an advocate for ‘Function and Beauty,’ we asked Leslie what recommendations she can offer to those building their studio space today.

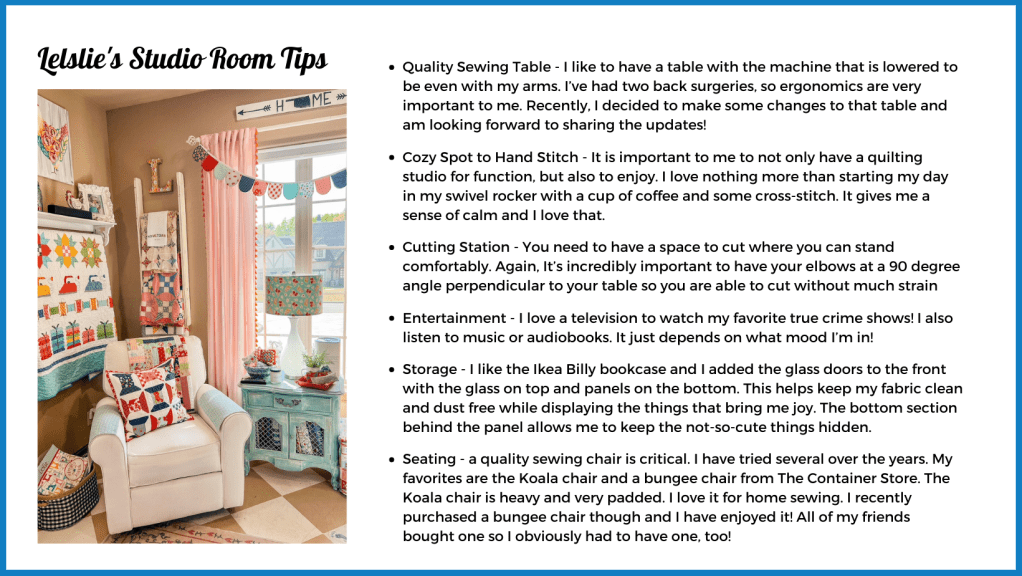
“You have to start with function. But if it isn’t cute, it better have a very good reason to take up your space!”

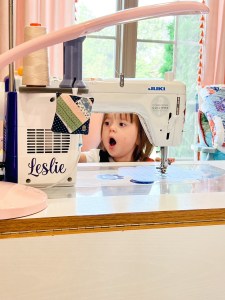
What else can you find in Leslie’s studio? Her JUKI! With her Haruka TL-18QVP, named Camille after Camille Roskelley, Leslie has been able to create beautiful quilts and projects she loves. With 95% of her projects involving straight-stitch, she chose a machine that fit her needs. Her top three features at the time were: consistent straight stitch, an automatic thread cutter, and speed! Her best recommendation to sewists and quilters looking for a new machine is to focus on what features are important to you, figure out what type of stitches you plan to create with, the speed, and visit your local dealer! A local dealer can listen to everything you may want and offer machine recommendations and test-sewing.

Leslie’s quilting has opened up a community for her, allowing her to be creative, meet new people, and enjoy her hobby! As she’s transitioned to a content creator and business owner, we asked what advice she’d offer to someone trying to build their brand. “There are so many little things that you didn’t plan. Be gracious with yourself in the process.” Setting up the government business aspects of a shop, like tax ID, sales taxes, and even finding a partner, can be challenging, but the final product is worth it when you love what you do!

We’re so excited to continue seeing Leslies’ brand and content grow, especially with possible plans of opening a YouTube page for creators to join! Listening to feedback from the community she’s created is vital, and she trusts them to lead her toward new and exciting project ventures. So even with her reservations about being on camera, you can expect Leslie to meet her community in the middle and find a way to join the video world!

From quilting to running a podcast, we had a great time getting to know Leslie and going behind the scenes for her projects. If you’ve enjoyed getting to know Leslie and want to keep up with her and Rochelle’s podcast and future quilt projects, join us in following her socials and websites below!

Blog: read here!

Instagram: follow here!

Linktree: Find Leslies channels here!

YouTube: watch here!

Podcast: Inappropriate Quilters – available where you listen to podcasts

Inappropriate Quilters Shop: shop here!

Tips for Creating a Sewing or Quilting Video

When we first begin creating videos for our projects, we might not be sure where to start. Creating a video for our socials can go beyond the camera and your current project and step into pre-planning, long editing, and finding the right places to publish.

Today we’ll review tips and things to keep in mind when you want to shoot your next video! From planning your videos to editing, shooting, and posting, follow along as we go through the steps it takes to get your project video going.

What to Film?

Before we can step into the studio, let’s begin with brainstorming. It all starts with an idea! This idea doesn’t need to be perfect but think of a specific project you’d like to work on and create. From there, figure out the goal of your video.

For example:

  1. Is this video being created to present how to create a project for each step?
  2. Are you creating this video project to showcase a specific machine or accessory?
  3. Are you going behind the scenes?

Once you know why you’re creating this video, we can jump into the how.

Some ways you can plan your videos are scripting certain scenes, creating a storyboard that allows you to see what flow you want to make for your videos, and designing the production space and location. For scripting, think of certain spots like introductions, saying goodbye, or even a script for your whole video! The storyboard process can be as simple as breaking down your video into parts and seeing where you’ll be changing positions or locations to film. Once you find your filming location, ensured good lighting, low outside sounds, and a room that looks inviting to viewers, you can begin filming.

Deciding what projects to focus on can be difficult, but the great thing is you can always keep creating videos! Sometimes we’ll want to focus on a WOW project that can cost us big bucks and involve a lot of editing. Other times we might create a piece that is short, easy, and to the point. So choose a project you love doing, no matter what form of project or video you’re creating!

The Equipment

When you’re ready to begin filming, there are a few tools every studio should have. Some might think they need to start with a professional camera, but when you’re first beginning, a smartphone can be the best option! With any standard smartphone, you should be able to create excellent video content that can be used for YouTube videos, Instagram Reels, TikTok, and more.

However, if you have a budget and are ready to dive in and buy equipment, we recommend a few of the basics below.

  • Camcorder or DSLR
  • Camera lenses: These can be used for different shots. An example would be purchasing microlens for close-up shots of your needlework!
  • Memory cards: we recommend having a few on hand for those long shooting days.
  • Tripod or stabilizer: different versions can be purchased. You can find ones for tabletop views and bird-eye views.
  • Microphone: make sure you’re viewers can hear you well! We also recommend captioning your videos for viewers to follow along.
  • Lighting: Lighting can break or build a video! Proper lighting will help sewists see where you’re stitching, the needle, your stitch types, and more.

If you use your phone camera, you can still use this extra equipment! Multiple accessories will Bluetooth link to your phone for microphones and new lenses can be attached to your smartphone camera. Remember phone tripods and good lighting, and you’ll be creating your professional videos soon!

Recording Your Video

There is no real right or wrong way to filming, but there are tips for creating clean and fun videos! When it comes to filming, you want to start by allocating time for it. Filming time always depends on your projects, the angles you’re shooting at, and what your video storyboard is.

For example, if you’re shooting a quick tip video, that won’t require camera move changes or machine adjustments, it can take 15 minutes to film your new tip video and 10 to edit. Now, you have fun short videos for your followers and other sewists!

However, if you’re planning to create a project video like a garment piece, be prepared to allocate a larger amount of time for filming and post-production. Editing and the theme of your video style will change as you learn new techniques and features, but it’s best to create consistency in your videos for your viewers to follow. Whether it’s a standard opening sequence, the way you style the shots, or the theme of your projects, consistency is what begins to build a following.

Once you’ve planned your sewing space and managed your time, you can start setting up! The setup process is important when you’re creating because this will help build the momentum for your video and make the correct layout. Focus on lighting, how the sounds of your space are (are you getting a lot of outside noises in your film location?), and decide If you’ll be using a script so you can plan to have a mini prompter to read off, or finding a screen large enough to assist.

Lastly, do some test runs! Have fun and practice first by creating mock videos and testing your sewing location, audio, lighting, angles, and more. Then, once you feel you’re ready, go ahead and film your video!

Film Tips

  • If you’re shooting a sewing technique, use a lens like the micro one we mentioned above! Simple to use, this adjustment can help viewers get a better peak at the stitches you’re using, presser feet, and even stitch length!
  • Bird-eye/Overhead view can be your best friend when creating projects that otherwise wouldn’t be seen on a direct shot. For example, use bird eyes view when making garment projects or quilts to showcase how the projects are truly turning out.
  • Make sure to have your supplies and fabric ready to go before filming! We recommend pre-cutting, pre-washing (if needed), and setting up your workspace for viewers to see what supplies they’ll need while allowing you to be ready to go.
  • Include an opening and closing shot in your videos! This little detail will help viewers feel welcomed to your channel and give them an idea of what they’ll learn when they watch.

Post Production Time

Here comes the fun part! Once we’ve completed our filming, it’s time to move on to editing, planning, posting, and getting those posts and blogs ready. Of course, the first step is importing your video! A tip we recommend is organizing your footage before editing. This way, you can plan the placements, title screens you might need if you choose to use them, and any other graphics you want to be included.

Once you’re ready to edit, choose the film editing software that works best for you! Editing is the most important part of this process, so follow along and mention some things to keep in mind while editing.

Cut out the Quiet and Redundancies

Before editing, watch your footage fully through. Here you’ll begin editing and cutting out pieces like long moments of silence, mistakes made while filming, or repetitive steps.

Adding Elements

From there, decide what elements you want to include in your video. Think of photos, captions, and graphics. Next, consider what background sounds or music you’d like to include. When we have those times without speech, having fun and simple themed music in the background can keep viewers interested. Make sure to choose music that matches the tone of your video! For example, if you’re creating a summery project, look for background music that is more pop than somber.

Next, when adding transitions and video effects, focus on being cohesive! Using multiple types of transitions can make your videos look clunky, so it’s best to find the transitions you’re comfortable with and use those in your videos.

Placing Your Intro and Outro

Place these in your video if you choose to film your intro and outro post-production! Videos give a complete feeling when they have a direct opening and closing, so we recommend having fun with it and creating a guideline you can follow when creating. Whether this includes a common intro phrase, placing your logo, promoting the pattern you’re working on, or something more personal, these two elements will elevate your video!

Staying Consistent

Consistency builds a following! To create a consistent aesthetic for your videos, plan out and design certain pieces that will be repeatedly used.

  • Thumbnail Image Templates that can be edited to fit new videos
  • Color themes for graphics and slides
  • Font choices
  • Logo

Editing Tools

If you’re unsure which editing applications to choose from, we’ve placed a few recommendations for beginner video editors. As you learn new techniques and skills, you’ll be able to upgrade your editing software for more detailed editing.

  • Apple iMovie: If you’re an apple owner, we recommend apple iMovie! Easy for beginners to use and with features more advanced creators can enjoy, Apple IMovie allows you to create seamless videos, add in elements and music, and if you’re an apple user will directly link with your images and music. For those who purchase a Mac, this application is free.
  • Animaker: an online video editor, this application is perfect for creating simple videos using drag and drop. With no editing experience to work the application, you can easily place music, videos, text, and photos. However, unlike iMovie, this application costs a monthly fee and can range from $10 to $49, depending on your needs.
  • Corel Video Studio: a one-time purchase application for $99, this video editing software is perfect for those who plan to upgrade their video editing skills in the future. Simple to use, this software has everything you’ll find in the previous ones, as well as clean motion tracking. This means you can have the video track specific objects throughout the editing process and place an element like an arrow pointing to a particular spot or blurring.
  • Final Cut Pro: Another Apple product, Final Cut Pro, is a one-time purchase editing program offering a more advanced editing experience than iMovie. Final Cut Pro allows creators to edit professionally finished videos, including a library of transitions, title slides, a music library, and more. This program is an excellent option for those who feel they have mastered the iMovie program or are up to a new challenge!
  • Adobe Premiere: if you plan to work with a team or immerse yourself in video editing techniques, Adobe Premiere Pro is one of the top choices. This program offers many features, including team organization with online elements and Photoshop and After Effects. It is perfect for those who plan to create videos often and want to upgrade their skills. Adobe does require a monthly subscription for usage.

Exporting and Publishing

Now that you have a finished video and are ready to publish let’s talk about the export process. The best file format to export your video is MP4. This file can then work and present a clean video on your social platforms, website, and YouTube.

As for publishing, you need to plan where this will be posted, and how it will be published (a blog, a post, a reel) and focus on how you’ll promote the new video. Depending on where you post is, what dimensions your video will be, what time length the video can be, and what direction the video will lay (vertical for YouTube or horizontal for TikTok,) is how you’ll choose the site location.

Plan the description your video posts will have, what eye-grabbing title you’ll place, and how you’ll share this new video with your audience. For example, if you have a new project video releasing for a holiday pattern, you can create a story, post, and newsletter to promote the new video to viewers.

Once you begin video recording and editing, you’ll see what aspects your audience likes, doesn’t like, and want more of! From there, the process changes until you find your direction and routine where the audience keeps returning.

Now that you have an idea of where to begin, we hope this helps you plan your video ideas, find the right filming tools, and encourage you to try something new! Remember, this can all start with a free editing application on your phone, camera, and an idea; everyone begins somewhere.

Looking for ideas? Check out our JUKI Youtube page here today! Offering how-to’s, behind scenes, projects and so much more!

Stuff Your Stockings with JUKI!

Are you excited about the holidays? We are! In today’s blog, we’ll share our top 10 stocking stuffers you can get for the sewist in your life! Perfect for our MO and MCS series, follow along as we share what’s new at JUKI and our top recommendations.

Clear Presser Foot – MCS

Focusing on multiple layers or sewing pieces where they need a clear view of their stitches? Then, the Clear Presser Foot is perfect for their next project! Since this presser foot is transparent, it helps them observe the stitches and fabric easily.

Easily keep an eye on the state of the fabric and its condition while sewing, and sew with comfort knowing they have a good eye on that stitch!

Double Fold Bias Binder – MCS

If they’re someone who enjoys creating apparel like tank tops and camisoles, the Double Fold Bias Binder is a great tool to keep in the kit! Seamlessly turn, bind and attach fabric strips to project edges in one step, helping them quickly create the perfect outfit for their next outing.

Belt Loop Binder – MCS

Create bracelets, finish belts, and belt loops, or create beautiful finished bags using the Belt Loop Binder! This presser foot automatically folds and sews with the coverstitch sewing and offers a tape size of 20 mm and a finished size of 10mm.

Curve Foot -MO

If they’re working on pieces with curved edges like blouses, dresses, or even capes, the Curve Foot is excellent at helping them create those clean and beautifully finished seams. Due to the size of the presser foot, they can easily make small turns compared to the wider ones with the standard presser foot. It’s useful for sewing tight curves on their apparel and home décor projects!

Elasticator Presser Foot – MO

Creating pieces like lingerie, swimwear, or even home décor like bed sheets can be done easier using the Elasticator Presser Foot! As it guides and stretches the elastic as its being sewn onto their apparel projects, the presser foot overlocks the edge of the fabric. The tensions can be changed on the machine with the roller clamping screw, and this foot can attach elastic tape with a width of 5 to 8mm.

Tractor Presser Foot – MO

If they’re working on apparel or home décor, the Tractor Presser Foot is an excellent addition to their tool kit! Using this accessory, they can smoothly ride up and down the multi-layered part of the material while preventing stitch skipping, perfect for attaching quilt pieces or creating garment projects like bathing suits.

Gathering Presser Foot – MO

For the gathered look on blouses and dresses, having a presser foot like the Gathering Presser Foot is great to have on hand! Easily gather the fabric as the user sews due to the foot’s shape, and stay away from slipping or sliding up and down the stitch line.

This accessory is helpful for apparel creators that like adding texture and design to their projects, like pillowcases, aprons, and more.

Piping Presser Foot – MO

Add a professional touch to projects with the Piping Presser Foot! By defining the edges or style lines of garment and house projects using the Piping Presser Foot, they can create projects pieces will think are store-bought! This foot helps sewists create projects with a more professional look thanks to the clean finishes.

This foot accessory is also great for adding that professional touch to quilts, cushions, and handbags.

Universal Blind Stitch Presser Foot (For Right & Left Needle) – MO

Working on some fun apparel? The Universal Blind Stitch Presser Foot is perfect for sewing a decorative flatlock! This stitch is ideal for their apparel projects because of its strength, commonly used in athletic wear. They can also create blind hem stitching, hide seams, or create beautiful texture on their blouses and add pintucks with this accessory!

MO Attachment Sets

If your family member or friend is a sewist who creates an assortment of projects or is a project focused on a hobby like quilting, checks out our MO Attachment Sets! These kits offer a versatile selection of presser feet that match the users’ needs depending on their sewing level and presser foot needs.

Practical sewing use and enjoy adding decorative stitching? Check out the MO Attachment Set 6pcs created for the MO-80CB. This set includes a Universal Blind Stitch Presser Foot (for right and left needle), Elasticator Presser Foot, Beading Presser Foot, Piping Presser Foot, Gathering Presser Foot, and Taping Foot. Perfect for a selection of projects, like apparel and quilting.

If they’re still building their skills on the MO overlock sergers, a set like the MO Attachment Set 3pcs is fantastic for beginners. Offering the Blind Stitch Presser Foot (for the right needle), Elasticator Presser Foot, and Cording Presser Foot, these pieces can help them start building their tool kit and works for both apparel and quilting projects.

For someone who’s practiced on the MO and is ready to test new skills like professional finished bags or piping on a quilt, check out the MO Attachment Set 6pcs. This set includes Blind Stitch Presser Foot (for the right needle), Elasticator Presser Foot, Cording Presser Foot, Beading Presser Foot, Piping Presser Foot, and Gathering Presser Foot. With these feet accessories in their arsenal, they’ll be able to go above and beyond when it’s time to clean up their project and complete a professional-looking end product.

Finally, if the sewist in your life works primarily on the MO machine, check out the MO Attachment Set 8pcs! With this large selection of presser feet options, sewists can easily create a versatile amount of projects, encouraging their skill growth! This set includes a Blind Stitch Presser Foot (for right needle), Universal Blind Stitch Presser Foot (for right and left needle), Elasticator Presser Foot, Cording Presser Foot, Beading Presser Foot, Curved Beading Presser Foot, Piping Presser Foot, and Gathering Presser Foot. With this set, they’ll be able to cover all the basics for creating a complete garment project.

We hope this helps you find the best stocking stuffer for the sewist who uses sergers in your life! From quilting to creating fashion to designing a home, having the right presser feet in your tool kit will make the next project more manageable. Which presser foot is on your holiday wishlist? Comment below!

New Product Announcement: The New TL-15!

Introducing the new JUKI TL-15! The JUKI TL-15 is a high-performance sewing and quilting machine. Continuing the TL straight-stitch sewing machine legacy, the TL-15 is packed with features to ensure industrial-quality sewing. These features include a drop feed for free motion sewing, an industrial subtension system for perfectly straight stitches, a variable speed control slider, a large work area, and six presser feet.

In addition, the TL-15 has a large work area of up to 23 inches (with an auxiliary table attached), the TL-15 can handle large quilts, handbag making, or home decor projects with ease. Experience this workhorse sewing machine today! Create quilts, home decor, apparel, and handbags with excellent stitch quality every time while the speed that the TL-15 offers!

Features

  • Foot controller with thread trimming function
  • Automatic Thread Trimmer
  • Automatic Needle Threader
  • Thread Tension Scale
  • LED Light
  • Sub Tension Unit
  • Maximum Sewing Speed Control
  • Predetermined Stop Position of the Needle
  • Knee Lift Lever
  • Even Feed Foot
  • Heavy-Weight Materials are sewn with Ease
  • Easy Bobbin Replacement
  • Adjustment of Presser Foot Pressure

Included Accessories

The TL-15 includes Upper Feed Presser Foot with Quilt Guide, Zipper Attaching Foot, Quilting Foot Front Open Toe, and 1/4″ Quilting Foot for free motion quilting as well as a foot switch stopper that allows you to disable the automatic cutter.

In addition, the TL-15 has a large work area of up to 23 inches (with an auxiliary table attached), the TL-15 can handle large quilts, handbag making, or home decor projects with ease.

Specifications

Learn more about the NEW TL-15 at your nearest JUKI Dealer. To find your local JUKI Dealer, click here today!

It’s Always Halloween with Christina O.

With the fall season upon us and our favorite spooky holiday around the corner, we’re here to introduce Christina O, owner, and designer of Agashi! A handmade collection, the Agashi style focuses on modern gothic apparel & accessories; intended for those who love to celebrate Halloween every day of the year. Join us this month as we get to discover the history of how Agashi came to be and how Christina found her passion for fashion and running her shop.

From a young age, Christina became obsessed with sewing and crafting. From creating outfits that her Barbie dolls could wear to upcycling projects on her mother’s old Kenmore, Christina would constantly find a way to work on her craft. Then, with dreams of leaving her small town after high school to become a fashion designer, she focused on what she would need to do to achieve her goals.

Classic & Bat Wing Kiminos

Coming from a family where becoming a fashion designer seemed more like a faraway dream than reality, Christina was prepared to do everything it took. Evaluating her options, she entered her community college before transferring to Indiana University of Pennsylvania (IUP) for their fashion merchandising program. While her path to becoming a fashion designer changed for Christina and may have been different than she planned, her dream is still happening!

“It wasn’t going to happen easily for someone like me, and I was prepared to do whatever it took. Not having many resources will force you to become resourceful.”

While Christina admits she would’ve chosen the path of the self-taught designer over school, her hard work was beginning to pay off. After college, her downtime was focused on sewing and creating. However, after trying her hand at creating accessories for her shop, she soon realized apparel was her favorite project to focus on. By Halloween of 2010, she was able to move to Philadelphia, where she ended up meeting her future husband, Paul.

It wasn’t until 2013 that Christina launched her current fashion brand Agashi! With only $50 worth of material, she was able to put together a few harnesses and kawaii-style dresses for the first few months of her shop opening. Over the next couple of years, Christina would go on to add theatrical crinoline pieces and obtain some of her first custom-order customers, burlesque performers! This success was a step in the right direction, leading to her career change in 2015, where she could quit her day job and place all her focus on her brand.

Battress Gown

It was in 2017 when Christina and Paul moved into their first home in Philadelphia. Agashi began growing faster than ever, surpassing their home space and pushing Christina to open up her first official studio space in 2018, including shop assistants. While the shop continued to see great success over the next couple of years, 2020 brought the shop to a slow down, causing Agashi to be brought back home after closing the studio due to the pandemic.

Due to Christina’s passion for the business, Agashi is still live and running! She also launched her first YouTube channel for sewing, DIY, and Behind the Seams content during the summer of 2020, creating a new connection to her community of followers and new sewists. During this time, she began modeling a new path for her business, one where her passion for creating fashion and teaching sewing skills could intermix. Now, Agashi offers smaller quantities of made-to-order wear at faster turnaround times, allowing Christina to slow down and push her passion for teaching into the mix.

One focus about Agashi that never changed was sustainable fashion. While she acknowledges that not everyone has the financial ability to only buy made-to-order, Christina sees sustainable fashion as “buying with a purpose and purging clothes slower.” To avoid over-production, Christina focuses on creating made-to-order pieces and upcycles 90% of her fabric scrap pieces when sewing.

“My entire process is slow, intimate, and intentional. I’m grateful to have customers who invest in my custom pieces. They aren’t ordering for instant gratification, but rather an affordable luxury item they can cherish.”

Battrix Velvet Bralette (made 100 from upcycled velvet scraps)

Avoiding offers from manufacturers, the quality of her work and products is what Christina focuses on when creating her apparel. With each project feeling personal, she continues to place a lot of thought, time, and labor into each stitch of her pieces. Her dedication and message seep into her packaging with a handwritten thank you note, sustainable packaging, and self-sewn reusable gift bags.

While the shop’s plans for sales may have changed, her fashion design hasn’t! Those lovers of the gothic aesthetic and Halloween can find a piece they’ll love in Christina’s shop. Christina was inspired by cinema with darker themes like Addams Family Values, The Dark Crystal, and The Return to Oz. She found herself naturally drawn to the characters portrayed, connecting to the “weirdos” of the films. As someone who grew up having trouble making friends, finding a connection in these films inspired her to design fashion for grown-up sizes. With a variety of minimal designs, horror lovers like herself can easily wear fashion with spider webs and bat wings, celebrating their gothic ways!

Her style inspiration can also be pinpointed to vintage lingerie catalogs and old runway shots from McQueen, Mugler, and Gaultier. Victorian and Rococo fashion inspire Christina heavily over today’s fashion, feeling that the style now is only a repetition of the past.

“Agashi is for anyone who celebrates Halloween once a year or every day.”

It’s this niche design and theme that brings attention to Christina’s shop, where lovers of all Goth and horror can find fashion pieces that fit within the modern world. Thanks to social media, Christina has been able to build a community of over 100 thousand followers that have followed along the journey to where the business is today. Whether they’ve followed because they found interest in the shop, or her recent videos showcasing tips and tricks to sewing, she’s been able to utilize these platforms to grow her business and expand her brand awareness.

Ayumi Seifuku Classic Collection

As a business owner focused on social media for branding, she consistently posted content multiple times a week that revolved around her work and brand aesthetic. With Instagram being her platform, she’s focused on showcasing her work and her as a creator and behind-the-scenes looks. Focusing on building that connection between her customers and art is one of the reasons she’s been successful, with social media allowing her to connect with other creators, customers, and sewists.

While today’s social media can be more brutal to gain popularity on, Christina’s advice is to diversify your social media presence and focus on platforms that will help build your community. She recommends focusing on video content that’s popular right now and seeing how you can share behind the scene looks or process videos, as viewers will always love feeling like they can relate to you! Sites like Tiktok and YouTube are her favorites. This is thanks to their ease to use and the sewing communities that have been built.

Her new focus on sewing tutorials and tips is an excellent passion for Christina. When asked about her current sewing machine choices and what she would recommend for a new sewist, she reminded us that finding the perfect machine is just like dating!

“You want to know what you’re looking for and find the best machine to match your sewing needs and goals. And yes, just like dating, you will be disappointed with some machines.”

Her first tip for new sewists is to find a second-hand or vintage machine. Focusing on budget-friendly when entering a new hobby will allow you to get a taste of the craft while letting you hone your skills. A few basics, like a straight & zigzag stitch and a buttonhole feature, are perfect when starting off. Once you feel more comfortable or your skills begin outgrowing your machine, you can start focusing on upgrading and buying the suitable machine for you. For Christina, this answer comes in a rotation of 3 domestic sewing machines, 4 sergers, and 1 coverstitch machine, one being her trusty TL-2000Qi!

Greta Peignoir

It was in August 2020 when she searched for a “straight stitching beast,” focusing on the features wishlist, the budget, and the space, she chose the TL-2000Qi. Looking for industrial power that would fit her studio space, Christina loves its power and the finished quality of her projects when she creates on it, using it for her final seams on every order. Her dream goal? All industrial JUKI machines!

Beyond her tips and tricks for sewing, Christina also has advice for sewists out there who plan to open their small businesses. “Always invest in yourself and learn from your mistakes,” she says, encouraging those out there to keep investing in their passion and to never stop learning. While Christina earned a degree in Fashion Merchandising, she still acclaims herself as a self-taught sewist and designer. She encourages you to find your best path, whether it be fashion school or self-taught, and to learn at your own pace to enjoy the journey.

Focus on building relationships with those in your community, and choose it over the competition. Christina focuses on finding her own identity and experiments by not comparing herself to others. Because of this, she’s been able to plan the new future for Agashi. With a new effort to prioritize her mental health, Agashi will begin scaling down on made-to-order apparel and start focusing on teaching sewing next year. This will include DIY sewing kits for clothing and accessories and focus on those who don’t have many resources to learn sewing beside the internet.

“There is plenty of space for everyone to succeed together.”

Grateful to the community she’s been able to build and proud of how the brand has grown and evolved over the years, Christina and her brand Agashi will continue to flourish in the fashion industry! We can’t wait to see the new changes soon to come, and we’re excited to learn alongside her followers! If you love Halloween or want to learn new sewing tips and tricks, join us in following Christina’s journey below and wishing her a Happy Halloween!

Find Agashi and Christina below!

Agashishop.com

Instagram

Facebook

Etsy (Paper Bats)

Tiktok

Pinterest