How to Start Your Clothing Brand

In a generation where fashion has no limits, fashion brands and designs have continued to change, evolve and return over the past decade. Whether it’s fast fashion, one of a kind, or small shop drops, there is no limit to the options available for your closet. Even in this era of fashion where we can choose styles from all over the world, there is always room for new fashion and trends to grow, and that’s where you come in! If you’ve been dreaming of starting your clothing brand and apparel shop, follow along as we go over ways you can start planning your new business today. From figuring out your market to budgeting, we go over the things you should know before jumping into this journey.

Start With a Plan

Before beginning any business, it’s best to start with a plan. The fashion industry is more than the pieces being sold, but understanding its steps to sell those pieces. There are multiple options for creating apparel: Direct-To-Garment based apparel, Embroidery apparel, Ready-Made Apparel, Custom Apparel, and so much more. The world of fashion is not one skill set or technique but is filled with endless options on how to create.

Once you have an idea of the products you plan to create, you can build your business plan. Your business plan should include ideas for your brand and products, budgeting and sale goals, marketing ideas, and more. The more details and work put into your plan, the better chance you’ll have when it comes to the time to open your shop and sales.

If you’re looking for more information on how to create a budget plan and calculate profit visit our post here to begin creating your own today.

Who’s Your Market?

Let’s begin by thinking of who will wear your fashion pieces! By identifying your target audience and what they’re looking for when they want to shop apparel, you’ll be able to locate your niche and find your customer base. The better you understand your audience base, the better you’ll be at marketing your products to them.

The top two things to keep in mind when studying your audience is:

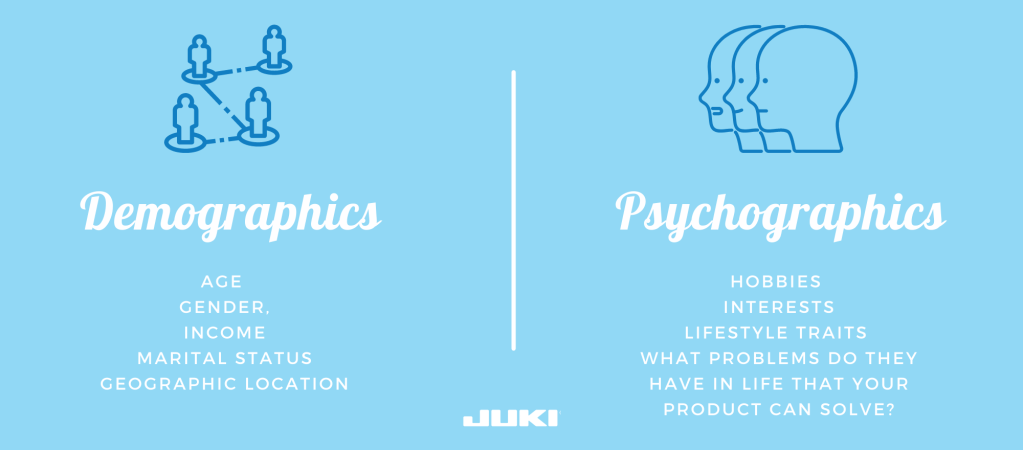
Demographics: age, gender, income, marital status, geographic location, etc.

When you understand your audience’s demographics, you’ll have a higher chance of completing a sale. For example, if you market your product to women in their early twenties, you’ll have a higher chance of gaining a sale on Instagram and Tiktok than marketing on Facebook. Likewise, by knowing your audience, you can find the correct places to push your products and not spend energy on a site that focuses on an older audience like Facebook, whose average users are in their mid-40s and higher.

Psychographics: hobbies, interests, lifestyle traits, and what problems do they have in life that your product can solve.

Knowing the psychographics of your audience is where you’ll be able to create the right products. Here is where you can learn what fabric to use (is your audience athletic and need breathable material?), what interests they have (can you design graphic tees for fan bases?), and more. With every detail you learn about your audience, you’ll be able to create products that are better suited for their wants and create a solid returning customer base.

Once you better understand your niche audience, you can begin creating a solid marketing plan. If you’re having trouble making your marketing plan, follow along here as we show you step by step how to begin yours today.

Focus On Your Brand

Now that we know what you’re going to sell and who you’re going to sell to let’s start talking about building your brand. Branding goes past your business name and logo and dives into what your values are, what your mission is, and more.

Create brand guidelines and a storyline for your products that customers resonate with and want to follow. Focusing on platforms like your website, social media pages, email marketing program, and more will build that relationship between buyers and your shop. The best way to bring your brand to life in today’s age is through marketing on social media!

The key to building your brand is being consistent in your message, constantly posting and promoting your brand and products, and making sure what you put out into the world defines your brand correctly. If you’re unsure what to post, look into examples like behind-the-scenes videos, how-to’s, fashion inspo using your pieces, and more for ideas. Have fun and be creative when it’s time to get your brand out there!

Let’s Start Development

Now that we have an idea for your brand let’s begin designing and developing your clothing line.

  1. Keep your Sketchbook on You

Any artist will tell you that inspiration hits anywhere and any time. So be prepared for when you want to design a new piece by keeping a sketchpad on you or using your phone as a digital sketchbook with apps like ProCreate, Adobe Designs, and Adobe Illustrator.

2. Create Samples

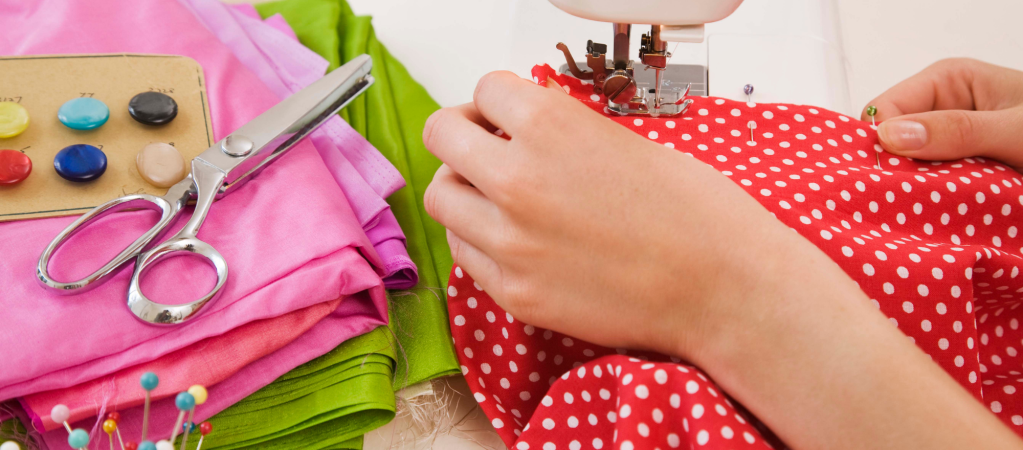
Start creating sample pieces of what you want to make for your shop. Whether you’ll be doing buy-to-make or pre-made pieces, having sample work is perfect for modeling on social media and understanding material costs for re-production.

3. Have Your Beginning Set

When you first open up shop, it’s best to not overwhelm yourself with product varieties. Instead, find your top 3-5 products you want to create and go from there as you begin building your audience base and receiving orders. Once you create more demand for your brand, you can start testing out new designs and growing your product options.

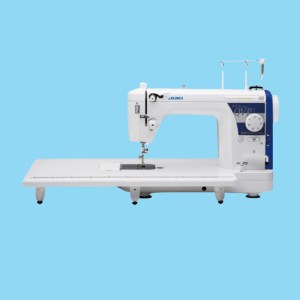
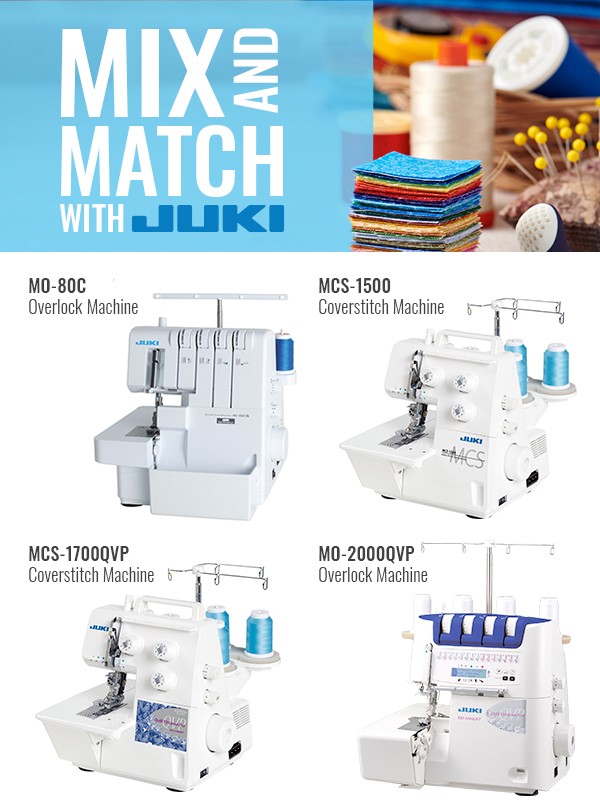
Now that we’re in the development phase make sure you have your station ready! Start by deciding what fabrics you’ll be using in your apparel shop, what style you’ll create, and what machinery and notions you’ll need to get there.

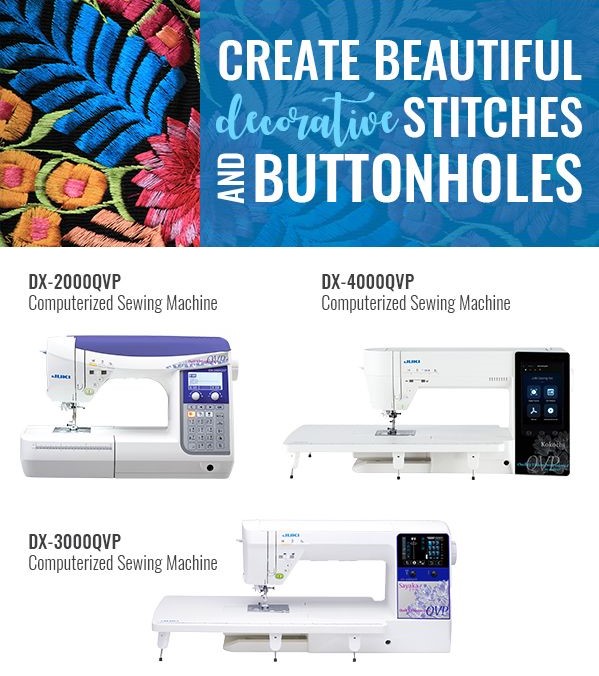
For example, if you want to open an apparel shop that focuses on couture dress-making, you would look into a machine like the MO-654DE that offers built-in rolled hemming and the HZL-DX7 which offers presser feet options like the button attaching presser foot, invisible zipper foot and more. Your fabric choices could be options like silk, tulle, satin, and more. 

By knowing what you plan to create, you’ll be able to have the right machinery, accessories, and notions on hand when it’s time to begin producing.

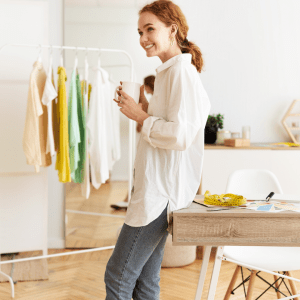
Start Setting Up Shop

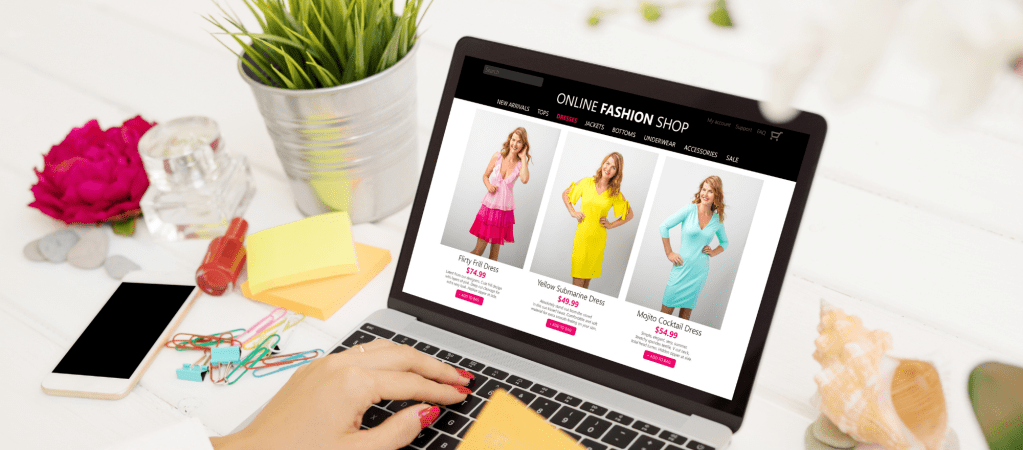
Whether you’re setting up shop online or in person, having an online face is a great way to promote your business and gain new customers. Online shops allow you to reach new audiences! Below are some things to keep in mind when setting up shop.

Clothing Images: Take photos of your clothing that truly presents its colors, fabric textures, and closures. These photos don’t need to be professional if you’re working on a small budget; just have a simple lighting kit, a good camera and learn some tricks on taking professional fashion DIY shots.

Pricing, Shipping, and Handling: Make sure to have a plan in place for how you’ll be pricing your products. From shipping to taxes, you’ll need to make sure you price your products correctly to pay for your bills, time, workspace, etc. Learn your target audience’s price point and what they’re willing to pay for your product. Then, keep an eye on competitor pricing to confirm you’re in the suitable price range.

Website Design: Don’t forget to add your brand’s personality to your site! Set up your Social media, include graphics of your work, add an ‘About Me page, use your brand theme colors, bring in customers and build relationships.

Put Your Marketing Plan into Action

You’re now ready to begin implementing if you’ve created your marketing plan from our earlier steps! Start by setting up your shops’ profiles and deciding how you’ll be advertising. Organic advertising, meaning you do not pay and use search engine optimization like hashtags and tags, is a perfect way to start when you’re on a low budget. If you’re marketing budget includes spending for advertisements, begin setting up your ads by using the information you have on your niche. Focus on your top media sites for higher chances of receiving a sale.

Don’t forget the power of word of mouth, and research your options in ambassador marketing. By offering free items, or negotiating payments, you can bring in influencers from your target audience and work with them to promote your brands and products.

Let’s Launch!

Launching your first clothing brand doesn’t happen quickly or easily. It will take time and dedication, but you’ll create your brand soon with the proper steps! After that, you can begin selling in numerous ways, from your social media accounts to in-person artisan markets and pop-up shops. Then, finally, it’s time to get your product out there.

Now that you have an idea of where to start when it comes to opening your apparel shop and starting your brand, we hope to see your brands’ names soon! What kind of apparel would you create if you were to open your apparel shop?

How to Start Sewing Your Own Clothes

In the past few years, we’ve seen a rise in sewists pop up from all over the world, beginners starting their journey. If you recently started sewing and are interested in learning how to start sewing your own clothes, today we’re here to help you start! Follow along as we go over the basic supplies you should keep on hand, beginner machines and the machine types, and more.

What You Need to Start

The most important thing for sewing your own clothes is your tools! Having the right tools on hand will help the process go smoothly, and you’ll have better quality projects at the end of it. Below is a list of tools every sewist should have in their tool kit.

  1. Scissors

A prominent tool, but an important one! When it comes to your sewing scissor, we always recommend having one dedicated to only fabric and one for everything else. This helps to keep your fabric scissor blades sharp longer so that you don’t fray your fabric when it’s time to cut.

2. Measuring Tape

Important and handy, having a measuring tape in your kit is a need! A measuring tape is a must for any sewist, from measuring yourself when it’s time to begin creating to measuring your fabric, elastic, and more.

3. Sewing Gauges

An excellent tool for when it’s seam allowance time, the sewing gauge is a t-shape measuring stick with a slide gauge that allows you to measure the distance from your edge of the fabric to where you are stitching. So when you’re sewing apparel, this tool is perfect for hemming!

4. Thread Snips

This tool is perfect for creating apparel because it allows you to get that close thread cut on your projects without the fear of cutting your fabric. So without fear, cut close to your fabric using a thread snip on your next project.

5. Seam Ripper

Made a mistake in your stitching? Want to reconstruct a piece in your closet? It’s easier deconstructing those mistakes and projects with a seam ripper. This tool has a sharp hook that easily rips through the thread, breaking those pieces apart. Be careful, though, with its sharp end, it can also easily go through the fabric if you’re too rough.

6. Iron and Ironing Board

When you’re sewing clothes, it’s best to have your iron and ironing board nearby! When creating, there are a lot of pieces that need to be pressed, so having this is a need! If you don’t have room for an ironing board, you can always get an ironing mat. This is perfect for beginner projects and is a great place to start.

7. Pins and Clips

Whether you keep them in a jar, or a cushion, having clips and pins on hand is necessary when you’re sewing. These little tools are needed to keep fabric pieces together and aligned, ensuring your project comes out exactly as you want it to!

8. Fabrics and Threads

There is an abundance of options for choosing fabrics and threads for your apparel projects. Check out your current closet to see what fabric types you already use to better figure out what options you should buy. As for the thread, sewing is an excellent fabric/thread/needle game. Depending on what fabric you’re working with, you’ll be able to choose the right thread type and the right needle. 

We recommend looking for fabric created for apparel and 100% polyester thread which is durable and comes in every color.

9. Sewing Patterns

When you’re new to creating apparel, following sewing patterns is a great way to learn! Look at online patterns, your local quilt shops, and even antique and vintage shops when you begin browsing for your next pattern! Some pattern designers even offer step-by-step video tutorials and diagrams for the beginner sewist.

10. Sewing Machine

When you’re first choosing a sewing machine, how many options are out there can be daunting, but we’re here to help! Whether you get a machine with all the bells and whistles, or a basic straight-stitch, finding the suitable machine depends on your needs and wants. So follow along below as discuss the different types of machines out there, and what you should look for in yours.

Picking Your Sewing Machine

Let’s start by discussing the different types of machines out there! It’s important to know your options for what’s available out there and understand how each machine can help you build your project.

Mechanical Sewing Machines

JUKI Options: TL-2010Q, TL-2020PE, TL-2000Qi, TL-18QVP

JUKI Haruka TL-18QVP

A mechanical sewing machine, or electric sewing machine, has little to almost no circuitry. It has a motor that moves the needles up and down, a foot pedal to drive the motor. Some mechanical sewing machine options, like the JUKI line, also offer Free Motion Quilting, allowing you to piece and quilt.

These machines are perfect for beginners because they’re simple to use, and don’t have a lot of bells and whistles. For someone who is just beginning, and doesn’t want too many buttons or stitch options, a mechanical sewing machine is perfect.

These sewing machines are also perfect for the sewist who plans to work with heavy or thick fabrics. Our TL series, for example, is a popular choice among bag makers because it can handle multiple pieces of fabric at once and can sew through fabrics like vinyl, leather, and cork.

Computerized Sewing Machines

JUKI Options: HZL-DX7, HZL F-600, HZL DX-4000QVP

JUKI Kokochi DX-4000QVP

A sophisticated type of machine, the computerized sewing machine includes an LCD screen and offers more stitch options and functions. There are many digital features including sensor systems, pivot functions, digital tension, auto thread trimming, and more.

Some machines like, the HZL-NX7, come with features like JUKI Smart Feed, to move the top layer of your fabric in sync with the lower layer. If you’re working on apparel, this feature is perfect for stitching without the worry of shifting layered fabrics.

Computerized sewing machines, even with their selection of features, are relatively simple to use and for many make sewing an easier process.

Let’s Talk Features

Let’s go through some features you need, and features you’ll want. Knowing the options available to you will help you build a better wish list once you start looking for your machine.

  1. Know Your Presser Feet

Keep in mind the projects you plan to create and research what presser feet you’ll need to own. Some machines come with these accessories in their set, others you’ll have to purchase separately. Having the right foot is important when you start implementing techniques like gathering, adding elastics, and more.

Some feet we recommend for apparel are the Buttonhole Foot, Walking Foot, Smooth Foot, and Invisible Zipper Foot to start.

2. Stitches

Think about the type of stitches you’ll want to work with. Some machines only offer straight stitch, others will offer zig-zag. You can also find machines that offer stitches for quilting, piecing, overlocking, triple stretch, blind hem, and more.

3. Creating Buttonholes

This can take 4 steps, or 1 step depending on the machine you purchase. Some machines will offer an automatic one-step buttonhole while in others you must manually switch between the zigzag and bar tack stitches to form the buttonholes. If you’re a beginner, finding a machine that uses an automatic option is great, especially if you plan on using buttons often!

4. Built-In Free Arm

If you plan on creating apparel, a free arm is perfect for pants legs, and sleeves. This free arm will allow you to sew those narrow cylindrical or tubular items, helping you create the perfect closet.

5. Automatic Needle Threader

A small feature with a big impact, the automatic needle threader feature is great for users who have difficulty with eye-sight or shaky hands. This feature works by using a small hook to pull the thread through the eye of the needle.

Let’s Start Creating!

Now that you know what tools you’ll need and have a better idea of what machine you’ll want, you can start planning your sewing journey! Sewing your own clothes is a wondrous journey where mistakes will happen, your skills will surprise you, and you’ll constantly be learning. Pick beginner-friendly projects and patterns, research local sewing classes, and test your skills by grabbing thrifted and discounted fabric when you first start.

We recommend looking on YouTube for online tutorials and lessons when you find yourself lost, and enjoy the limitless amount of resources out on the web for sewist! We put together our top 5 tips for new sewists!

  1. Start Small

Don’t psych yourself out with big projects when you first start sewing. Pick up simple patterns and projects and start there before building your skill base and attempting larger projects. By doing this you’ll reduce the chances of burnout and have fun making mistakes!

2. Use Scrap Fabric

Don’t let those pieces go to waste! Scrap fabric is perfect for when you want to practice new stitches and techniques.

3. Read Those Patterns!

Don’t start a project before fulling reading through a pattern. Then, if you need to make adjustments, you can catch it early on and do so before you start cutting. It will also help you understand the steps you’re about to take and help you understand the entire process before you begin stitching.

4. Check, and Check Again

Test trying your outfits and projects as you sew is the perfect way to confirm you’re doing it right. Check on the stitches, make sure the length is correct, and make those adjustments.

5. Enjoy the Journey

Not many call themselves sewing experts, even those who have been doing it for years. Every time we sew and create, there’s a chance for a new technique to be learned and a new project to be created, meaning the journey is never-ending! Enjoy the process and watch yourself grow as you sew.

We hope these tips and resources help you find the right tools and machines when you start sewing! What do you wish you had known before you started sewing? Comment down below and leave tips for the new sewist!

5 Quilting Project Ideas for You!

Celebrate National Quilting Month by bringing out your favorite charm squares, jelly rolls, and sandwiches! Whether you’re creating for friends and family or your small business, we’ve put together a few fun ideas for projects you can quilt next. 

Wall Hanging

Decorating new office spaces or livening up current homes is easy with wall hangings. Projects like these are perfect because you can create smaller designs than quilts and use them for seasonal purposes. With the ability to create on a large or small scale, you can try new techniques like adding embellishments and accents (for example, cording) that you wouldn’t have thought of using before. This project is excellent for when holidays and birthdays come around since it can brighten up any room, from a nursing home to your kid’s college dorm. 

Accessories like the Couching Foot are perfect when creating wall hangings. They allow you to add three-dimensional textures to your projects, bringing in an extra element that will make your design pop. Use decorative threads like yarn and cord or other thicker threads that don’t fit your needle. 

Pillows 

Pillows are great for many reasons:

  1. You can create beautiful personalized décor and treat pillows like a small sample for a quilt idea you have by making that one block you need. A pillow allows you the freedom of creation like a quilt, with less fabric and space required.
  2. You can treat pillows as an add-on to your quilts and create matching or complementary designs.
  3. Creating simple add-ons like pillows is a great way to increase your revenue if you have a small business. 

Look into an accessory like the Glide Foot when creating décor like pillows. This foot can help you glide along with applique, and other three-dimensional textures, allowing you to get creative and add more personalization to your projects. 

Table Top Décor

Have holidays motivated you to create new table runners? Have the seasons changed, and do you want to brighten up your home for spring? Table décor is a great way to bring color to your home! Create pieces like table toppers, table runners, dresser décor, storage covers, and so much more. Perfect for protecting your furniture while bringing in color and a theme to your rooms, these patterns are great for anyone who wants a touch of color in their home. 

If you want to add fun shapes and lines to your designs, look into quilting rulers like our JUKI Ruler Set. You can create different textures from straight lines to circles and waves and bring your designs to life.  

Totes, Pouches, and More!

Bring your artwork outside your home by creating beautiful travel gear! Show off your quilting skills by creating pieces that can hold your money, electronics, or clothing. Work in matching sets like wallets and handbags or traveling sets like make-up bags and carrier totes to brighten up your trips. The possibilities are endless when it comes to hitting the road with your creations. 

Tools like Grip and Stitch are great to have one hand when you’re quilting those detailed projects. They make free-motion quilting fun and easy and allow you to easily add on fun designs like spirals, feathers, and more. 

Quilts and More Quilts

Whether your project was created for comfort and lounging, or décor that can bring in bright colors, quilts will never be out of style. Quilts can be so versatile when we step outside of the box. Decorate your home by placing quilts on racks and ladders, use them to upholster chairs and love seats, toss them on white couches for pops of colors. Whether you’re using them for comfort or because the pattern was just suitable for your aesthetic, you can never go wrong with creating a quilt. 

Look into extension poles when quilting more significant projects for a more effortless and more fun experience! By adding extension poles, you can easily design quilts from twin to king-size on your stand-up quilting machine like the Miyabi J-350QVP.

While quilts may have started off as a necessity in the past, they’ve become their own form of artwork for current generation quilters. So branch out and try your skill in new quilting projects like the ones mentioned above the next time you start on a new project! What are your favorite inventive ways to use your quilts?

5 Projects You Can Create on Your Embroidery Machine

When you own an embroidery machine, you can accessorize, personalize and decorate just about anything you can get your hands on. So whether it’s the denim jacket you’ve wanted to revamp or personalize your quilt, embroidery is another form of design taken to the next level!

While embroidery machines are not new to the home sewing world, their technology advancement has passed bounds for those who want to start a small business. Starting your small business is easier than ever with the ability to find top-speed and high-quality machines for home use now. Now that the machine is in your grasp, what can you start creating to sell for your small business?

Follow along below for 5 ideas you can bring into your small business that is fun and easy to complete.

Bags and Purses

Perfect for any season, everyone uses some form of carrier. Whether it’s a tote bag for groceries, a beach bag for toys, or a purse for going out, there are so many options when it comes to personalizing bags! You can place fun sayings, eccentric artwork, or beautiful designs and create a new and fun product for bag lovers.

Monogrammed products

Never out of style, people love owning and gifting monogrammed pieces! Newlywed couples, or those celebrating an anniversary, can enjoy gifts like monogrammed robes, towels, and more. Sports enthusiasts can enjoy having monogrammed sweaters with their favorite teams to cheer on at the games. Readers can find comfort in monogrammed blankets for nooks! The possibilities on who can enjoy this are endless, being a perfect niche to jump into.

Embroidered Pillows

Embroidered pillows from a small shop are an excellent idea for those who love to spruce up their home with fun and exciting décor pieces! Different from those in stores, think of how your designs can bring personalization into buyers’ homes, letting them share their passions in colors, designs, and more. 

Baseball Caps & Other Apparel

Whether you’re creating hats to support sports teams, your city, or your brand, baseball caps are favorites for many. Think of designing pieces with local area code numbers, fun sayings, silly designs, and more so others can show off their personality with your work! A classic go-to, baseball caps are always in style and can be worn by everyone. T-shirts, sweaters, and other apparel pieces are always popular, a classic to create and work on! Allow your creativity to flow as you create pieces with original designs, fun and sassy quotes, and more. Look into different types of clothing like jean jackets, uniform shirts, and more to get a better idea of what you want to create.

Pet Accessories

Pets are like family, so it’s no secret why creating for pets is a fun niche to jump into! Create pieces like pet beds, clothing, food mats and so much more for those furry friends. Simply embroidering pet names can be a big selling point for those who want personalized pieces, and a way to express their style in their homes. Not sure what to create? Check out our business page here for ideas!

What Will You Create?

There are so many things you can customize and create with your embroidery machine. From pieces, we talked about to other exciting ideas like jewelry, ornaments, and more, the possibility of what you can create is up to you! So keep up with JUKI as we share our project ideas through the year that you can create on an embroidery machine and others. What project would you be most excited to create on an embroidery machine?