How to Start Sewing Your Own Clothes

In the past few years, we’ve seen a rise in sewists pop up from all over the world, beginners starting their journey. If you recently started sewing and are interested in learning how to start sewing your own clothes, today we’re here to help you start! Follow along as we go over the basic supplies you should keep on hand, beginner machines and the machine types, and more.

What You Need to Start

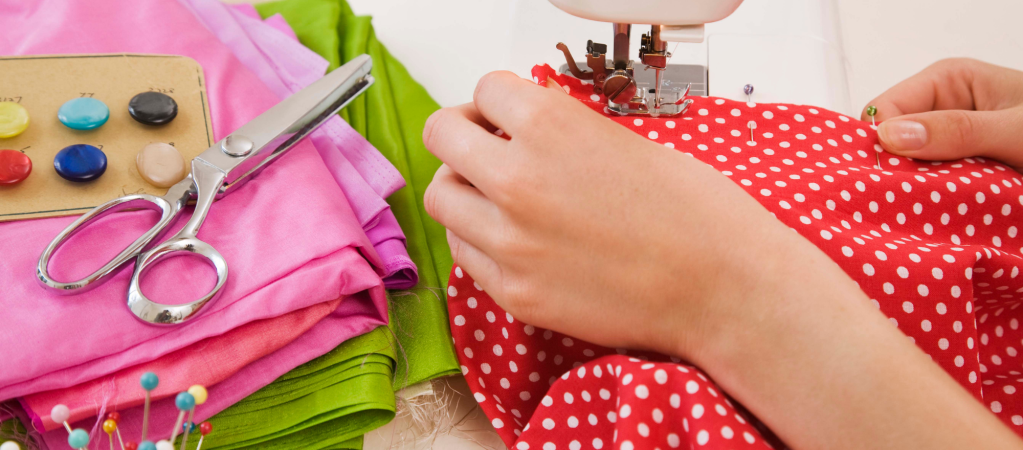
The most important thing for sewing your own clothes is your tools! Having the right tools on hand will help the process go smoothly, and you’ll have better quality projects at the end of it. Below is a list of tools every sewist should have in their tool kit.
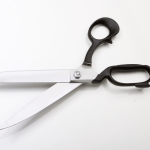
  1. Scissors

A prominent tool, but an important one! When it comes to your sewing scissor, we always recommend having one dedicated to only fabric and one for everything else. This helps to keep your fabric scissor blades sharp longer so that you don’t fray your fabric when it’s time to cut.

2. Measuring Tape

Important and handy, having a measuring tape in your kit is a need! A measuring tape is a must for any sewist, from measuring yourself when it’s time to begin creating to measuring your fabric, elastic, and more.

3. Sewing Gauges

An excellent tool for when it’s seam allowance time, the sewing gauge is a t-shape measuring stick with a slide gauge that allows you to measure the distance from your edge of the fabric to where you are stitching. So when you’re sewing apparel, this tool is perfect for hemming!

4. Thread Snips

This tool is perfect for creating apparel because it allows you to get that close thread cut on your projects without the fear of cutting your fabric. So without fear, cut close to your fabric using a thread snip on your next project.

5. Seam Ripper

Made a mistake in your stitching? Want to reconstruct a piece in your closet? It’s easier deconstructing those mistakes and projects with a seam ripper. This tool has a sharp hook that easily rips through the thread, breaking those pieces apart. Be careful, though, with its sharp end, it can also easily go through the fabric if you’re too rough.

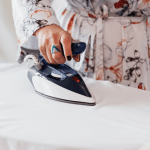
6. Iron and Ironing Board

When you’re sewing clothes, it’s best to have your iron and ironing board nearby! When creating, there are a lot of pieces that need to be pressed, so having this is a need! If you don’t have room for an ironing board, you can always get an ironing mat. This is perfect for beginner projects and is a great place to start.
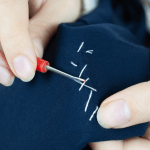
7. Pins and Clips

Whether you keep them in a jar, or a cushion, having clips and pins on hand is necessary when you’re sewing. These little tools are needed to keep fabric pieces together and aligned, ensuring your project comes out exactly as you want it to!

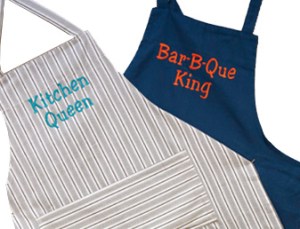
8. Fabrics and Threads

There is an abundance of options for choosing fabrics and threads for your apparel projects. Check out your current closet to see what fabric types you already use to better figure out what options you should buy. As for the thread, sewing is an excellent fabric/thread/needle game. Depending on what fabric you’re working with, you’ll be able to choose the right thread type and the right needle. 

We recommend looking for fabric created for apparel and 100% polyester thread which is durable and comes in every color.

9. Sewing Patterns

When you’re new to creating apparel, following sewing patterns is a great way to learn! Look at online patterns, your local quilt shops, and even antique and vintage shops when you begin browsing for your next pattern! Some pattern designers even offer step-by-step video tutorials and diagrams for the beginner sewist.
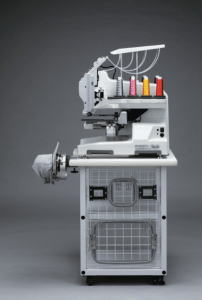
10. Sewing Machine

When you’re first choosing a sewing machine, how many options are out there can be daunting, but we’re here to help! Whether you get a machine with all the bells and whistles, or a basic straight-stitch, finding the suitable machine depends on your needs and wants. So follow along below as discuss the different types of machines out there, and what you should look for in yours.

Picking Your Sewing Machine

Let’s start by discussing the different types of machines out there! It’s important to know your options for what’s available out there and understand how each machine can help you build your project.

Mechanical Sewing Machines

JUKI Options: TL-2010Q, TL-2020PE, TL-2000Qi, TL-18QVP

JUKI Haruka TL-18QVP

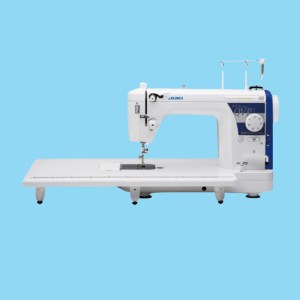
A mechanical sewing machine, or electric sewing machine, has little to almost no circuitry. It has a motor that moves the needles up and down, a foot pedal to drive the motor. Some mechanical sewing machine options, like the JUKI line, also offer Free Motion Quilting, allowing you to piece and quilt.

These machines are perfect for beginners because they’re simple to use, and don’t have a lot of bells and whistles. For someone who is just beginning, and doesn’t want too many buttons or stitch options, a mechanical sewing machine is perfect.

These sewing machines are also perfect for the sewist who plans to work with heavy or thick fabrics. Our TL series, for example, is a popular choice among bag makers because it can handle multiple pieces of fabric at once and can sew through fabrics like vinyl, leather, and cork.

Computerized Sewing Machines

JUKI Options: HZL-DX7, HZL F-600, HZL DX-4000QVP

JUKI Kokochi DX-4000QVP

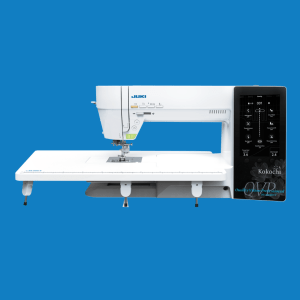
A sophisticated type of machine, the computerized sewing machine includes an LCD screen and offers more stitch options and functions. There are many digital features including sensor systems, pivot functions, digital tension, auto thread trimming, and more.

Some machines like, the HZL-NX7, come with features like JUKI Smart Feed, to move the top layer of your fabric in sync with the lower layer. If you’re working on apparel, this feature is perfect for stitching without the worry of shifting layered fabrics.

Computerized sewing machines, even with their selection of features, are relatively simple to use and for many make sewing an easier process.

Let’s Talk Features

Let’s go through some features you need, and features you’ll want. Knowing the options available to you will help you build a better wish list once you start looking for your machine.

  1. Know Your Presser Feet

Keep in mind the projects you plan to create and research what presser feet you’ll need to own. Some machines come with these accessories in their set, others you’ll have to purchase separately. Having the right foot is important when you start implementing techniques like gathering, adding elastics, and more.

Some feet we recommend for apparel are the Buttonhole Foot, Walking Foot, Smooth Foot, and Invisible Zipper Foot to start.

2. Stitches

Think about the type of stitches you’ll want to work with. Some machines only offer straight stitch, others will offer zig-zag. You can also find machines that offer stitches for quilting, piecing, overlocking, triple stretch, blind hem, and more.

3. Creating Buttonholes

This can take 4 steps, or 1 step depending on the machine you purchase. Some machines will offer an automatic one-step buttonhole while in others you must manually switch between the zigzag and bar tack stitches to form the buttonholes. If you’re a beginner, finding a machine that uses an automatic option is great, especially if you plan on using buttons often!

4. Built-In Free Arm

If you plan on creating apparel, a free arm is perfect for pants legs, and sleeves. This free arm will allow you to sew those narrow cylindrical or tubular items, helping you create the perfect closet.

5. Automatic Needle Threader

A small feature with a big impact, the automatic needle threader feature is great for users who have difficulty with eye-sight or shaky hands. This feature works by using a small hook to pull the thread through the eye of the needle.

Let’s Start Creating!

Now that you know what tools you’ll need and have a better idea of what machine you’ll want, you can start planning your sewing journey! Sewing your own clothes is a wondrous journey where mistakes will happen, your skills will surprise you, and you’ll constantly be learning. Pick beginner-friendly projects and patterns, research local sewing classes, and test your skills by grabbing thrifted and discounted fabric when you first start.

We recommend looking on YouTube for online tutorials and lessons when you find yourself lost, and enjoy the limitless amount of resources out on the web for sewist! We put together our top 5 tips for new sewists!

  1. Start Small

Don’t psych yourself out with big projects when you first start sewing. Pick up simple patterns and projects and start there before building your skill base and attempting larger projects. By doing this you’ll reduce the chances of burnout and have fun making mistakes!

2. Use Scrap Fabric

Don’t let those pieces go to waste! Scrap fabric is perfect for when you want to practice new stitches and techniques.

3. Read Those Patterns!

Don’t start a project before fulling reading through a pattern. Then, if you need to make adjustments, you can catch it early on and do so before you start cutting. It will also help you understand the steps you’re about to take and help you understand the entire process before you begin stitching.

4. Check, and Check Again

Test trying your outfits and projects as you sew is the perfect way to confirm you’re doing it right. Check on the stitches, make sure the length is correct, and make those adjustments.

5. Enjoy the Journey

Not many call themselves sewing experts, even those who have been doing it for years. Every time we sew and create, there’s a chance for a new technique to be learned and a new project to be created, meaning the journey is never-ending! Enjoy the process and watch yourself grow as you sew.

We hope these tips and resources help you find the right tools and machines when you start sewing! What do you wish you had known before you started sewing? Comment down below and leave tips for the new sewist!

JUKI Small Business Seminar: How to Create a Budget and Calculate Profit

One of the most important things about starting a business is creating your budget and understanding your profit. While there will be challenges and unexpected turns in your journey as a business owner, you can avoid surprises and keep your business financially healthy by building a budget that fits your goals while keeping track of your spending.

Creating a sample budget can give you a general idea of what expectations to have for your business’s first few months or years. As your business grows, you’ll use this as a basis for your budgeting plans and create a more concise idea of your spending and expenses. We’re going to be giving a preview of what you should include in your budgeting plans for success in your company.

Expenses

The best way to start is to focus on what you’ll be spending. Create a list of things your business will need, like materials, software programs, and staffing. Include items that will be involved in your day-to-day work, from office supplies to the thread on your machine if you’re creating an apparel shop. We recommend looking online and using your favorite search engine by researching examples of budgets in your industry. These can be layouts that will help you build your own. Let’s review the type of expenses your company can obtain.

One-Time Expenses

Think of these expenses as those big-ticket items that are more of an investment than a purchase. Your machine, for example, if you were to purchase a RICOH Ri 100, would count as a one-time expense. One-time expenses can also include laptops, office furniture, and services for your logo or website creation.

Fixed Expenses

These costs are to be expected each month in your budget planning. Think of what rent you pay, insurance, services, website hosting, and subscriptions. Keep in mind that fixed expenses vary little in price.

Variable Expenses

Here you’ll find those spending pieces that fall somewhere between a one time-expense and a fixed expense. They occur more than once but can vary in amount and payment dates. These expenses include materials you use to make your products, marketing costs, travel, accountant to file taxes, and credit payments.

Pricing

Finding the sweet spot in pricing your product is vital in your budgeting. Keeping certain factors in mind will assist you in creating a price that is true to your work but still allows your company to flourish and be profitable.

Cost of Goods

Think of what costs are going into your merchandise. For example, if you’re creating an apparel shop, keep track of spending for t-shirts, threads, ink, bobbins, and more. In addition, whatever supplies you’re using to develop your product should be added to the cost of goods.

Staffing

Do you have a team for your company? Are you paying yourself correctly? Include their fees or salaries into your cost of goods. Understanding that this involves yourself and keeping track of the hours and work you put into your own company will ensure that you’re pricing your products correctly to pay yourself back for labor. In addition, giving yourself a livable hourly wage will give you an idea of how your company is prospering and give you a nudge on when it can be time to bring others on board.

Packaging and Shipping

When you’re shipping your products to customers, your shipping can be seen as a view into your brand. When creating your packaging and how you want to present your products, factor in the costs for shipping materials, any goodies or filler placed inside, and marketing items like business cards or flyers.

Shipping is a crucial point to being on top of your industry. Failing to estimate costs correctly can throw off your budgeting and disrupt your cash flow. Focus on standard shipping prices for your products (size, weight, location, and speed.) One of the best ways to plan your shipping cost is by visiting your local post office for assistance on rates.

Remember to keep in mind how you plan to ship and the timing. While many customers expect next-day shipping, small shops shipping every day can be more costly than planned large shipments.

Online shoppers will expect shipping charges, but try to keep this reasonable. One of the top reasons many will leave their cart unpurchased from an online shop is exponential charges in the shipping cost.

Processing Fees and Credit Card Sales

Selling online means customers will pay through cash services, like debit or PayPal, while others will use their credit cards. When setting up your shop, note the processing fees that follow credit card usage. You will likely be paying a fixed processing fee per transaction and an additional fee of around 3% of the order price. However, this can vary depending on what processing service you use for your shop. For example, processing fees are higher when selling internationally, resulting in higher costs.

Damages and Returns

While we never hope our packages get damaged, it’s best to be prepared. Set aside a budget that can be used for emergency products that may have been damaged on the way to a customer. Research your product and see what’s standard for profit loss with damaged returns on your product type. Keep in mind the re-shipping cost that will follow as well. It’s essential to focus on your shipping methods for this reason and find the best way to ship your products if they’re at a higher chance of being damaged, like glass items.

When it comes to returns, you do have the option as a shop owner not to accept them. Shops that are focused on artisan sales, for example, might choose to be final sale shops. However, if you do choose to accept returns, keep these options in mind:

  • A separate charge for a “restocking fee” to recoup some of the loss.
  • If you feel you get returns often, which e-commerce sites are more likely to receive than in-person shops, you can raise your prices slightly to account for losses from those returns.
  • You can also leave your prices the same and trust this policy will allow more sales to generate due to those finding comfort in the option to return an item.

Projecting Revenue

When it comes to projecting your sales, you’re working on educated guesses from research or experience if you’re upgrading from what was once a side gig. Whether you’re going off based on your initial sales data from the side gig or starting from scratch, seeing the numbers can give you a better idea of what products to focus on and when to expect higher or lower sales rates.

For those who find themselves with no data to start with, we recommend reaching out to those in the industry you’re entering that you may know or contacting your accountant who might have contact with those in the business. Starting your own company is based on constant research and finding the right people to work with you and get you where you need to be.

How to Calculate Your Profit

First Step: to calculate profit, take your total revenue and subtract the cost of goods sold. The difference is your gross profit.

  • Revenue – Cost of Goods Sold = Gross Profit

For example, if you sold $10,000 in printed canvas tote bags and the bags themselves cost you $3,000 wholesale, your gross profit would be $7,000.

  • Revenue: $10,000
  • Cost of Goods Sold -$3,000
  • Gross Profit: $7,000

There are other expenses beyond buying the t-shirts, like the cost for your e-commerce website and your ads running on Google. These expenses are called operating expenses, which are subtracted from your gross profit.

Operating expenses include most costs that don’t directly connect to what you sell—things like rent, equipment, payroll, and marketing.

Second Step: subtract those operating expenses from gross profit. The difference is net profit.

  • Gross Profit – Operating Expenses = Net Profit

For example, following off where we left off above:

  • Revenue: $10,000
  • Cost of Goods Sold: -$3,000
  • Gross profit: $7,000
  • Operating Expenses: -$1,000
  • Net profit: $6,000

Now, if your net profit totals as a positive number, you’ve made money. If it’s a negative number, you’ve lost money. By following along with your profit calculator, you can start to see what costs might need to be reviewed and plan if you need to change your prices or other costs like shipping.

Other Expenses

While we’ve gone over the basis for most companies, your costs will be dependent on your company. Some fees to keep in mind when creating your budget are debt repayment, Equipment payments, Taxes, and money received.

Debt repayment and Equipment payment are contingent on your company and what debt you’ve entered. This can be from payment plans on machinery to owning a storefront and mortgage. Keep these things in mind when creating your expenses budget.

All companies have to pay taxes at the end of the year. So make sure to factor this in when creating your budgets so that you’re able to cover your tax payments come the season.

Money received is meant to focus on what cash payments you’ve attained. So while on paper, your sales can show $100,000, unless you’ve fully received these payments from customers, you’ll have a hard time paying your expenses when the time comes. Also, be aware that if you hold inventory for your shop, all those products have value and get included on your income statement.

Be Prepared

Whether your company is just beginning, or you’re transcending to a higher level and want to upgrade your company, creating your budget is the first stepping stone to success. You can have the best product and equipment, but you can find yourself in dire financial health if you don’t prepare your finances correctly.

Knowing how to manage and track your budgets, spending, and earnings can help you create a strong base for your business. The more you learn to control your money, the better success you’ll see in the long run! 

10 Reasons to Start an Embroidery Business

Starting an embroidery business is an exciting and growing venture. If you’re interested in starting an at-home business, embroidery is a great option, especially for those with creative ideas that others would love in their niches.

Below, we will give you ten reasons why the embroidery business could be the best idea for your new venture with a machine like the JUKI Tajima Sai.

Keep Your Space

When you start an at-home business, you may not have the space available for a large machine and equipment. So finding a single head embroidery machine like the Tajima Sai or similar is a great idea because they’re for compact spaces.

Minimal Set Up Cost

Starting a new business, we want to create something low-cost to create to achieve a profit. Therefore, the initial money you put into an embroidery business doesn’t require a considerable amount. For example, the Tajima Sai can be found for under 12K with software and supplies included. Many machines will also have training videos or resources for starting users.

Supply Cost is Low

When it comes to buying supplies for a business, you want to make sure that it will be a profitable outcome. For example, a 5000-meter cone of embroidery thread is under $7.00, and the line will last for many projects.

Creative Freedom

Creating merchandise can be a great experience! If you have many ideas, owning a business that allows you to create is perfect. You can find yourself in many niches, whether it be creating for hobbies you enjoy, TV shows or movies you follow, and more; there is a customer base for everything.

Flexible Work Hours

When you own a business, you’re able to create work hours for yourself. This can be a great side business for many after their workdays, at night, or on weekends and special events. The ability to choose when and how you work is a pro for many owners.

Profitable Business

It makes sense that when you start an at-home business, you want something that will be low cost with high profit. The great thing about embroidery is the low cost of supplies. Remember that you will never receive 100% profit on an item you create, but hitting 10% profit is average and hitting 20% profit is good!

Customer Demand

Small businesses are currently experiencing a boom! With social media and the online network at your disposal, small businesses are constantly growing and creating audience bases. However, while there are many in the game, there is never someone who creates the same way you create, and you should keep this in mind when choosing to enter into the embroidery market.

Resources are Everywhere

Embroidery is not a new thing! However, one of the best things about the embroidery world is the number of resources available to new and advanced users. Whether it be training videos, attending workshops, or other programs, embroidery offers the chance to learn a new product and new project with much help.

Easy Expansion

When it’s time to upgrade your small business, it’s easy to expand. Certain machines can easily link together, allowing you to create your own production ‘floor’ right in your home. With the ability to easily grow your business when you need it, knowing the possibility is always there is good.

Product Choices

Designing and creating a new product to sell should be fun, even if there is work to do. The possibilities with an embroidery machine allow you to focus on different niches! With accessories available to embroider socks, hats, bags, t-shirts, jackets, and more, a pro for this machine is the ability to be multi-dimensional in your merchandise.

Whether this pushes you to open that embroidery business you’ve been thinking about or not, we hope this helps you see the prod of opening your own small business! So, what questions do you have about embroidery? Let us know down below!