
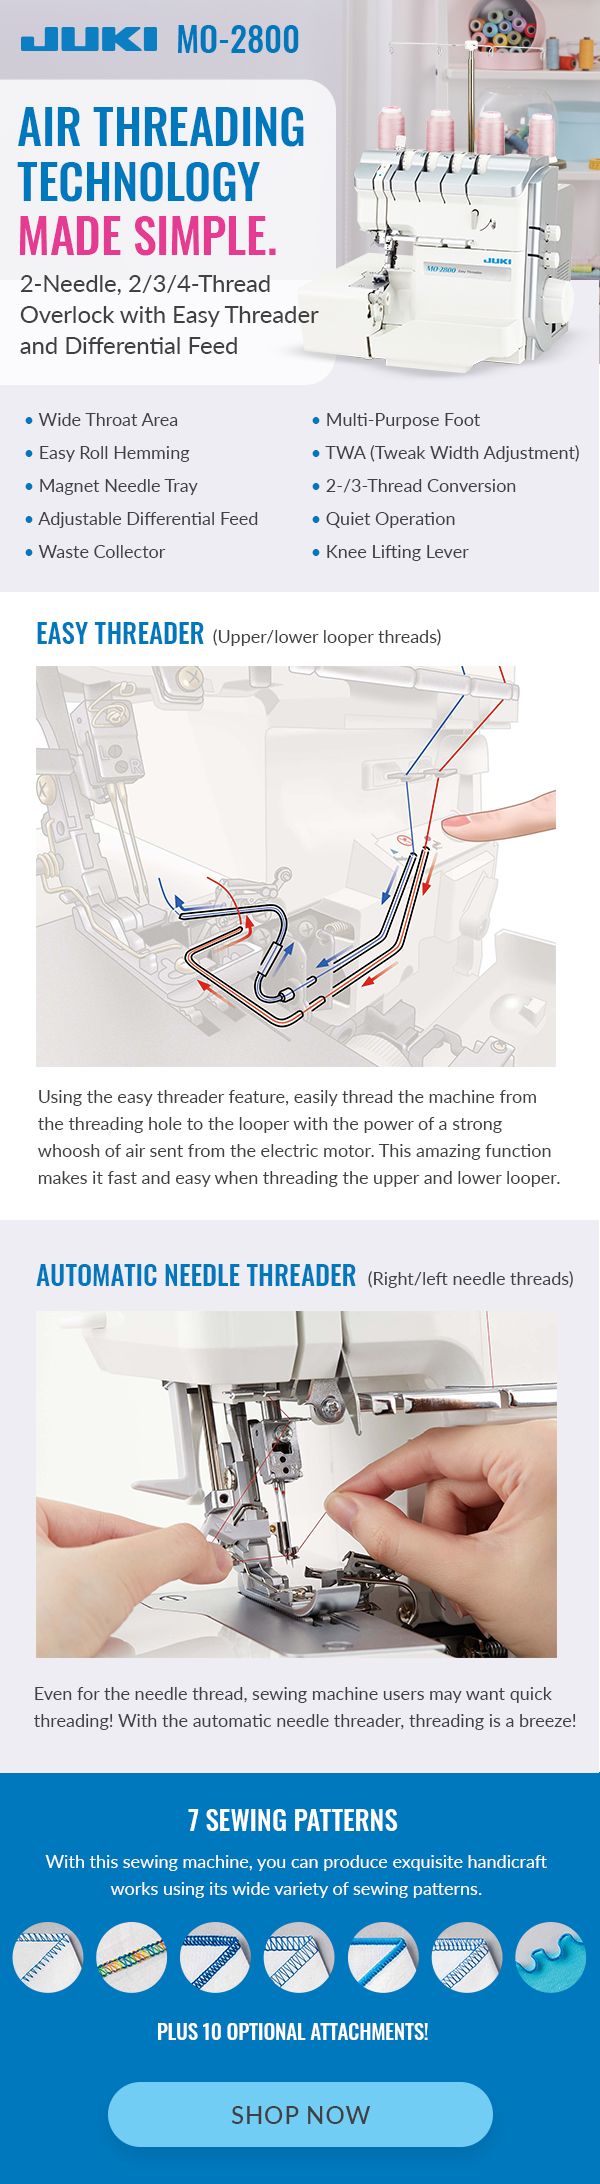
Introducing our new serger the MO-2800!
See here to learn more about our new 2-needle, 2/3/4-Thread Overlock with easy threader and differential feed.
Introducing our new serger the MO-2800!
See here to learn more about our new 2-needle, 2/3/4-Thread Overlock with easy threader and differential feed.

When we think of creating a business, our mind often jumps to brick-and-mortar shops or online shops that sell creations. However, there is another type of business many tend to overlook, and that’s their expertise!
One of the most popular ways to sell your expertise in a skill is to offer online courses that new crafters can purchase and use on their journey. These online courses can be pre-planned and downloadable or offered as live sessions with scheduled classes for students to attend. The pro of providing a service like this is that instead of a physical product like your quilts and apparel, which require multiple steps like creating, shipping and processing, an online course allows you not to worry about things like that.
Do you feel like you have expert knowledge that others can learn from? Have you built a platform showing friends and followers tips and tricks on your machines? Creating an online course is about taking that knowledge plus your skills in teaching that offers you the chance to compress your expertise and showcase it to new crafters like yourself.
Follow along today as we go over some steps you can follow to create your online course today.
Let’s Talk About Online Courses
In our day and age of technology, online courses have risen in popularity. From education on how to run a business to classes on sewing, online courses have broadened our ability to learn new skills worldwide.
Online courses can take much time to create and require much planning and direction. However, this is a single product that you can sell multiple times without you having to re-create. There is no product inventory or packaging cost; instead, customers can easily buy this service with a few clicks. Besides purchasing a few subscriptions to create and host your course and purchasing the equipment necessary to film and edit your videos, your central budgeting will go towards marketing and hosting your course after creation.
Online courses can also offer high revenue. After you’ve completed the costs that go into your original course creation and production equipment, the rest of your revenue can be profit. Whether you choose to update the course once in a while or leave it as is, this product can be seen as passive income and is a perfect addition to many businesses.
Building Your Course
Let’s jump into the steps to building your online course! As we know, there are many educators out there who are offering online courses in their fields of expertise. The best way to stand out from others is to find your niche in skills and build on a topic that you’re uniquely good at. Think of your course as a solution to new sewer needs, and choose a topic where you have credibility, expertise, and of course, passion! Follow along as we go over steps to keep in mind while building your course.
Research Your Future Customers
Before you can jump into creating your course, let’s discuss who you’ll be teaching and selling to. Below are some tips to keep in mind when researching your audience.
– Learn what your audience wants to know! Are you constantly asked how to create a handbag? Finish a sleeve? Free motion quilt designs? These questions are essential to note, so when you make your course, you can find what common questions, and more complex ones, can be addressed. In addition, students want to feel accomplished when they attend your class, so learn what skills and projects can achieve this while working on your course design.
– Find the solution! When new students find your course, they often have a problem they’re looking for a solution to. Your course can be that problem solver! Make sure when creating your course that you offer efficient and quick ways of teaching skills and sharing your knowledge.
– Learn your audience. It’s best to know your target audience, whether you are selling to new sewists who have little knowledge or experts who want refresher courses or to learn more complex skills. Then, when it’s time to promote and sell your class, you have a clear message for students to read and understand, so they choose the right course for their needs.
– Don’t forget to put yourselves in their shoes! When creating a course for a student, put yourself in the students’ shoes and make sure you’re covering the essential details. You don’t want to attend a class and leave with more questions than you came with, so have friends and family test the course and find what pieces can be removed or should be added.
Need help deciding what subjects and problems to cover? Do some research in your field! We recommend googling trends, browsing community forums, and roaming social media to see what questions and concerns are being brought up in your community that you can answer with your course! Keep in mind what problems you have solutions for, what goals your students have, and how you can help them achieve their goals.
Choosing a Class Type
There are multiple formats for your online course that you can choose from. Depending on how you plan to structure your class and how many days you believe a student will need to learn your material, you can create a template for students to follow when downloading your course.
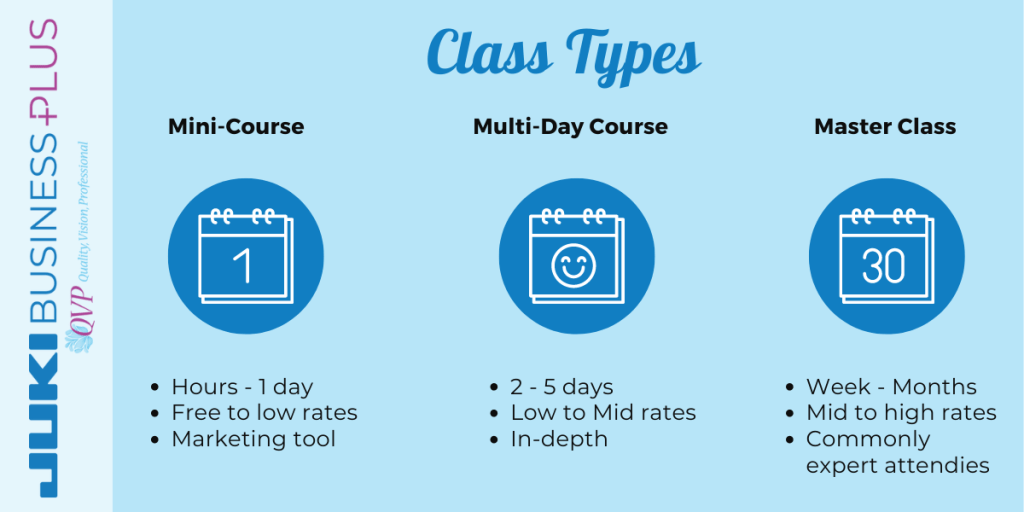
Mini-Course
These courses can take up to a few hours or one day. These classes can be formatted as a video, blog series, and more. Generally, in the lower cost sector, these courses are offered at low rates or free as a marketing tool if you’re trying to sell a higher-end course later. Mini-courses are perfect for those treading the waters of starting an online course and can give you an idea of what plans and efforts are needed to create a multi-day course.
Multi-Day Course
Generally, a multi-day course takes a few to several days of work to complete. Broken down into chapters or modules, these courses break down the lesson plan into multiple segments where a student can gain more in-depth knowledge of a skill. In addition, a multi-day course will often include add-on material for teachings like a project or worksheets. Falling into a higher cost range, these courses can range from $300 – $2500. A great way to sell this course for newcomers is offering that mini-course we mentioned beforehand as a sneak peeks at what’s available. A mini-course is also helpful in validating your expertise before a more significant purchase, like a multi-day course.
The Master Class
A master class should offer in-depth knowledge and skill teaching for your customer base from weeks to months. Generally offered for those already in the field looking to expand on their current skill set, these classes can go up to $5,000 in charge. We don’t recommend creating a master class as your first or even third course, but it is something that can be worked towards if you enjoy teaching!
Master Classes have a way of succeeding when they start becoming communities. When creating a master class, look into creating a community forum or group page for your students to interact. This is a great way to encourage communication between you and your customers while creating a loyal customer base that will want to return and learn new skills and talents from you.
Breaking Down Your Course
Once you’ve decided what your course will be focused on and what format you want to create yours in, it’s time to break down your ideas and start planning! Again, put yourself in the student’s shoes, and work from end to beginning to see how you’ll plan out your lesson. Remember, the point of your course is to provide a solution for someone’s problem, in this case, their lack of knowledge or expertise on a skill or project.
Below is an example of a course breakdown:
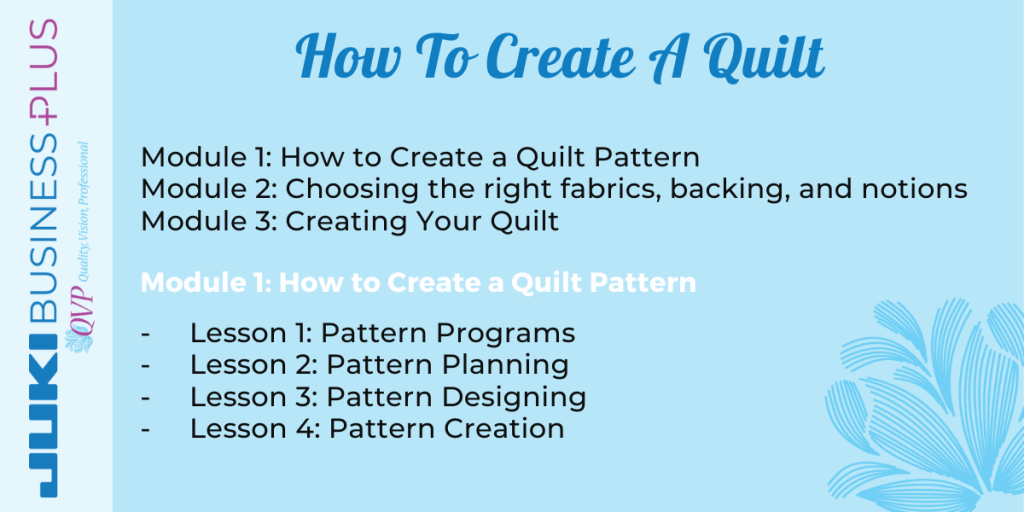
Once you have an idea of your outline, depending on how many days your course is and how much time you expect your course to take, it’s time to start planning the content for the lessons and what formats you’ll need to create those in. Besides text, below are examples of content formats you can use in your online course.
Video Content: portray those stitches, curves, feet replacing tricks, and more using video as a tool.
Screencasts and Walkthroughs: if you’re working on a program, like the Tajima Sai Writer, for example, screen record your directions and how-to’s and place those in your course so students can follow along and build with you. Using screencasts and walkthroughs is a great way to show step-by-step instructions when using programs that new users are unfamiliar with.
Downloadable content: Here is where you can place patterns, worksheets, to-do lists, and more that correlate with your lesson plan. Creating interactive work for your lesson plan is a great way to keep the student involved and have them learn these skills hands-on.
Before setting up your content, research what formats other courses use that you find helpful and find out what content students feel most comfortable learning with. Your content will solely focus on your audience group and their needs, so think about what you would like to work with if you were learning.
Setting Those Prices
Pricing will always vary on course cost, but your format is the first step. For example, free and low-cost are recommended if you choose to do a mini-course. On the other hand, high costs are expected if you do a masterclass. Other things to keep in mind when playing with the cost are who your audience is (think of what they’re willing to pay), and your expertise and credibility (the more expert you are in a skill, the more people will want to pay.)
Research your competitor’s pricing and their expertise levels to get an idea of pricing. Don’t sell yourself short, but be realistic when placing pricing. Make sure to set a goal for yourself to decide how many students will need to sign up for your course each month to meet that goal.
Choosing a platform
Once you’ve planned, created, and priced your course, it’s time to choose students who can access the platform. Follow along as we go over a few options you can consider before choosing your venue.
– Udemy: to keep it easy and simple when creating your first online course, we recommend checking out Udemy! With over 50 million current students, their platform can offer you the chance to get your name out there. To create a course, you must first follow the process of being approved as a ‘premium instructor,’ and then you’ll follow easy step-by-step directions on how to set up your first mini-course! With multiple support options for new teachers and programs you can join to up your business game, Udemy is excellent for beginners in the online course world.
– Thinkific: Beginner-friendly, Thinkific is simple and offers ready-to-use templates for those creating their courses. Feel free to follow along with the template and tweak it to your liking as it recommends specific cue points like quizzes, instructor notes, downloads, and more. Created to make your life simple, Thinkific works towards simplifying the creative process so you can enjoy your course faster.
– Skillshare: Those looking for creative skills in crafts tend to float towards Skillshare when it’s time to learn something new! Free to sign up and publish a course. This is a great way to practice creating mini-courses and getting comfortable with building your skills in teaching. Keep in mind that your classes will be accessible here unless listed on Skillshare’s premium catalog.
Getting Your Name Out There
Now that your course is up and running begin marketing your expertise! Work on that email marketing campaign, share your class with your social media pages, encourage others to join and share too, appear in content relevant to your audience and niche, and consider paid ads. It takes time to find the right marketing tools for your audience and see what brings in the right customers, but tests and trials are the perfect way to bring in those students and get your class running.
Don’t forget to ask for reviews and testimonials that can be shared on your sites so new prospective students can get an idea of what your course can do for them! Remember, your course’s goal is to help students accomplish their goals. So don’t take feedback to heart, and listen to your students’ needs as you tweak and perfect your course for future customers.
Let’s Get Started!
Now that you’ve planned and set up your course let’s make it a reality! If you’ve been able to teach yourself and teach others, creating an online course that follows your passion is a great business to look into. Teaching others your passion can be an enriching journey while setting you up to earn money through your expertise and skills! So, if you were to start an online course today, what would you teach?
Interested in starting your business today? Visit us here to see how JUKI can help you start today!
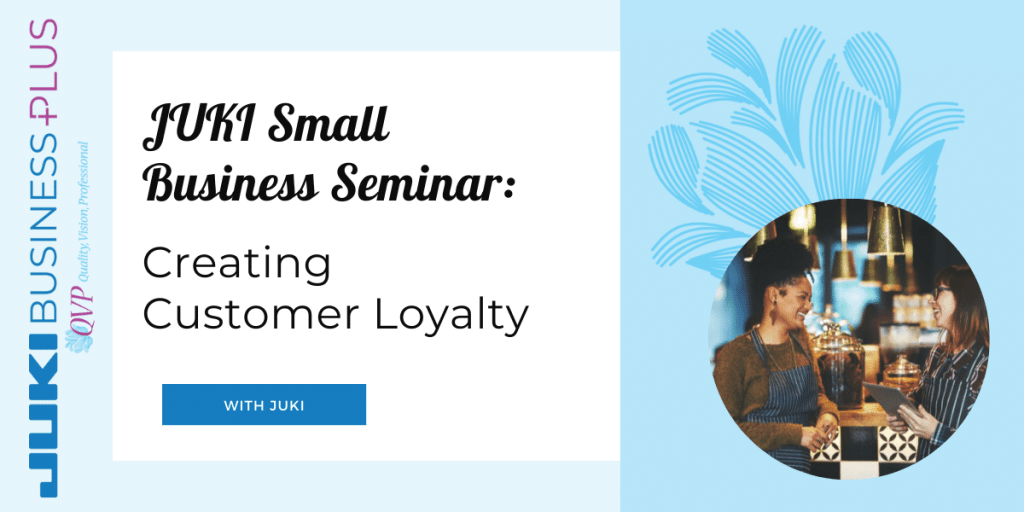
It’s great to get new customers and introduce your brand to new people, but one of the best ways to succeed is to create those returning customers. You can cultivate the relationship from the first time they purchase and continue it through social media and other channels.
One of the ways you can do this is by GLUE marketing, a strategy we’ll dive into in this article, where you ‘Give Little Unexpected Extras’ to customers during their experience with you and help them feel a sense of gratitude. By going just a bit above your competitors with this tactic, you can build closer relationships with each sale. GLUE doesn’t have to break the bank but can be a small thank you note, freebie minis of your product, or fun advertising products like stickers.
GLUE doesn’t need to be used all the time, but it can be used as an assistant. So if you’re going to be doing a sales promotion, for example, you can go ahead and throw in those GLUE tricks you’ve been saving on surprising customers and building that bond.
Follow along as we go over other GLUE tactics on your marketing plans to encourage those repeat customers and bring in new ones.
Build a connection
With marketing, you can also advertise your business and brand, so take the time to introduce yourself and the company’s story to build that bridge of connection with your customer base.
You can focus on your company’s guidelines, bring attention to how you create or source your products and materials, or share what you use for sustainable practices in your company. All these little things will open a door between the inside of your business and customers, creating a more personal feel to your work.
Honesty in marketing is one of the best ways to get your name out there. By sharing the behind-the-scenes, and showcasing how to use a product or how it’s made, you can bring in new customers, and they’ll feel closer to your brand.

Content in your packaging
Receiving a package in the mail is one of our generation’s favorite feelings, which is why as an e-commerce shop owner, you’ll want to create a package that will engage the customer long after it’s been opened. Opening that package and seeing your product for the first time is what all your work has gone into, and you want to make sure your work was worth it.
Minor aspects like prints, including business cards or flyers, can bring those customers back to your business through blogs, social media, and your website.
While the GLUE tactic can take planning and work from you or your team, it can create a strong bond between customers and your brand and keep them interested in re-purchasing. That personal touch drives people to specific shops, so taking the time to add this to your marketing plan can be a successful tactic.
Branded Gifts
You’ve probably shopped before and experienced this, like receiving a sticker with the brand name, for example. You have two options to consider when you decide to place branded gifts on your packages, ‘Value Add’s’ or an ‘Identity-based’ gift.
– Value Add: this is a small and economical gift that can help the customer get more experience with your products. Think of this as an opportunity for immediate use and a sample of a different product they can come back to purchase (creating that returning customer you want).
– Identity-based: this can be considered a form of free advertising while still a valuable gift for the customers. Think of identity-based gifts like branded stickers or pins that can be placed on apparel, cars, or more that will showcase your brand while showing off their interest. For example, every purchase with Vans shoes comes with a sticker of the vans logo, which a skater can add to their board. This is free advertising for Vans and is now a fun accessory for the customer.
Video
During the onset of COVID-19, we saw an increase in brands using videos to get personal with their customers. With the removal of face-to-face shopping for some time, and many have switched over to preferring to shop online, creating that personal touch between the consumer and seller is essential.
Videos can bring that personal touch many have been feeling has gone missing. Follow along for a few ways you can take this and use it in your marketing plans.

Customer Support

Customer support is one of the biggest deal-breakers when returning to a shop. No one wants to deal with poor customer support during their shopping, so look into ways to build a successful support plan or upgrade your current one.
Focus on shipping and handling policies, and establish how and where customers can reach you. By having a dedicated contact they can reach out to, customers will feel more comfortable when shopping with you if they have questions or need to handle a return/exchange.
This is still a GLUE version, even if it’s not a gift. Offering proper support and contact information can be the difference between you and another online retailer that doesn’t offer these options. Remember that this doesn’t mean you need to be available 24/7. Good support is setting and meeting reasonable expectations for you and the customer. This falls on you to respond promptly, assist where you can, offer support where you can’t, and be accountable for shop/item issues.
When handling customer support, some tips to keep in mind are setting up follow-up dates for issues and concerns or creating an FAQ for your shop that customers can easily access.
GLUE and You
In the end, using GLUE in your business is a tactic that can lead to success and assist you in creating a loyal customer base. For GLUE to work correctly, you need to ensure your product and customer service are up to level. Think about how you can make the customer’s experience special, and plan your customer approach from there. Remember, your product and service are the main focus, but the little extras sure help!
Joining us on this month’s blog, is Kiki Kitty, JUKI Designer Ambassador, and well-known Fashion Designer. Kiki joins us by giving a view into her thoughts on bag trends through the decades! From the 80s to today, where looks have come and gone, follow along as she shares her thoughts on how bag styles have transformed over time.

There are certain trends that will always remain classic due to their root of it. When a particular style becomes synonymous with a certain era we will always reminisce about it, so its return is inevitable. Style trends vary from city to city, even from hood to hood. You could tell where someone was from based on their style choices. The artists who create & rock dope style bring the flavor of their neighborhoods onto global platforms, thus influencing the style of those around the world. This is street style. This is culture.
Getting nostalgic about my bag choices through the decades I think about the world around me and what influenced me from a teen in the 80s to today.

The 80s were a time in desperate need of artistic exploration and expression. Hip hop was in its infancy and brought about my first opportunity to see the style from city to city every week on Soul Train, Video Soul, Yo MTV Raps.
Dapper Dan gave us Logo Mania by taking materials from bags and creating custom jackets. We began to find new ways of inventing and upcycling. Anything to show off our personality and originality. But whatever you wore, having a giant designer was a must. It was so huge, that it wasn’t an accessory. It was part of the outfit.

In the 90s, when I left Atlanta to begin my life as an NYC fashion designer. Andre Harrell introduced us to “Ghetto Fabulous”. This movement took ownership of the style trends we created in our everyday life and screamed it from the rooftops. Our favorite rap stars may have been shouting about the brands they wore but be clear, it was the artists themselves, the stylists, the team who altered those garments, added their originality to them and turned them into something entirely new that would influence generations of creators.
This movement brought about the rise of urban fashion. Looks we no longer had to alter to fit our dope style needs. What was once “Dungarees” that were the easiest to rip apart, remix, and put back together was now ripped denim, studded, painted, and patchworked available right from the rack. I remember looking through The Source Magazine and seeing this denim saddle bag. It’s no shock that a bag with those unique curves would be such a huge hit amongst a generation of originators.

By 2000 we all had “Carrie Fever” as Jay z rhymed in ’03 Bonnie & Clyde. Patricia Fields whose iconic 8th St shop offered a space for just dope style. Period. It was always less about the designer and more about giving us the vibe and the energy of the city, from the rappers to the club kids and beyond. Luckily for the rest of the world, ‘Sex n the City’ episodes brought the mashup of New York Street Style to everyone’s living rooms. Even if you weren’t a music lover or style hunter you were getting these trends!
The 2000s were all about that Aliyah belly button, that boyfriend style mix with the feminine baby tee, and that pop color pump. The perfect bag had to be small enough to not distract from the belly button ring but large enough for your 2-way pager. It was also the perfect way to add more color to your look, even adding a charm or 2 if you deemed it necessary to make the look more your own.

Before Insta-minute-to-minute fashion was available we counted on the “Us Weekly’s” to give us weekly updates on what all our favorite celebrities were wearing. Sure, my monthly fashion fix subscriptions remain something to anticipate, but these weekly tabloid mags brought us news of everyday style. Along with this came the rise of celebrity fashion couples and thus began my obsession with Kanye & Amber Rose.
Tracking Amber Rose and other fashionable tastemakers’ everyday styles offered us more bag trends than a typical fashion editorial would offer. So the possibilities became endless!! As a woman on the go, my go-to choice was the mini backpack. I could still get the trendy prints and the femininity of a purse but I could also carry my flats for a long day of running around the fashion district or hold my passport and travel necessities for a flight. The best of both worlds!

Girl on the go. 42% of small businesses are owned by Women. That, within itself, is a trend that grows year after year. All 12.3 million of us are busier than ever! With so much to manage all we really need in our bag is our phone and lipstick. The secret to not leaving your bag at that last investor meeting is… lean in, I’ll whisper it to you… cross shoulder bags! Why haven’t we done this all along!!! Even fanny packs are worn across the shoulder. Small is in and just like small business owners, great things come in small packages.
The bags we carry are very personal, it keeps what’s valuable to us safe, and it comes with us to more places than anything else in our wardrobe. Your bag is your shoe’s bestie, the thing that can make or break a whole outfit. When deciding what bag to rock; designer, vintage, or DIY, remember that trends come and go, style is what counts!
Written by: Kiki Kitty, JUKI Designer Ambassador
So many sewists love bag-making! Whether they’re creating beautiful handbags, fun beach totes, or designing team bags, this is a fun project any sewist can start doing, no matter their skill level. From simple tote bags to more complex purses, bag-making is an excellent project for those who want to learn new skills and up their sewing game. Today’s blog covers five different types of bags you can create! We cover the basics of starting your bag-making journey, from their level of expertise to the sewing feet and notions you’ll need.

Tote Bag
Level: Beginner
If you’re new to bag making and want to try your hand at a fun and easy project, look into patterns for tote bags! Whether they’re simple with a few panels or a little more fun with optional pockets and different handle styles, the tote bag is one of the best projects for beginners. Tote bags are great for their versatility as well! Use this project for the beach, grocery shopping, farmers’ markets, etc.
If you’re making tote bags, we recommend checking out these fabrics for the outside: canvas, denim, and twill, and for your bag’s lining, cotton, all-purpose muslin, and broadcloth all work. Use firmer fabrics to add the structure and shape you want your bag to take. For a lighter feel, use fabrics like cotton.
You can either use leftover fabric from which your bag was created or webbing for a firmer handle to create a handle.

Electronic Carrier Case
Level: Beginner to Intermediate
Here is where we start testing our skills! You’ll want to add zippers for storage and safety for an electronic carrier case. You’ll need to learn how to use specific feet to attach zipper closures for this bag, like an invisible zipper foot. We recommend using online resources like YouTube to learn your new skill and purchasing a pattern to learn the process and understand the pieces it takes to create your project.
For electronic cases, we recommend looking into soft padding options to place inside to keep your electronics from hitting one another. The case can be created from any fabric, making this a fun project to personalize to your style! From vinyl leather to cotton, you can get creative with the design of your carrier.
Features you can add to your project are:
• Pockets for your electronic chargers
• Different closures like magnetic buttons or velcro
• A strap as a wristlet or bag
Level up: Test your skill with mesh netting fabric! The best way to sew and attach this fabric piece to your projects is to use a ballpoint needle or Universal machine needle size 70/10-80/12 with a strong polyester thread. These are great for the outside of carrier cases and add more storage space for details like headphones, iPad pens, and more.
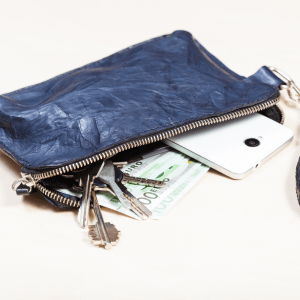
Wristlet Wallet
Level: Beginner-Intermediate
Fun and perfect for those family day trips or nights out, a wristlet is a great way to raise those sewing skills and try something new! Some skills you can pick up while creating wristlets are adding in pockets, attaching zippers, and creating straps. You can also learn to attach closures like buttons, clasps, and velcro.
For outside fabric options, we recommend leather, cotton, or synthetic. If you want to add durability to your projects, attach inner linings using fabric like polyester or nylon to reinforce the structure.
Level up: A fun way to add to your skill set is using clear vinyl! Placed in wallets to make certain pockets visible, like your ID, you can sew this in to add that professional touch. When using clear vinyl, make sure you have a clean and free workspace; this will reduce the chances of your vinyl smudging or scratching. Use a non-stick foot, a leather needle size 90/14 or denim needle size 90/14, and if you can, a strong, 100% polyester thread. Slow and steady wins the race with clear vinyl, so keep that in mind when creating!

Hand Bags
Level: Intermediate – Expert
If you’re ready for a fun and more challenging project, try your hand at creating a handbag! Think of those purses you love seeing for events and going out. These bags come in many styles, from large to small and extravagant to everyday use. Research different patterns and see what options out there catch your eye.
Fabrics for handbags vary depending on their use. Creating for everyday use? Look into fabrics like leather and vinyl for a classic and long-lasting look! These fabrics offer a protective layer that won’t allow liquids to fall through, longer-lasting color, and durability from usage. On the other hand, if your handbag is for travel use, look into fabrics like tweed and canvas! These fabrics are easy to use, come in various colors, and offer that stability when placing some weight in your bag.
Put your skills to the test and add in features like organizational pockets, zipper closures for the bag and pockets, and placing a flat bottom. Look into interfacings and stabilizers to stiffen your bag and create structure. Some interfacing we recommend are woven, non-woven, decovil, fusible fleece, foam, or felt.
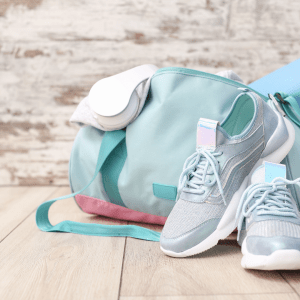
Duffle Bag
Level: Intermediate – Expert
Are you a gym-goer? Is your child in sports? Then, try your hand at a duffle bag for your traveling needs! Perfect for those weekend trips and sports games, you can design your duffle bag specifically for your needs. Add pockets for sports equipment, a water bottle pocket, space for your travel-size toiletries, and more.
You want to keep in mind bag weight, usage, and durability when selecting fabrics. Choices like leather, vinyl, nylon, and cotton are standard picks for duffle bags. Look into webbing fabric for creating the handles, as this will help handle the weight. Don’t forget to purchase lining fabric to structure your duffle bag and create shape!
Features you can include are inner and outer pockets, zipper closures, and zippered pockets. Focus on what you need and create pockets for your cleats, toiletries, snacks, books, electronics, and chargers.
Level up: Add bag hardware pieces like D-Rings and Hooks to your duffle bag handles to adjust the strap depending on the user comfortably. This is great for bags that will be shared with family members and friends, making it comfortable for everyone to use. We recommend using basting tape to keep the D-rings and hooks in place while stitching.
Don’t Forget to Personalize!
Whether you’re a beginner or an expert, adding a personal touch to any bag is easy by using an embroidery machine or direct-to-garment printer. Embellish bags with your name, team names and logos, and art designs. Using a machine like the Tajima Sai, you can easily embroider up to 8 color designs at once with a touch of a button.
Using a direct-to-garment printer like the RICOH Ri 100, you can create your fabric and use this for your next bag project. Then, add your artwork, Photoshop designs, family and memory photos, and more, quickly making something uniquely ‘you!’
Get Started Today!
We hope this gave you some ideas you can implement on your next bag project! Whether you’re new to sewing bags and starting small with a tote or wristlet, or an advanced sewer looking for ideas, these projects are great for challenging yourself and building up your skills. So which bag would you create first? Let us know down below!
