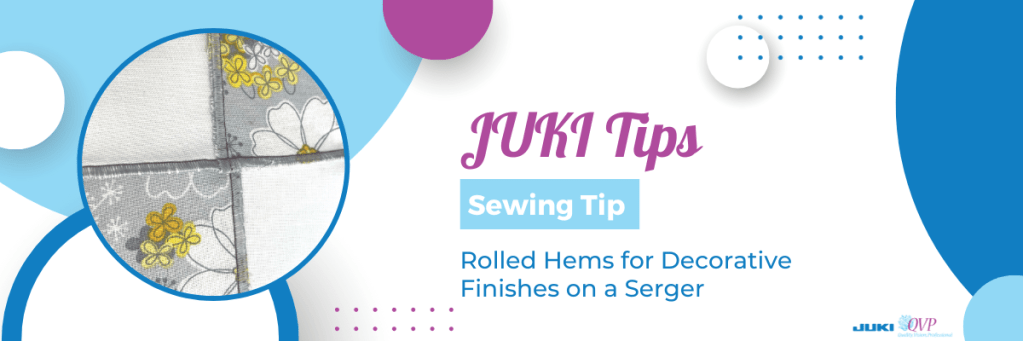
In this month’s tip, JUKI National Account Trainer Alba showcases how to use rolled hems as a decorative touch to your quilt projects and create this on the Serger. In this video, we’ll be using our latest MO-3000QVP model.
Follow along below for a rundown of what Alba covers on today’s JUKI Tip!
Hello all my JUKI friends, welcome to another JUKI tips and tricks. My name is Alba and today we’re talking sergers.
I am working on the MO3000, but this can be done with any serger. So, today I’m talking about rolled hems, and mostly everyone uses a roll hem to finish up a hem. I’m going to take it to my next quilt project and use it as a decorative finish. I’m working on a chandelier Quilt Block. it is a very easy block to do, and I just wanted to give it a Decorative Touch. So what I have done on this one, is I’ve added is a rolled hem, and I’m doing a wide rolled hem so that it catches more of the fabric and I am going to create that Quilt Block using that rolled hem as my actual seam and that Decorative Touch. Now when you are doing this I would not recommend using woolly nylon, which is typically used for a rolled hem, because when you do press your blocks the woolly nylon may melt at the higher settings. Now, I’m going to bring this to the machine and finish up this Quilt Block.
I am at the MO 3000, but you can use any serger that allows you to do a rolled hem. Now the trick to doing that rolled hem, is placing the fabric right side out and my wrong sides together; so opposite of how you would normally put your fabric together. Now here at my intersection, I am going to show you just like we alternate the seams, I have alternated and nested those rolled hems. So I will be bringing this to my machine and sewing, and I am going to get as close as I can to show you exactly what I’m doing.
Now I am lining up my fabric just before my needles, and I am bumping it up against the knife, and I have left the knife up to catch any of those little fraying edges that can happen on cotton fabric. Now, I am going to start slowly and then build up speed, and I am going to go over all of those. Now I have not pinned, so I am just Gathering and making sure my pieces are together, and I’m sewing all the way down that edge, and surging off and I am going to cut right to the edge because I know that all of my seams will be covered in another seam.
Now I am going to bring this to the table, and I am going to just finger press but you would really want to bring that to your iron, but look at how lovely that is with that thread detail and that’s going to be 3D where it will be dimensional and just give this Quilt Block a lot of texture. So just a tip that rolled hems are not just for hems they’re great for decorative touches. So I would love to see this also on garments as an exposed seam.
I’m so glad you were able to join me with this tip, and I wanted you to get a really closeup look at how pretty that just three-dimensional finish looks on that Quilt Block. So don’t forget to give me your messages and give me some other things that you’d like to see tips on. Make sure to like and share with all of your friends so that they could get these amazing JUKI tips see you next time, bye-bye!
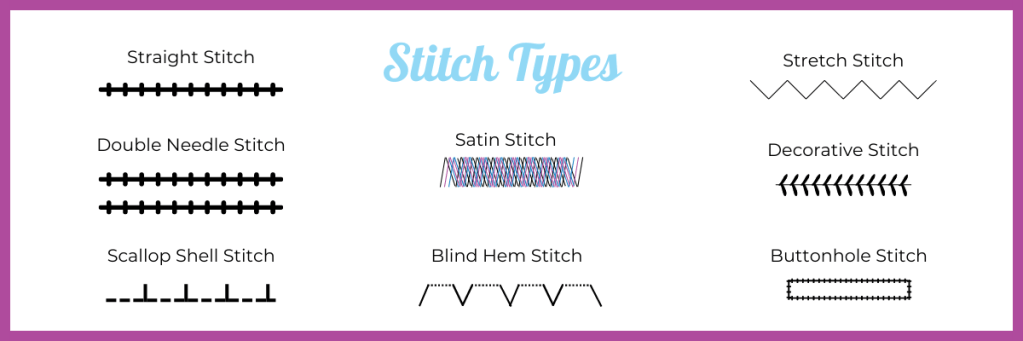
Decorative stitching is a wonderful way to add flair and personality to your Halloween creations this month. You can transform your creations into unique and eye-catching pieces with the right sewing machine and techniques! In this blog post, we will explore five different types of decorative stitching and how you can incorporate them into your costume creations. Let’s delve into decorative stitching and discover how these techniques can elevate your sewing projects.
Satin Stitch:
The satin stitch is a dense and smooth decorative stitch perfect for creating bold outlines, filling shapes, or adding intricate details. It is commonly used for appliqués, monograms, and decorative borders. To create a satin stitch, set your sewing machine to a wide zigzag stitch and shorten the stitch length. Use a satin stitch foot or a stabilizer underneath the fabric to ensure smooth stitching. Experiment with different thread colors and widths to achieve the desired effect and make your designs pop.
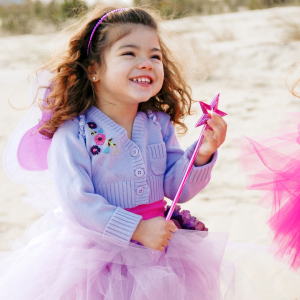
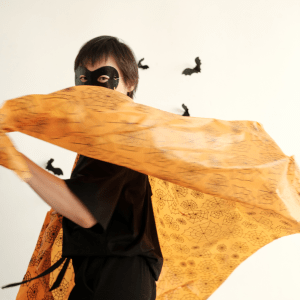
Craft a fairy or mermaid costume and use satin stitch to embellish the wings or scales, adding a touch of enchantment. For spooky creatures like witches or vampires, the satin stitch can create intricate appliques on capes or hats, bringing them to life. Additionally, you can use satin stitch to embroider haunting motifs like spiders, skulls, or bats onto costume pieces such as vests, gloves, or masks.
Decorative Embroidery Stitches:
Embroidery stitches offer a world of possibilities when it comes to decorative stitching on garments. From delicate flowers to intricate motifs, countless embroidery stitches exist to explore. These stitches can embellish collars, cuffs, and pockets or create beautiful focal points on your garments. Transfer your design onto the fabric, and use embroidery floss or decorative threads to bring your vision to life.
Use this technique when creating a whimsical fairy costume and using decorative embroidery stitches to add intricate floral patterns or delicate butterfly motifs to the wings and dress. For a frightful twist, bring your vampire or witch costume to life by embroidering intricate cobweb designs or eerie symbols onto capes and hats. Additionally, you can use decorative embroidery stitches to add a touch of mystique to costumes such as fortune tellers, pirates, or mythical creatures. With various stitches like chain stitch, feather stitch, or French knots at your disposal, you can create captivating textures and embellishments that will make your Halloween costume truly unforgettable.
Decorative Hemstitching:
Hemstitching is a classic decorative technique that adds elegance and refinement to garments. It is often seen on hems, cuffs, and necklines. Hemstitching involves creating a row of evenly spaced and neatly aligned holes along the edge of the fabric, followed by stitching that secures the fabric and creates a decorative effect. You can achieve hemstitching with a wing or twin needle on your sewing machine. Experiment with different stitch widths and thread colors to create unique and personalized hemstitched details.
Imagine sewing a vampire or witch costume and using decorative hemstitching along the edges of the cloak or cape, adding a subtle yet mesmerizing touch! For ethereal creatures like fairies or mythical beings, you can incorporate decorative hemstitching to create intricate patterns on the hems of flowing skirts or sleeves, evoking a sense of enchantment. Additionally, consider using this technique to add texture and interest to costumes like ghosts or ghouls, where delicate and uneven hemstitching can mimic the appearance of the tattered fabric.
Scallop or Shell Stitch:
Scallop or shell stitching is a beautiful decorative stitch that adds a feminine and playful touch to garments. It is commonly used on necklines, hems, or as an accent trim. The scallop stitch creates a series of rounded or pointed arches resembling scallop shells. You can achieve this stitch using a decorative stitch setting on your sewing machine or with a scallop-shaped embroidery foot. Experiment with different stitch lengths and thread colors to create varied and delightful scallop designs.
Consider crafting a mermaid or ocean-themed costume and using the scallop or shell stitch to create a stunning scale-like effect on the tail or bodice. For angel or mystical creature costumes, incorporate this technique to embellish the edges of wings or capes, evoking a sense of enchantment. The scallop or shell stitch can also create spooky accents on costumes like witches or sorcerers, where a scalloped hem or trim adds a touch of eerie elegance.
Pintucks:
Pintucks are tiny, parallel folds of fabric that add texture and dimension to garments. They are commonly used on bodices, collars, or as decorative accents on sleeves. Pintucks can be created with a pintuck foot on your sewing machine, which helps guide the fabric and maintain even spacing between the folds. Experiment with different pintuck widths and spacing to achieve the desired effect. Pintucks can be further enhanced using contrasting thread colors or adding decorative stitching along the folds.
Imagine crafting a Victorian-inspired vampire or steampunk outfit and using pintucks to create intricate details on the bodice or sleeves, giving it an air of timeless elegance. For magical creatures like fairies or enchanted beings, pintucks can create delicate pleating on flowing skirts or delicate wings, adding a touch of enchantment to the costume. Additionally, pintucks can be utilized to create structured elements on costumes like knights or superheroes, providing a bold and heroic aesthetic.
Decorative stitching opens up a world of creative possibilities in garment creation. By incorporating techniques such as satin stitching, decorative embroidery stitches, hemstitching, scallop or shell stitching, and pintucks, you can add depth, personality, and uniqueness to your garments. These techniques allow you to experiment with different thread colors, stitch widths, and designs, giving your creations a personalized touch. So, unleash your creativity, explore these decorative stitching techniques, and let your garments become works of art. Happy sewing, and may your decorative stitches bring joy and beauty to your sewing projects!
Get ready to add a touch of enchantment to your Halloween sewing projects with JUKI! Our DX and HZL series machines are the ultimate companions for sewists and quilters looking to bring their Halloween costume ideas to life. With a wide array of decorative stitches and innovative features, these machines will transform your creative visions into reality. Whether you’re stitching intricate spiderwebs onto a witch’s cloak or crafting spooky embroidery for a ghostly gown, the DX and HZL series ensures precision and ease.
Don’t miss this opportunity to unlock the full potential of your Halloween costume designs and make this October unforgettable with JUKI’s exceptional sewing technology. It’s time to sew magic into every stitch and enchantment into every costume!
Learn more by visiting your nearest JUKI dealer here.
Quilting is a timeless craft that has allowed us to create beautiful and functional art pieces using fabric and thread. Whether you’re a beginner or have some quilting experience, you may have questions that need clarification. In this blog post, we will address five popular questions often asked by quilters. By understanding these fundamental aspects, you’ll be on your way to confidently quilting and creating those stunning quilts you’ve been dreaming of.
What is the difference between quilting cotton and regular cotton fabric?
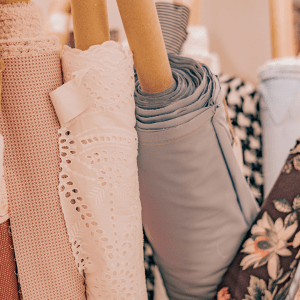
Quilting cotton and regular cotton fabric differ primarily in construction and intended use. Quilting cotton is designed for quilting projects and is known for its tightly woven and durable nature. It typically has a higher thread count, which means that the fabric is made up of more threads per square inch. This dense weave gives quilting cotton its sturdiness, making it ideal for stitching and holding up to repeated use and washing. Additionally, quilting cotton often features vibrant prints and patterns, which add aesthetic appeal to quilts and other sewing projects.
On the other hand, regular cotton fabric refers to the broad category of cotton textiles used in various applications, including clothing, home décor, and crafts. Regular cotton fabric comes in different weights, weaves, and finishes to suit other purposes. Unlike quilting cotton, the regular cotton fabric may have a looser weave and a lower thread count, making it lighter and more breathable. It is commonly used for making garments such as t-shirts, dresses, and pants and crafting household items like curtains, pillowcases, and tablecloths.
What is the importance of accurate seam allowances in quilting?
Accurate seam allowances play a crucial role in quilting, ensuring the final project’s overall quality, precision, and consistency. Firstly, precise seam allowances help maintain the structural integrity of the quilt by ensuring that the fabric pieces are securely joined together. Accurate seam allowances ensure that the seams are strong and reliable, preventing unraveling or fraying of the fabric over time. This is especially important for quilts that will be used, washed, and handled frequently!
Secondly, precise seam allowances contribute to the quilt design’s overall visual appeal and accuracy. Quilts often involve intricate patterns and designs that rely on precise measurements and seam allowances. Consistently accurate seam allowances ensure that the blocks and elements of the quilt fit together seamlessly, creating clean lines, even corners, and balanced proportions. Inaccurate seam allowances can lead to mismatched points, distorted shapes, or misaligned seams, which can detract from the quilt’s visual impact and overall aesthetic. Quilters can achieve a professional finish by paying attention to precise seam allowances and bringing their envisioned design to life.
How do I prevent fabric stretching while quilting?
Preventing fabric stretching is crucial in quilting to ensure accurate piecing and maintain the integrity of your quilt blocks. Here are two key techniques to help you prevent fabric stretching:
Proper handling and pinning: When working with fabric, especially bias-cut pieces, handle them with care to minimize stretching. Avoid pulling or tugging the fabric excessively, as this can distort its shape. Instead, support the fabric with one hand while guiding it through the sewing machine with the other. Additionally, use pins to secure your fabric layers together before stitching. Place the pins perpendicular to the seam line, with the heads pointing away from the sewing direction. This technique will help keep the fabric in place during sewing and prevent stretching caused by shifting layers.
Stabilizing techniques: Stabilizing the fabric can also help minimize stretching. One effective method is using spray starch or fabric sizing. Lightly spray the fabric with starch or sizing and press it with an iron before cutting and piecing. This process stiffens the fabric temporarily, making it less prone to stretching. Follow the manufacturer’s instructions and test on a scrap piece of fabric first to avoid any adverse effects. Another technique is to use a stabilizer such as lightweight fusible interfacing or wash-away stabilizer. These products provide temporary support to the fabric and can be applied to specific areas or the entire fabric piece, depending on your needs.
These techniques will help any beginner or everyday quilter!
Should I prewash my fabric before quilting?
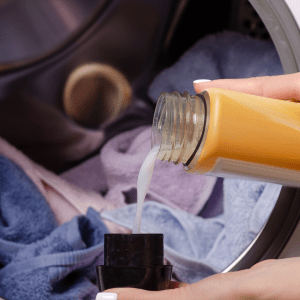
The decision to prewash fabric before quilting is a personal choice that depends on various factors. Prewashing fabric can be beneficial in addressing potential shrinkage and removing excess dyes or chemicals. By washing the fabric before cutting and piecing, you can ensure that any shrinkage occurs beforehand, reducing the risk of distortion or warping in your finished quilt. Additionally, prewashing helps remove residual substances that may bleed onto other fabrics or affect the overall appearance of your quilt. It can be advantageous when working with different fabric types with varying shrinkage rates in the same project.
On the other hand, some quilters prefer to avoid prewashing fabric to maintain its stability and finish. Prewashing can cause the fabric to lose some of its sizing or stiffness, potentially impacting the ease of cutting and piecing. Certain fabrics, such as precuts or those with delicate prints or embellishments, may be unsuitable for prewashing due to their fragile nature. In such cases, alternative precautions like color-catching sheets or test-washing small fabric pieces can help prevent bleeding without prewashing.
Ultimately, the decision to prewash fabric before quilting is a personal preference based on the desired outcome, fabric type, and project requirements. Considering factors such as shrinkage, potential bleeding, and fabric stability can help you decide whether to prewash or not.
How can I achieve precise quilting lines or designs? Using rulers with your JUKI sewing machine can be highly beneficial to achieve precise quilting lines or designs. Here’s a step-by-step guide on how to utilize JUKI rulers for accurate quilting:
Step 1: Prepare your fabric and JUKI ruler: Start by ensuring your fabric is properly layered and basted for quilting. Then, select the appropriate JUKI ruler for the design or quilting lines you wish to create. JUKI offers a range of rulers specifically designed for quilting purposes, such as straight rulers, curved rulers, and specialty rulers for different patterns and shapes.
Step 2: Secure and position the ruler: Place your ruler on the fabric, aligning it with the desired quilting line or design. Use fabric grips or non-slip adhesive tape to secure the ruler, ensuring it remains stable and doesn’t shift during quilting. It’s vital to position the ruler accurately to achieve precise results.
Step 3: Quilt along the ruler edge: Once the ruler is secured, guide your JUKI sewing machine’s foot along the ruler’s edge. Ensure to maintain a steady speed and apply gentle pressure to the ruler to prevent it from moving. As you quilt along the ruler, the foot of the machine will follow the ruler’s edge, resulting in clean and precise quilting lines or designs.
Remember to practice and experiment with different rulers and techniques to achieve the desired quilting effects. It’s also essential to familiarize yourself with the features and settings of your specific JUKI sewing machine to ensure optimal performance during quilting.
As a quilter, understanding the basics is essential for successful and enjoyable quilting projects. By addressing these five common questions, you can better grasp the differences between quilting cotton and regular cotton fabric, the importance of accurate seam allowances, preventing fabric stretching, deciding whether to prewash fabric and achieving precise quilting lines or designs. With this knowledge, you can confidently embark on your quilting journey, create stunning quilts, and continue expanding your quilting skills. Looking for quilting machines? Be sure to check out JUKI’s wide range of machines! Happy quilting!
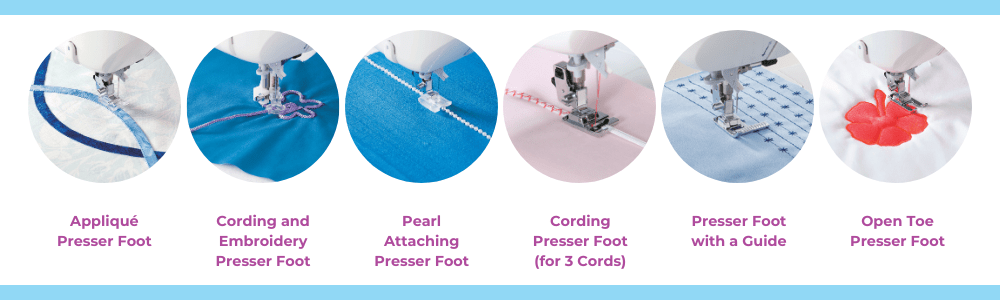
The Creative Set Accessory Kit by JUKI is a treasure trove for sewists looking to expand their creative possibilities. With an assortment of specialized presser feet and essential accessories, this kit allows you to add unique and professional touches to your sewing projects. In this blog post, we’ll explore the presser feet included in the Creative Set and their various applications. From appliqué to pearl attaching and cording, we’ll also provide project ideas that showcase the versatility and potential of these fantastic accessories.
The appliqué presser foot is designed to facilitate the application of appliqué designs onto fabric. It allows for precise stitching along the edges of the appliqué pieces, securing them in place seamlessly. Use the appliqué foot for quilts, garments, and home decor projects to add decorative fabric shapes or motifs. Create beautiful appliqué designs on t-shirts, table runners, or personalized pillows.
This presser foot is a versatile tool for embellishing your sewing projects with decorative cords or embroidery threads. It has a groove on the underside that holds the cord or thread, allowing it to be stitched securely in place. Use this foot to add texture and dimension to garments, handbags, or home decor items. Create unique corded or embroidered designs on collars, cuffs, or even the edges of tote bags or cushion covers.
The pearl-attaching presser foot is designed to attach pearls or beads to fabric. It has a channel that holds the pearls in place as you sew, ensuring even spacing and secure attachment. This foot is perfect for adding elegant and eye-catching details to bridal wear, evening gowns, or accessories like clutches and headbands. Create stunning pearl trims on necklines, bodices, or along the edges of a veil.
The cording presser foot for three cords is ideal for incorporating multiple cords into your sewing projects. It allows you to guide and stitch three cords simultaneously, creating beautiful raised designs or decorative trims. Use this foot to add intricate corded details on garments, such as piping on collars or bodices. You can also use it to create unique corded accents on bags, belts, or home decor items like curtains or cushions.
The presser foot with a guide is a versatile accessory that helps you achieve accurate and consistent seam allowances. The guide runs along the fabric’s edge, ensuring precise stitching and alignment. This foot is perfect for projects that require precise topstitching or edge stitching, such as quilt bindings, bag handles, or garment details like collars and cuffs.
The open-toe presser foot provides excellent visibility, making it ideal for projects that require precise stitching along marked lines or intricate patterns. Its open front lets you see the stitching area clearly, making it suitable for quilting, appliqué, or free-motion embroidery. Use this foot to create intricate quilt designs, stitch along curves, or add decorative motifs to the fabric.
Project Ideas:
Quilted Appliqué Pillow: Use the appliqué presser foot to create beautiful fabric shapes on a quilted pillow cover, adding texture and visual interest.
Embellished Tote Bag: Utilize the cording and embroidery presser foot to add decorative cords or threads to a plain tote bag, creating a unique and personalized accessory.
Pearl-Trimmed Evening Dress: Attach pearls using the pearl attaching presser foot to the neckline or bodice of an evening dress, adding an elegant and sophisticated touch.
Corded Collar Blouse: Incorporate multiple cords with the cording presser foot (for 3 cords) to create a striking corded collar detail on a blouse, making it a standout garment.
Topstitched Quilted Table Runner: Use the presser foot with a guide to achieve precise topstitching on a quilted table runner, enhancing its visual appeal.
The Creative Set Accessory Kit by JUKI provides a range of specialized presser feet and accessories to elevate your sewing projects. These presser feet open up endless creative possibilities, from appliqué and cording to pearl attaching and topstitching. Incorporate these accessories into your sewing projects and bring your unique ideas to life. Unleash your creativity and let the JUKI Creative Set inspire your sewing journey!
Stay tuned for a future JUKI Tip to showcase these accessories!