Celebrate National Quilting Month by bringing out your favorite charm squares, jelly rolls, and sandwiches! Whether you’re creating for friends and family or your small business, we’ve put together a few fun ideas for projects you can quilt next.
Wall Hanging
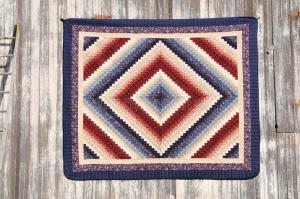
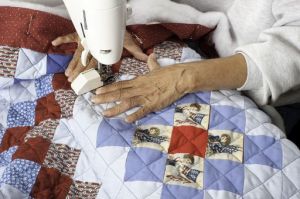
Decorating new office spaces or livening up current homes is easy with wall hangings. Projects like these are perfect because you can create smaller designs than quilts and use them for seasonal purposes. With the ability to create on a large or small scale, you can try new techniques like adding embellishments and accents (for example, cording) that you wouldn’t have thought of using before. This project is excellent for when holidays and birthdays come around since it can brighten up any room, from a nursing home to your kid’s college dorm.
Accessories like the Couching Foot are perfect when creating wall hangings. They allow you to add three-dimensional textures to your projects, bringing in an extra element that will make your design pop. Use decorative threads like yarn and cord or other thicker threads that don’t fit your needle.
Pillows
Pillows are great for many reasons:
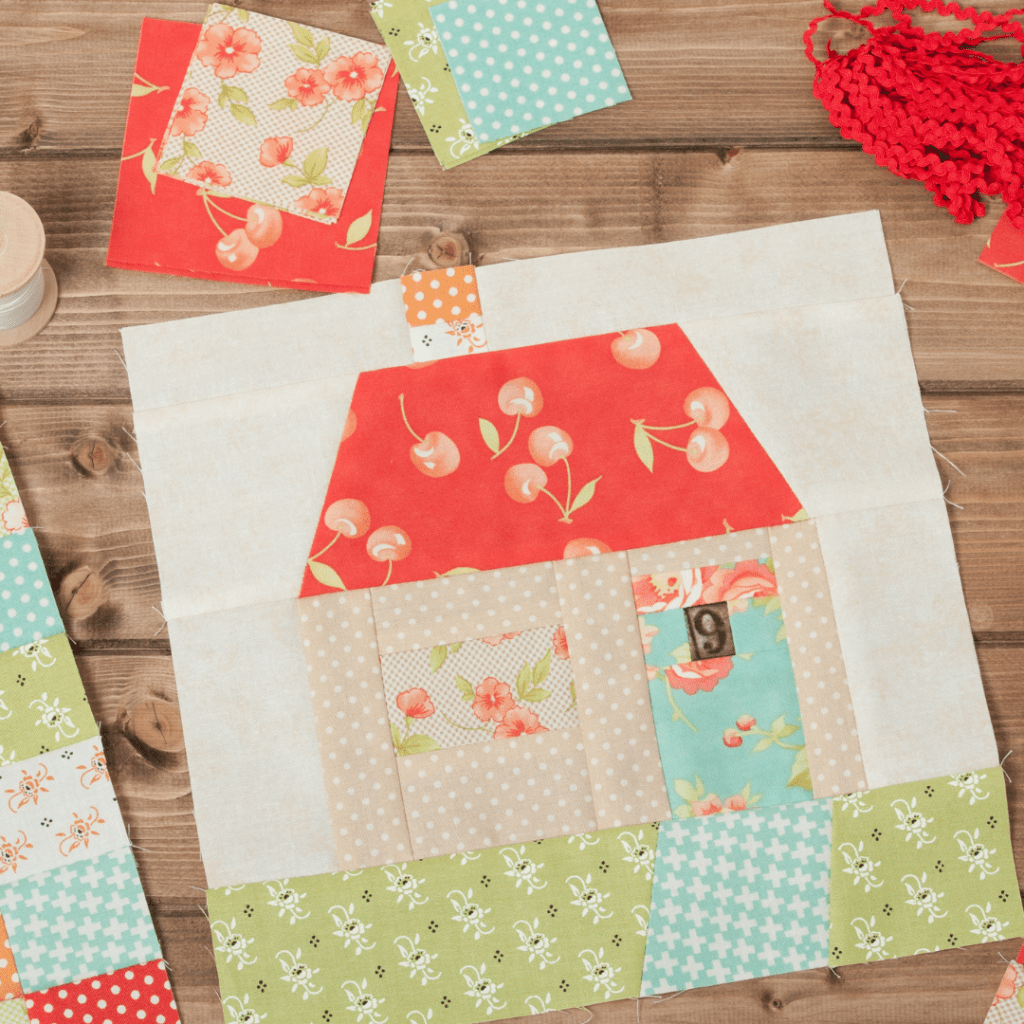
You can create beautiful personalized décor and treat pillows like a small sample for a quilt idea you have by making that one block you need. A pillow allows you the freedom of creation like a quilt, with less fabric and space required.
You can treat pillows as an add-on to your quilts and create matching or complementary designs.
Creating simple add-ons like pillows is a great way to increase your revenue if you have a small business.
Look into an accessory like theGlide Foot when creating décor like pillows. This foot can help you glide along with applique, and other three-dimensional textures, allowing you to get creative and add more personalization to your projects.
Table Top Décor
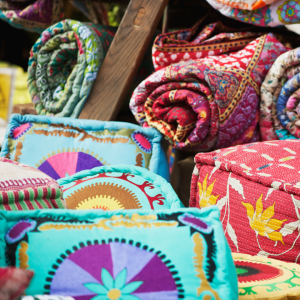
Have holidays motivated you to create new table runners? Have the seasons changed, and do you want to brighten up your home for spring? Table décor is a great way to bring color to your home! Create pieces like table toppers, table runners, dresser décor, storage covers, and so much more. Perfect for protecting your furniture while bringing in color and a theme to your rooms, these patterns are great for anyone who wants a touch of color in their home.
If you want to add fun shapes and lines to your designs, look into quilting rulers like our JUKI Ruler Set. You can create different textures from straight lines to circles and waves and bring your designs to life.
Totes, Pouches, and More!
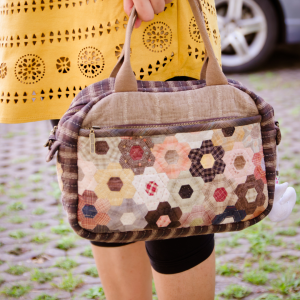
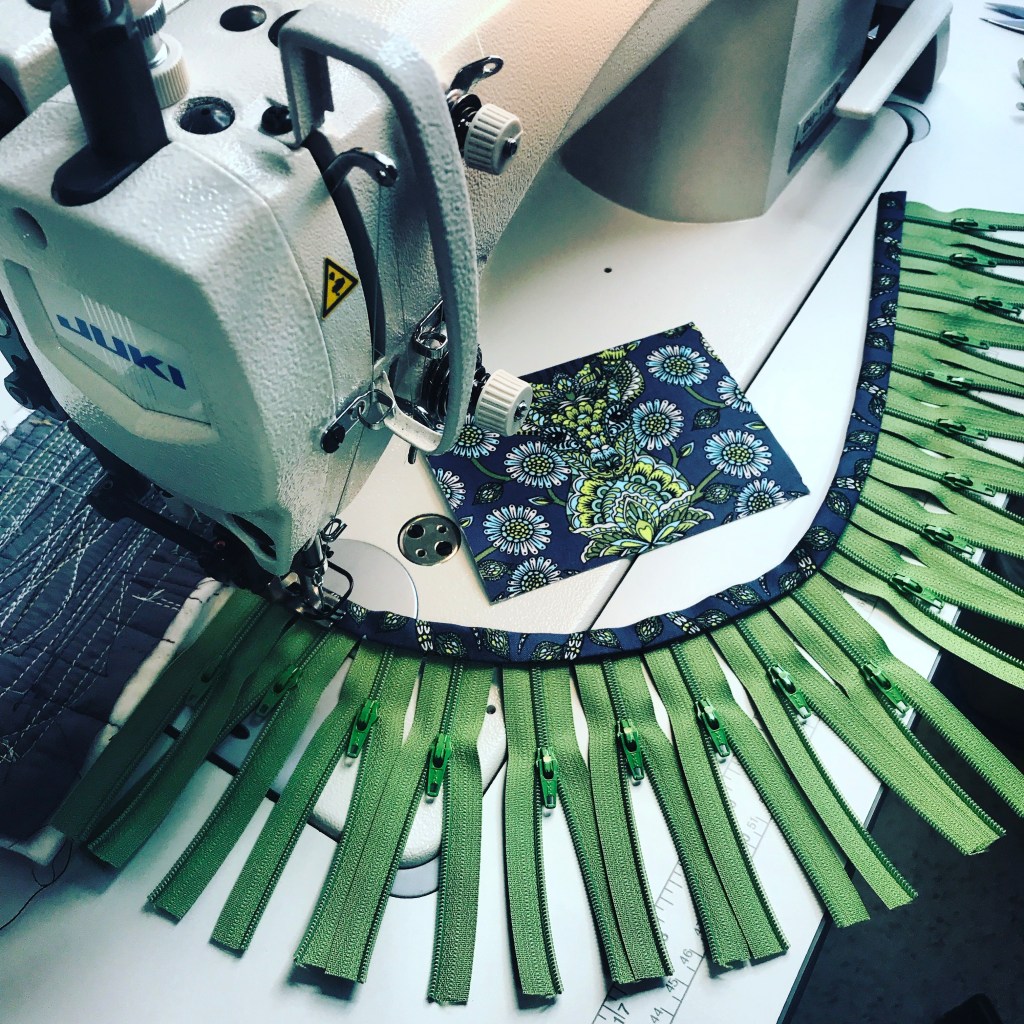
Bring your artwork outside your home by creating beautiful travel gear! Show off your quilting skills by creating pieces that can hold your money, electronics, or clothing. Work in matching sets like wallets and handbags or traveling sets like make-up bags and carrier totes to brighten up your trips. The possibilities are endless when it comes to hitting the road with your creations.
Tools like Grip and Stitch are great to have one hand when you’re quilting those detailed projects. They make free-motion quilting fun and easy and allow you to easily add on fun designs like spirals, feathers, and more.
Quilts and More Quilts
Whether your project was created for comfort and lounging, or décor that can bring in bright colors, quilts will never be out of style. Quilts can be so versatile when we step outside of the box. Decorate your home by placing quilts on racks and ladders, use them to upholster chairs and love seats, toss them on white couches for pops of colors. Whether you’re using them for comfort or because the pattern was just suitable for your aesthetic, you can never go wrong with creating a quilt.
Look into extension poles when quilting more significant projects for a more effortless and more fun experience! By adding extension poles, you can easily design quilts from twin to king-size on your stand-up quilting machine like the Miyabi J-350QVP.
While quilts may have started off as a necessity in the past, they’ve become their own form of artwork for current generation quilters. So branch out and try your skill in new quilting projects like the ones mentioned above the next time you start on a new project! What are your favorite inventive ways to use your quilts?
Have you been dreaming of a quilt idea, but you’re not sure how to bring it to life? At JUKI, we want to help you elevate your quilting skills, which comes with learning how to create your own quilt patterns and designs. So we created a base for you to start with different methods to make a pattern and applications that can assist.
Start from the Beginning
Before we can dive into creating a pattern, let’s touch base on the creative process it takes to get there. One of the best things you can do is begin a design journal, where you can jot down notes, attach scraps of fabrics, place photos, and more that will lead you to create the design you’re imagining.
Learn to upload your ideas into a digital surface. You can redraw and clean up your designs from their sketch versions here. Create a library and label it with a title like ‘New Patterns’ to keep up with your ideas. With this digital organization, you can keep a hold on pattern ideas and add touches as inspiration comes until you have a quilt design you’re ready to work with and bring to life.
If this is your first time designing a quilt, and a blank page seems daunting, lean into the power of self-imposed limitations. Create with quilt size in mind, limit yourself to fabrics already in your arsenal, hold yourself to only using 6 fat quarters. When you start off, creating limits on designs creates a constraint on specific variables, allowing those free variables to make you think outside the box and design quilts you wouldn’t have created otherwise.
Breaking Down A Quilt
Let’s begin by breaking up the layout.
Look at your design and find the repeating elements. Here is where we’ll start forming the blocks. Figuring out your blocks is usually an easy process; however, working more towards modern or complicated patterns can be more challenging. When you first start creating your patterns, start with repetition and begin building your blocks for the quilt and pattern from there.
As you design your quilt, figure out the arrangement style you plan to work with. While some block designs need to be in even numbers for the quilt to come out right, other times you can create symmetric blocks that allow you to use either odd or even numbers. Remember that patterns can be built with one size in mind or edited for different size options. If you’re someone who plans to sell their patterns, customers look favorably upon having the option to choose sizes.
Once you’ve determined the design and size of your quilt, you can choose between adding borders or not. Borders are an excellent addition for multiple reasons; cleaner finish, more breathing space when creating, or as an addition to the size of your quilt pattern. Depending on your design, you can widen or tighten the border size and allow those who use your pattern the option to decide what best fits them.
Keep in mind that a quilt block size averages 6″ to 18″. You have the option to create other shapes like triangles, rectangles, and more if you want to venture away from traditional squares.
Guidelines for Pattern Creating
Now that we have a design idea, we can begin writing instructions. As you start creating the instructions and erasing and creating some more, you’ll begin to build an instruction guide that others can follow along with. Here are some things to keep in mind when writing out your pattern instructions.
Who is this pattern being marketed to?
Break down your pattern and think about who will be trying to follow along. New quilters will need more instructions than advanced quilters that don’t need much detail. Keep this in mind as you add instructions, tips, and illustrations to your work.
Instructions
Patterns don’t usually have instructions on basic techniques, like baste, quilt, and bind. Still, it usually includes instructions for advanced techniques like binding corners and adding curved piecing. To keep patterns from being overfilled with instructions, you can include links to videos and blogs that dive deeper into specific techniques.
Keep A Pattern Piece Library
Your first pattern creation might be complex, but once you have a few under your belt, you’ll find that it’s easy to re-use previous patterns when creating new ones. If you keep up with past projects and use them as foundations for new ones, you’ll save time, and your patterns will begin advancing.
Be Consistent
If you’re writing patterns to share with others, make sure to be consistent in quilting terms. When it comes time to patent your patterns if you’re choosing to sell, not having the correct terms can cause you to lose the patent. The consistent format also includes focusing on writing your measurements, quilting terminology, and your action and verb tenses. Keep in mind to label your fabric pieces, like Fabric A and Fabric B, so that the instructions are easy to follow.
Breakdown the Quilt Measurements
Now that we’ve moved on to instructions, math is the most crucial factor. Follow along as we go over a quilt example to show you an easy way to calculate your quilt squares and cutting requirements.
Step 1: Quilt block and Cutting instructions
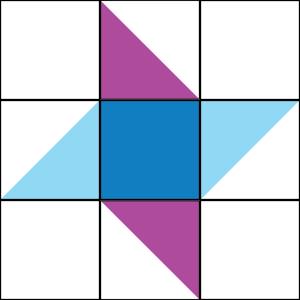
Let’s begin by breaking down the block into its individual components. Our example quilt comprises a 3 x 3 arrangement of components.
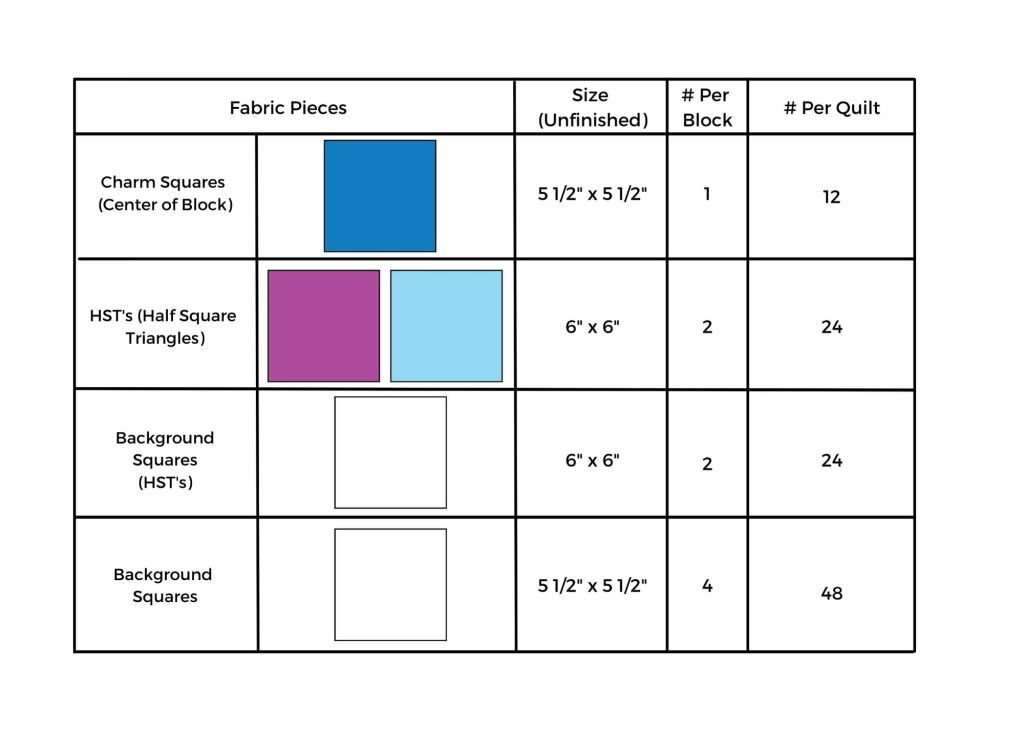
Let’s break down these pieces further! Include pieces like HST components here.
You are now at the individual fabric pieces if you’re creating a simple quilt like we’re showing here. However, if your designs are more complex and have more components, keep breaking it down until you’ve hit every piece you need for each block.
Now that we know the individual pieces needed let’s multiply the fabric pieces per block and place that in its own column. Our example quilt will have 12 blocks in a 3×4 block placement, so we will multiply by 12. Once you’ve calculated how many blocks you’ll need, your last column should showcase how many fabric pieces you’ll need for the project in total.
Now that we have the pieces planned for our quilt, let’s move on to creating cutting instructions.
A. Charm Squares: 24 are used as-is for making the HSTs (6” x 6”) and 12 trimmed for the centers of each block (5 ½” x 5 ½”).
B. Minimum background fabric required:
1. Figure out how many pieces can be cut from a single width of fabric (WOF) strip for each of the fabric pieces:
Dividing 50” (our assumed WOF) by 5 ½” you get 9.09 so round down to 9. You can get 9 squares 5 ½” x 5 ½” from each 5 ½” x WOF strip.
Dividing 50” by 6” you get 8.333 so round down to 8. You can get 8 squares 6” x 6” from each 6” x WOF strip.
2. Divide the number of fabric pieces needed by the number of pieces you can get per strip to figure out how many strips are required.
Our example pattern requires 48 background squares (5 ½” x 5 ½”) and you can get 9 squares per strip so 48/9 = 5.333 which rounds out to 5. In this case, to cut 48 squares, you will need 5 strips of 5 ½” x WOF.
Our example pattern also requires 24 squares for the HSTs (6” x 6”) and you can get 8 squares per strip so 24/8 = 3. To cut 24 squares (6” x 6”), you will need 3 strips of 6” x WOF.
Step 2: Let’s Add a Border!
A finished quilt looks great with a border! Let’s go over how to figure out the strips you’ll need for the border.
Here’s how to figure out your yardage for the side borders:
# of blocks x-height of blocks (unfinished) – ½ times [# of blocks -1]
To create the top and bottom borders, use this equation:
Quilt top width + side border thickness + the side border thickness – 1″ (for seam allowances).
Step 3: Find The Yardage For The Quilt Top
To calculate the yardage of background fabric needed, multiply the number of strips times the thickness of the strips for all of the strip sizes you use.
Step 4: Include Binding Fabric Measurements
Calculate the binding fabric (for a straight grain), by adding up the lengths of the 4 sides and adding 10″ of safe space before dividing by the width of fabric.
Step 5: Don’t forget the Backing!
This is a simple measurement; we recommend adding an 8″ overhang, 4″ on each side, to your quilt top width. This is basic for all quilts and what’s usually required by quilters. The best thing to keep in mind is that programs available on your phone and computer can assist with calculating these measurements. For example, Robert Kaufman has a free mobile app to calculate borders, binding, backing, and more.
Let’s Create Our Pattern Sheet
Once you’ve finalized the sizing needed and the designs you’ll create, we can begin putting together a physical pattern. There are programs available to quilters that can help you create patterns. Whether you choose to use programs you might already have, like Microsoft, or invest in higher-tech ones like EQ7 or EQ8, we broke down a few you can look into.
Design and Pattern Layout Programs
Microsoft PowerPoint: This program can be found in most electronics and is universally used. It’s great for the basics when starting off and is very user-friendly. The only setbacks are aligning blocks can be complex, and vector images aren’t accepted.
Electric Quilt (EQ8): This is an excellent program for editing quilts, and it allows you to break down quilt designs so that you can export portions at a time. However, it is challenging to create HST’s and can result in low-quality images in the export process.
Adobe Illustrator: This program is perfect for those that enjoy advanced artwork. You can create vector images and obtain high-resolution photos, and there’s an extensive resource library available for any learning curve. The cons of this program is that it does come with a fee of around $20 per month.
Adobe Indesign: This program is best for pattern layouts and offers the most professional quality. Like Illustrator, it does come with a monthly fee and learning curve.
Corel Draw: Perfect pattern designing and layouts, Corel Draw allows you to create art, export in vector files for high-quality images, and hit a lower cost point.
Images and Graphics to Include
Illustrations:
Cutting: if you have an efficient way to cut, include how in the instructions
Block Piecing: The majority of your illustrations will show the pieces assembled together. We recommend starting from the finished block and breaking down from there.
Quilt Top Assembly: Showcase how the blocks go together into the quilt top.
Optional: Include how the backing is pieced, bonus tips, and templates.
Text:
Introduction/notes: Describe the pattern, inspiration mentions, and more.
Material requirements: List all material requirements, including sizing.
Cutting: Include the calculations and measurements needed for cutting.
Block assembly: Walkthrough creating the blocks and assembling the quilt.
Quilt top assembly: Walk through the instructions of piecing the blocks together and assembling the quilt.
Finishing: Walk through the backing, binding, batting, and more instructions.
When you’ve completed creating a pattern, creating a PDF file is the last step. This file format is the most commonly sold in pattern networks and is the easiest to access across platforms.
Get To Testing!
Lastly, before selling your pattern creations, it’s time to go through some trial testing. Share this pattern with trusted friends and family members who can review your work and provide feedback. Request that they confirm the measurements were correct, that the pattern was readable and that they’re able to follow, and more. Use this as an opportunity to spruce up your creation for potential buyers. Then, build the pattern yourself and see what could be added or removed in your work.
Time to Publish!
Once you’ve triple-checked your pattern and decided it’s time to publish, take time to determine how you’re going to sell and where. Digital PDFs are the easiest to share and sell online, and printed patterns can be sold at markets, shows/events, and local quilt shops. Look into E-shops like Etsy and Craftsy when starting off your online shop, and if you choose to go physical, contact your local artisan markets and quilt shops for possible sale opportunities.
Join us every last Saturday of the month for JUKI’s small business seminars designed to help you start or grow your at-home sewing, quilting, embroidery, or direct-to-garment business.
When it comes to owning your own small business, finding your niche is one of the first goals you should focus on. While you can have all the supplies in the world, and top equipment, not knowing your niche will leave you lost. Take the time to consider who you’re selling to and what kind of designs and work you’ll need to do to hit that audience base
Sometimes finding your niche can be coincidental. If you create a t-shirt for your daughter’s dance friends, and everyone loves it, you might find yourself attending dance recitals with moms and supporters wearing your shirts. Think of finding your niche as an upside pyramid. The top is wide and covers everything on earth, it’s up to you to trickle down and see what’s at the point for your market.
Who are you marketing to?
The best way to start your small business is by planning who you’re going to sell to! Having a target audience or niche will help you build ideas for designs or connections to go after that will grow your shop. Below are some examples of audiences you could market towards.
Hobby and Niche Markets
Are you obsessed with comics, cars, and more? Many groups of people enjoy having products that are different and creative, and allow them to show support for their favorite things in fun ways! Think of what groups you resonate with that you could create custom shirts for.
Car Hobby: If you find yourself having fun puns or art ideas for cars, those in the car community would enjoy having new products like t-shirts they could wear to car shows to show off their personality!
Punny Jokes: Something so many people enjoy are good puns and jokes. Creating material with fun graphics, or even quotes is a great way for people to show off who they are. Think of fun socks, printed t-shirts, or canvas bags with fun quotes.
Pop Culture References: With media constantly expanding and growing, you’re always likely to stumble upon a TV show, movie, or band that has a following. Create things in your style that fans would enjoy wearing as a form of pride and excitement in their likes.
Events and Show Markets
In a world where there is always something going on, events and shows always need some merchandise and freebies!
Charity Events: Charity events are always circulating. Many times these events include team t-shirts to set apart company teams, or for individuals who are volunteering! Connect with your local charities and see who needs a partner for event merchandise. These events are not only a great way to get your business out there, but they will allow others to see the quality of your work and bring in new connections for future events.
Trade Shows: If you’re located in an area where tradeshows are common, look into exhibiting at these events! Many times teams will set up their shops on-site and sell their goods and creations while customers are attending. You can also look into what tradeshows are happening near you and create custom products to sell beforehand.
Sports Events: does your town have a kickball league? Look into what leagues are in your area for options on creating merchandise for their teams! Many companies, schools, and friends have their own sports leagues that require team t-shirts, tote bags, hats, and more.
Create Your Brand
For those who have a mind filled with artwork and fun style, look into creating your brand! These projects may seem big, but you get to choose how you create and sell. Many small businesses are known for having their select few designs that they focus on. We recommend starting with 3-5 designs you want to place on merchandise and going from there when creating your brand.
Once you’ve picked your niche deep dive into what’s popular in the community. Whether it be characters, quotes, styles, or more; these tips will help you create your shop and build up a profitable business. The more you know your audience, the more likely you are to create pieces that others find special and worth buying. Small niche consumers pay more as well because of the low product options available for them to choose from.
Whether you choose to market to corporate, or to your local community, finding your niche is the essence of creating a profitable and successful company. Don’t be afraid to join niches that seem popular, the same reason people go to Walmart instead of Target can be the same reason someone goes to you instead of another seller. Begin with categorizing people so that the game plan is more concrete. Research their demographics, interests, jobs, etc. Once you reach the point where it’s too narrow, go up a level until you find your sweet spot. Try to find a niche where there are enough people to market to, and then go for it!
Focusing on direct to garment (DTG) printing can be the beginning of a successful business venture! With this technology, you can now print quality images and graphics onto garments and have the ability to customize designs, fonts, and more. Using a machine like the RICOH Ri 100, you’re now able to create the highest print quality for the lowest cost per print. If you’re looking into starting up a business or upgrading your current one, DTG printing is the ideal choice. Let’s deep dive into some options you can create on your DTG machine today!
Custom Made, Personalized Apparel on Demand
A highly competitive market that’s constantly growing due to high demands is custom-made apparel. With the ability to print-on-demand small production volumes cost-effectively while quickly following market trends, you’re able to create your brand easily. These items don’t need to stop at custom t-shirts but polo’s, socks, aprons, tapestries, and more. There is a wide range of options for what you can create.
Memory Quilts
Are you thinking about creating or expanding your quilting business? An exciting venture is creating your unique fabric pieces for memory quilting. With the RICOH Ri 100 software, you can import photos of loved ones, graphics of their interests, and more to create a unique, personalized quilt. In addition, you can provide fabric printing services to other quilters that want to create their very own memory quilt or are looking to make a quilt with their fabric design. DTG printers, like the RICOH Ri 100, use a wide range of colors, going as far as being able to print a photo taken in real-time with a webcam.
Fashion Textile Printing
DTG printers, like the RICOH Ri 100, use a wide range of colors, going as far as being able to print a photo taken in real-time with a webcam. With access to these unlimited colors, designers can make their fashion trends by creating prints for their projects. This can be a great niche to enter if you enjoy clothing construction and add more personalization to your projects. In addition, you can create on-demand accessories that users will love by printing limited edition fabric and using these on your projects. Some additions you can focus on are tote bags, socks, beach bags, and more!
Home Décor
We all enjoy decorating our home, and a fun way to do this is using personalized home textile! Using your DTG printer, you can create pieces like holiday-themed table runners for the dining room, tea towels with funny phrases for the kitchen, and monogrammed pillowcases for the bedroom. The possibilities are endless! You can also develop themes that transfer over different products, inviting shoppers to buy sets instead of one product.
Event Products
Marketing products are popular items to personalize and create for other small businesses, sports teams, school events, and more. You can also design pieces for birthdays, weddings, and other events that involve goodies being handed out. Follow your niche’s needs and open your business to personalized projects instead of creating designs or products. You can also offer up your services and attend events for onsite printing. Using a machine like the RICOH Ri 100, you’re able to take a photo and instantly print it onto a garment, creating a fun giveaway item for special events and shows.
Additionally, if you’re attending conventions or sporting events, you can take the RICOH Ri 100 on the go due to its compact nature! It can fit into a space as small as 15.7″ wide x 27.5″ deep, making it one of the smallest DTG printers. In addition, the printer and its finisher can be stacked to maximize functionality without sacrificing space.
With so many possibilities for creative products, the world of DTG is an exciting venture for many to enter. Creating personalized and commissioned pieces is also a perfect option for those who aren’t art savvy but enjoy creating otherwise. If you’re interested in starting your own DTG business, continue reading for tips on how to begin! What would you create on your DTG machine? Let us know down below!
Sewing has always been a part of my life for as long as I can remember. When I was young, my mother sewed many of our outfits. We went to a private school, and with some additional help, she even sewed all the students’ uniforms. But it wasn’t just my mother who influenced my sewing journey, my paternal grandmother would sew Barbie clothes for me, which filled me with great delight! Later in life, my aunt helped me make curtains for my first apartment. Eventually, a majority of the women in our family started meeting regularly to either sew group projects or just work on our things. We still try to get together every year!
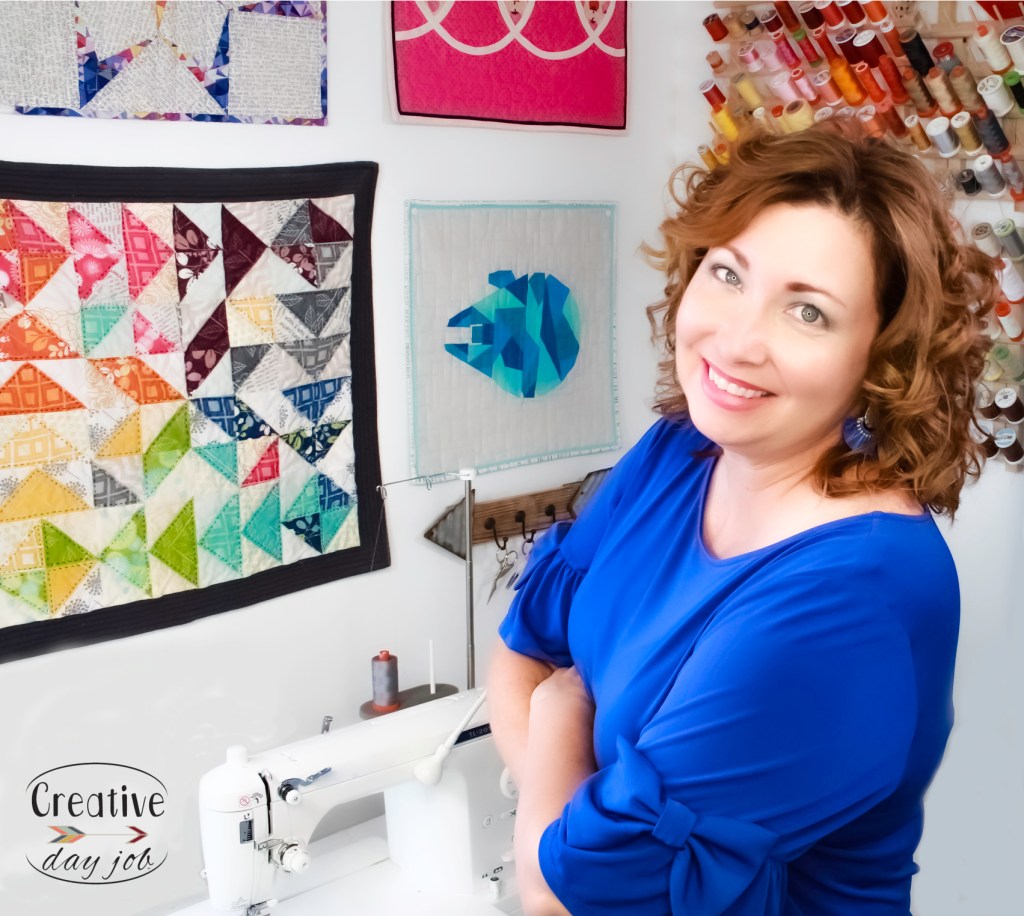
I didn’t start “seriously sewing” until I transitioned out of the corporate world (back in 2013). I’ve always been a driven and determined person and was convinced that there was more to being a stay-at-home mom than philanthropy and the car rider line. Most of my friends and all of my family knew that I love to sew. I was often asked to make things for people and told to sell my creations. I never really gave it too much thought until our local music Association hosted a craft fair. I decided to put myself out there and get a booth. I made several pillowcases and sold the majority of them at the craft fair. I was so excited about my success that I decided to open an Etsy shop and place the leftover products for sale online. This is how my company, Sew Much Moore In Storebegan.
My Etsy shop was how I initially made money with sewing. I started with pillowcases, then transitioned to bags, and was doing well making custom ID wallets for people on my Etsy shop. During this time, I started a website and learned about blogging through an online course. I created multiple lines of income through affiliate marketing and paid sponsorships. It wasn’t until 2016 that I made my business legitimate. You see, Etsy sent me an email that said they needed either my social security number or my FEIN#. I decided to go ahead and get my business license and things took off from there.
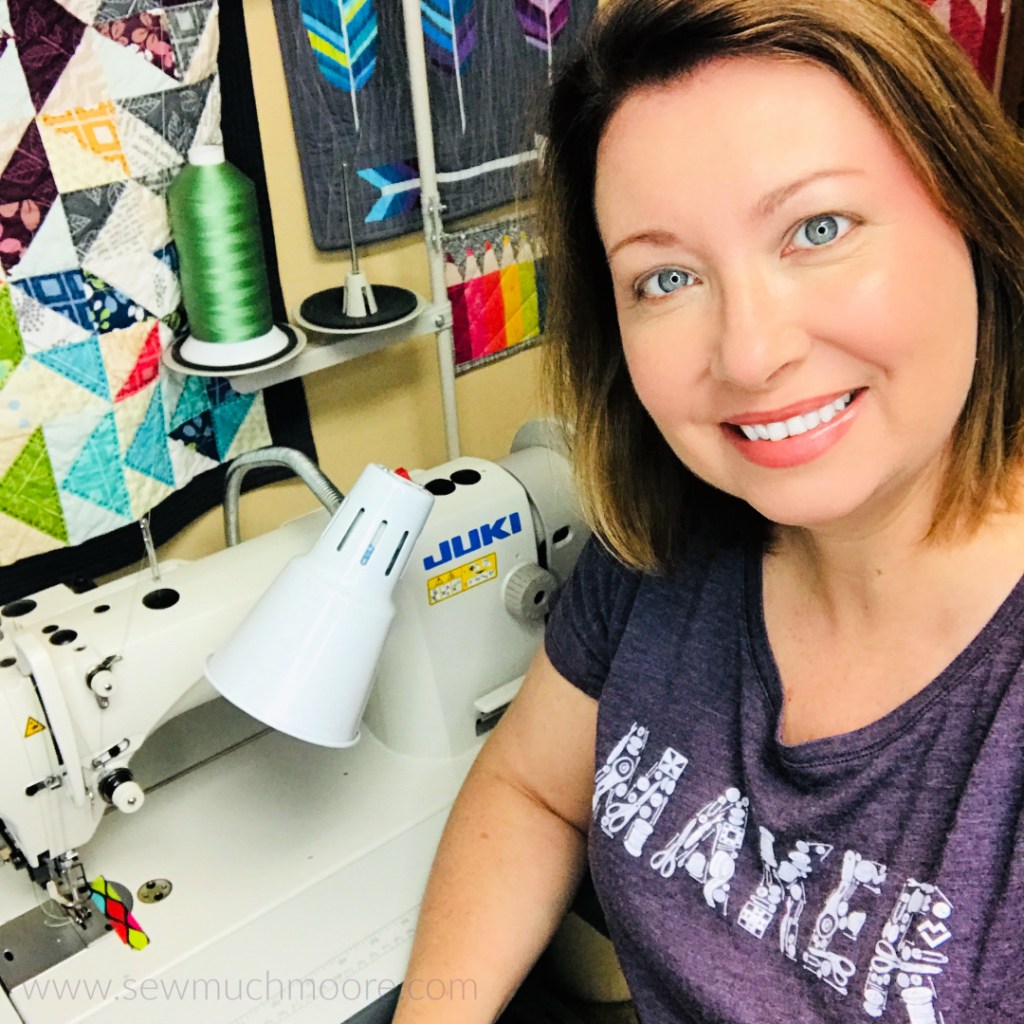
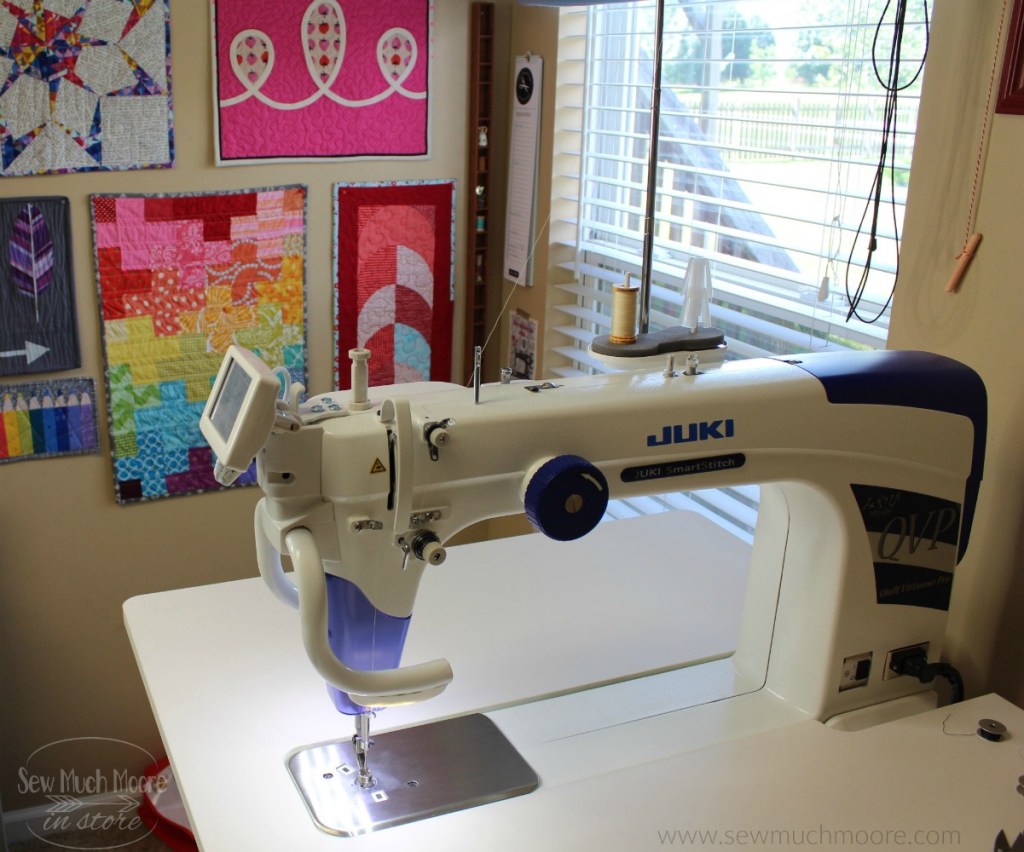
After I went legitimate, I was motivated and decided to give Amazon Handmade a try. At the time, I was using a hand-me-down 1984 Kenmore. This poor machine was on its last leg. I had made hundreds of ID wallets and make-up bags on it. I was constantly sending it in for service, and it just couldn’t keep up. When I opened my Amazon Handmade shop on Black Friday weekend, I made enough money to purchase my first Juki sewing machine. I’ve decided on an industrial sewing machine considering the amount of bags I was making in my commercial business. I purchased the Juki DU-1181N. I decided to get the servo motor so I could control the speed. I learned a great deal about industrial machines and even wrote a blog series which can be found here.
I found great success with my JUKI industrial, so it was an easy decision to purchase additional JUKI machines like the JUKI TL-2010Q straight stitch sewing machine. This is hands-down my favorite machine to sew on! I can easily piece my quilts, make most bags and even do some free motion quilting. It sews like a dream! And because I love free motion quilting, I added a JUKI J-350QVP as well. I occasionally quilt other people’s quilts, but because my long arm is currently on a table (and not a frame) I mostly just quilt my quilts with my J-350QVP. One of my business goals is to transition my long arm sit down to a frame and add the automation package. Both my kids are still in the house so until they fly the coop, I don’t have the real estate in my home for a longarm business right now. I’m also learning more about making garments so it only makes sense that I have a JUKI serger and cover stitch combo, MO-735. I bought these as gifts for my Mom and love to use them when I visit her. My mom still loves to teach me new things since sewing garments is something that I am still learning more about.
Speaking of sewing lessons… In 2017, I decided to add sewing lessons to my business! I was already contracted with a local quilt shop to teach monthly lessons to a kids club. I enjoyed working with the kids and decided to offer classes in my home for the local community. We don’t have a large space for group sewing, but we did manage to gather around the dining room table with our machines and learn about quilt piecing, bag making, and many other valuable sewing lessons. I continue to teach sewing and quilting through my videos and offer classes to guilds and quilt shops as well. To learn more about my lectures and and in-person workshops, you can visit my website here.
2017 was also the year that I was nominated for the Vice President of programming for the Kansas City Modern Quilt Guild. During my two years of service, I had the opportunity to learn more about being a professional in the industry. I gained experience including contract negotiations, learning what a professional is worth, and the pleasure of getting to know so many inspiring creators in the industry. I was also pleased that the membership of the guild experienced tremendous growth during my years of service. I believe it had a lot to do with the talent we acquired for lectures and workshops. I also believe our guild was more successful in gaining new members and filling most sewing workshops because of the marketing efforts for the guild. My experience with Facebook pages, groups and events provided maximum exposure for our guild members and for potential members as well. We grew so much that we had to find a new place to meet as most meetings were “standing room only” and many workshops would sell out quickly.
I was getting comfortable with social media by this time and started engaging my audience through these platforms. By this time, my business had a weekly newsletter, a Pinterest marketing strategy, a social media schedule, patterns and products offerings on my WooCommerce website while still maintaining my Etsy and Amazon Handmade presence. I even started a custom t-shirt quilt business as well! With all these things going on, I decided it was time for a YouTube channel! This was a pretty good learning curve because I didn’t know much about editing videos. Fortunately, iMovie made it pretty simple and with the help of Google, I was able to start producing video tutorials. This new format helped reach a new audience and brought additional traffic to my website, which was now hosting advertising for yet another line of income to my business.
Fast forward to 2019, and I was sharing every day on my Instagram stories. I would constantly get questions about my sewing business. These questions inquired about how I managed everything that I was doing, and it made me feel happy and excited to help other people do the same thing. I never thought about adding coaching to my business until I learned more about producing my online courses. I learned how to create my business by online learning, so it only made sense for me to create my own coaching company.
The Creative Day Job began in 2020 and it currently hosts multiple online courses that serves Creative Entrepreneurs (mostly in the sewing and quilting industry). I love to help sewers and quilters that want to turn their hobby into a business by navigating the technology and overwhelm so they can start earning income from their craft. If I were to give a piece of advice to someone about starting or creating their own sewing/quilting business, it would be this, “just get started.” There’s always going to be something to overcome or some obstacle that might get in your way, but if you just get started and keep moving forward you can do it also! To learn more about the Creative Day Job, you can visit my website here.
I truly believe there is Sew Much Moore In Store for myself and my journey with the sewing and quilting industry. I love to help people with their sewing and quilting projects and I love to help people overcome their creative business obstacles. I especially love the JUKI brand because with the help of their machines and technology, my work has become more productive and enjoyable!