Unleashing Creativity: JUKI Heavy User Kit

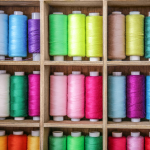
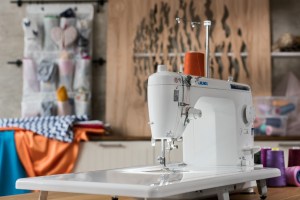
For avid sewists and professionals, having a versatile set of presser feet is essential to elevate the quality and variety of their sewing projects. The JUKI Heavy User Kit is a fantastic collection that offers a range of presser feet designed to tackle different sewing techniques and achieve professional results. In this blog, we will delve into the diverse capabilities of each presser foot in the JUKI Heavy User Kit, including the button-attaching presser foot, invisible zipper foot, rolled hemming presser foot, binder presser foot, presser foot with a guide, cording presser foot, and embroidery presser foot. Let’s explore the ways each presser foot can enhance your sewing projects!

Button Attaching Presser Foot:

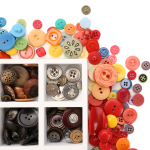
The Button-attaching Presser Foot is an essential tool for any sewing enthusiast, as it simplifies the process of adding buttons to garments or fabric projects. This specialized foot is designed with two prongs that securely hold the button in place while the sewing machine stitches it onto the fabric. It ensures precise button placement and evenly spaced stitches, resulting in a professional finish. The button attaching presser foot is adjustable to accommodate various button sizes, making it versatile for different projects.

From crafting chic button-down shirts and blouses to adding decorative buttons on skirts, dresses, and jackets, this foot allows you to add functional or stylish elements to your clothing creations! Additionally, you can use it to create button closures on bags, pouches, and other accessories.

For quilting enthusiasts, this presser foot comes in handy when incorporating fabric-covered buttons as embellishments on quilted wall hangings, cushions, or even quilts themselves.

Invisible Zipper Foot:

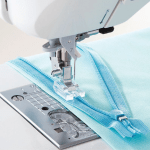
The Invisible Zipper Foot is a game-changer for sewing enthusiasts, especially when it comes to creating seamless and polished garment finishes. This specialized presser foot allows you to insert invisible zippers into projects with ease. The foot features two grooves on the underside, which accommodate the zipper coils while the needle stitches close to them, concealing the zipper within the fabric. The result is a clean and smooth appearance that gives the illusion of an uninterrupted fabric surface.

For garment making, this foot is ideal for dresses, skirts, trousers, and blouses, where you want to maintain a sleek and professional look without visible zipper teeth. It also works wonders for creating invisible closures on cushions, pillowcases, and home decor items!

Quilters can utilize the Invisible Zipper Foot to attach hidden pockets on quilted totes, and purses, or even to seamlessly join sections of a quilt without any exposed seams.

Rolled Hemming Presser Foot:

The Rolled Hemming Presser Foot is a fantastic tool for achieving delicate and narrow hems on fabric edges. This specialized foot is designed with a narrow channel that allows you to fold and roll the fabric as you sew, creating a beautifully finished hem with minimal effort. The foot’s unique structure guides the fabric smoothly through the machine, resulting in even, consistent stitches. It is particularly useful when working with lightweight and sheer fabrics, as it prevents them from getting caught or frayed during the hemming process.

With the Rolled Hemming Presser Foot, you can take on a variety of sewing and quilting projects that demand a touch of elegance. For clothing projects, this foot is perfect for creating hems on chiffon blouses, silk dresses, or lightweight skirts, adding a professional touch to your garments. You can also use it for crafting decorative hems on table linens, napkins, and other home decor items.

Quilters can utilize the Rolled Hemming Presser Foot to add subtle finishing touches to the edges of quilted wall hangings or to create narrow borders for smaller quilt projects. Whether you’re working on fashion, home decor, or quilting projects, this foot allows you to achieve neat and dainty hems that elevate the overall appearance of your creations!

Binder Presser Foot:

The Binder Presser Foot is a versatile and time-saving tool that aids in adding beautiful binding to the edges of fabric projects. This specialized foot is designed with a slot that accommodates the folded binding strip, guiding it precisely as it’s stitched onto the fabric. It allows for quick and consistent binding application, creating a clean and professional finish!

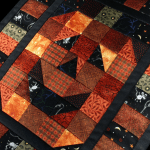
One of the primary uses of the Binder Presser Foot is in quilting projects. It enables you to attach binding to the edges of quilts with ease, providing a neat and durable finish. You can use it to add contrasting or coordinating binding to your quilts, enhancing their overall appearance.

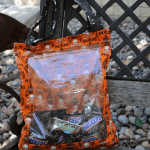
The Binder Presser Foot is also perfect for sewing projects that require binding, such as aprons, placemats, and fabric baskets. By using this foot, you can streamline the binding process and achieve professional-looking results on a wide range of sewing and quilting projects.

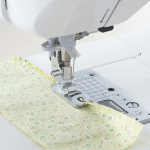
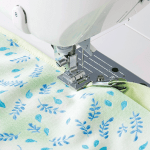
Presser Foot with a Guide:

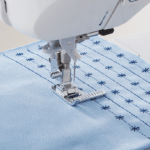
The Presser Foot with a Guide is an invaluable accessory for sewists and quilters, providing enhanced precision and control while sewing. This specialized foot comes with an adjustable guide that allows you to sew straight lines or parallel stitching with ease. The guide keeps the fabric aligned and ensures consistent seam allowances, making it ideal for projects that require accurate stitching, such as quilting, topstitching, and adding decorative elements.

With the Presser Foot with a Guide, you can undertake a wide range of sewing and quilting projects that demand precise stitching. In quilting, this foot is excellent for creating straight-line quilting designs, channel quilting, and stitch-in-the-ditch quilting.

It also comes in handy when topstitching on garments, as it ensures evenly spaced lines and parallel stitching! Additionally, you can use the guide for sewing borders, trims, and embellishments onto various fabric projects.

Cording and Embroidery Presser Foot:

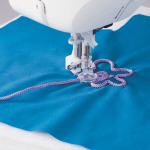
The Cording and Embroidery Presser Foot from JUKI is a versatile tool designed for free-motion sewing of cording. Its unique design includes a hole through which the cording can be fed, allowing users to effortlessly sew over the cording. By lowering the feed dog, the fabric becomes free to move in any direction, enabling the creation of elegant and intricate embroidery designs using the cording as a decorative element.

This foot is perfect for adding beautiful embellishments to garments, home decor items, and accessories. In sewing, you can use this foot to add delicate cording details to hems, necklines, cuffs, and more. It’s an excellent choice for adding a touch of sophistication and texture to any sewing project.

In quilting, this presser foot opens up a whole new realm of creative possibilities. You can use it to quilt intricate designs with cording, adding depth and dimension to your quilt. This foot also allows you to create beautiful trapunto quilting, where cording is inserted to raise certain areas of the quilt and make them stand out, adding an extra layer of visual interest to your quilting projects.

The JUKI Heavy User Kit offers a comprehensive range of presser feet that elevate your sewing projects to professional standards. Each presser foot serves a specific purpose, whether it’s attaching buttons, creating invisible zippers, achieving rolled hems, binding edges, guiding precise stitching, adding decorative cording, or incorporating embroidery. By harnessing the capabilities of these presser feet, you can explore endless creative possibilities and achieve impeccable results in your sewing endeavors. So, equip your sewing machine with the JUKI Heavy User Kit and unlock the potential to create stunning and professional-looking projects!

JUKI Tip: Using the JUKI Smooth Foot

In this month’s tip, JUKI National Account Trainer Kelly showcases how to use the JUKI Smoot Foot, an accessory available on both the TL series and the DX series, which allows you to create with fun fabrics like vinyl, leather, suede, and more!

Follow along below for a rundown of what Kelly covers on today’s JUKI Tip!

Hi, I’m Kelly with JUKI America, and on today’s tip if you like to sew on a variety of fabrics and get a professional finish every time, invest in the JUKI smooth foot. The JUKI smooth foot is white on the bottom because it’s made out of resin material that’ll enable a smooth feed for fabrics like leather, cork, and vinyl! I love to make bags on my JUKI Haruka, but recently I chose to make a leather tote bag from an old long leather coat I had, and I realized quickly that I needed the smooth foot to get a superior feed for that type of fabric. Watch above as we demonstrate!

With my stitch length set at three and a half, the leather does not want to move through the machine with the standard presser foot. Let me change to the smooth foot and show you the difference.

The only change I made was to put on the smoked foot, and you can see now top stitching this leather is easy.

Take a look at the beautiful stitch quality on the leather!

Topstitching is made easy on leather with this wonderful smooth foot.

It also sews beautifully on the cork!

The smooth foot is available for the TL series and our computerized sewing machines. You can go to JUKIHome.com and then select accessories to find the smooth foot that’ll work with your machine. You can visit your local JUKI retailer to purchase the smooth foot for your JUKI. Have fun with your JUKI making bags with all kinds of fabrics, with your smooth foot by JUKI!

Sewing and Quilting in Fall

As the crisp air of autumn settles in, it’s the perfect time to embrace the cozy and creative world of fall sewing and quilting projects! From, warm blankets to stylish accessories, the possibilities are endless. In this blog post, we will explore the best fabrics, projects, and designs that capture the essence of the fall season. Whether you’re a seasoned sewist or a beginner looking for inspiration, these ideas will help you begin a delightful autumn sewing journey.

Fabrics for Fall:

When it comes to fall sewing, selecting the right fabrics is crucial. Opt for cozy and comfortable materials that evoke a sense of warmth and texture. Some popular choices include:

  • Flannel:

A beloved fabric that instantly brings warmth and comfort to mind, this soft and brushed cotton material is perfect for creating snuggly garments like shirts, pajamas, and robes. Its insulating properties make it ideal for blankets and throws, keeping you warm during chilly autumn evenings. With a variety of colors and patterns available, flannel adds a touch of rustic charm to any fall sewing project.

  • Wool:

When it comes to fall fabrics, wool is a true champion! Known for its excellent insulation, wool is perfect for sewing cozy sweaters, scarves, and outerwear. It traps heat, keeping you comfortably warm during those low temp. autumn days. Additionally, wool’s natural elasticity ensures that your projects hold their shape and drape beautifully. From lightweight merino wool to chunky wools for heavier projects, this fabric adds a touch of warmth to your fall wardrobe.

  • Corduroy:

For retro charm and texture, look no further than corduroy! This ribbed fabric is excellent for fall sewing projects like skirts, pants, hats, and jackets. With its durability and warmth, corduroy projects are perfect for transitioning from fall to winter. The fabric is available in a variety of wale sizes and colors, and offers a vintage appeal to your creations.

  • Faux Fur:

When you want to add a luxurious and cozy touch to your fall sewing projects, faux fur is the way to go! This animal-friendly fabric is perfect for creating accessories like hats, scarves, and trimmings on your projects. It instantly elevates any design, and adds a touch of opulence to your fall wardrobe. From subtle accents to bold statement pieces, faux fur is a fantastic choice for those seeking a touch of elegance.

  • Quilting Cotton:

Quilting cotton is a versatile and widely accessible fabric, making it a popular choice for fall sewing projects. With an extensive range of prints, colors, and designs, quilting cotton is suitable for various projects, including clothing, home decor, and accessories. From pumpkin-themed tablecloths to plaid dresses, this fabric allows you to be creative and capture the essence of fall.

Fall Sewing Project Ideas:

a. Blankets and Throws: When fall arrives, there’s nothing quite as comforting as wrapping yourself in a soft and inviting blanket. Get creative with warm fabrics like flannel or wool, and experiment with patchwork designs that feature autumn-inspired colors and motifs. Incorporate leaves, pumpkins, or other seasonal elements into your blanket’s design to capture the essence of fall. Whether it’s for your living room or as a thoughtful gift for a loved one, these blankets are sure to be cherished throughout the season.

b. Scarves and Wraps: As the temperatures drop, it’s time to accessorize your fall wardrobe with fashionable scarves and wraps. Sew lightweight wool or soft knit scarves in various textures, lengths, and patterns like plaid or fall leaves. These accessories not only keep you warm but also add a touch of style to your everyday outfits. Get creative with colors that complement the season’s palette, and you’ll be ready to strut your fall fashion with confidence.

c. Pumpkin-themed Home Decor: Bring the pumpkin patch into your home with charming pumpkin-themed decor items. Sew fabric pumpkins in various sizes and fabrics, and arrange them as table centerpieces or mantle decorations. For a functional twist, create pumpkin-shaped potholders that will add a delightful autumnal touch to your kitchen. Experiment with different fabrics and colors to suit your personal taste and create a warm and inviting atmosphere for family and guests.

d. Cozy Jackets and Cardigans: With the arrival of fall, layering becomes essential, and what better way to do it than with cozy jackets and cardigans you’ve crafted yourself? Choose fabrics like corduroy or sweater knits to create stylish outerwear perfect for the season. Consider adding oversized collars, patch pockets, or belted waistlines for a fashionable touch. Sewing your own jackets and cardigans allows you to customize the fit and design, making each piece uniquely yours.

Fall Quilting Designs To Try:

a. Autumn Leaves: Incorporate leaf motifs into your quilt designs using appliqué or embroidery techniques. Experiment with different shapes, sizes, and colors to capture the vibrant hues of fall foliage.

b. Harvest-inspired Patchwork: Create quilt blocks inspired by the abundance of the harvest season. Consider using fabric prints featuring pumpkins, sunflowers, or cornstalks to infuse your quilts with a rustic charm.

c. Cozy Log Cabin Quilts: The traditional log cabin quilt pattern lends itself well to the warmth and comfort of fall. Play with earthy tones and rich browns to create a quilt that embodies the cozy atmosphere of the season.

d. Plaid and Tartan: Incorporate plaid or tartan fabrics into your quilts for a timeless fall aesthetic. Mix and match different plaid patterns to create visually appealing designs that evoke a sense of nostalgia.

Fall is a wonderful season for sewing and quilting enthusiasts to embrace the rich colors, textures, and themes that it brings. By choosing fabrics like flannel, wool, corduroy, faux fur, and quilting cotton, you can create cozy and stylish projects. Whether it’s blankets and throws, scarves and wraps, pumpkin-themed home decor, or jackets and cardigans, let your creativity flourish. Additionally, consider incorporating autumn-inspired designs like leaves, harvest motifs, log cabin patterns, and plaids into your quilting projects. Enjoy the process of sewing and quilting during this beautiful season, and bring the warmth and charm of fall into your creations. Happy stitching!

Efficient Stitches: Sewing Room Organization Tips

A well-organized sewing room or dedicated sewing space can be the key to a productive and enjoyable sewing experience. From neatly storing fabrics and notions to creating a good workflow, a functional workspace allows you to focus on your creative projects without the frustration of clutter! This blog post will explore practical tips and tricks for organizing your sewing room, innovative storage solutions, and space-saving ideas. Get ready to transform your sewing space into a haven of creativity and efficiency!

Start Evaluating and Decluttering:

Start your sewing room organization journey by evaluating your current setup and decluttering unnecessary items. Sort through your fabrics, threads, and notions, and donate or discard anything you no longer need or use. By minimizing clutter, you’ll create more space and make finding and accessing the supplies you truly need easier.

Plan Your Fabric Storage:

Proper storage of fabrics is essential for easy access and preservation. We’ve gathered a few tips for getting your storage well organized.

  • Categorize and Sort: Start by categorizing your fabric based on different criteria, such as color, fabric type, or project type. This will make finding the fabric you need easier when starting a new project.
  • Use Clear Containers or Bins: Store your fabric in clear plastic containers or bins. This lets you see the contents at a glance, saving time and effort when searching for specific fabrics.
  • Fold and Label: Fold your fabric neatly and uniformly to maximize space and prevent wrinkles. Use labels or tags to identify the fabric type, color, yardage, or other relevant details. This makes it easier to locate specific fabrics without unfolding everything.
  • Vertical Storage: Consider storing your fabric vertically rather than horizontally. This method saves space and allows you to easily browse through the fabric stacks without disturbing the neatly folded fabrics.
  • Utilize Shelving or Cubbies: Install shelves or use cubbies to store your fabric. These provide a dedicated space for each fabric category and help organize your sewing room. You can even sort fabrics by size or project type within each shelf or cubby.

Organize Your Notions and Tools:

Organizing notions and tools in your sewing and quilting room is essential for maintaining a functional and efficient workspace. Start by grouping similar items, such as needles, pins, and buttons. Utilize clear plastic containers, small jars, or compartmentalized organizers to store these smaller items, ensuring they are easily accessible and visible. Consider using a pegboard or wall-mounted tool organizer to hang scissors, rulers, and other frequently used tools, keeping them within reach and saving valuable workspace.

Designate specific shelves or drawers for larger tools like cutting mats and rotary cutters to keep them safely stored and neatly organized. Additionally, labeling containers or using clear bins for items like zippers, ribbons, and trims can make it quick and easy to find what you need. By implementing a well-thought-out organization system, you’ll streamline your sewing and quilting process and have a clutter-free environment that inspires creativity!

Organizing Those Threads and Bobbins:

Practical thread and bobbin organization in your sewing and quilting room is crucial for a smooth and efficient workflow. To keep your threads easily accessible and neatly arranged, consider using a thread rack or spool holder. These can be mounted on the wall or placed on a table or shelf, providing a convenient display of your thread collection. Group threads by color or type, allowing for quick identification and selection. Alternatively, you can store threads in clear plastic containers or drawers, protecting them from dust and light exposure.

To keep your bobbins organized, use a bobbin storage case or tray specifically designed for holding bobbins securely in place. This prevents them from unwinding and tangling. You can also match bobbins with corresponding thread spools, storing them together to easily locate the appropriate combination when needed. By implementing an effective thread and bobbin organization system, you’ll save time and frustration, allowing for a more enjoyable sewing and quilting experience.

Creating Your Workflow:

Creating an efficient workflow in your sewing and quilting room is essential for maximizing productivity and enjoying a seamless creative process! Start by organizing your workspace in a way that suits your working style. Arrange your sewing machine, cutting table, and ironing station in a seamless layout, and ensure easy access to all your needed tools and materials. Consider setting up your own assembly line for different stages of the process! Such as cutting, piecing, and assembly, to keep everything organized and efficient.

Next, establish a workflow that works best for you! Start by planning your projects in advance. Gather your fabric, confirm your pattern, and have your cutting instructions ready. With a clear roadmap, you can avoid unnecessary interruptions or backtracking during the creative process.

Prioritize tasks and break your sewing down into manageable steps! This allows you to focus on one project piece at a time, cutting fabric, sewing seams, or ironing. Remember to declutter and tidy your workspace to maintain a clear and inspiring workspace. By creating an efficient workflow tailored to your needs, you’ll be able to fully immerse yourself in your sewing and quilting projects, resulting in beautifully crafted creations!

Inspiring and Personalized Decor:

Create an inspiring environment in your sewing room by adding personal touches and decorative elements. Display finished projects, hang inspirational quotes, or place around artwork that sparks your creativity. Look into incorporating good lighting to avoid eye strain during your project creation. Maybe add a pinboard or corkboard to pin inspiration, project ideas, or fabric swatches!

A well-organized sewing room is a haven for creativity and productivity. By implementing the tips and tricks in this blog post, you can create a functional and inspiring workspace that enhances your sewing experience. From efficient fabric storage to optimizing workflow and adding personal touches, these strategies will help you maximize your sewing space and enjoy a clutter-free environment. Embrace the joy of organization and watch your sewing projects flourish in a space designed for creativity and efficiency. Happy sewing!

Sewing Haunted Halloween Delights

Halloween, the most thrilling time of the year, offers a perfect opportunity for crafty individuals to unleash their creativity. If you have a JUKI sewing machine, you’re in luck! JUKI machines are renowned for their quality, precision, and versatility, making them ideal for various sewing projects. In this blog post, we will explore beginner-friendly Halloween projects you can create using your JUKI sewing machine. Get ready to infuse some spookiness into your sewing skills and bring the Halloween spirit to life!

Spooky Placemats:

Transform your dining table into a haunted feast with custom Halloween-themed placemats. Choose spooky fabric prints like spiders, bats, or jack-o’-lanterns and cut them to the desired size. Use your JUKI sewing machine to hem the edges neatly. To add an extra touch, sew on appliqués, such as a ghost or a witch’s hat, to each placemat. These simple yet stylish placemats will delight your guests during Halloween dinner parties!

Trick-or-Treat Bags:

Nothing says Halloween like trick-or-treat bags filled with sweet surprises. Create your unique bag using your JUKI sewing machine and some festive fabric. Cut two rectangular pieces of fabric and sew them together, leaving the top open. Add a handle using a coordinating fabric strip. To make it even more exciting, consider adding Halloween-themed appliqués, such as a black cat or a pumpkin, to the front. Your trick-or-treat bag will be the envy of the neighborhood!

Join us on our project page here to create a Halloween trick-or-treat bag with JUKI!

Decorative Pillow Covers:

Give your living room a spooky makeover with Halloween-themed pillow covers. Select fabrics in eerie colors like black, orange, or purple. Measure your pillows and cut the fabric accordingly, leaving enough allowance for sewing. Use your JUKI sewing machine to sew the sides together, leaving one end open for inserting the pillow. For added flair, sew on decorative elements like ribbons, lace, or felt appliqués in the shape of bats, spiders, or ghosts. These pillow covers will add a touch of Halloween charm to your home decor.

Costume Accessories:

Elevate your Halloween costume by crafting unique accessories with your JUKI sewing machine. The possibilities are endless, whether you want to be a witch, a vampire, or a superhero. Create a witch’s hat by sewing black fabric together, forming a cone shape. Embellish it with ribbons or sequins. Craft bat or spider wings using fabric and wire, and attach them to a black leotard for a DIY superhero or fairy costume. The JUKI sewing machine’s precision stitching will ensure your costume accessories are sturdy and long-lasting.

Halloween Garland:

Deck your halls with a spooktacular Halloween Garland. Cut out triangular or rectangular pieces of fabric in Halloween colors and patterns. Sew the pieces together using your JUKI sewing machine, leaving a small opening at each end. Turn the fabric right side out and press it flat. String the banner pieces together with ribbon or bias tape, and hang it above your mantelpiece or doorway. Add flair by attaching felt or fabric letters that spell out “BOO” or “Happy Halloween.” Your banner will set the mood for a frightfully delightful celebration!

Check out how we created this set here for Valentine’s and design it for your Halloween theme!

With your JUKI sewing machine as your trusted companion, you can dive into the world of Halloween crafts and create delightful projects that will add charm and spookiness to your celebrations. The possibilities are endless, from decorative items like placemats and pillow covers to costume accessories and banners. So, gather your fabric, thread your JUKI sewing machine, and let your imagination run wild this Halloween season. Prepare to impress your friends and family with your handmade creations and have a hauntingly good time!