Starting Your Sewing or Quilting Blog

Have you wanted to start your own blog? In today’s post, we’ll teach you steps you can follow for creating your own blog today. Businesses, creators, influencers, and more can all benefit from having a blog. With this channel being a great way to back up your expertise, share your story, and inspire others, having a blog is the perfect addition to any business. Follow along as we go over what a blog is, where you can start yours, and tips for designing and writing your post.

What is a blog?

A blog can be many things. For some, a blog is a journal documenting their journey. For others, it’s a great way to promote their business plans and products. Focused on a specific topic, a blog is more personal than a news outlet and pushes toward creators having a deeper connection with their audiences. Whether we’re sharing our passions, teaching others, hoping to make money, or a combination of all of them, blogging can be a fun and rewarding venture.

Anyone can start a blog! Readers enjoy blogs because of the different personal perspectives they gain. With an informal and conversational style at the forefront, you can write about various topics without needing to be an expert, just a new view. In addition, readers want to know about your experience with techniques, projects, products, and more.

Now that you know what a blog is let’s start planning yours!

Blogging is also a commitment. You can choose the regularity for your posting; some will do it weekly, some monthly, depending on your preference and audience. The aim should be consistent and create content that people want to see. Bloggers rarely see results when they first begin, but those who stick to the idea find themselves in a new community.

Step 1: Naming Your Blog

Your blog name is a small preview of what readers can expect to find on your page. First, think about what you want to call your blog. Yourname.com? Yourbussinessname.com? Maybe you want to title the blog something creative and different and use a wordplay name like “That’s Sew Susy.” Get fun and creative when creating a name so it can stand out! Once you’ve written down a few ideas, the next step is confirming the domain name is free.

You can check with multiple ways to confirm if the blog idea is free. Depending on what platform you use to create the blog, they’ll have a check system that will inform you whether or not the idea is available. Some tips to keep in mind if your idea is being used, try different extensions (like .org or .net), or add small fluff words like “my,” “a,” or “best” (SewSusy.com vs. ThatsSewSusy.com).

Remember, most blog sites will offer a free domain with their site on front; (wordpress.thatssewsusy.com.) If you’d like to have a domain with only the blog name, this will cost a monthly or yearly fee; depending on the platform’s options.

Step 2: Finding Your Niche and Topic

Let’s go through those blog ideas now! While there are a wide array of blogs out there, there are always readers looking for new perspectives. So when it comes to choosing the topic for your blog, pick a topic that allows you to consistently create content without burning out the idea. The more breathing space you allow yourself, the more content you’ll be able to create posts that readers are interested in.

For example, if we’re creating a quilting blog, we don’t focus on only sharing patterns. Instead, by covering cover quilting as a whole and including pieces like projects, behind-the-scenes, how-to’s, personal messages, and more, readers get personal while learning new ways to approach their interests.

Keep in mind that blogs can often lead to opportunities for monetization. Whether through advertisements or connecting the blog to an e-shop, you want the message to align with your future goals. Just like creating videos for YouTube, or content for social media, look for what solutions and perspectives your blog can offer that differ from others out there.

Step 3: Hosting Your Blog

Once you’ve settled on the blog’s name and general topic, it’s time to research host sites. To fully create a blog online, you’ll need a hosting program and blogging program; luckily, these two programs usually come in a package deal.

The host is the website that readers will access. All your blogs will be stored and organized according to tags and design. On the other hand, the blog software is where you’ll write up and design the content for readers.

Below are 3 recommendations for hosting and building your blog. Each offers package deals that allow you to host and create your blog in one location.

WordPress.com: Designed to let you build your blog quickly, WordPress allows users to upload and manage media, text, blog posts, and eCommerce products online. Completely free and open to anyone who wishes to download the program, WordPress is both popular and influential.

Completely hosted by Automattic, bloggers only need to choose a free or paid plan and the domain. All other aspects of hosting are handled by Automattic and WordPress directly. Easy to use and set up, WordPress offers creators a variety of template designs that can be edited to fit their theme and topic. You can also include plug-ins for an eCommerce store, blogs, social media channels, and more.

There are multiple payment plan options, ranging from freelance bloggers to businesses requiring more storage and freedom in design and coding. Powerful, WordPress is known for being one of the top blog sites for creators.

Wix.com: Wix offers accessible design features and free or paid subscriptions for your site. In addition, you can easily add in media content like videos, photos, and PDFs, as well as a variety of applications that can interwork into the blog. In this case, you can easily add applications for e-shops, reservations, and so much more.

Like WordPress, Wix offers blog creators an opportunity to host and build their blog on one site. In addition, their site will offer full technical support, even on free accounts, and has a beautiful SEO system to help you get your blog up on search platforms.

Squarespace.com: Stylish and easy to edit, Squarespace is comparable to WordPress for its power and popularity. Offering over 140 template designs for your blog, Squarespace focuses on keeping a clean design for their sites, adapting the screen size for tablet and phone users on its own. Like the two programs stated above, users can host and create their blogs on one site.

The only cons of working with Wix is that larger websites exceeding 50 individual pages experience slow loading or difficulty. You’ll need to look for alternatives like WordPress for a more prominent website host.

Squarespace offers bloggers the opportunity to create teams with multi-author functionalities, engage readers with their comment features, and allows you to easily organize and schedule your blog posts. Thanks to their Squarespace application for bloggers, you can also blog on the go! With a larger page limit than Wix, hosting up to 400 pages while containing excellent resolution and speed, Squarespace can be a great alternative to WordPress for your website needs.

The cons of working with Squarespace are that you can’t create a large assortment of menu items, as this will slow to load down, and all save when editing automatically publishes onto the website in real-time.

Once you’ve decided on your host and blog site, you can begin designing! Look for designs that relate to your topic and theme while offering easy navigation for readers and a clean look. All programs we’ve recommended above come with built-in templates that can be edited and improved according to your needs.

Step 4: Writing a Blog and Publishing

Let’s begin with setting the site up and creating the content readers should view when they first find your blog. Some basics to set up on your blog are the about page, contact page, and any other page readers should browse with your focus.

Other items you can add to the site include a photo of yourself, a logo, images, a comment section, your social media channels, and other applications to which you’d like readers to have direct links. Your blog represents yourself and the topic you’ve chosen, so make sure to have fun designing and personalizing the site!

Moving on to the blogs themselves, focus on being informative and engaging! Our top recommendation for bloggers is to create a supply of idea topics and plan ahead to ensure you’re always on track for posting. Remember, consistency is what builds your blog following. Using a calendar or spreadsheet is perfect for keeping those ideas organized and will help the creative process go smoother.

When you write your blog, there are key aspects you should focus on like post titles, engaging and lengthy information, original content, and editing. No matter what topic you focus on, having an intriguing article title will bring a reader’s attention. Likewise, having engaging and informative information in your article while keeping it personal and including your perspectives will keep readers coming back.

Need ideas for your blog post? View below for posts you can include in your schedule.

  • Curated content: Focusing on your niche, these blog posts gather valuable pieces of information that readers are interested in learning about.
  • Topical content: stay in touch with current events and topics in your niche! Readers will enjoy seeing your perspective on current happenings in your community.
  • Visual content: Incorporate photos, videos, sound clips, and more to engage readers beyond reading.
  • Feature pieces: Interview popular creators and businesses in your niche! Networking and spotlighting others in your community is a great way to meet new friends and bring new readers to your site that are in the interviewee’s community. 
  • Evergreen content: answer your blog posts’ questions and educate readers on your niche topics.
  • Interactive content: Countdowns, quizzes, word finds, giveaways, and so much more will encourage audiences to interact with your site and blog. In doing so, they’ll help your SEO and give you a better insight into who your readers are.

Step 5: Getting Your Blog Out There

Now that your blog is running let’s get some readers! The first step is creating a plan to promote your blog. Then, follow along as we go over strategies you can implement to start getting your blog out there.

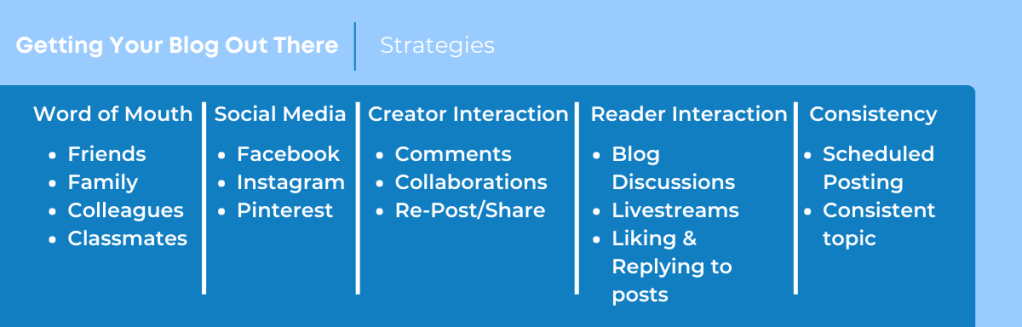
  • Word of Mouth: Contact your friends, family members, and colleagues to tell them about your new blog! By asking them to visit, read and follow, you’ll begin getting your site out there and raising awareness. Encourage them to share your blog posts, and don’t forget to thank them!
  • Social Media: Whether you use your personal page, or create a business solely for the blog, getting your blog link onto top social sites like Instagram, Facebook, Twitter, and Pinterest is the place to start. Post relevant photos, videos, and announcements for your blog on these sites to bring attention to your brand and writing. Asking friends and family members to share your profile and links will multiply your reach and help you gain that following you’re looking for.

Another significant aspect of social media is networking and using their search systems to your advantage! Reach out to other members of your niche, and use notions like hashtags and profile tags, to raise your posts on the algorithms.

  • Interacting with other creators: One way to create a name for yourself in a community is by interacting with other creators’ content. Leave comments, like their posts, re-share and more to begin building those connections within the community.

When you build these connections, you have a higher chance of broadening your audience and the opportunity to speak with others in your niche. In addition, this is an opportunity to create bonds leading to future collaborations and new projects.

  • Interacting with your readers: Let them know you care and interact with them! Whether liking their posts, replying to comments, or discussing your blog topics, readers like to know the author cares about their community.
  • Post regularly and keep in contact: Consistency is vital when building your blog. So create that calendar we mentioned and follow a routine for posting. This will keep readers engaged and waiting for a new post each time. Also, don’t forget to create an email list! This way, you can keep in direct contact with your readers and keep them updated when new posts or news about your brand are happening.

Step 6: Enjoy Your Blog!

Whether you created this blog for your small business, or your hobbies and passions, remember to enjoy the creative process! While building your audience at first can be difficult, remember these projects take time. So post regularly, engage with your community, plan ahead, and you’ll begin seeing your audience and opportunities grow.

Focus on creating content you’re proud of; remember, this project can be a stepping stone to new opportunities!

5 Projects you can create this Spooky Season!

It’s almost time for spooks and candy JUKI Lovers! For today’s blog, we will share our top 5 favorite Halloween projects you can begin creating this weekend. So whether you’re going trick-or-treating, or staying at home, follow along below for ideas you can start today!

Halloween Patchwork Quilt

Stay warm this fall and create a Halloween patchwork quilt! Using a variety of Halloween fabric pieces, think witches, pumpkins, and ghosts, you can begin making your very own patchwork quilt. Quilts are the perfect accessory to any home, used and loved by everyone.

We recommend checking out your local quilt shop for holiday quilt bundles. Great options when you want to create a patchwork quilt, and don’t have the scraps, are browsing charm bundles, jelly rolls, and mini-charms! Also, don’t forget to grab batting for your quilts and have fun by bringing texture to the surface using free-motion quilting techniques.

Some great tools to have when quilting is your Open Toe Quilting Presser Foot, Quilting Rulers, and a ¼” Presser Foot for finishing.

Costume Cape

The perfect addition to so many costumes, a cape can be used for various characters ranging from royals to superheroes. To use this cape multiple times, create your piece using basic colors like white, red, or black so you can enjoy this project through the years.

For creating a cape, we recommend having fabrics like stretch velvet, fleece, or wool! Usually, you’ll use about 2 yards of fabric for an adult cape and 1 yard for a child’s cape. This is an excellent apparel project for a beginner to try their hand at. For more advanced sewers, you can add features like trims and a hood for a more finished and professional look.

We recommend having a Cording Foot on hand if you plan to attach a string inside for the cape hood. Also, use a Decorative Stitch Presser Foot to add designs on your cape’s ends for extra personalization!

Spooky Placemats and Table Runner

Decorate your home with a spooky table runner and matching placemats! A fun and easy home project, you can accessorize and personalize your kitchen and dining table with fun fabric designs and colors.

When creating placemats and table runners, we recommend having some tools on hand. Inside your placemats and table runner, you’re going to place a fleece or batting; this will stabilize your project. Spray glue is an excellent adhesive for this! Once you’ve pieced together your mat, you can choose to leave it as is or add designs with free motion quilting.

For yardage, we recommend 2-3 yards of fabric. With one yard, you can create up to 8 basic-sized placemats, and with your other yards, you can create your table runner depending on your table length! Keep a ¼ presser foot on hand when you’re ready to complete your project, so you can quickly finish the edging.

Halloween Garland

Decorate your archways and doorways with a fun garland! Easily created with less than a yard of fabric for the hanging pieces and string, this décor piece is the perfect touch. For the hanging details, we recommend using backing fabric for stabilization.

For this project, keep your ¼” presser foot nearby! Perfect for creating a clean edging on each hanging piece and the edging on the hanging string, this accessory can be the only foot you need for the project.

Trick–or–Treat Bag

Lastly, don’t forget to have your trick-or-treat bag ready! Wishing you a happy spooky season, download our free instructions for our see-through trick-or-treat bag here. With a finished size of 14″ x 16″, this bag will carry all those treats home!

Happy Halloween, JUKI Lovers!

Behind the Collection with Mah-Jing Wong, JUKI Designer Ambassador

Join us today as we go behind the collection with JUKI Design Ambassador Mah-Jing Wong! Inspired by Marvel and Anime, we get to see his studio and discuss his designs and looks.

Follow below for a transcribed version of our look behind the collection with Mah-Jing Wong.

JUKI: What inspired you to create a collection based on the anime ‘Sailor Moon?

Mah-Jing Wong: Alright, so this time around it wasn’t just Sailor Moon that inspired the collection. I did a little bit of Sailor Moon and Marvel X-Men. I blended the two together and created my own cartoon which is GALAXIA X and she is the powerful superhero from the sailorverse. So this time around I kind of created my own thing, you know?

JUKI: How did you decide what style and cut to create the fashion pieces?

Mah-Jing Wong: Well, this time around I wanted to keep the same silhouette and just kind of build on there. Because it’s our fall collection it’s a little more coverage, it’s a little colder outside we have jackets, skirts, some joggers, and oversized tops. We still have our sheer dresses, but they have a little more coverage within them.

JUKI: What was your favorite outfit to design and create for this collection?

Mah-Jing Wong: Now my favorite outfit, that is so hard to choose! Kinda like picking your favorite child is hard to do! I guess, maybe our GALAXIA dress which is the color block dress with the green patch over the breast. Awe man that one was super sick and it was very sexy to you know?

JUKI: Let’s talk about the modeling! How do the models bring your work to life? What vision did you see when creating this collection?

Well this time around our house model, which is my wife Stacy, she’s just absolutely amazing. We really want to channel LAness pose, high fashion pose. So we did bleached brows on some of the photos, really sleek and wet hair. She did some really out-of-this-world-like poses, I mean I’m not her so I can’t go do poses, but she’s absolutely amazing, and she really helps to bring the clothes to life.

She is GALAXIA X you know?

JUKI: What future plans do you have in store for the Anime collection?

Mah-Jing Wong: Well, just to continue to push to the masses and get some really cool placement and you know, drop our own cartoon which is something I really want to work on. Maybe a comic book. I mean the sky is the limit with fashion and Mah-jing Wong because the good thing about us is we’re so multi-fashionst, and multi-talented, that I really want to touch all areas especially when it comes to animation.

So you never know what you may see from us.

To learn more about Mah-Jing Wong join us here!

Interested in Mah-Jing Wong’s machine? Check it out here!

To find a JUKI dealer near you visit us here.

Catching Up with Rob Appell

You may recognize this month’s spotlight from “Michael Miller Fabrics Making It Fun” or “Man Sewing,” we’re so excited to spotlight our JUKI Ambassador, Rob Appell, during National Sewing and Quilting month! In today’s blog, we get to speak with Rob about his journey in quilting, his passion for the craft, and how he came to be where he is today.

Robs journey in quilting began when he moved back home from college, spending his free time outside and snowboarding. His mother, the manager and eventual owner of the local quilt shop brought Rob into the business, where he started as a clerk. When his mother began bringing in machines to sell, Rob eventually shifted to machine repairs, and here is where he started falling in love with sewing!

Creating fun Hawaiian shirts as his uniform for the quilt shop, he found himself having fun making them and eventually began looking into patchwork quilting. A fun and easy way to pick up quilting, he began testing his skills in free motion quilting his projects. Again, finding himself loving the hobby. The rest, as they say, is history!

Since he began to quilt, Rob has accomplished a published quilt book, starred in and hosted multiple quilting YouTube shows, created a community for his teachings, and so much more! His videos encourage new quilters to be creative and enjoy their projects! With a focus on basic techniques, his hope when he’s creating for viewers is that they find something they can take away from his lessons and learn how to make their versions.

Recently starring in ‘Michael Miller Fabrics’ Making it Fun,’ you can follow along with his high-energy videos and view the different patterns and free motion quilting techniques Rob uses. While he offers some design patterns and templates for quilters, his work mainly focuses on organic creation. Going with the flow, his work often doesn’t follow design patterns; the finished design patterns he has sold usually come from these organic works he’s completed after the fact!

“The Free Motion Quilting, I prefer to go freestyle, no pattern, sometimes a plan, but usually pretty random and free.”

Quilting didn’t take him away from the outdoors he loved. Combing two of his favorite things, Rob is known for his landscape quilts. These beautiful pieces focus on nature and showcase views in bright colors. In fact, in 2009, Rob created 12 different quilts that featured faces of endangered species. Using the patterns from his work, he was able to fundraise and advocate for these species through sales that went toward endangered species charities.

He also authored a pattern book, “Making Waves … Adventures of a Surf Quilter,” a self-published print book featuring his landscape and seascape quilts. Early in his quilting journey, Rob was known for his scenic creations. Then, using free motion quilting and applique, he would add fun designs like fish, coral, rocks, lighthouses, ships, and more! Then, bringing in his love for surfing, he created a piece that intertwined surf terms with quilting terms, going above the average and setting himself apart.

Now, as someone who’s been quilting and creating those quilting videos we love for years, we asked Rob what keeps him going. “Videos are free and can be viewed over and over again if you’re learning from them. I love to present my passion for quilting.” Rob likes to focus on basic quilting techniques because he’s often reminded of how many new quilters have emerged in the community over the years. Thanks to video cameras and social sites like YouTube, where Rob hosts, he can teach how to construct quilts and the basic skills all quilters want to know. Keeping himself motivated with fun fabrics and the creative process has pushed him to bring that energy into each episode’s studio. Thankful for the following he’s gained on YouTube that keeps him going!

Rob at his studio with the J-350QVP & J-150QVP

He recently created a new quilt, the “Synergy Remix,” designed by Kristie J. Smith in her pattern book, “Splice Magic,” that he loved! Always excited to try out new and different quilting techniques, like he encourages his viewers, Rob locked himself in the quilt shop, Stitchin’ Heaven, his latest collaboration where he’ll be hosting new quilting episodes, and went to work! In one night, he created a quilt and video, maligning the entire project and finishing it. Yet, this project places a smile on his face when he thinks about it.

While Rob has gone on to try other ventures, like his work in textile design with Free Spirit Fabrics, he vouches for his love of quilting. Sharing his love of fabric and free motion quilting, he focuses on his desire to quilt the top to push him through the construction process. Recently, he’s begun focusing on improving his precision in his patchwork! By creating little half-square triangles and trimming them up, he’s found joy in practicing his skills.

Always learning and growing, Rob has begun a new journey in his quilting career with Stitchin’ Heaven! As their new YouTube manager and Content presenter, he’ll be able to create a team of quilt lovers like himself who can share their passion for the craft while teaching others worldwide. Stepping back from handling all processes by himself, he’ll now have quilting friends who will help him create new and exciting projects for viewers like you. We’re excited to see the different techniques and quilting styles that will emerge from this new partnership!

“The thing I love most about the quilting industry is that there is so much for everyone.”

With the quilting community constantly growing as new members find their passion for the hobby, we asked Rob what advice he has for JUKI Quilters. “Get to know your machine, spend 7me learning the nuances, understand what the different feet do and when to use them. Then, remember – this is a hobby, not a race. Please slow down to enjoy the process.” When you enjoy the steps to what you’re creating and take a moment to appreciate each technique you’ve picked up, you’ll truly enjoy the finished project. As Rob mentions, so many people need something positive in their lives. Take the time to find your passion, teach and work with others in your quilting community, and enjoy the process.

We hope you enjoyed learning more about Rob with us, and we hope this inspires you to join him on an online video one day and check out quilting! A hobby for everyone, we hope everyone enjoys National Sewing and Quilting month with a fun new project!