Sewing Techniques for Spring

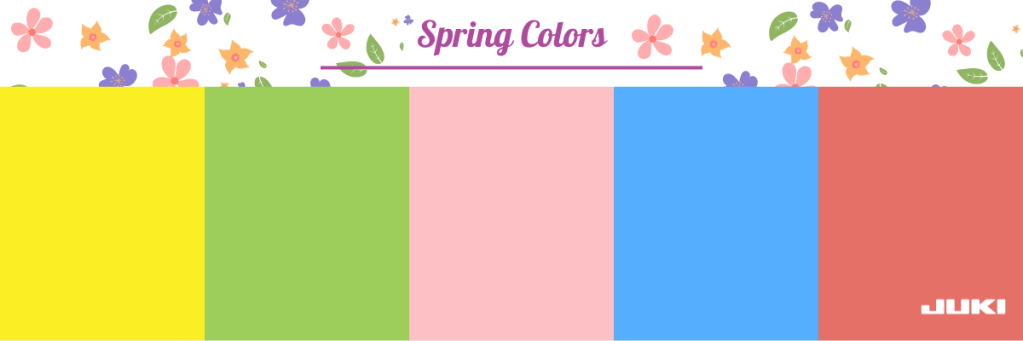
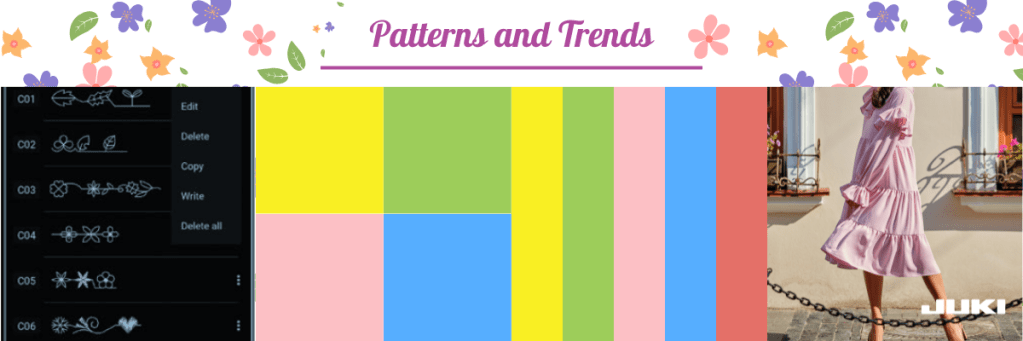
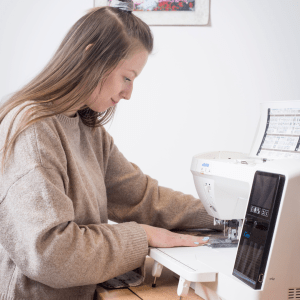
It’s that time of the year when chiffon, linen, and cotton reign supreme in the fashion world, offering a breath of fresh air to wardrobes everywhere! But mastering the art of sewing with these ethereal fabrics can be a bit like taming a butterfly—challenging yet incredibly rewarding. Let’s dive into the world of spring sewing techniques and explore how to work magic with these fabrics on our trusty JUKI machines.

Embracing Chiffon

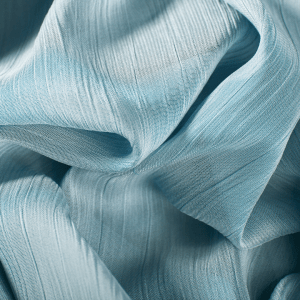
Chiffon is the epitome of elegance and lightness. Working with this sheer, floaty fabric might seem intimidating, but fear not! Please start by selecting a fine needle, preferably a size 9 or 11, to ensure it glides through the fabric without causing snags. Using a walking foot or a roller foot on your JUKI machine can also work wonders by preventing the fabric from shifting as you sew.

You can craft lightweight scarves in various colors and prints, finishing them with narrow rolled hems or decorative stitching for a personalized touch. Design flowy tops or blouses with chiffon fabric for a breezy and feminine look, incorporating details like ruffles or gathers. These projects embody the essence of spring with their lightness and grace. Below are popular techniques that Chiffon fabric can handle well.

  1. Staystitching: Before handling chiffon fabric, it’s crucial to stabilize its edges with staystitching. This prevents the fabric from stretching or distorting during construction, especially around curved or bias-cut seams.
  2. French Seams: French seams are excellent for chiffon as they encase raw edges within the seam, providing a clean finish without adding bulk. This technique helps prevent fraying and ensures a polished look, which is ideal for sheer fabrics like chiffon.
  3. Narrow Rolled Hems: Chiffon fabric lends itself well to narrow rolled hems, which create a delicate and elegant finish on edges without adding weight or bulk. This technique involves folding and stitching a small hem allowance twice to create a narrow rolled edge, perfect for chiffon’s lightweight nature.

Working with Linen

Linen, with its natural, breathable texture, is a springtime favorite. Sewing with linen on your JUKI machine can be a breeze with a few simple tricks. Start by prewashing and pressing the fabric to account for any shrinkage, and use a universal needle size 12 or 14 to handle the slightly heavier texture of linen.

Consider creating lightweight and breathable garments such as dresses or skirts, perfect for warm weather. Linen’s natural texture adds a touch of sophistication to home decor items like table runners or throw pillow covers. Additionally, you can fashion tote bags or accessories such as headbands or sun hats using linen fabric for a chic and understated look.

  1. Staystitching: Similar to chiffon, staystitching stabilizes the edges of linen fabric to prevent stretching or distortion, especially around curved or bias-cut seams.
  2. Understitching: Understitching is beneficial when sewing linens with facings or linings, helping to secure them and ensure they lie flat against the body. This technique benefits lightweight linens where topstitching may be too visible or bulky.
  3. French Seams: French seams work well with linen due to its natural texture and weight. They provide a clean finish by encasing raw edges within the seam, reducing fraying and ensuring durability without adding bulk.

Consider using a serger or finish seams with pinking shears to prevent fraying. A straight stitch or a medium-width zigzag stitch works well for sewing linen. And don’t forget about pressing—keep a trusty steam iron nearby to ensure crisp seams and a polished finish.

Cotton Comfort

Cotton, the quintessential spring fabric, offers versatility and comfort. Whether working with crisp cotton poplin or soft cotton voile, your JUKI machine can handle it like a pro. A universal needle in sizes 10 to 14 is your go-to for sewing cotton fabrics.

You can fashion vibrant and cheerful quilts or patchwork blankets, which are ideal for picnics or outdoor gatherings. Sew lightweight and breathable clothing pieces such as blouses, sundresses, or shorts, perfect for enjoying the warmer weather. Or create home decor projects, including curtains, tablecloths, or kitchen towels, adding a fresh touch to your living space. Following the techniques below, you can create with cotton seamlessly.

  1. Understitching: Utilize understitching to secure facings or linings in place, ensuring they lie flat against the body. This technique is particularly beneficial for lightweight cotton fabrics, where topstitching may be too visible or bulky.
  2. Basting: Temporary basting stitches hold fabric layers together before permanent stitching, aiding in precise seam alignment and preventing shifting during sewing. This technique is invaluable for lightweight cotton fabrics, ensuring accuracy and ease of construction.
  3. Clipping and Notching: Reduce bulk in seams and ease curved edges by carefully clipping and notching lightweight cotton fabric. This ensures smooth draping and prevents puckering or bunching, maintaining the garment’s natural flow.

Experiment with different presser feet to enhance your sewing experience. For example, an edge-stitching foot can help achieve precise topstitching, while a quarter-inch foot is excellent for creating accurate seams in quilting-weight cotton. Use a smaller stitch length for more control and accuracy when sewing curves or delicate corners.

Must-Have Accessories

Your JUKI machine accessories can make a difference when working with these springtime fabrics. Consider investing in:

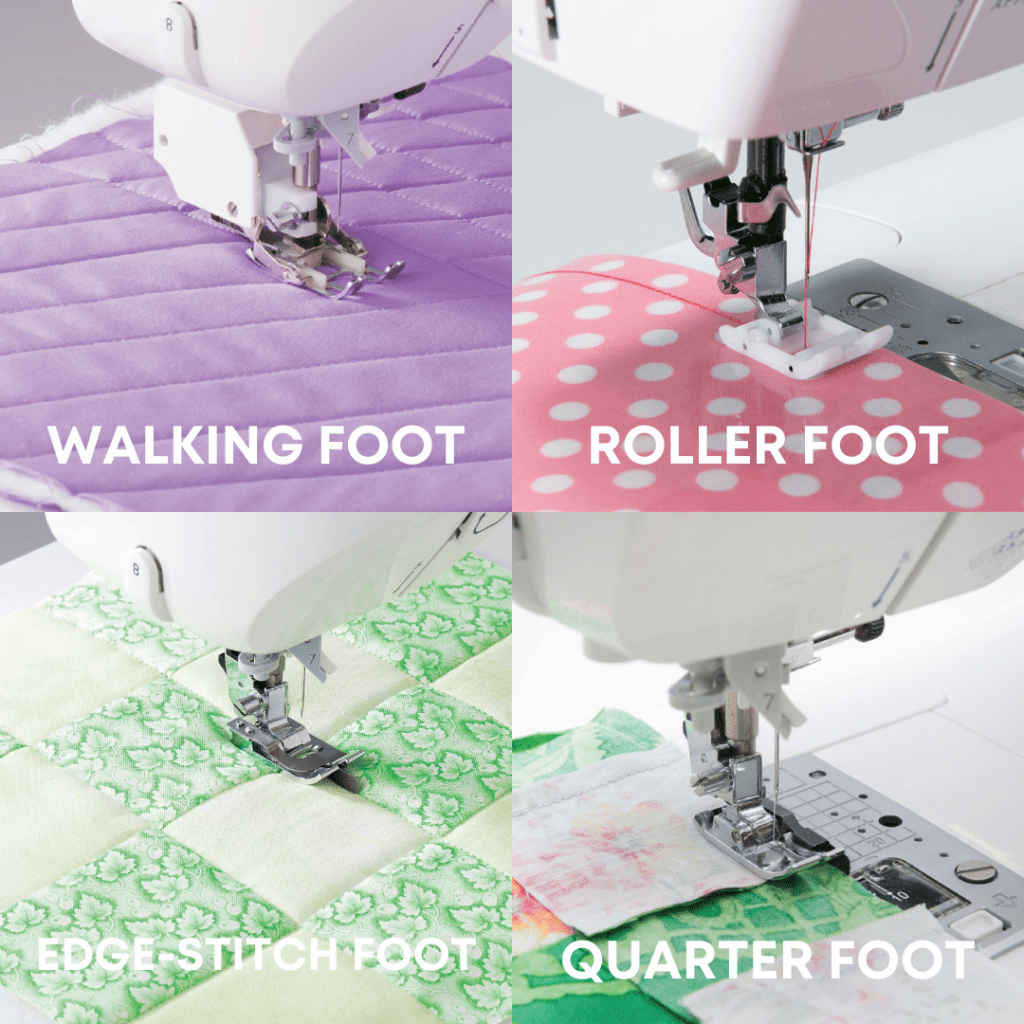
  • Walking Foot: Ideal for handling multiple layers of fabric or slippery materials like chiffon.
  • Roller Foot: Great for fabrics that tend to stick or drag, ensuring smoother sewing experiences.
  • Edge-Stitching Foot: Perfect for achieving neat, uniform topstitching on hems and edges.
  • Quarter-Inch Foot: Essential for precise quarter-inch seams, especially useful in quilting cotton.

Sewing with light and airy spring fabrics can be a delightful journey with the proper techniques and accessories at your fingertips. Remember, practice makes perfect, so don’t be disheartened if your first attempt doesn’t turn out as expected!

Embrace the nature of these fabrics, experiment with different stitches and presser feet, and most importantly, enjoy the process. With your JUKI machine as your trusty companion, you’re well-equipped to create stunning pieces that embody the essence of springtime elegance and comfort.

So, gear up your JUKI machine, grab your favorite spring fabrics, and let your creativity soar like a gentle spring breeze through the sewing world!

JUKI Tip: Air Thread Sergers VS. Traditional Manual Sergers

In this month’s tip, JUKI National Account Trainer, Alba, demonstrates the difference between an air threading serger and a non-air threading serger. The first serger we’ll showcase is the non-air threading serger, the Mo 114D. This is a non-air thread surger so this is a manually threading serger and the main difference is the way that the machine is threaded.

The other thing is that with a traditional serger, you must follow a specific order and usually it is an upper looper gets threaded first then the lower looper and then the needles in order; so there is a specific order that needs to be followed with this serger. When there is a thread breakage within this serger, it is often recommended that you start rethreading the machine from beginning to end.

Now with the air thread serger, here we’re showcasing the MO-2800, we’re going to show you their differences. Now what the air threading capability is all about, is the mechanism on the inside of the machine and its tubes, allow that jet stream of air to go through. Now in order to activate or start the air thread process we need to flip one lever, shown on video, and it really is as simple as that!

I will be turning the hand wheel towards me and what that does is if you watch this action that tube closes and you hear that click where I am now ready to activate and use the air thread. What is really nice about an air thread serger is it does not matter the order that you thread in! So I am going to go in the opposite order of the one right next to me. Now, I get my thread, I hold it with the tweezers, and I am putting between half an inch and an inch of thread in there. I have 8 to 10 in of loose thread in front of me and that lower looper has been threaded. This is typically the one that takes the most amount of time to thread on a serger and you could see just how easily. Now in order to close the door you will have to lower the lever and that’s usually where I get the call where people will say oh my door isn’t closing and that’s exactly why.

Another feature I was so excited about is the needle threader! I left one needle unthreaded and I’m going to open up the door just to make it easier to see on video, and I’m going to lower my foot and I have a lever that goes right and left. I’m threading my left needle, I have it to that position on video, and I am going to lower my needle threader and I am going to place the thread right in.

There’s a little groove on your needle threader that hugs around your needle and the thread goes right in there. You’ll notice I left it really nice and loopy and when I raise that needle threader up it threads the needle quickly.

Those are some of the differences between a regular serger and an air thread serger! I hope you enjoy these updated features, stay tuned and make sure to hit like and give us your comments!

To learn more about our JUKI Serger, visit your nearest dealer by visiting here.

That’s Sew JUKI Spring

It’s almost spring! As the season of renewal and vibrant blooms unfold, the world of fashion beckons with fresh colors, patterns, and trends just waiting to be stitched into existence. This season, infuse your sewing projects with the essence of spring, and let JUKI guide you!

Renowned for our precision, reliability, and innovative features, JUKI machines are poised to revolutionize your spring sewing experience. From intricate floral motifs to breezy sundresses and chic accessories, JUKI offers the tools and accessories to bring your spring fashion inspirations to life with impeccable craftsmanship and ease.

Join us as we explore trends, share tips and tricks, and delve into the endless possibilities that spring sewing with JUKI machines offers.

Spring Fashion Palette: Colors to Embrace

As we dive into the vibrant world of spring fashion, harnessing the power of color to truly bring your sewing projects to life is essential. The spring fashion palette offers a kaleidoscope of hues, evoking a distinct mood and energy. Here’s a closer look at the colors to embrace this season:

  • Sunny Yellows: As the epitome of sunshine and optimism, shades of yellow illuminate the spring landscape with their cheerful glow! Whether you opt for pale buttery tones or vivid like Lemon Fruit, yellow injects a sense of joy and brightness into your creations.
  • Fresh Greens: From minty hues to the depth of shades echoing nature, greens reign supreme in the spring palette. Green hues can infuse any project with fresh air and vitality, symbolizing growth and renewal.
  • Pastel Pinks: Soft and delicate, pastel pinks evoke a sense of romance and femininity synonymous with spring! Whether you’re crafting delicate florals or dreamy garments, pastel pinks add a touch of soft beauty and grace to your creations.
  • Soothing Blues: Like a tranquil oasis amidst the hustle and bustle of spring, shades of serene blues offer a calming contrast to the lively tones of the season! Look for shades like colors of the sky or of the sea. Blue hues bring a sense of peace and tranquility to your sewing projects.
  • Cheerful Corals: Vibrant and energetic corals infuse your creations with warmth! With their cheerful tone, corals add a playful pop of color to any project, radiating positivity.

In addition to embracing these colors, selecting the right thread color is crucial to achieving impeccable results in your sewing endeavors. You can match your thread to your fabric to achieve seamless and professional-looking seams or select threads that complement the color and texture of your fabric for a contrasting pop of design and color.

Experiment with contrasting colors to create visual interest and depth, adding a dynamic element to your sewing projects. Whether accentuating intricate details or adding decorative embellishments, thread colors can elevate your creations to new heights of artistry and expression.

Patterns and Trends for Spring Sewing

Patterns and Trends for Spring Sewing are all about embracing the vibrant colors and timeless motifs that define the season. With JUKI machines, sewing enthusiasts can easily bring these trends to life. Equipped with a wide range of design stitches, JUKI machines allow for intricate embellishments and precise detailing, enhancing garments, quilts, and accessories with stunning motifs and textures. Whether stitching delicate petals or crafting striking color combinations, JUKI machines empower you to infuse your spring sewing projects with style and sophistication, ensuring impeccable results every time.

Below are a few patterns and trends we love for spring sewing!

  1. Florals and Botanicals: Embrace the timeless allure of florals and botanical prints with JUKI machines’ array of decorative stitches. Whether you’re stitching floral designs or intricate leaves, JUKI’s digital sewing machines offer various decorative stitch options to embellish garments, quilts, or accessories with stunning motifs.
  2. Pastel Color Blocks: Dive into the trend of pastel color blocking with confidence, as JUKI machines ensure precise stitching for seamless color transitions. Mix and match soft pastels from the spring palette to create striking yet soothing combinations in garments, quilts, or home décor items.
  3. Stripes and Gingham: Whether you’re drawn to bold stripes or the timeless charm of gingham, JUKI machines offer the precision stitching needed to execute these patterns with finesse. Experiment with varying stripe widths and directions or play with the scale of gingham checks to create garments or home décor items that exude classic sophistication. With JUKI’s accessory feet, you can create seamless patterns with ease.
  4. Flowy Silhouettes: Embrace the lightness of spring with flowy, relaxed silhouettes crafted using JUKI machines. With JUKI’s advanced feed mechanisms and precise stitching capabilities, sewing with lightweight fabrics like chiffon, silk, or cotton voile becomes effortless. Whether crafting billowy blouses, airy skirts, or elegant dresses, JUKI machines ensure that your creations drape beautifully and move gracefully with every step.

With JUKI sewing machines as your trusted companions, the possibilities for spring sewing projects are as boundless as your imagination. Whether embellishing garments with intricate floral motifs, experimenting with color blocking, or mastering classic patterns like stripes and gingham, JUKI empowers you to bring your creative visions to life with precision and ease.

Incorporating Spring Trends with JUKI Machines

Before jumping into creation, let’s talk about the JUKI features you can find on your machine and how to use them on your next project. JUKI machines offer a plethora of features and functionalities to bring your spring sewing visions to life:

  1. Creative Embellishments: Discover the multitude of decorative stitches offered by JUKI machines, perfect for enhancing your spring garments or quilts with floral accents, decorative borders, or intricate patterns like those mentioned above!
  2. Impeccable Stitching: Benefit from JUKI machines’ precision stitching capabilities, guaranteeing flawlessly executed lines and precise seam allowances. This precision is invaluable for crafting garments with tailored fits or intricate patchwork designs. From flowy dresses to clean-cut blouses, the right stitch is vital for a seamless finish.
  3. Fabric Versatility: JUKI machines excel in handling a wide range of fabrics, from delicate silks to durable cotton. This adaptability empowers you to explore various materials, allowing for seamless experimentation and creativity in your spring sewing endeavors. Use fabrics like Chiffon or Vinyl on the same machine with ease of switch and create projects that vary in design and texture for fun and vibrant new looks!
  4. Ease of work: JUKI machines are designed to be the ultimate ally in your sewing journey, effortlessly streamlining your workload with various innovative features. From the convenience of automatic needle threaders to the efficiency of air threaders on our sergers, JUKI machines eliminate the hassle of manual threading, allowing you to focus on your creative process. Enhanced lighting ensures optimal visibility, while extension tables provide ample space for easily handling larger projects. With JUKI machines, every aspect of your sewing experience is optimized for efficiency, precision, and comfort, empowering you to tackle any task with confidence and ease!

As the fashion world awakens to the allure of spring, sewing enthusiasts have an opportunity to infuse their creations with the season’s vibrant colors, patterns, and trends. With JUKI machines as your creative companion, the possibilities are endless.

Whether you’re designing flowy dresses, quilting vibrant florals, or crafting accessories in the season’s palette, JUKI machines provide the precision, versatility, and decorative stitches needed to bring your spring sewing visions to fruition. Embrace the essence of spring, one stitch at a time, and weave a tapestry of creativity with JUKI.

JUKI Tip: How to Get Started with Ruler Work

In this month’s tip, JUKI National Account Trainer Alba teaches us a fun and easy way to use our new JUKI ruler set in the Hearts and Wings collection! Showcased by Alba, check out examples of patterns you can create and an easy trick on how to plan out your designs the next time you’re creating.

Follow along below for a rundown of what Alba covers on today’s JUKI Tip!

Hello, all my JUKI friends my name is Alba and I am the national accounts trainer for JUKI Home Sewing! I’d like to welcome you to my home and today I’m really excited because this is almost like a double video for you. I am not only introducing a new product but I’m going to give you a tip on getting started with that new product. So let’s get right to it and let me show you the new product!

What I’m referring to is the hearts and wings ruler set. This is absolutely beautiful, you’re getting five different rulers that I have spread out on the video and they are clear rulers so I do have them down on white paper to try and make it easy for you to see them. As you could see, they give you five different shapes and really endless possibilities and a lot of people when they get started with rulers and quilting one of the first questions they ask is “so how do I get started?” And that’s exactly my tip for you today!

Now you notice I have no machine set up because really getting started with rulers or any free motion for that fact is on paper or a dry-erase material. So you can work on paper with pen, and I do recommend getting a pen that does not have a click on/off, because that pen will close on you as you are tracing those rulers or templates. You may hear this term, ruler or a template, and they refer to the same thing.

What I am going to do, is at my local Dollar General they have a dry-erase wallpaper and for me, I put this on the back of my cutting mat and it makes it really easy for me to audition and practice with my rulers. So the first thing I am going to do is I will be doing a border with this ruler here, and what I like about the JUKI ruler is, it doesn’t show well on camera, but there are a little dots of grips fabric grips on these rulers so it makes it really easy to start using them.

To start in the video I’ll draw a center line, and what I like about the dry erase is I can just erase if I’ve make a mistake and it makes it really practical on this dry erase material but remember to use a dry erase marker that’s especially made for this. Now with free motion it really doesn’t matter where you start at the beginning or at the end because you have full 360 movements; but for me when I start I like to start at the top of my fabric with the bulk towards me so as I move I’m moving into the machine and that’s exactly what I will be doing here.

I am going to place my ruler down and you will notice on the video all the cross markings, and these are indicator markings to keep you straight, plum and even. So I am going to line up, and when using rulers you want to put some of your fingers on the ruler and some of them off the ruler guiding it and having you keep it from moving or shifting. Now if this were my machine I would be following the edge and at any point stop because that is what will give you a nice beautiful point. Now I am going to move my ruler and line up and make sure that I am staying on those lines.

Now I’m going to turn my ruler around and go to the other side. I could either start from the top or the bottom and always when you’re doing this, pause at that corner. Im going to make sure I am lined up beautifully, and look at what a beautiful design this makes for a border!

As you play with this you could put a medium size one in between and audition but this is what I like about working with a dry erase area paper pen, you’re getting to play with it and really experimenting with the movement and the shape that you will create. Now by using the dry erase, it will be slightly larger because my foot does grip about A4 of an inch from that ruler base but this is a good way to get that general idea of how that ruler will take shape and also to play with it and trying create new and exciting shapes of your own.

I want to thank you for sharing this time with me! If you enjoyed this video and others that you’ve seen make sure to hit subscribe and make sure to leave comments as well on what you’d like to see. Please come back and show me your progress that you’re making with your rulers and again this is the new hearts and wings ruler set that I am playing with a five-piece ruler set so please reach out to your local dealer and get a really nice look at this set!

JUKI Tip: MO-2800 Features

In this month’s tip, JUKI National Account Trainer Kelly showcases how to use the features on one of our latest sergers, the MO-2800! From the useful air threader to safety features that keep sewing fun, follow along for Alba’s favorites.

Follow along below for a rundown of what Alba covers on today’s JUKI Tip!

Hello all my JUKI friends, my name is Alba and I am a trainer for JUKI America. Today I want to share with you one of the newer JUKI surgers and I’m going to be talking about the MO-2800. I’m going to go over some of the key features in that made me fall in love with this machine.

First of all,l you may notice that there is a knee lift on the machine. What the knee lift does as you’re sewing, is it raises and lowers the foot, which can be really handy when you’re working with corners or any other areas.

The MO-2800 is a two, three, and four-thread serger and it has that easy threading, our air thread capability. That means with a push of a button, and a jet of air, your lower and upper looper are instantly threaded.

I also love the fact that my tools that I require for the serger also have a spot and a home right on the inside cover.

One of the safety features in their machine you’ll notice is that the machine will not run if the front storage door is open or the foot is up. Isn’t that just absolutely wonderful?

Now, the one feature that I fell in love with, I’m going to be I’m going to be honest with you, is that needle threader. Now, in the video, I’m just going to turn the machine slightly so you can see that needle threader, and the feature threads your right and left needle. I absolutely love not having to fuss with tweezers, a magnifying glass, or getting an extra pair of glasses to thread my needles.

Now the other feature I want to show you is going to be a little bit difficult to show but hopefully you will be able to follow along in the video. I have a stitch width adjustment where I can move my knife to the right and to the left. Normally that would be the only way to adjust your stitches, but on the MO-2800 I have an independent adjustment to also move my stitch finger independently of my knife. This really allows for perfect stitches, especially on those super fine delicate lacy knits that I find such a hard time getting that perfect stitch on. JUKI has thought of it all!

Now a rolled hem is something that I do and this machine handles a very sheer fabric, to my home deck fabrics, so it could handle a wide variety of fabrics. But when I switch to a rolled hem, I have this quick easy tweak, that allows me to get that picture-perfect rolled hem as well, which you can see in the video.

Now that I’ve gone over some of the features on the MO 2800, please reach out to your local dealer and get a really nice look at this machine and test it out for yourself. I think you’ll love it as much as I do. Until next time, bye-bye!