
When we first begin creating videos for our projects, we might not be sure where to start. Creating a video for our socials can go beyond the camera and your current project and step into pre-planning, long editing, and finding the right places to publish.
Today we’ll review tips and things to keep in mind when you want to shoot your next video! From planning your videos to editing, shooting, and posting, follow along as we go through the steps it takes to get your project video going.
What to Film?
Before we can step into the studio, let’s begin with brainstorming. It all starts with an idea! This idea doesn’t need to be perfect but think of a specific project you’d like to work on and create. From there, figure out the goal of your video.
For example:
- Is this video being created to present how to create a project for each step?
- Are you creating this video project to showcase a specific machine or accessory?
- Are you going behind the scenes?
Once you know why you’re creating this video, we can jump into the how.
Some ways you can plan your videos are scripting certain scenes, creating a storyboard that allows you to see what flow you want to make for your videos, and designing the production space and location. For scripting, think of certain spots like introductions, saying goodbye, or even a script for your whole video! The storyboard process can be as simple as breaking down your video into parts and seeing where you’ll be changing positions or locations to film. Once you find your filming location, ensured good lighting, low outside sounds, and a room that looks inviting to viewers, you can begin filming.
Deciding what projects to focus on can be difficult, but the great thing is you can always keep creating videos! Sometimes we’ll want to focus on a WOW project that can cost us big bucks and involve a lot of editing. Other times we might create a piece that is short, easy, and to the point. So choose a project you love doing, no matter what form of project or video you’re creating!
The Equipment
When you’re ready to begin filming, there are a few tools every studio should have. Some might think they need to start with a professional camera, but when you’re first beginning, a smartphone can be the best option! With any standard smartphone, you should be able to create excellent video content that can be used for YouTube videos, Instagram Reels, TikTok, and more.
However, if you have a budget and are ready to dive in and buy equipment, we recommend a few of the basics below.

- Camcorder or DSLR
- Camera lenses: These can be used for different shots. An example would be purchasing microlens for close-up shots of your needlework!
- Memory cards: we recommend having a few on hand for those long shooting days.
- Tripod or stabilizer: different versions can be purchased. You can find ones for tabletop views and bird-eye views.
- Microphone: make sure you’re viewers can hear you well! We also recommend captioning your videos for viewers to follow along.
- Lighting: Lighting can break or build a video! Proper lighting will help sewists see where you’re stitching, the needle, your stitch types, and more.
If you use your phone camera, you can still use this extra equipment! Multiple accessories will Bluetooth link to your phone for microphones and new lenses can be attached to your smartphone camera. Remember phone tripods and good lighting, and you’ll be creating your professional videos soon!
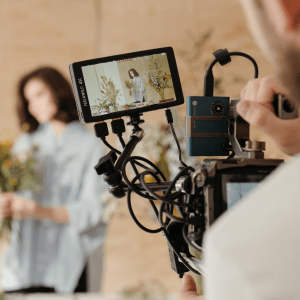
Recording Your Video
There is no real right or wrong way to filming, but there are tips for creating clean and fun videos! When it comes to filming, you want to start by allocating time for it. Filming time always depends on your projects, the angles you’re shooting at, and what your video storyboard is.
For example, if you’re shooting a quick tip video, that won’t require camera move changes or machine adjustments, it can take 15 minutes to film your new tip video and 10 to edit. Now, you have fun short videos for your followers and other sewists!
However, if you’re planning to create a project video like a garment piece, be prepared to allocate a larger amount of time for filming and post-production. Editing and the theme of your video style will change as you learn new techniques and features, but it’s best to create consistency in your videos for your viewers to follow. Whether it’s a standard opening sequence, the way you style the shots, or the theme of your projects, consistency is what begins to build a following.
Once you’ve planned your sewing space and managed your time, you can start setting up! The setup process is important when you’re creating because this will help build the momentum for your video and make the correct layout. Focus on lighting, how the sounds of your space are (are you getting a lot of outside noises in your film location?), and decide If you’ll be using a script so you can plan to have a mini prompter to read off, or finding a screen large enough to assist.
Lastly, do some test runs! Have fun and practice first by creating mock videos and testing your sewing location, audio, lighting, angles, and more. Then, once you feel you’re ready, go ahead and film your video!
Film Tips
- If you’re shooting a sewing technique, use a lens like the micro one we mentioned above! Simple to use, this adjustment can help viewers get a better peak at the stitches you’re using, presser feet, and even stitch length!
- Bird-eye/Overhead view can be your best friend when creating projects that otherwise wouldn’t be seen on a direct shot. For example, use bird eyes view when making garment projects or quilts to showcase how the projects are truly turning out.
- Make sure to have your supplies and fabric ready to go before filming! We recommend pre-cutting, pre-washing (if needed), and setting up your workspace for viewers to see what supplies they’ll need while allowing you to be ready to go.
- Include an opening and closing shot in your videos! This little detail will help viewers feel welcomed to your channel and give them an idea of what they’ll learn when they watch.
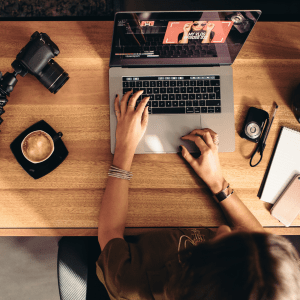
Post Production Time
Here comes the fun part! Once we’ve completed our filming, it’s time to move on to editing, planning, posting, and getting those posts and blogs ready. Of course, the first step is importing your video! A tip we recommend is organizing your footage before editing. This way, you can plan the placements, title screens you might need if you choose to use them, and any other graphics you want to be included.
Once you’re ready to edit, choose the film editing software that works best for you! Editing is the most important part of this process, so follow along and mention some things to keep in mind while editing.
Cut out the Quiet and Redundancies
Before editing, watch your footage fully through. Here you’ll begin editing and cutting out pieces like long moments of silence, mistakes made while filming, or repetitive steps.
Adding Elements
From there, decide what elements you want to include in your video. Think of photos, captions, and graphics. Next, consider what background sounds or music you’d like to include. When we have those times without speech, having fun and simple themed music in the background can keep viewers interested. Make sure to choose music that matches the tone of your video! For example, if you’re creating a summery project, look for background music that is more pop than somber.
Next, when adding transitions and video effects, focus on being cohesive! Using multiple types of transitions can make your videos look clunky, so it’s best to find the transitions you’re comfortable with and use those in your videos.
Placing Your Intro and Outro
Place these in your video if you choose to film your intro and outro post-production! Videos give a complete feeling when they have a direct opening and closing, so we recommend having fun with it and creating a guideline you can follow when creating. Whether this includes a common intro phrase, placing your logo, promoting the pattern you’re working on, or something more personal, these two elements will elevate your video!
Staying Consistent
Consistency builds a following! To create a consistent aesthetic for your videos, plan out and design certain pieces that will be repeatedly used.
- Thumbnail Image Templates that can be edited to fit new videos
- Color themes for graphics and slides
- Font choices
- Logo
Editing Tools
If you’re unsure which editing applications to choose from, we’ve placed a few recommendations for beginner video editors. As you learn new techniques and skills, you’ll be able to upgrade your editing software for more detailed editing.
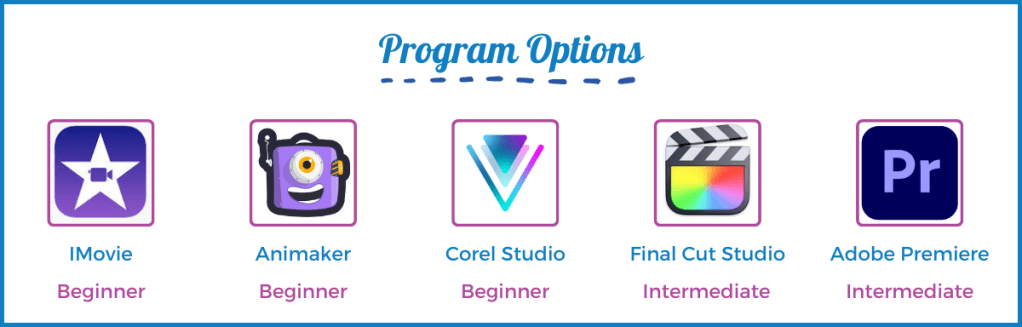
- Apple iMovie: If you’re an apple owner, we recommend apple iMovie! Easy for beginners to use and with features more advanced creators can enjoy, Apple IMovie allows you to create seamless videos, add in elements and music, and if you’re an apple user will directly link with your images and music. For those who purchase a Mac, this application is free.
- Animaker: an online video editor, this application is perfect for creating simple videos using drag and drop. With no editing experience to work the application, you can easily place music, videos, text, and photos. However, unlike iMovie, this application costs a monthly fee and can range from $10 to $49, depending on your needs.
- Corel Video Studio: a one-time purchase application for $99, this video editing software is perfect for those who plan to upgrade their video editing skills in the future. Simple to use, this software has everything you’ll find in the previous ones, as well as clean motion tracking. This means you can have the video track specific objects throughout the editing process and place an element like an arrow pointing to a particular spot or blurring.
- Final Cut Pro: Another Apple product, Final Cut Pro, is a one-time purchase editing program offering a more advanced editing experience than iMovie. Final Cut Pro allows creators to edit professionally finished videos, including a library of transitions, title slides, a music library, and more. This program is an excellent option for those who feel they have mastered the iMovie program or are up to a new challenge!
- Adobe Premiere: if you plan to work with a team or immerse yourself in video editing techniques, Adobe Premiere Pro is one of the top choices. This program offers many features, including team organization with online elements and Photoshop and After Effects. It is perfect for those who plan to create videos often and want to upgrade their skills. Adobe does require a monthly subscription for usage.
Exporting and Publishing
Now that you have a finished video and are ready to publish let’s talk about the export process. The best file format to export your video is MP4. This file can then work and present a clean video on your social platforms, website, and YouTube.
As for publishing, you need to plan where this will be posted, and how it will be published (a blog, a post, a reel) and focus on how you’ll promote the new video. Depending on where you post is, what dimensions your video will be, what time length the video can be, and what direction the video will lay (vertical for YouTube or horizontal for TikTok,) is how you’ll choose the site location.
Plan the description your video posts will have, what eye-grabbing title you’ll place, and how you’ll share this new video with your audience. For example, if you have a new project video releasing for a holiday pattern, you can create a story, post, and newsletter to promote the new video to viewers.
Once you begin video recording and editing, you’ll see what aspects your audience likes, doesn’t like, and want more of! From there, the process changes until you find your direction and routine where the audience keeps returning.
Now that you have an idea of where to begin, we hope this helps you plan your video ideas, find the right filming tools, and encourage you to try something new! Remember, this can all start with a free editing application on your phone, camera, and an idea; everyone begins somewhere.
Looking for ideas? Check out our JUKI Youtube page here today! Offering how-to’s, behind scenes, projects and so much more!
