JUKI Tip: How to Get Started with Ruler Work

In this month’s tip, JUKI National Account Trainer Alba teaches us a fun and easy way to use our new JUKI ruler set in the Hearts and Wings collection! Showcased by Alba, check out examples of patterns you can create and an easy trick on how to plan out your designs the next time you’re creating.

Follow along below for a rundown of what Alba covers on today’s JUKI Tip!

Hello, all my JUKI friends my name is Alba and I am the national accounts trainer for JUKI Home Sewing! I’d like to welcome you to my home and today I’m really excited because this is almost like a double video for you. I am not only introducing a new product but I’m going to give you a tip on getting started with that new product. So let’s get right to it and let me show you the new product!

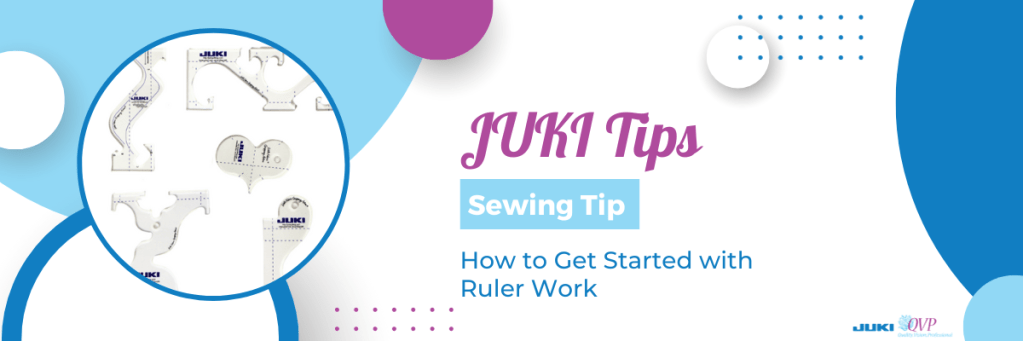
What I’m referring to is the hearts and wings ruler set. This is absolutely beautiful, you’re getting five different rulers that I have spread out on the video and they are clear rulers so I do have them down on white paper to try and make it easy for you to see them. As you could see, they give you five different shapes and really endless possibilities and a lot of people when they get started with rulers and quilting one of the first questions they ask is “so how do I get started?” And that’s exactly my tip for you today!

Now you notice I have no machine set up because really getting started with rulers or any free motion for that fact is on paper or a dry-erase material. So you can work on paper with pen, and I do recommend getting a pen that does not have a click on/off, because that pen will close on you as you are tracing those rulers or templates. You may hear this term, ruler or a template, and they refer to the same thing.

What I am going to do, is at my local Dollar General they have a dry-erase wallpaper and for me, I put this on the back of my cutting mat and it makes it really easy for me to audition and practice with my rulers. So the first thing I am going to do is I will be doing a border with this ruler here, and what I like about the JUKI ruler is, it doesn’t show well on camera, but there are a little dots of grips fabric grips on these rulers so it makes it really easy to start using them.

To start in the video I’ll draw a center line, and what I like about the dry erase is I can just erase if I’ve make a mistake and it makes it really practical on this dry erase material but remember to use a dry erase marker that’s especially made for this. Now with free motion it really doesn’t matter where you start at the beginning or at the end because you have full 360 movements; but for me when I start I like to start at the top of my fabric with the bulk towards me so as I move I’m moving into the machine and that’s exactly what I will be doing here.

I am going to place my ruler down and you will notice on the video all the cross markings, and these are indicator markings to keep you straight, plum and even. So I am going to line up, and when using rulers you want to put some of your fingers on the ruler and some of them off the ruler guiding it and having you keep it from moving or shifting. Now if this were my machine I would be following the edge and at any point stop because that is what will give you a nice beautiful point. Now I am going to move my ruler and line up and make sure that I am staying on those lines.

Now I’m going to turn my ruler around and go to the other side. I could either start from the top or the bottom and always when you’re doing this, pause at that corner. Im going to make sure I am lined up beautifully, and look at what a beautiful design this makes for a border!

As you play with this you could put a medium size one in between and audition but this is what I like about working with a dry erase area paper pen, you’re getting to play with it and really experimenting with the movement and the shape that you will create. Now by using the dry erase, it will be slightly larger because my foot does grip about A4 of an inch from that ruler base but this is a good way to get that general idea of how that ruler will take shape and also to play with it and trying create new and exciting shapes of your own.

I want to thank you for sharing this time with me! If you enjoyed this video and others that you’ve seen make sure to hit subscribe and make sure to leave comments as well on what you’d like to see. Please come back and show me your progress that you’re making with your rulers and again this is the new hearts and wings ruler set that I am playing with a five-piece ruler set so please reach out to your local dealer and get a really nice look at this set!

JUKI Tip: MO-2800 Features

In this month’s tip, JUKI National Account Trainer Kelly showcases how to use the features on one of our latest sergers, the MO-2800! From the useful air threader to safety features that keep sewing fun, follow along for Alba’s favorites.

Follow along below for a rundown of what Alba covers on today’s JUKI Tip!

Hello all my JUKI friends, my name is Alba and I am a trainer for JUKI America. Today I want to share with you one of the newer JUKI surgers and I’m going to be talking about the MO-2800. I’m going to go over some of the key features in that made me fall in love with this machine.

First of all,l you may notice that there is a knee lift on the machine. What the knee lift does as you’re sewing, is it raises and lowers the foot, which can be really handy when you’re working with corners or any other areas.

The MO-2800 is a two, three, and four-thread serger and it has that easy threading, our air thread capability. That means with a push of a button, and a jet of air, your lower and upper looper are instantly threaded.

I also love the fact that my tools that I require for the serger also have a spot and a home right on the inside cover.

One of the safety features in their machine you’ll notice is that the machine will not run if the front storage door is open or the foot is up. Isn’t that just absolutely wonderful?

Now, the one feature that I fell in love with, I’m going to be I’m going to be honest with you, is that needle threader. Now, in the video, I’m just going to turn the machine slightly so you can see that needle threader, and the feature threads your right and left needle. I absolutely love not having to fuss with tweezers, a magnifying glass, or getting an extra pair of glasses to thread my needles.

Now the other feature I want to show you is going to be a little bit difficult to show but hopefully you will be able to follow along in the video. I have a stitch width adjustment where I can move my knife to the right and to the left. Normally that would be the only way to adjust your stitches, but on the MO-2800 I have an independent adjustment to also move my stitch finger independently of my knife. This really allows for perfect stitches, especially on those super fine delicate lacy knits that I find such a hard time getting that perfect stitch on. JUKI has thought of it all!

Now a rolled hem is something that I do and this machine handles a very sheer fabric, to my home deck fabrics, so it could handle a wide variety of fabrics. But when I switch to a rolled hem, I have this quick easy tweak, that allows me to get that picture-perfect rolled hem as well, which you can see in the video.

Now that I’ve gone over some of the features on the MO 2800, please reach out to your local dealer and get a really nice look at this machine and test it out for yourself. I think you’ll love it as much as I do. Until next time, bye-bye!

JUKI Tip: Using the JUKI Smooth Foot

In this month’s tip, JUKI National Account Trainer Kelly showcases how to use the JUKI Smoot Foot, an accessory available on both the TL series and the DX series, which allows you to create with fun fabrics like vinyl, leather, suede, and more!

Follow along below for a rundown of what Kelly covers on today’s JUKI Tip!

Hi, I’m Kelly with JUKI America, and on today’s tip if you like to sew on a variety of fabrics and get a professional finish every time, invest in the JUKI smooth foot. The JUKI smooth foot is white on the bottom because it’s made out of resin material that’ll enable a smooth feed for fabrics like leather, cork, and vinyl! I love to make bags on my JUKI Haruka, but recently I chose to make a leather tote bag from an old long leather coat I had, and I realized quickly that I needed the smooth foot to get a superior feed for that type of fabric. Watch above as we demonstrate!

With my stitch length set at three and a half, the leather does not want to move through the machine with the standard presser foot. Let me change to the smooth foot and show you the difference.

The only change I made was to put on the smoked foot, and you can see now top stitching this leather is easy.

Take a look at the beautiful stitch quality on the leather!

Topstitching is made easy on leather with this wonderful smooth foot.

It also sews beautifully on the cork!

The smooth foot is available for the TL series and our computerized sewing machines. You can go to JUKIHome.com and then select accessories to find the smooth foot that’ll work with your machine. You can visit your local JUKI retailer to purchase the smooth foot for your JUKI. Have fun with your JUKI making bags with all kinds of fabrics, with your smooth foot by JUKI!

JUKI Tip: Rolled Hem for Decorative Stitches

In this month’s tip, JUKI National Account Trainer Alba showcases how to use rolled hems as a decorative touch to your quilt projects and create this on the Serger. In this video, we’ll be using our latest MO-3000QVP model.

Follow along below for a rundown of what Alba covers on today’s JUKI Tip!

Hello all my JUKI friends, welcome to another JUKI tips and tricks. My name is Alba and today we’re talking sergers.

I am working on the MO3000, but this can be done with any serger. So, today I’m talking about rolled hems, and mostly everyone uses a roll hem to finish up a hem. I’m going to take it to my next quilt project and use it as a decorative finish. I’m working on a chandelier Quilt Block. it is a very easy block to do, and I just wanted to give it a Decorative Touch. So what I have done on this one, is I’ve added is a rolled hem, and I’m doing a wide rolled hem so that it catches more of the fabric and I am going to create that Quilt Block using that rolled hem as my actual seam and that Decorative Touch. Now when you are doing this I would not recommend using woolly nylon, which is typically used for a rolled hem, because when you do press your blocks the woolly nylon may melt at the higher settings. Now, I’m going to bring this to the machine and finish up this Quilt Block.

I am at the MO 3000, but you can use any serger that allows you to do a rolled hem. Now the trick to doing that rolled hem, is placing the fabric right side out and my wrong sides together; so opposite of how you would normally put your fabric together. Now here at my intersection, I am going to show you just like we alternate the seams, I have alternated and nested those rolled hems. So I will be bringing this to my machine and sewing, and I am going to get as close as I can to show you exactly what I’m doing.

Now I am lining up my fabric just before my needles, and I am bumping it up against the knife, and I have left the knife up to catch any of those little fraying edges that can happen on cotton fabric. Now, I am going to start slowly and then build up speed, and I am going to go over all of those. Now I have not pinned, so I am just Gathering and making sure my pieces are together, and I’m sewing all the way down that edge, and surging off and I am going to cut right to the edge because I know that all of my seams will be covered in another seam.

Now I am going to bring this to the table, and I am going to just finger press but you would really want to bring that to your iron, but look at how lovely that is with that thread detail and that’s going to be 3D where it will be dimensional and just give this Quilt Block a lot of texture. So just a tip that rolled hems are not just for hems they’re great for decorative touches. So I would love to see this also on garments as an exposed seam.

I’m so glad you were able to join me with this tip, and I wanted you to get a really closeup look at how pretty that just three-dimensional finish looks on that Quilt Block. So don’t forget to give me your messages and give me some other things that you’d like to see tips on. Make sure to like and share with all of your friends so that they could get these amazing JUKI tips see you next time, bye-bye!

JUKI Tip: Using Your Straight Stitch Plate

In this month’s tip, JUKI National Account Trainer Alba showcases how to use the straight stitch plate and straight stitch presser foot. Going over when, and how to use them, follow along to begin using yours on your next project. In this video, we talk about the DX series and the TL series.

Follow along below for a rundown of what Alba covers on today’s JUKI Tip!

Hello all my JUKI friends, my name is Alba, and welcome back to my studio. Today I am going over a tip, a trick, for JUKI machines, and in the last session that I did several of you asked about straight stitch plate and straight stitch foot. What are they? When do I use them? Why would I want to use them? How do I use them?

So today I am going to be showing you the straight stitch plate and foot. How they get installed, how you use them, and also some tips on when you use them and when they make your sewing easier. I will be showing you this on two machines, on the DX-2000 QVP and on the DX-4000 QVP.

Both of these machines, this goes on a little bit differently. On the DX-2000 QVP the straight stitch plate is built into the machine, so it’s a lever that you’re touching to activate this feature and I wanted to show that because it is just such a great way to do that; and on the DX-4000 QVP it is an actual plate that you’re changing out but there’s also a feed dog system that you’re switching out when you go to the straight stitch plate,

I’m really looking forward to getting up close and personal with both of these machines and showing you how to do that. Now when you use a straight stitch plate, for some people if they’re using a straight stitch on their machine that straight stitch plate is always on, and for others, it’s only on for certain scenarios that they use it. What a straight stitch plate does, is it turns a machine with lots of decorative stitches that has that sideway needle movement into a straight stitch only machine. It stabilizes that needle bar so that the straight stitch is straighter and also the opening in the plate is smaller so that when you are sewing, the fabric that you’re sewing onto, does not get pushed into the feed dogs; and if that’s ever happened to you that alone is a reason to switch out to a straight stitch plate.

Welcome back everyone just like I promised I am right in front of the machine and I wanted to get really up close, very personal with the machine, so that you could see exactly what I am doing; and I am just making sure that I am at a straight stitch because I will be talking about the straight stitch plate and feed dog. Now the first thing I wanted to do is, most of you are familiar with the straight stitch plate that has a hole that just the needle goes into as opposed to the zigzag plate which this opening goes wide across and is sometimes referred to as the shape of the Jelly Bean.

What JUKI does differently on their full-size, 12-inch throat, machines is that they give you the feed dogs that match up to the plate, so that you’re getting full contact with the foot and the plate at all times. Now, I’m going to move a little bit closer and I’m going to show you removing the plate as well as putting on the new feed dog. Right now, I do not have a foot or needle in my machine just for safety reasons and to give you the clearest view possible.

So this is the zigzag plate and this is to allow the needle to move to different positions, to do decorative stitching. And because this needle moves on a straight stitch the straight stitch plate gives it a bit more stability because its opening is only allowing for that needle drop. For no movement whatsoever. So that is the main difference between that straight stitch plate and the zig-zag plate.

Now, I’m going to zoom in on that feed dog system and I am just lifting that out and pulling it out of my machine. If you notice my zigzag plate matches up to my zigzag feed dog, that’s a nice close-up shot, and I want you to see the difference in how narrow the two are.

I am going to put in the straight stitch feed dogs, and you could see that just slid in really easily, and it just went right into place, and this allows for me to clean in between my feed dogs and also be able to get into this area for cleaning really nicely.

Now I’m gonna place my straight stitch plate on my machine and just pop it back down and it sets into place, and as you could see right here is where that needle would be dropping. So as I said, especially when you’re doing triangles and you’re doing half Square triangles, when you’re sewing right on the edge of the fabric to sew, that fabric will sometimes get pushed down into the feed dog system and because this opening is smaller that allows for that not to happen.

Now, the DX-2000 QVP does not have the plate and the feed dog system like we just saw on the DX-4000QVP. It’s a little bit different and I’m going to get into how to activate this and again I’m going to remove my foot and I’m going to zoom in so that you can see. Right now I have that zigzag opening and I mentioned that this machine has a straight stitch plate built into it and this mechanism here when I activate that plate it slides up and gives me a straight stitch plate.

Let me show you how easily that’s done. I am removing my bobbin cover and with a quick slide of that mechanism, I’m going to do this with the tweezer so that you can see that, so here it is all the way to the left and I have that zigzag opening right here where that needle drops, and when I slide that over, my looks like a stitch finger on a serger came forward and look at where my needle is dropping into and I’m going to try and get just a little bit closer and zoom a little bit more but you could see that that is allowing for stitching to take place in a smaller opening which is why you would want to use that straight stitch plate so again with the automatic this is on the DX-2000 QVP and the changing of the plate was done on the DX-4000 QVP

I hope you enjoyed that demonstration of putting in a straight stitch plate, and some of the uses for straight stitch plate, and when and why you would use it. When I am piecing, and I know I’m going to be piecing for a long time, or even if I’m doing garment sewing where I’m constructing, I like to put in my straight stitch plate because as I said it just gives me that feel and that Stitch quality like a straight Stitch machine would. For any time when you’re working with very fine sheer fabrics that tend to get pulled down into that feed dog system, the straight Stitch plate eliminates that.

Until next time for the next tip and trick with JUKI, I will see you then. I want to thank you for joining me, please make comments during the video and at the end so that we know what to present and what you would like to see just like the few people who commented that they needed to understand that straight stitch plate better! I was able to do that for you, so please leave your comments and share the video with your friends.

Until next time, bye bye!