Sewing Haunted Halloween Delights

Halloween, the most thrilling time of the year, offers a perfect opportunity for crafty individuals to unleash their creativity. If you have a JUKI sewing machine, you’re in luck! JUKI machines are renowned for their quality, precision, and versatility, making them ideal for various sewing projects. In this blog post, we will explore beginner-friendly Halloween projects you can create using your JUKI sewing machine. Get ready to infuse some spookiness into your sewing skills and bring the Halloween spirit to life!

Spooky Placemats:

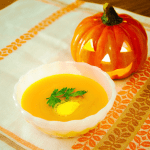
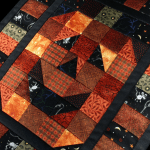
Transform your dining table into a haunted feast with custom Halloween-themed placemats. Choose spooky fabric prints like spiders, bats, or jack-o’-lanterns and cut them to the desired size. Use your JUKI sewing machine to hem the edges neatly. To add an extra touch, sew on appliqués, such as a ghost or a witch’s hat, to each placemat. These simple yet stylish placemats will delight your guests during Halloween dinner parties!

Trick-or-Treat Bags:

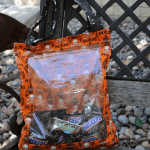
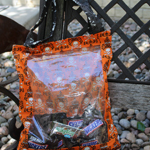
Nothing says Halloween like trick-or-treat bags filled with sweet surprises. Create your unique bag using your JUKI sewing machine and some festive fabric. Cut two rectangular pieces of fabric and sew them together, leaving the top open. Add a handle using a coordinating fabric strip. To make it even more exciting, consider adding Halloween-themed appliqués, such as a black cat or a pumpkin, to the front. Your trick-or-treat bag will be the envy of the neighborhood!

Join us on our project page here to create a Halloween trick-or-treat bag with JUKI!

Decorative Pillow Covers:

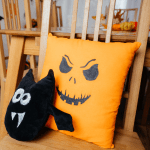
Give your living room a spooky makeover with Halloween-themed pillow covers. Select fabrics in eerie colors like black, orange, or purple. Measure your pillows and cut the fabric accordingly, leaving enough allowance for sewing. Use your JUKI sewing machine to sew the sides together, leaving one end open for inserting the pillow. For added flair, sew on decorative elements like ribbons, lace, or felt appliqués in the shape of bats, spiders, or ghosts. These pillow covers will add a touch of Halloween charm to your home decor.

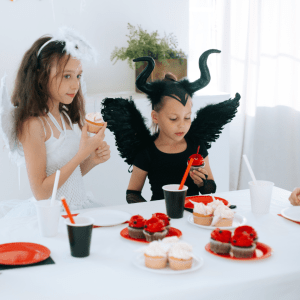
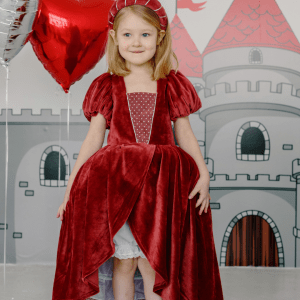
Costume Accessories:

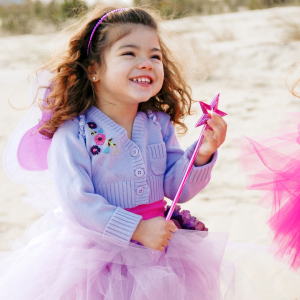
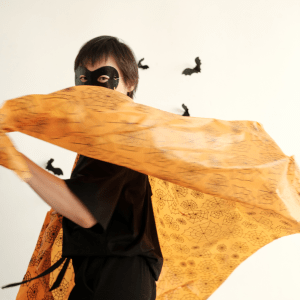
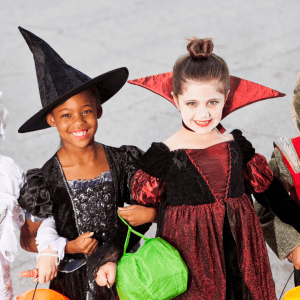
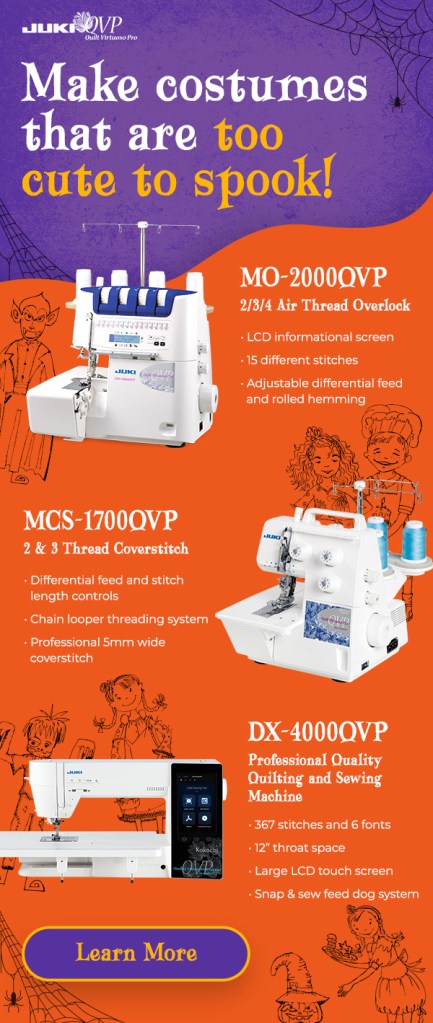
Elevate your Halloween costume by crafting unique accessories with your JUKI sewing machine. The possibilities are endless, whether you want to be a witch, a vampire, or a superhero. Create a witch’s hat by sewing black fabric together, forming a cone shape. Embellish it with ribbons or sequins. Craft bat or spider wings using fabric and wire, and attach them to a black leotard for a DIY superhero or fairy costume. The JUKI sewing machine’s precision stitching will ensure your costume accessories are sturdy and long-lasting.
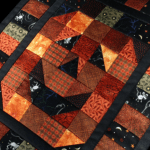
Halloween Garland:

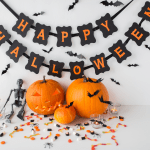
Deck your halls with a spooktacular Halloween Garland. Cut out triangular or rectangular pieces of fabric in Halloween colors and patterns. Sew the pieces together using your JUKI sewing machine, leaving a small opening at each end. Turn the fabric right side out and press it flat. String the banner pieces together with ribbon or bias tape, and hang it above your mantelpiece or doorway. Add flair by attaching felt or fabric letters that spell out “BOO” or “Happy Halloween.” Your banner will set the mood for a frightfully delightful celebration!

Check out how we created this set here for Valentine’s and design it for your Halloween theme!

With your JUKI sewing machine as your trusted companion, you can dive into the world of Halloween crafts and create delightful projects that will add charm and spookiness to your celebrations. The possibilities are endless, from decorative items like placemats and pillow covers to costume accessories and banners. So, gather your fabric, thread your JUKI sewing machine, and let your imagination run wild this Halloween season. Prepare to impress your friends and family with your handmade creations and have a hauntingly good time!

Magical Sewing Techniques for Halloween Costumes

Decorative stitching is a wonderful way to add flair and personality to your Halloween creations this month. You can transform your creations into unique and eye-catching pieces with the right sewing machine and techniques! In this blog post, we will explore five different types of decorative stitching and how you can incorporate them into your costume creations. Let’s delve into decorative stitching and discover how these techniques can elevate your sewing projects.

Satin Stitch:

The satin stitch is a dense and smooth decorative stitch perfect for creating bold outlines, filling shapes, or adding intricate details. It is commonly used for appliqués, monograms, and decorative borders. To create a satin stitch, set your sewing machine to a wide zigzag stitch and shorten the stitch length. Use a satin stitch foot or a stabilizer underneath the fabric to ensure smooth stitching. Experiment with different thread colors and widths to achieve the desired effect and make your designs pop.

Craft a fairy or mermaid costume and use satin stitch to embellish the wings or scales, adding a touch of enchantment. For spooky creatures like witches or vampires, the satin stitch can create intricate appliques on capes or hats, bringing them to life. Additionally, you can use satin stitch to embroider haunting motifs like spiders, skulls, or bats onto costume pieces such as vests, gloves, or masks.

Decorative Embroidery Stitches:

Embroidery stitches offer a world of possibilities when it comes to decorative stitching on garments. From delicate flowers to intricate motifs, countless embroidery stitches exist to explore. These stitches can embellish collars, cuffs, and pockets or create beautiful focal points on your garments. Transfer your design onto the fabric, and use embroidery floss or decorative threads to bring your vision to life.

Use this technique when creating a whimsical fairy costume and using decorative embroidery stitches to add intricate floral patterns or delicate butterfly motifs to the wings and dress. For a frightful twist, bring your vampire or witch costume to life by embroidering intricate cobweb designs or eerie symbols onto capes and hats. Additionally, you can use decorative embroidery stitches to add a touch of mystique to costumes such as fortune tellers, pirates, or mythical creatures. With various stitches like chain stitch, feather stitch, or French knots at your disposal, you can create captivating textures and embellishments that will make your Halloween costume truly unforgettable.

Decorative Hemstitching:

Hemstitching is a classic decorative technique that adds elegance and refinement to garments. It is often seen on hems, cuffs, and necklines. Hemstitching involves creating a row of evenly spaced and neatly aligned holes along the edge of the fabric, followed by stitching that secures the fabric and creates a decorative effect. You can achieve hemstitching with a wing or twin needle on your sewing machine. Experiment with different stitch widths and thread colors to create unique and personalized hemstitched details.

Imagine sewing a vampire or witch costume and using decorative hemstitching along the edges of the cloak or cape, adding a subtle yet mesmerizing touch! For ethereal creatures like fairies or mythical beings, you can incorporate decorative hemstitching to create intricate patterns on the hems of flowing skirts or sleeves, evoking a sense of enchantment. Additionally, consider using this technique to add texture and interest to costumes like ghosts or ghouls, where delicate and uneven hemstitching can mimic the appearance of the tattered fabric.

Scallop or Shell Stitch:

Scallop or shell stitching is a beautiful decorative stitch that adds a feminine and playful touch to garments. It is commonly used on necklines, hems, or as an accent trim. The scallop stitch creates a series of rounded or pointed arches resembling scallop shells. You can achieve this stitch using a decorative stitch setting on your sewing machine or with a scallop-shaped embroidery foot. Experiment with different stitch lengths and thread colors to create varied and delightful scallop designs.

Consider crafting a mermaid or ocean-themed costume and using the scallop or shell stitch to create a stunning scale-like effect on the tail or bodice. For angel or mystical creature costumes, incorporate this technique to embellish the edges of wings or capes, evoking a sense of enchantment. The scallop or shell stitch can also create spooky accents on costumes like witches or sorcerers, where a scalloped hem or trim adds a touch of eerie elegance.

Pintucks:

Pintucks are tiny, parallel folds of fabric that add texture and dimension to garments. They are commonly used on bodices, collars, or as decorative accents on sleeves. Pintucks can be created with a pintuck foot on your sewing machine, which helps guide the fabric and maintain even spacing between the folds. Experiment with different pintuck widths and spacing to achieve the desired effect. Pintucks can be further enhanced using contrasting thread colors or adding decorative stitching along the folds.

Imagine crafting a Victorian-inspired vampire or steampunk outfit and using pintucks to create intricate details on the bodice or sleeves, giving it an air of timeless elegance. For magical creatures like fairies or enchanted beings, pintucks can create delicate pleating on flowing skirts or delicate wings, adding a touch of enchantment to the costume. Additionally, pintucks can be utilized to create structured elements on costumes like knights or superheroes, providing a bold and heroic aesthetic.

Decorative stitching opens up a world of creative possibilities in garment creation. By incorporating techniques such as satin stitching, decorative embroidery stitches, hemstitching, scallop or shell stitching, and pintucks, you can add depth, personality, and uniqueness to your garments. These techniques allow you to experiment with different thread colors, stitch widths, and designs, giving your creations a personalized touch. So, unleash your creativity, explore these decorative stitching techniques, and let your garments become works of art. Happy sewing, and may your decorative stitches bring joy and beauty to your sewing projects!

5 Projects you can create this Spooky Season!

It’s almost time for spooks and candy JUKI Lovers! For today’s blog, we will share our top 5 favorite Halloween projects you can begin creating this weekend. So whether you’re going trick-or-treating, or staying at home, follow along below for ideas you can start today!

Halloween Patchwork Quilt

Stay warm this fall and create a Halloween patchwork quilt! Using a variety of Halloween fabric pieces, think witches, pumpkins, and ghosts, you can begin making your very own patchwork quilt. Quilts are the perfect accessory to any home, used and loved by everyone.

We recommend checking out your local quilt shop for holiday quilt bundles. Great options when you want to create a patchwork quilt, and don’t have the scraps, are browsing charm bundles, jelly rolls, and mini-charms! Also, don’t forget to grab batting for your quilts and have fun by bringing texture to the surface using free-motion quilting techniques.

Some great tools to have when quilting is your Open Toe Quilting Presser Foot, Quilting Rulers, and a ¼” Presser Foot for finishing.

Costume Cape

The perfect addition to so many costumes, a cape can be used for various characters ranging from royals to superheroes. To use this cape multiple times, create your piece using basic colors like white, red, or black so you can enjoy this project through the years.

For creating a cape, we recommend having fabrics like stretch velvet, fleece, or wool! Usually, you’ll use about 2 yards of fabric for an adult cape and 1 yard for a child’s cape. This is an excellent apparel project for a beginner to try their hand at. For more advanced sewers, you can add features like trims and a hood for a more finished and professional look.

We recommend having a Cording Foot on hand if you plan to attach a string inside for the cape hood. Also, use a Decorative Stitch Presser Foot to add designs on your cape’s ends for extra personalization!

Spooky Placemats and Table Runner

Decorate your home with a spooky table runner and matching placemats! A fun and easy home project, you can accessorize and personalize your kitchen and dining table with fun fabric designs and colors.

When creating placemats and table runners, we recommend having some tools on hand. Inside your placemats and table runner, you’re going to place a fleece or batting; this will stabilize your project. Spray glue is an excellent adhesive for this! Once you’ve pieced together your mat, you can choose to leave it as is or add designs with free motion quilting.

For yardage, we recommend 2-3 yards of fabric. With one yard, you can create up to 8 basic-sized placemats, and with your other yards, you can create your table runner depending on your table length! Keep a ¼ presser foot on hand when you’re ready to complete your project, so you can quickly finish the edging.

Halloween Garland

Decorate your archways and doorways with a fun garland! Easily created with less than a yard of fabric for the hanging pieces and string, this décor piece is the perfect touch. For the hanging details, we recommend using backing fabric for stabilization.

For this project, keep your ¼” presser foot nearby! Perfect for creating a clean edging on each hanging piece and the edging on the hanging string, this accessory can be the only foot you need for the project.

Trick–or–Treat Bag

Lastly, don’t forget to have your trick-or-treat bag ready! Wishing you a happy spooky season, download our free instructions for our see-through trick-or-treat bag here. With a finished size of 14″ x 16″, this bag will carry all those treats home!

Happy Halloween, JUKI Lovers!

Get Ready for Halloween with JUKI!

Halloween season is upon us, JUKI lovers, and we’re so excited to let the creativity flow! Join us today, as we talk about ideas for your spooky costumes and what machines and accessories will help you get there.

One of the crucial things to keep in mind when planning your costume is not everything has to be from scratch. Costumes are created from pieces put together, which means parts of them can be homemade, and other parts can be store-bought or even found in your home!

Before You Start:

The best way to start is to pick a theme! Build an inspiration board with color schemes, materials, and other costumes people have done. Consider your budget as you go through ideas on how you want your finished project to look. Add your special flair and creative touches to make your costume unique to you!

Helpful Tools to Creating Your Project:

We recommend having two sewing machines on hand when creating your costume, a computerized sewing machine and a serger. Our Kokochi DX-4000QVP is an essential tool when creating Halloween costumes or even cosplay. This computerized sewing has a large sewing area for your capes or larger pieces, includes 368 sewing patterns to personify your garments and 20 professional buttonhole options. No matter what you’re creating, this machine creates beautiful pieces that you envision!

If you’re creating pieces that involve fabric that may fray or need gathering, like fairy costumes or princess gowns, it is a great idea to keep an overlock on hand like the MO-654DE. This popular serger has a built-in rolling hem that covers the fabric and prevents it from fraying as well as all the popular overlock and flatlock variations. It is perfect for adding those touches like a bunched-up sleeve, neckline, or skirt.

Here are some key things to think of when planning your costume:

Focus on what fabrics you’re going to need. Keep in mind what colors you’ll need, what kind of character you’re going to be, and what you need the costume to do for you! Cotton is a common one for costumes, but keep in mind location and weather. Tulle is perfect for petticoats, bows, and tutus. Felt is helpful for decorations, or if you need accessories like a hat. Some costumes will require stretch, so keep that in mind when shopping for a costume like superheroes made from latex and lycra. Satin can be used for costumes like princesses or creating a decade pieces from the ’20s.

Are you adding embellishments to your costume? Add a touch of glam and glitz like buttons on a clown costume, or gemstone, and flashy sequins on a decade’s piece for the ’70s! We recommend making sure; you have the right foot on hand for your sewing machine as well. Our Creative Set, for example, will have all our popular design attachment pieces like our applique presser foot, cording and embroidery presser foot, pearl attaching presser foot, and more!

As Halloween dawns upon us be ready to celebrate! Did you create a Halloween costume with your JUKI? Be sure to tag us!