Every sewing project starts the same way, with an idea. And, when it comes to turning that idea into something wearable, it’s especially important to have a machine that can support every step of the process.
In this blog, we’re going to talk about the journey of garment creation from ideas to planning and construction, and how to do it with JUKI by your side. Our sergers and sewing machines are created to help you conquer each step with ease and create an outfit you’ll love to wear. But before we get to the features that help you create, let’s start with the base of your project.
Start With the Vision
Before the first stitch, garment creation starts with a concept. This is the stage where everything starts to take shape. Fabric choices, patterns, colors, and fit can all come together before you even sit down at the machine. Some sewists prefer sketching out full designs, while others gather inspiration from fashion trends, social media, or ready-to-wear pieces they want to reinterpret.
It also helps to think through how the garment will actually be worn in real life. Is it an everyday piece, something more structured and tailored, or something soft and flowy with movement? Fabric choice plays a huge role here, since the same pattern can feel completely different depending on the material you use.
A few key things to think about at this stage:
- Fit adjustments and shaping
- Thread color and weight choices
- Closures like zippers, buttons, or hooks
- Seam finishes and interior details
- How the garment will actually be worn
Taking a little extra time here can make a big difference later. We recommend pre-washing fabric, organizing pattern pieces, testing stitches, and planning your steps ahead of time. All these steps can help make the sewing process smoother once you begin construction. Even small details like topstitching placement can elevate the final look.
This is often one of the most creative parts of the process; it’s where your idea starts becoming something real, long before the first seam is sewn.
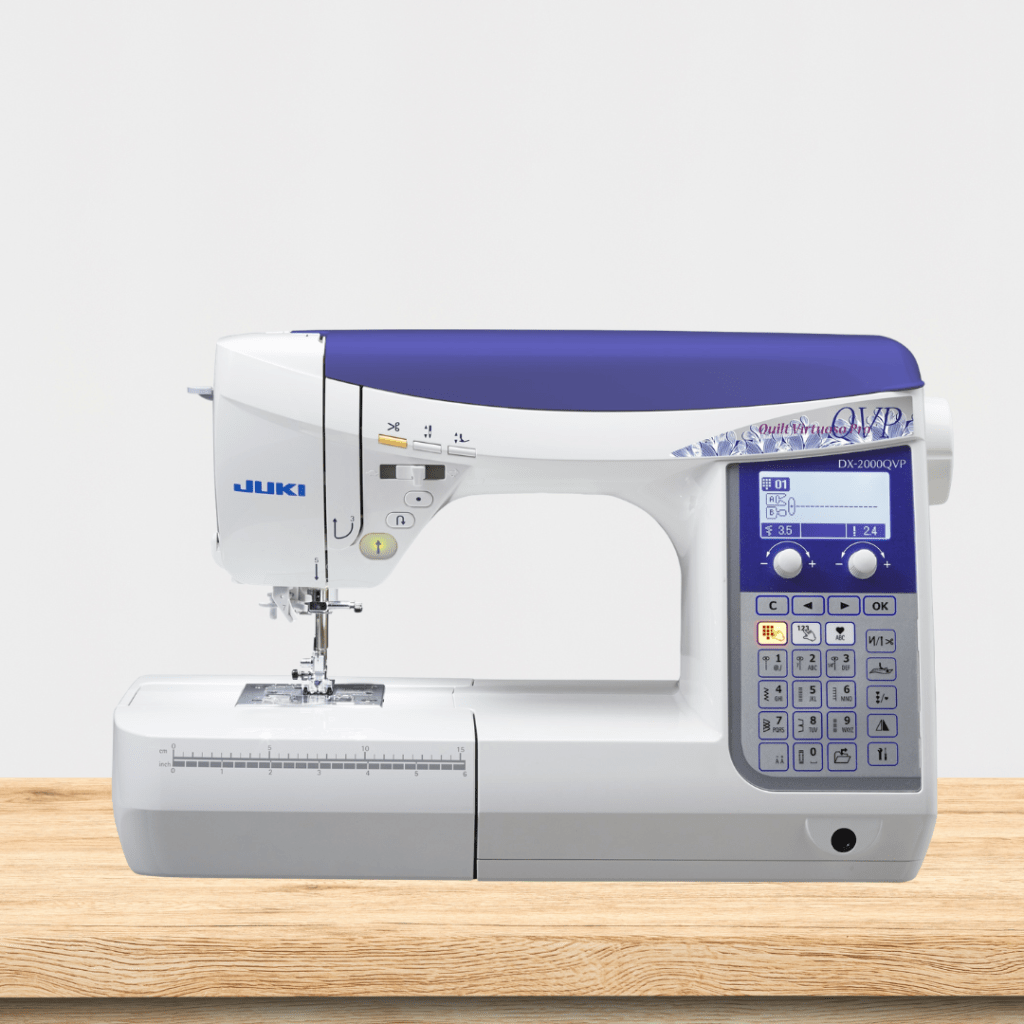
Building with the DX-2000QVP
Once you have your concept design, it’s time for everything to start coming together. Fabric pieces turn into structure, seams start forming shape, and your idea becomes something you can actually try on.
One machine we want to highlight for garment creators is the DX-2000QVP. This machine was created to support you through that entire construction process. From straight seams to curved stitching, it handles a wide range of garment work with steady control. Whether you’re piecing together a fitted bodice, attaching sleeves, or working through multiple layers, it helps keep stitching consistent so you can focus more on the construction itself.
It also gives you flexibility as you move through different steps of garment-making. You can go from utility stitches to zipper insertion, buttonholes, and decorative topstitching without constantly overcomplicating the setup. That makes it easier to stay in the flow of your project instead of stopping to adjust settings every few minutes.
From structured jackets to everyday dresses, shirts, and skirts, the DX-2000QVP supports the full build process while still giving you space to add personal details and creative touches along the way.
Finishing with the MO-2000QVP
Once your garment is fully assembled, finishing is what brings everything together and gives it that clean, professional look.
With an Air Serger like the MO-2000QVP, each step feels more approachable and efficient. For example, its air threading system helps make setup quicker and less of a hassle, so you can move straight into finishing your seams and edges.
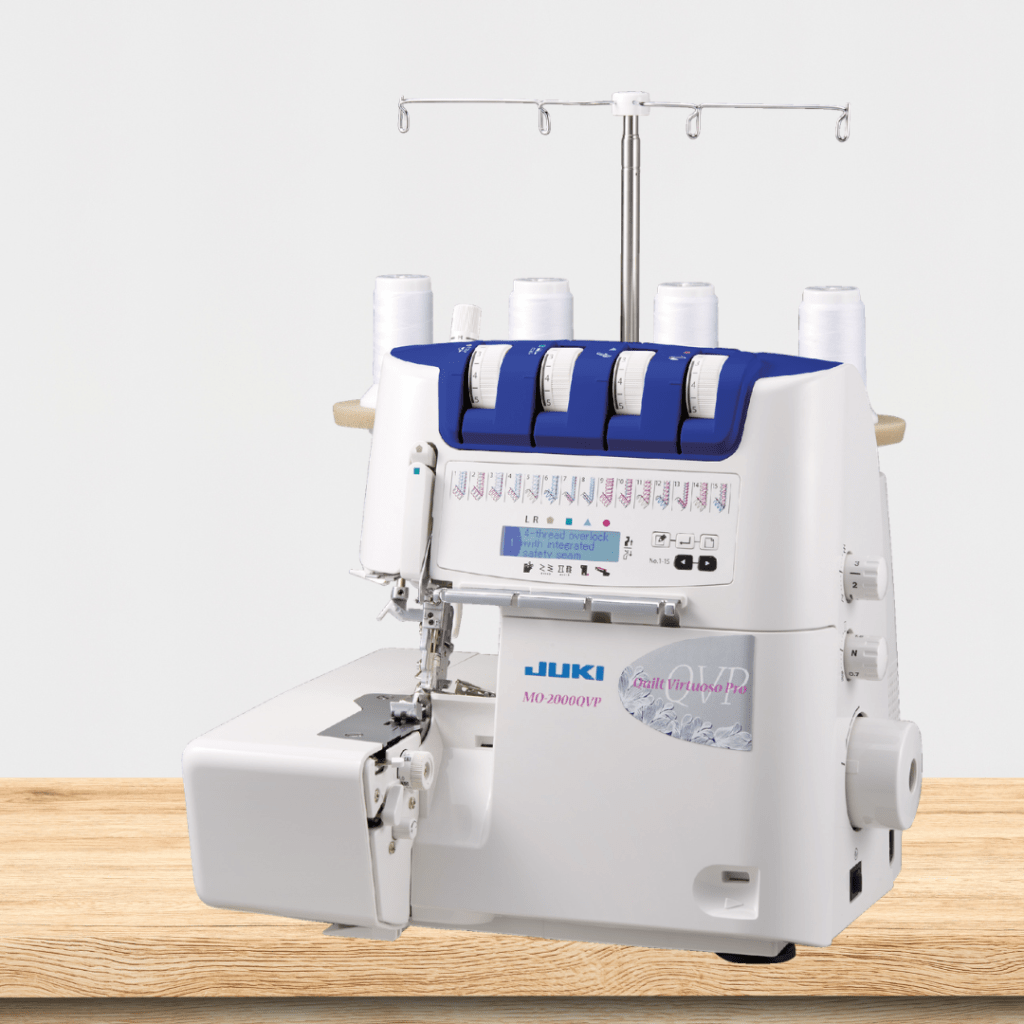
It also works smoothly across a variety of fabrics, which is especially helpful when you’re sewing garments that combine different materials or weights. Whether you’re working with lightweight cotton, stretch fabrics, or more structured textiles, it helps keep seam finishes consistent and clean.
Here is where you can add touches like rolled hems to seam finishing and clean edge work, really bringing your garment to life. Once you’re on a serger, it’s not just about construction anymore; it’s about refining the inside and outside so the finished piece feels intentional and wearable.
Bringing It All Together
From the first sketch to the final seam, garment making is really about watching an idea evolve step by step. What starts as inspiration slowly turns into pattern pieces, then structure, then something you can actually wear and use in life.
The DX-2000QVP and MO-2000QVP work together through that entire process in different ways. One supports the construction and shaping of your garment, while the other helps you finish it with clean, polished edges that bring everything together.
When you step back and look at the finished piece, it’s not just about the final result; it’s everything that happened along the way. The planning, the adjustments, the small creative decisions, and the finishing details all come together to turn an idea into something real.
That’s the part that makes garment sewing so rewarding: every project starts the same way, but no two finished pieces ever tell exactly the same story. Looking for a new partner in your sewing journey? Take a look at our full collection to see which machines are right for your fashion needs at JUKIQuilting.com.