What’s the JUKI Stitch?

Halloween is the perfect time to let your creativity run wild, and if you’re looking to take your sewing projects to the next level, it’s time for you to check out the TAJIMA 8-needle embroidery machine! Known for its versatility and advanced features, this machine is ideal for easily creating detailed, spooktacular designs. Let’s explore how the TAJIMA 8-needle machine and its various accessories can bring your Halloween dream costumes to life!

Discover the TAJIMA 8-Needle Embroidery Machine.

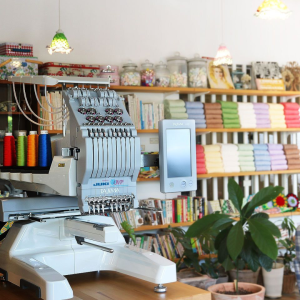
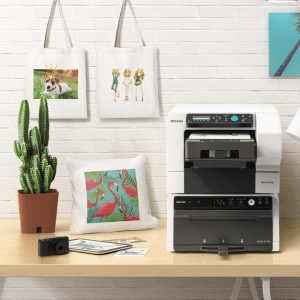
The TAJIMA 8-needle embroidery machine is known for its precision and versatility. It features eight needles, allowing users to embroider up to eight thread colors in a single pass. This multi-needle setup is beneficial for creating complex and colorful designs, making it the perfect companion for projects like detailed Halloween costumes or elaborate decorations that require a broad spectrum of colors. The machine’s innovative design incorporates a computerized control panel that allows for easy programming and design customization, allowing users to execute intricate patterns easily.

The  TAJIMA 8-needle machine operates with high efficiency and speed, thanks to its advanced motor system and precise stitch control. It comes equipped with automatic thread tensioning and color change capabilities and ensures stability during use! It is an excellent machine for various project needs, like creating personalized apparel, home décor items, and more! The TAJIMA machine’s ability to handle diverse and exciting projects makes it a fantastic tool for professional embroiderers and hobbyists looking for high-quality results.

You can learn more about the TAJIMA Sai here!

Accessories for Every Project

Now, let’s talk about the TAJIMA 8-needle machine accessories, available to enhance your sewing experience for the costume season! These accessories will make it easier to tackle various types of projects, from large capes to intricate embroidery on smaller items like hats or dress collars:

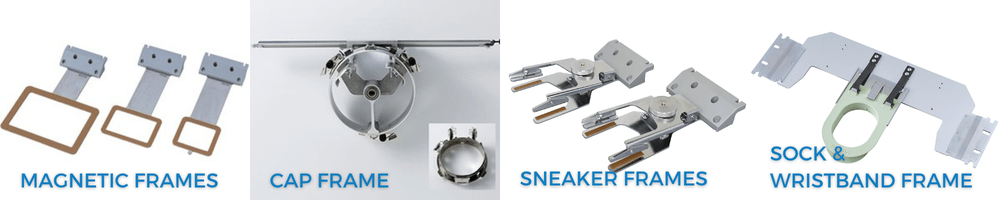
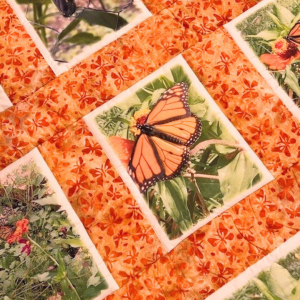
  • Magnetic Frames: For big projects like Halloween quilts, the large magnetic frame allows you to stitch larger areas in one go, reducing the need for multiple frames and ensuring a seamless design. Think of designs you want to add, like quotes, witch drawings, or bats!
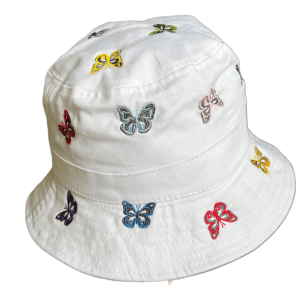
  • Cap Frames: When working on Halloween hats or themed caps, the cap frames ensure precise and smooth embroidery, accommodating the curvature of the hat and providing a professional finish. Here you can add designs like ghosts or a phrase like “BOO!”
  • Sneaker Frames: Sneaker frames are perfect for customizing Halloween-themed sneakers. They allow detailed embroidery on the unconventional surface of sneakers, making your designs pop. This is a great way to accessorize a costume! Add spooky designs, use glow-in-the-dark thread, or stitch patterns like spider webs for a vampire costume.
  • Sock and Wristband Frame: Embroidering on sweaters or jackets for a spooky Halloween look is made easy with these specialized hoops. They hold the fabric securely while you stitch, ensuring accuracy and reducing the risk of fabric shifting. You add details to the sleeves, like pumpkins or fall leaves, for a more generic fall look!

You can watch these accessories in action by visiting our JUKI Home Sewing YouTube here.

Incorporating Built-In Stitch Designs into Halloween Projects

With the TAJIMA 8-needle embroidery machine, the possibilities for Halloween projects are endless. If you don’t know what you would add to your Halloween costume or decorations, we’ve put a few ideas below. Here are some creative ideas to inspire your spooky creations!

a. Haunted House Quilts: Turn a standard quilt into a haunted masterpiece with ghostly and cobweb-inspired stitch designs. The machine’s stitches can create delicate, eerie patterns, while bold silhouettes like bats or witches add a striking effect.

b. Spooky Embellished Costumes: Enhance your Halloween costumes with embroidered details. Use the 8-needle capability to incorporate multiple thread colors and designs, such as eerie eyeballs or gothic patterns, adding a unique touch to cloaks, capes, and more. Layer your stitching to add texture to your designs and vision!

c. Halloween-Themed Accessories: Elevate your trick-or-treat bags, spooky pillows, and other accessories with intricate embroidered designs. Utilize spider webs, jack-o’-lanterns, or black cats in vibrant thread colors to make your accessories stand out. Looking for a trick or treat bag idea? Visit us here for free project ideas!

d. Personalized Home Decor: Create personalized Halloween decorations by embroidering spooky quotes or family traditions on table runners or wall hangings. The TAJIMA machine’s variety of stitch textures allows you to create striking and unique decor items.

Tips for Creative Success

Experimenting with textures is key to making the most of your TAJIMA 8-needle embroidery machine. The machine offers a variety of stitch textures that can add dimension and depth to your Halloween projects. You can create more engaging and visually interesting designs by layering different stitches.

Color choice is also crucial for Halloween projects. This holiday is known for its bold and vibrant colors, and the TAJIMA machine’s ability to handle up to eight thread colors simultaneously allows you to craft intricate, multi-colored designs that truly stand out. Use colors wisely to achieve the most striking effects, like Pumpkin Orange, Midnight Black, Eerie Purple, or Vampire Red.

Before diving into your main project, take some time to experiment with different stitch designs and thread colors. This practice will help you understand how various elements interact and allow you to refine your approach, ensuring the best possible outcome for your Halloween creations.

Need help deciding on what to be this year for Halloween? Finding inspiration for your embroidery projects can be an exciting journey, and there are numerous ways to spark your creativity! Explore Pinterest, Instagram, and dedicated crafting websites to learn more about current trends and unique ideas. Check out the JUKI Home Sewing social media pages or website for project inspiration and tips that can provide fresh ideas and motivation for your next work!

Ready to get stitching? The TAJIMA 8-needle embroidery machine gives you the tools and features to create exceptional Halloween designs. So grab your fabrics, choose your threads, and let the embroidery magic begin!

Personalize Your Spring Projects with JUKI

Discover the boundless possibilities of personalization with the RICOH Ri 100 direct-to-garment printer and the Tajima SAI embroidery machine! In this blog we’ll discuss how you can customize apparel and embellish accessories to show off your unique flair and individuality! With these powerful tools, get ready to elevate your sewing projects to new heights.

Designing with Tajima:

Imagine having access to a treasure trove of embroidery designs at your fingertips. Tajima’s software, Writer’s Plus, offers a diverse array of intricate patterns and motifs spanning various themes. The options are as vast as your imagination, from majestic animals to pretty flowers!

For animal lovers, the Tajima Program offers various designs featuring creatures big and small. You can find butterflies, dogs, and even wild animals like bears for your next project!

Space enthusiasts can explore the cosmos without leaving the comfort of their stitching corner. Galactic marvels like planets, stars, and more await, ready to adorn your creations with an otherworldly charm!

Rev up your sewing projects with designs inspired by the world of cars and racing. From fun family cars to exciting off-road vehicles, these designs add a dash of adrenaline to any fabric canvas.

The Tajima Software also offers a lineup of sports-themed patterns encompassing various athletic pursuits. Football, basketball, soccer, tennis – you name it. Elevate team jerseys, gym bags, or sports accessories with these spirited designs, just in time for Summer!

Step-by-Step Guide to Unleashing Tajima Magic

Now, let’s discuss the magic of the Tajima Software with a step-by-step guide on how to use these designs to create unique sewing projects.

Step 1: First, familiarize yourself with the Tajima embroidery software. Explore the design library, navigating through the various themes and motifs available. Please select your desired design and ensure it suits the dimensions of your project. You can find the size by checking the measurements of your Tajima Accessory, like your Magnetic Frame!

Step 2: Select a suitable fabric for your project, ensuring it complements the chosen design. Consider the thread colors that best enhance the design’s visual impact on the fabric. Before hooping your design, decide whether to fuse a lightweight tear-away. This can help with puckering on your designs!

Hat embroidered on TAJIMA Sai by JUKI Team

Step 3: Proper hooping is crucial for achieving neat embroidery. Secure your fabric in the embroidery hoop, ensuring it’s taut and evenly stretched to avoid puckering.

Step 4: Transfer the selected Tajima Design to your USB and then to your embroidery machine. Double-check the design’s alignment and positioning on the fabric before commencing stitching.

Step 5: Prepare your machine for embroidery, ensuring the correct thread colors are loaded and the settings match the design’s requirements. Follow the instructions on the Tajima Panel and press start. Watch as the magic unfolds with each placed stitch!

Step 6: After the embroidery, carefully remove the fabric from the hoop. You can also choose to restitch your design for a more filled-in finish. Trim any excess threads and admire your masterpiece.

You can learn more about how to set up and create projects on the Tajima Sai here.

RICOH Designs:

The standout feature of the RICOH Ri 100 is its ability to print directly onto the fabric, enabling users like you to produce unique textile designs tailored to your specific vision. Whether it’s a bold pattern, a subtle texture, or a full-color image, the DTG machine delivers stunning results in a wide range of colors!

The RICOH Ri 100 empowers you to add intricate designs to your sewing projects, whether intricate artwork, fun designs, or exciting typography. The RICOH ensures that every element is faithfully reproduced with precision and accuracy.

In addition to fabric designs, the RICOH Ri 100 can print vibrant photos directly onto garments, offering a unique way to personalize sewing projects. From family portraits to scenic landscapes, the DTG machine transforms ordinary fabrics into wearable works of art, adding a personal touch to every print!

Whether embellishing accessories, customizing home decor items, or adding branding to merchandise, the DTG machine offers limitless opportunities for personalization in sewing projects. The RICOH includes a variety of designs that are ready to go right when you set her up, and you can learn more about how to set up your designs here.

Step-by-Step Guide to Using Your RICOH

  1. Preparation:
    • Prepare your design file using the RICOH design software, and confirm the project specifications for size, resolution, and color mode.
  2. Fabric Preparation:
    • Choose the fabric or project you’ll be printing on and pre-press it! Ensure the fabric is clean, flat, and positioned securely on the RICOH’s tray.
  3. Loading the Design:
    • Connect your computer directly to the printer via a USB drive to load your design file onto the RICOH Ri 100. Then, use the software to adjust the design’s placement, size, and orientation as needed.
  4. Printing:
    • Once your design is loaded and properly positioned, use the start button to initiate the printing process. Printing takes approximately 2 minutes. Just load and unload your tray—it’s that easy!
  5. Finishing:
    • Once the printing is complete, remove the tray from the printer and transfer it to the RICOH finisher.
Quilt created by Kelly with RICOH Ri 100

Curing Temperature: The recommended curing temperature typically ranges from 320°F to 350°F (160°C to 177°C). This temperature range is just right for curing the ink and ensuring its adhesion to the fabric!

Curing Duration: As a general rule of thumb, curing durations typically range from 30 seconds to 3 minutes. However, keep in mind your project and design size.

After curing, allow the fabric to cool completely before handling.

Let Your Creativity Soar

The beauty of Tajima and RICOH lies not just in their capabilities but also in their ability to infuse your personality and charm into your sewing projects. Whether creating personalized gifts, embellishing garments, or adding flair to home decor, these designs serve as your creative accomplice!

So, embrace the Tajima and RICOH Ri 100, let your imagination run wild, and create your way to a world where fabric transforms into a canvas of boundless creativity. With every stitch or print, you’re not just crafting; you’re creating stories and memories and adding a touch of your unique essence into every project.

In the realm of projects, the only limit is your imagination, and with JUKI, TAJIMA Sai, and RICOH lighting the way, the possibilities are as vast as the cosmos itself. Let your projects tell a story that’s uniquely yours. Happy creating!

JUKI Tip: Trimming Your Tajima SAI Thread

Don’t you hate when you’re about to start an embroidery and you have that thread tail hanging out? On this JUKI Tip video today we’re going to show you how quick and easy it is to trim that right up on the machine.

In the video above, you’ll see on the screen I am going to go to the icon that looks like four needles with arrows on either side. When you tap on this icon you can move to whichever needle you need to trim with ease, without disrupting your current project.

In our video you’ll see it’s set up on needle number one and needle number one is the one with the thread that we direct you to. You’ll see me press and hold the scissor icon, and it will cut and remove that thread from your needle.

We hope this quick and easy tip helps you the next time you’re creating on the TAJIMA Sai Embroidery machine! What tip do you want to see next? Let us know down below!