Starting a Sewing Business with JUKI

The start of a new year is the perfect opportunity to pursue your dreams and set ambitious goals! If you’ve been thinking about turning your love for sewing into a business, 2025 is the time to make it happen. A sewing or quilting business allows you to combine creativity with entrepreneurship, offering the freedom to work on projects you’re passionate about while earning income. From custom creations to unique products for your community or online marketplace, the possibilities are endless.

Today we’re going to talk about how you can start planning your business using JUKI sewing machines. Launching a sewing business can feel daunting, but it can be an exciting and rewarding journey with the right mindset and planning! Focusing on quality, originality, and a clear vision of what you want to create and sell can help you stand out in a competitive market. Whether you plan to specialize in custom quilting, stylish garments, or personalized home décor, JUKI can help set the stage for success.

Let’s talk about top business machines!

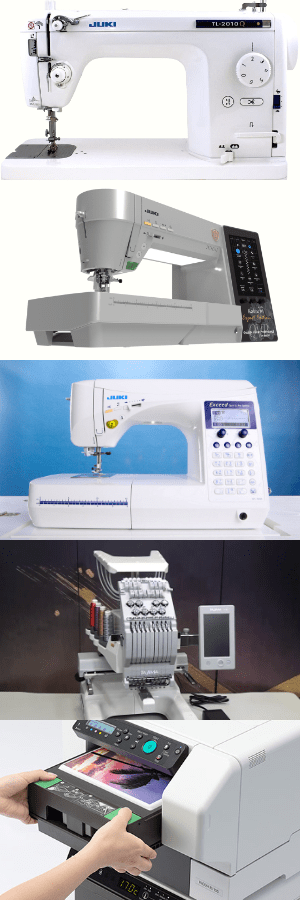
The TL-2010Q is a semi-industrial straight stitch machine perfect for small businesses that focus on quilting or other projects that require high-speed sewing. Its powerful motor allows for faster production, ideal for shops creating custom orders like large quilts, home décor items, or table runners efficiently. With features like a knee-lift lever, adjustable presser foot pressure, and an automatic thread cutter, this machine enhances productivity and precision, enabling you to handle bulk orders without compromising quality!

The DX-4000QVP Expert Edition is a versatile electronic machine designed for advanced stitching needs, making it a great choice for creating intricate designs and high-end garments. It has an intuitive touchscreen interface and comes installed with over 400 stitch patterns that can help you get creative when finalizing your designs! This machine also has a box-feed system which ensures even stitching on all types of fabric. This feature is important if you plan on creating garments that offer different textures and styles! For small business owners, these machine features are invaluable for crafting unique, professional-grade products that stand out in your market.

The HZL-F600 offers a combination of power and versatility, making it a favorite for small businesses that handle a mix of apparel, quilting, and home décor projects. It has a wide range of decorative and utility stitches, comes installed with an automatic thread trimmer, and includes free-motion sewing capabilities that allow you to create diverse products with ease. If you’re planning a startup, the HZL-F600’s user-friendly features will help you reduce production time and increase efficiency, while also helping you meet customer demands without overwhelming your workflow!

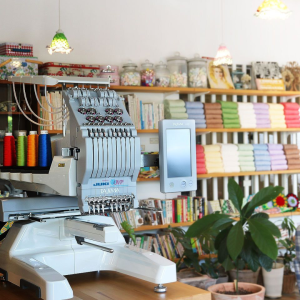
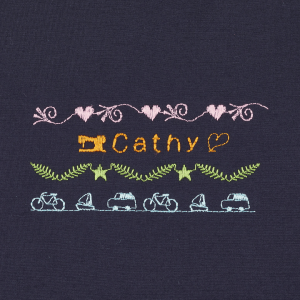
The TAJIMA Sai 8-needle embroidery machine is a game-changer for businesses looking to offer personalized and embroidered products. Since the machine offers eight needles for multicolor designs, you can be creative and detailed in your design ideas! It’s also a compact size suitable for smaller workspaces while still offering professional capabilities with convenience. Its precision and speed make it ideal for creating custom logos, monograms, and intricate embroidery, giving your business the edge to cater to the growing demand for unique, customized items. Perfect for creating apparel for teams, events, businesses, and more!

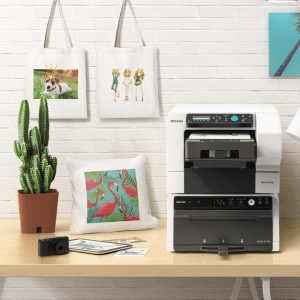
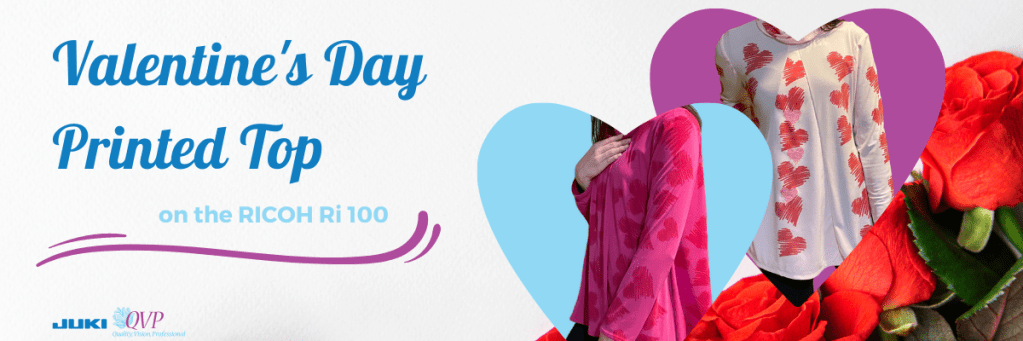
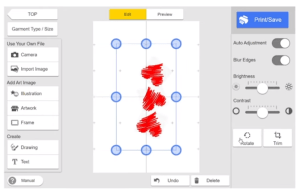
Last, we have the RICOH Ri 100 Printer, which is perfect for small businesses interested in fabric printing. The RICOH comes in a compact design and offers an easy-to-use interface, which makes it accessible for beginners! This machine offers the ability to print high-quality images on textiles and opens up opportunities for custom t-shirts, tote bags, banners, and more. For startups, the RICOH’s efficiency and affordability compared to other garment printers in the market will allow you to experiment with creative ideas and expand your product range without significant overhead costs!

Next, let’s talk about the products you can create and sell using these machines!

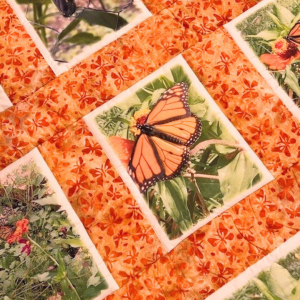
  1. Custom Quilts and Home Décor
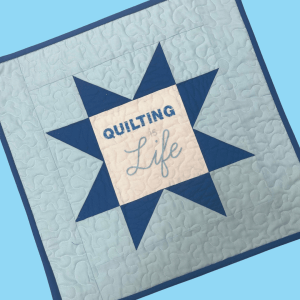
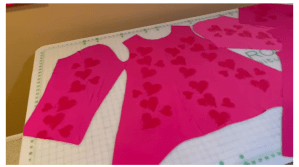
    Quilts are timeless and highly valued items! These are perfect for selling at markets or online. With a machine like the 2010Q, you can craft intricate quilt designs, table runners, or wall hangings quickly and professionally. Pair your quilting skills with trendy fabrics and patterns to attract customers looking for unique, handmade pieces for their homes. Personalized touches, like embroidered initials or custom color schemes and themes, can further increase their appeal and value!
  2. Fashion and Accessories
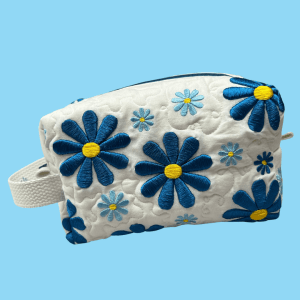
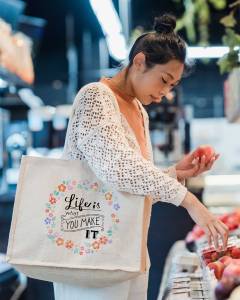
    Using machines like the DX-4000QVP or HZL-F600, you can create fashionable clothing and accessories tailored to your target audience. From boutique dresses to custom tote bags and accessories, these projects are practical and in demand. Decorative stitches and advanced design features allow you to add special details that make your items stand out! At markets, customers are often drawn to unique, handcrafted garments and accessories they can’t find in stores, and you can create their next beloved fashion piece!
  3. Personalized Embroidered and Printed Items
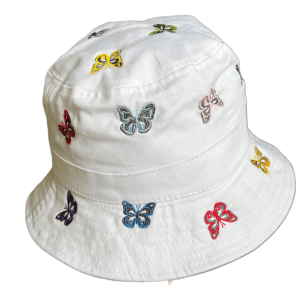
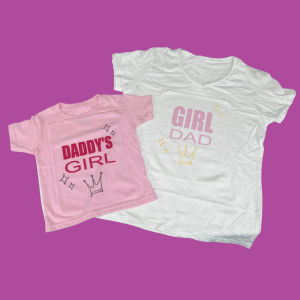
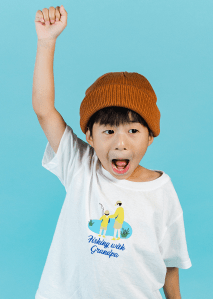
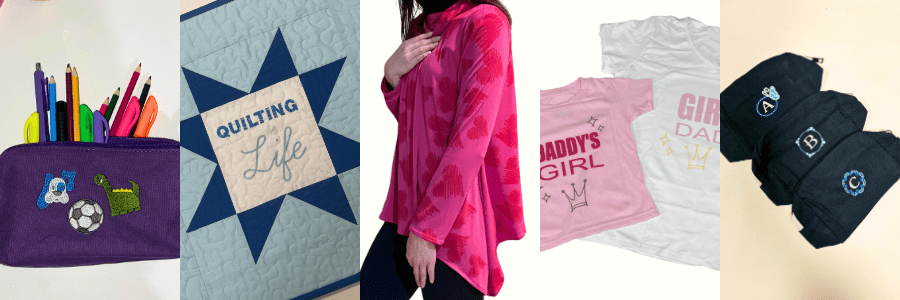
    For customers seeking personalized gifts, embroidered or printed items like hats, t-shirts, towels, and baby blankets are always a hit! With the TAJIMA Sai 8-needle embroidery machine, you can add intricate monograms, logos, or designs to your products, while the RICOH Ri 100 Printer allows you to create vibrant, custom-printed fabrics. These items make great gifts and are ideal for special occasions like birthdays, weddings, or holidays. Offering customization options gives your business an edge in attracting a wide range of customers!

Starting a sewing business is an exciting way to channel your creativity into a profitable endeavor, and JUKI machines are here to support your journey! With our reliability, versatility, and advanced features, these machines empower you to produce high-quality products that stand out in any market. Whether you’re crafting intricate quilts, stylish outfits, or personalized gifts, the right tools can make all the difference in turning your vision into reality.

Let this New Year be the start of your successful sewing venture, and visit your nearest JUKI dealer by clicking here!

Personalize Your Spring Projects with JUKI

Discover the boundless possibilities of personalization with the RICOH Ri 100 direct-to-garment printer and the Tajima SAI embroidery machine! In this blog we’ll discuss how you can customize apparel and embellish accessories to show off your unique flair and individuality! With these powerful tools, get ready to elevate your sewing projects to new heights.

Designing with Tajima:

Imagine having access to a treasure trove of embroidery designs at your fingertips. Tajima’s software, Writer’s Plus, offers a diverse array of intricate patterns and motifs spanning various themes. The options are as vast as your imagination, from majestic animals to pretty flowers!

For animal lovers, the Tajima Program offers various designs featuring creatures big and small. You can find butterflies, dogs, and even wild animals like bears for your next project!

Space enthusiasts can explore the cosmos without leaving the comfort of their stitching corner. Galactic marvels like planets, stars, and more await, ready to adorn your creations with an otherworldly charm!

Rev up your sewing projects with designs inspired by the world of cars and racing. From fun family cars to exciting off-road vehicles, these designs add a dash of adrenaline to any fabric canvas.

The Tajima Software also offers a lineup of sports-themed patterns encompassing various athletic pursuits. Football, basketball, soccer, tennis – you name it. Elevate team jerseys, gym bags, or sports accessories with these spirited designs, just in time for Summer!

Step-by-Step Guide to Unleashing Tajima Magic

Now, let’s discuss the magic of the Tajima Software with a step-by-step guide on how to use these designs to create unique sewing projects.

Step 1: First, familiarize yourself with the Tajima embroidery software. Explore the design library, navigating through the various themes and motifs available. Please select your desired design and ensure it suits the dimensions of your project. You can find the size by checking the measurements of your Tajima Accessory, like your Magnetic Frame!

Step 2: Select a suitable fabric for your project, ensuring it complements the chosen design. Consider the thread colors that best enhance the design’s visual impact on the fabric. Before hooping your design, decide whether to fuse a lightweight tear-away. This can help with puckering on your designs!

Hat embroidered on TAJIMA Sai by JUKI Team

Step 3: Proper hooping is crucial for achieving neat embroidery. Secure your fabric in the embroidery hoop, ensuring it’s taut and evenly stretched to avoid puckering.

Step 4: Transfer the selected Tajima Design to your USB and then to your embroidery machine. Double-check the design’s alignment and positioning on the fabric before commencing stitching.

Step 5: Prepare your machine for embroidery, ensuring the correct thread colors are loaded and the settings match the design’s requirements. Follow the instructions on the Tajima Panel and press start. Watch as the magic unfolds with each placed stitch!

Step 6: After the embroidery, carefully remove the fabric from the hoop. You can also choose to restitch your design for a more filled-in finish. Trim any excess threads and admire your masterpiece.

You can learn more about how to set up and create projects on the Tajima Sai here.

RICOH Designs:

The standout feature of the RICOH Ri 100 is its ability to print directly onto the fabric, enabling users like you to produce unique textile designs tailored to your specific vision. Whether it’s a bold pattern, a subtle texture, or a full-color image, the DTG machine delivers stunning results in a wide range of colors!

The RICOH Ri 100 empowers you to add intricate designs to your sewing projects, whether intricate artwork, fun designs, or exciting typography. The RICOH ensures that every element is faithfully reproduced with precision and accuracy.

In addition to fabric designs, the RICOH Ri 100 can print vibrant photos directly onto garments, offering a unique way to personalize sewing projects. From family portraits to scenic landscapes, the DTG machine transforms ordinary fabrics into wearable works of art, adding a personal touch to every print!

Whether embellishing accessories, customizing home decor items, or adding branding to merchandise, the DTG machine offers limitless opportunities for personalization in sewing projects. The RICOH includes a variety of designs that are ready to go right when you set her up, and you can learn more about how to set up your designs here.

Step-by-Step Guide to Using Your RICOH

  1. Preparation:
    • Prepare your design file using the RICOH design software, and confirm the project specifications for size, resolution, and color mode.
  2. Fabric Preparation:
    • Choose the fabric or project you’ll be printing on and pre-press it! Ensure the fabric is clean, flat, and positioned securely on the RICOH’s tray.
  3. Loading the Design:
    • Connect your computer directly to the printer via a USB drive to load your design file onto the RICOH Ri 100. Then, use the software to adjust the design’s placement, size, and orientation as needed.
  4. Printing:
    • Once your design is loaded and properly positioned, use the start button to initiate the printing process. Printing takes approximately 2 minutes. Just load and unload your tray—it’s that easy!
  5. Finishing:
    • Once the printing is complete, remove the tray from the printer and transfer it to the RICOH finisher.
Quilt created by Kelly with RICOH Ri 100

Curing Temperature: The recommended curing temperature typically ranges from 320°F to 350°F (160°C to 177°C). This temperature range is just right for curing the ink and ensuring its adhesion to the fabric!

Curing Duration: As a general rule of thumb, curing durations typically range from 30 seconds to 3 minutes. However, keep in mind your project and design size.

After curing, allow the fabric to cool completely before handling.

Let Your Creativity Soar

The beauty of Tajima and RICOH lies not just in their capabilities but also in their ability to infuse your personality and charm into your sewing projects. Whether creating personalized gifts, embellishing garments, or adding flair to home decor, these designs serve as your creative accomplice!

So, embrace the Tajima and RICOH Ri 100, let your imagination run wild, and create your way to a world where fabric transforms into a canvas of boundless creativity. With every stitch or print, you’re not just crafting; you’re creating stories and memories and adding a touch of your unique essence into every project.

In the realm of projects, the only limit is your imagination, and with JUKI, TAJIMA Sai, and RICOH lighting the way, the possibilities are as vast as the cosmos itself. Let your projects tell a story that’s uniquely yours. Happy creating!

5 Ways to Personalize Your Projects

As creators, we love being inspired by other sewist and quilters, but how do we take their inspiration and personalize it? Today we will discuss five ways to personalize your sewing and quilting projects. From adding lettering to printing on designs, there are so many ways we can find a project and turn it into our style. So follow along and check out what machines and accessories we recommend for your personalization touches.

Adding Lettering

Whether you’re inspired to create a tote bag, or a sweater, adding lettering to your projects can be just the touch of personalization you need! Add your initials with your partners on a sleeve to create the perfect valentines gift, place your child’s name on their new school bag, or gift a quilt with a quote to your loved one using the lettering feature on your creations.

To add this personalization technique, you can use an electric computerized sewing machine that offers lettering, like the Kokochi DX-4000QVP! An electronic computerized sewing machine like the DX-4000QVP offers lettering stitch choices, ranging in different fonts, that will allow you to quickly and easily stitch in your child’s name, favorite quote, or number one sports team name!

Adding lettering is an easy way to personalize your next project and can be done with just a tap of your finger and a stitch!

Adding Embroidery Designs

Using a specialized embroidery machine, you can start adding your designs and bring texture to your projects by adding a touch of your personality! For example, add a cool design to sneakers, pet collars, or even a child’s teddy bear to create a project representing you or the gift receiver.

A machine like the JUKI/Tajima Sai 8 Needle Embroidery Machine is an example of a machine that can offer this feature! With 8 different color options, you can create beautiful flowers, animals, and a scenic view from your last hike. Art is limitless with what you can create on an embroidery machine. Adding embroidery can be an exciting art form when creating personalized projects!

Want to try your hand at embroidering and creating a makeup bag? Learn how to create this makeup bag with our JUKI Ambassador Nicole Moore here!

Designing Your Fabric

Have you found yourself wanting a specific fabric design? Been drawing some designs of your own? Then take the leap and design your own fabric! With a machine like a Direct-To-Garment printer, the options in patterns and designs for your projects are now endless, thanks to the ability to design your own fabrics right from your studio.

The RICOH Ri 100 can help you print your art designs and patterns onto fabric easily and quickly. From canvas fabrics for your tote bags to cotton for your memory quilts, enjoy the freedom of designing and creating anything for your imagination, and enjoy a material that no one else would have!

Try your hand at printing your own fabric with this east mini quilt project! Learn how to create your own with our JUKI Ambassador Nicole Moore here!

Adding in Photos

Whether it’s a family photo or a memory from your favorite trip with friends, adding a memory photo to a project like a t-shirt or a quilt is a great way to personalize your projects! Whether you’re embroidering designs with free motion quilting, using a Direct-To-Garment printer, or using an embroidery machine, there are limitless ways you can get to designing and including your photos in your projects.

Our favorite projects are memory quilts users create with photos! From sweet newborn gifts to anniversaries and holidays, a quilt created with personalized love is an excellent idea for your next gift project! Using a machine like our Direct-To-Garment printer, the RICOH Ri 100 can easily print and place your photos directly onto the fabric you’re creating, letting you put your focus on your quilt block designs.

Want to create your own memory quilt like the one shown for your loved one? Follow along here to learn more here!

Creating a Set

One of the best things about personalization is the freedom to be creative in what we embroider and print on. Personalize your next gift by creating a matching set! Whether it’s a set of make-up bags for traveling, or a matching set of t-shirts for the father and daughter duo, sets can be a fun gift that allows you to try different project ideas.

One of the best ways to create sets is to intermix your work! Print on your fabric, embroider your design and sew it all together to create something unique and different. Whether your project is small, like a glasses case, or large, like a king quilt, adding these touches of personalization will bring the whole idea together!

So the next time you create a project, add your name, embroider a design, or print on a pattern and show your personality when showing off your project!

Want to try your hand at creating a matching set? Check out our Daddy and Daughter duo set project here!

Want to personalize your next project? Then, visit us here today to find your nearest JUKI dealer!

JUKI Project: Valentine’s Day Printed Top

Join us for this month’s project as we create a printed fabric valentines top using the RICOH Ri 100, with a touch of texture thanks to the TAJIMA Sai 8-needle embroidery machine! For this project, our JUKI National Account Kelly will show us how she used the RICOH Ri 100 to personalize her top and make a love-filled gift!

With the direct-to-garment printer (RICOH Ri 100), you can complete a multitude of projects! From designing your own fabric, like you’ll see done in this project video, to placing images on already constructed bags and home décor, a machine like this will help you personalize your next dream project.

The first step when using a RICOH Ri 100 to print on your fabric is to cut out the blouse pattern from the fabric of your choosing. The reason we want to cut the pattern out first before printing on our fabric is so we can precisely place our designs, save ink, and save fabric!

Now that your pieces are all cut out let’s move on to the RICOH Ri 100 designer app that can be installed onto your laptops and computers. Depending on your material and project choice, you’ll set up the RICOH to understand the dimensions and print type you need before moving on to designing. In our project today, we’ll be choosing t-shirts and thin material since we’re working on a Knit jersey material. Keep in mind what tray you’ll be using because the program will ask!

Next is placing and choosing your designs. The best thing about printing is the ability to place almost any design on your material. In today’s project, we’ll be installing our own graphics, but keep in mind the selection of designs offered on the RICOH Ri program when first starting out. Place the designs as you’d like to see them printed. What you see on the screen is what you’ll see printed!

Once you’ve finished your design, you’ll pre-iron your fabric and then place it into the direct-to-garment printer. The time process depends on your designs; the more intricate and colorful, the more time for printing! Once your designs have been printed onto the fabric, go ahead and place your tray in the heater for finishing.

Having our completed fabric, we can now begin constructing our project and creating the blouse! Sewn on our MO-2000QVP and DX-4000QVP, Kelly puts together her pattern pieces to complete a beautiful Valentine’s blouse!

Lastly, if you’d like to add a special touch of personalization, we follow Kelly as she moves over to the JUKI TAJIMA Sai! This is our 8-needle embroidery machine which allows you to embroider a multitude of projects, including shoes, sweaters, hats, and so much more. To start off using the TAJIMA Sai, we’ll use the Writer Plus software that includes designs to choose from, as well as the ability to upload your own, like the RICOH Ri 100.

Like the RICOH Ri 100 software, you’ll choose your project type, material type, and segments that focus on how your stitching will look. If you choose to add embroidery, make sure to do this before constructing your project on the sewing machines.

Once you’ve completed your steps, you’re ready for a night out with your loved one in this cute blouse! We hope you enjoyed learning more about the RICOH Ri 100, and we hope this inspires you to begin making your own fabric and going the extra mile with personalization!

5 Things You Create On Your Direct-To-Garment Printer

Focusing on direct to garment (DTG) printing can be the beginning of a successful business venture! With this technology, you can now print quality images and graphics onto garments and have the ability to customize designs, fonts, and more. Using a machine like the RICOH Ri 100, you’re now able to create the highest print quality for the lowest cost per print. If you’re looking into starting up a business or upgrading your current one, DTG printing is the ideal choice. Let’s deep dive into some options you can create on your DTG machine today!

Custom Made, Personalized Apparel on Demand

A highly competitive market that’s constantly growing due to high demands is custom-made apparel. With the ability to print-on-demand small production volumes cost-effectively while quickly following market trends, you’re able to create your brand easily. These items don’t need to stop at custom t-shirts but polo’s, socks, aprons, tapestries, and more. There is a wide range of options for what you can create.

Memory Quilts

Are you thinking about creating or expanding your quilting business? An exciting venture is creating your unique fabric pieces for memory quilting. With the RICOH Ri 100 software, you can import photos of loved ones, graphics of their interests, and more to create a unique, personalized quilt.  In addition, you can provide fabric printing services to other quilters that want to create their very own memory quilt or are looking to make a quilt with their fabric design. DTG printers, like the RICOH Ri 100, use a wide range of colors, going as far as being able to print a photo taken in real-time with a webcam.

Fashion Textile Printing

DTG printers, like the RICOH Ri 100, use a wide range of colors, going as far as being able to print a photo taken in real-time with a webcam. With access to these unlimited colors, designers can make their fashion trends by creating prints for their projects. This can be a great niche to enter if you enjoy clothing construction and add more personalization to your projects. In addition, you can create on-demand accessories that users will love by printing limited edition fabric and using these on your projects. Some additions you can focus on are tote bags, socks, beach bags, and more!

Home Décor

We all enjoy decorating our home, and a fun way to do this is using personalized home textile! Using your DTG printer, you can create pieces like holiday-themed table runners for the dining room, tea towels with funny phrases for the kitchen, and monogrammed pillowcases for the bedroom. The possibilities are endless! You can also develop themes that transfer over different products, inviting shoppers to buy sets instead of one product.

Event Products

Marketing products are popular items to personalize and create for other small businesses, sports teams, school events, and more. You can also design pieces for birthdays, weddings, and other events that involve goodies being handed out. Follow your niche’s needs and open your business to personalized projects instead of creating designs or products. You can also offer up your services and attend events for onsite printing. Using a machine like the RICOH Ri 100, you’re able to take a photo and instantly print it onto a garment, creating a fun giveaway item for special events and shows.

Additionally, if you’re attending conventions or sporting events, you can take the RICOH Ri 100 on the go due to its compact nature! It can fit into a space as small as 15.7″ wide x 27.5″ deep, making it one of the smallest DTG printers. In addition, the printer and its finisher can be stacked to maximize functionality without sacrificing space.

With so many possibilities for creative products, the world of DTG is an exciting venture for many to enter. Creating personalized and commissioned pieces is also a perfect option for those who aren’t art savvy but enjoy creating otherwise. If you’re interested in starting your own DTG business, continue reading for tips on how to begin! What would you create on your DTG machine? Let us know down below!