JUKI Tip: Trimming Your Tajima SAI Thread

Don’t you hate when you’re about to start an embroidery and you have that thread tail hanging out? On this JUKI Tip video today we’re going to show you how quick and easy it is to trim that right up on the machine.

In the video above, you’ll see on the screen I am going to go to the icon that looks like four needles with arrows on either side. When you tap on this icon you can move to whichever needle you need to trim with ease, without disrupting your current project.

In our video you’ll see it’s set up on needle number one and needle number one is the one with the thread that we direct you to. You’ll see me press and hold the scissor icon, and it will cut and remove that thread from your needle.

We hope this quick and easy tip helps you the next time you’re creating on the TAJIMA Sai Embroidery machine! What tip do you want to see next? Let us know down below!

Stitching Love with JUKI

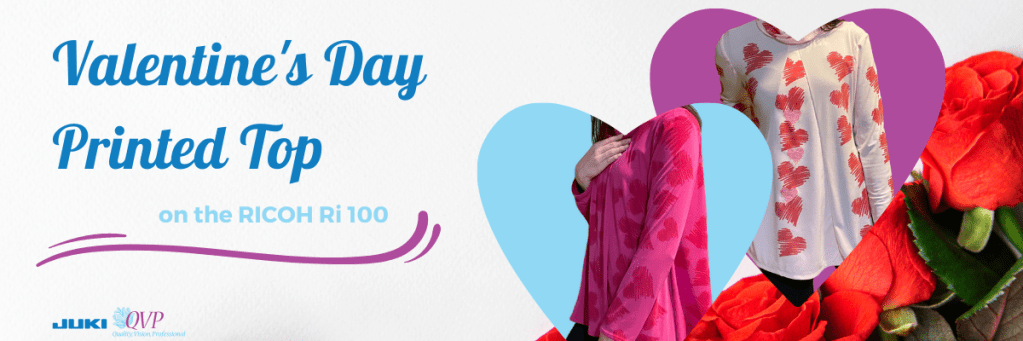
Valentine’s Day can be an opportunity for couples to strengthen their bond through shared activities and heartfelt moments! What better way to commemorate this occasion than by delving into an array of delightful sewing projects designed for two?

With the precision and versatility of JUKI machines complemented by the embroidery finesse of Tajima Sai and the printing features of the RICOH Ri 100 machines, let’s explore an assortment of heartwarming projects tailor-made for crafting love-filled memories together.

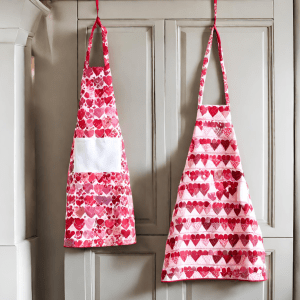
1. Culinary Harmony: Matching Aprons

Picture this: it’s Valentine’s Day, a day filled with love, laughter, and shared moments in the kitchen! As you whip up a delicious meal together, the matching aprons will bring a touch of laughter, a playful reminder of your shared love for culinary adventures and cheesy projects. It’s not just about the gift—it’s about the shared experiences, the laughter, and the beautiful memories you’ll create while cooking up a storm together, making this Valentine’s Day truly unforgettable.

To create your set this Valentine’s, here are a few things to have on hand. Choose durable and easy-to-clean fabrics suitable for aprons, such as cotton, linen, or canvas. Also, select a pattern that suits your skill level and desired style! Various apron styles are available, from simple waist aprons to full bib aprons with pockets, so find one that fits your cooking needs. Ensure the pattern is adjustable to fit different body sizes so you and your partner feel comfy in the kitchen!

Personalize these aprons with embroidered initials, whimsical patterns, or cute culinary motifs using the precision and creativity of our Tajima Sai or with the precision and versatility of JUKI machines complemented by the embroidery finesse of Tajima Sai and printing features of the RICOH Ri 100 machines. Let’s explore an assortment of heartwarming projects tailor-made for crafting love-filled memories together. Pay attention to details that can create a cohesive look. This includes matching or coordinating fabric patterns, colors, trims, or embellishments for both aprons! You can also add pockets and topstitch for added durability and aesthetic appeal.

For sewing aprons for the kitchen, you can use a standard or walking foot. A standard presser foot is suitable for most lightweight to medium-weight fabrics commonly used for aprons. A walking foot can help feed the fabric evenly and prevent shifting if you’re working with thicker fabrics or multiple layers. You can also consider using a zigzag stitch or an overcasting stitch to finish the edges of the apron for a clean and durable finish.

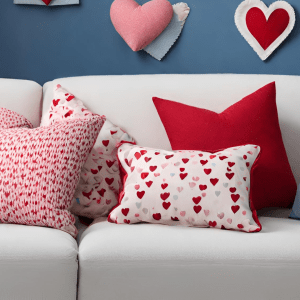
2. Dreamy Comfort: Personalized Pillow Covers

Valentine’s Day is a canvas for celebrating our unique love stories, and what better way to paint that picture than with personalized pillow covers? Imagine the joy of snuggling up to pillows adorned with inside jokes, shared memories, or heartfelt messages. It’s a chance to turn ordinary cushions into a delightful daily reminder of your special moments together!

For your own Personalized Pillow Covers, choose fabrics that complement your home decor or convey the theme or message you want to personalize. Take accurate measurements of your pillows before cutting the fabric to ensure a proper fit, and add seam allowance for a better finish. Add a closure! Choose an envelope closure, zipper closure, button closure, or even a snap, depending on your preference and sewing skill level.

Remember the inside! Depending on the fabric used and the desired finish, consider adding an inner lining or interfacing to give the pillow cover structure and durability. You can also add piping, trims, or decorative edges to enhance the aesthetic appeal of the pillow cover.

For adding piping, trims, or decorative edges, consider using a JUKI Piping Foot or a JUKI Overcasting Foot. The JUKI Piping Foot, designed with a groove for the piping cord, enables precise stitching close to the cord for a professional finish when attaching piping or decorative trims along the pillow cover edges. Alternatively, the JUKI Overcasting Foot is suitable for adding trims or finishing edges to prevent fraying, allowing for decorative overcasting stitches along the pillow cover’s perimeter.

Personalized pillow covers offer plenty of room for creativity! Experiment with initials, love quotes, or adorable motifs using the intricate capabilities of Tajima Sai embroidery machines, or check out our

With the precision and versatility of JUKI machines complemented by the embroidery finesse of Tajima Sai and the printing features of the RICOH Ri 100, let’s explore an assortment of heartwarming projects tailor-made for crafting love-filled memories together and add a personalized and heartfelt photo or hand-drawn design to your pillow covers.

3. Snugly Warmth: Cozy Blankets

Creating a cozy blanket for your partner this Valentine’s Day is a heartfelt gesture that encapsulates warmth, comfort, and love! Sewing or quilting a blanket allows you to pour love into every stitch, selecting the softest fabrics, personalized touches, and perhaps even embroidering initials or a heartfelt message.

Find a theme for your love quilt! Whether it’s a theme of your relationship or following the Valentine theme and using colors and designs that resonate with romance, this will be the basis for your fabric options. Traditional Valentine’s colors like red, pink, and white work well, but you can also opt for softer hues or a combination of your partner’s favorite colors.

If you’re into quilting, create a patchwork blanket using heart-shaped fabric pieces or a quilt design with love-themed patterns. Quilting can add a charming and intricate touch to the blankets!

To help you design this project, we recommend checking out JUKI’s new Hearts and Wings Ruler Set! This set offers the Cable Tool, Mini Heart, Traditional Hearts, Feathered Hearts, and Bird Bracket Chain rulers. Each ruler serves as a unique template, helping you bring individuality to your quilt! Whether you’re a seasoned quilter or a novice, the Hearts & Wings Ruler Set is an excellent addition to your tool set.

You can also add an extra touch of love with love quotes, poems, or meaningful messages embroidered into the blanket design using your Tajima Sai or your machine’s letter stitch options. Adding decorative elements like lace trims, ribbons, or sewn-on heart-shaped patches enhances the blanket’s romantic vibe.

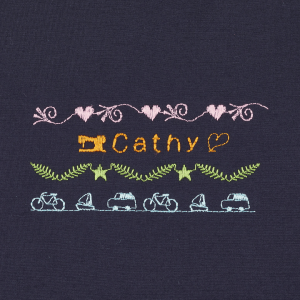
4. Unified Fashion: Embroidered Sweaters

Creating matching embroidered sweaters for your partner this Valentine’s Day is a heartfelt gesture that goes beyond a typical gift! It’s a beautiful way to express your love and unity as a couple. Sewing these sweaters allows you to infuse them with personalized touches, such as initials, meaningful symbols, or a special message, uniquely representing your bond.

Regarding the design, consider Valentine’s Day motifs like hearts, Cupid’s arrows, lovebirds, flowers, or romantic phrases. Opt for thread colors that evoke the Valentine’s Day palette—red, pink, white, and shades of purple. Metallic threads can add a touch of sparkle to your designs!

Remember to use a stabilizer to prevent puckering or stretching while embroidering, and use the smallest hoop necessary to secure the sweater without stretching it too much. When embroidering, plan the placement of your design thoughtfully. Centering it on the chest or towards the hemline can create a balanced look. Avoid areas that might cause discomfort when worn. Use the embroidery capabilities of the Tajima Sai machine to add monograms, intricate designs, or symbols that symbolize unity and warmth onto your sweaters!

Want to try out your hand at creating personalized sweaters? Use your digital sewing machine and check out the letter features, or use your Tajima Sai and follow along here for a demonstration on creating your own set!

5. Personal Footprints: Customized Shoes

From whimsical designs to meaningful initials or inside jokes intricately woven into the fabric, these shoes aren’t just footwear—they’re a token of your love. Gift them the joy of walking in style and stepping into every adventure with a reminder of your love!

For this project, select shoes made of a fabric that can accommodate embroidery. Canvas or denim shoes work well. We recommend testing your embroidery design on a similar fabric or scrap material to gauge how the stitches will appear on the shoe material. Adjust the design or thread colors as needed for better visibility or effect. Remember to use stabilizers appropriate for shoes! Self-adhesive or tear-away stabilizers can work well for this project, supporting the fabric during embroidery without leaving residue.

When it’s time to embroider, hoop the shoe fabric carefully and securely without damaging the shoe. Use smaller embroidery hoops suitable for the shoe’s size, ensuring the material remains taut but not overly stretched. Adjust your embroidery machine settings according to the shoe fabric. Test different stitch densities, speeds, and tensions to ensure a smooth and accurate embroidery process. Also, enjoy the pre-installed designs of the Tajima Sai program and add initials, patterns, or unique designs onto the canvas shoes!

Catch our February project live next week as we show you how to use the Tajima Sai to create your own pair here!

Celebrate your love and togetherness this Valentine’s Day by embarking on these heartwarming embroidery projects. With the precision of the JUKI and the capabilities of the Tajima Sai machine, transform simple fabrics into cherished tokens of your shared love and commitment!

Happy Valentine’s Day, JUKI lovers! We can’t wait to see your projects!

5 Ways to Personalize Your Projects

As creators, we love being inspired by other sewist and quilters, but how do we take their inspiration and personalize it? Today we will discuss five ways to personalize your sewing and quilting projects. From adding lettering to printing on designs, there are so many ways we can find a project and turn it into our style. So follow along and check out what machines and accessories we recommend for your personalization touches.

Adding Lettering

Whether you’re inspired to create a tote bag, or a sweater, adding lettering to your projects can be just the touch of personalization you need! Add your initials with your partners on a sleeve to create the perfect valentines gift, place your child’s name on their new school bag, or gift a quilt with a quote to your loved one using the lettering feature on your creations.

To add this personalization technique, you can use an electric computerized sewing machine that offers lettering, like the Kokochi DX-4000QVP! An electronic computerized sewing machine like the DX-4000QVP offers lettering stitch choices, ranging in different fonts, that will allow you to quickly and easily stitch in your child’s name, favorite quote, or number one sports team name!

Adding lettering is an easy way to personalize your next project and can be done with just a tap of your finger and a stitch!

Adding Embroidery Designs

Using a specialized embroidery machine, you can start adding your designs and bring texture to your projects by adding a touch of your personality! For example, add a cool design to sneakers, pet collars, or even a child’s teddy bear to create a project representing you or the gift receiver.

A machine like the JUKI/Tajima Sai 8 Needle Embroidery Machine is an example of a machine that can offer this feature! With 8 different color options, you can create beautiful flowers, animals, and a scenic view from your last hike. Art is limitless with what you can create on an embroidery machine. Adding embroidery can be an exciting art form when creating personalized projects!

Want to try your hand at embroidering and creating a makeup bag? Learn how to create this makeup bag with our JUKI Ambassador Nicole Moore here!

Designing Your Fabric

Have you found yourself wanting a specific fabric design? Been drawing some designs of your own? Then take the leap and design your own fabric! With a machine like a Direct-To-Garment printer, the options in patterns and designs for your projects are now endless, thanks to the ability to design your own fabrics right from your studio.

The RICOH Ri 100 can help you print your art designs and patterns onto fabric easily and quickly. From canvas fabrics for your tote bags to cotton for your memory quilts, enjoy the freedom of designing and creating anything for your imagination, and enjoy a material that no one else would have!

Try your hand at printing your own fabric with this east mini quilt project! Learn how to create your own with our JUKI Ambassador Nicole Moore here!

Adding in Photos

Whether it’s a family photo or a memory from your favorite trip with friends, adding a memory photo to a project like a t-shirt or a quilt is a great way to personalize your projects! Whether you’re embroidering designs with free motion quilting, using a Direct-To-Garment printer, or using an embroidery machine, there are limitless ways you can get to designing and including your photos in your projects.

Our favorite projects are memory quilts users create with photos! From sweet newborn gifts to anniversaries and holidays, a quilt created with personalized love is an excellent idea for your next gift project! Using a machine like our Direct-To-Garment printer, the RICOH Ri 100 can easily print and place your photos directly onto the fabric you’re creating, letting you put your focus on your quilt block designs.

Want to create your own memory quilt like the one shown for your loved one? Follow along here to learn more here!

Creating a Set

One of the best things about personalization is the freedom to be creative in what we embroider and print on. Personalize your next gift by creating a matching set! Whether it’s a set of make-up bags for traveling, or a matching set of t-shirts for the father and daughter duo, sets can be a fun gift that allows you to try different project ideas.

One of the best ways to create sets is to intermix your work! Print on your fabric, embroider your design and sew it all together to create something unique and different. Whether your project is small, like a glasses case, or large, like a king quilt, adding these touches of personalization will bring the whole idea together!

So the next time you create a project, add your name, embroider a design, or print on a pattern and show your personality when showing off your project!

Want to try your hand at creating a matching set? Check out our Daddy and Daughter duo set project here!

Want to personalize your next project? Then, visit us here today to find your nearest JUKI dealer!

JUKI Project: Valentine’s Day Printed Top

Join us for this month’s project as we create a printed fabric valentines top using the RICOH Ri 100, with a touch of texture thanks to the TAJIMA Sai 8-needle embroidery machine! For this project, our JUKI National Account Kelly will show us how she used the RICOH Ri 100 to personalize her top and make a love-filled gift!

With the direct-to-garment printer (RICOH Ri 100), you can complete a multitude of projects! From designing your own fabric, like you’ll see done in this project video, to placing images on already constructed bags and home décor, a machine like this will help you personalize your next dream project.

The first step when using a RICOH Ri 100 to print on your fabric is to cut out the blouse pattern from the fabric of your choosing. The reason we want to cut the pattern out first before printing on our fabric is so we can precisely place our designs, save ink, and save fabric!

Now that your pieces are all cut out let’s move on to the RICOH Ri 100 designer app that can be installed onto your laptops and computers. Depending on your material and project choice, you’ll set up the RICOH to understand the dimensions and print type you need before moving on to designing. In our project today, we’ll be choosing t-shirts and thin material since we’re working on a Knit jersey material. Keep in mind what tray you’ll be using because the program will ask!

Next is placing and choosing your designs. The best thing about printing is the ability to place almost any design on your material. In today’s project, we’ll be installing our own graphics, but keep in mind the selection of designs offered on the RICOH Ri program when first starting out. Place the designs as you’d like to see them printed. What you see on the screen is what you’ll see printed!

Once you’ve finished your design, you’ll pre-iron your fabric and then place it into the direct-to-garment printer. The time process depends on your designs; the more intricate and colorful, the more time for printing! Once your designs have been printed onto the fabric, go ahead and place your tray in the heater for finishing.

Having our completed fabric, we can now begin constructing our project and creating the blouse! Sewn on our MO-2000QVP and DX-4000QVP, Kelly puts together her pattern pieces to complete a beautiful Valentine’s blouse!

Lastly, if you’d like to add a special touch of personalization, we follow Kelly as she moves over to the JUKI TAJIMA Sai! This is our 8-needle embroidery machine which allows you to embroider a multitude of projects, including shoes, sweaters, hats, and so much more. To start off using the TAJIMA Sai, we’ll use the Writer Plus software that includes designs to choose from, as well as the ability to upload your own, like the RICOH Ri 100.

Like the RICOH Ri 100 software, you’ll choose your project type, material type, and segments that focus on how your stitching will look. If you choose to add embroidery, make sure to do this before constructing your project on the sewing machines.

Once you’ve completed your steps, you’re ready for a night out with your loved one in this cute blouse! We hope you enjoyed learning more about the RICOH Ri 100, and we hope this inspires you to begin making your own fabric and going the extra mile with personalization!

5 Projects you can create this Spooky Season!

It’s almost time for spooks and candy JUKI Lovers! For today’s blog, we will share our top 5 favorite Halloween projects you can begin creating this weekend. So whether you’re going trick-or-treating, or staying at home, follow along below for ideas you can start today!

Halloween Patchwork Quilt

Stay warm this fall and create a Halloween patchwork quilt! Using a variety of Halloween fabric pieces, think witches, pumpkins, and ghosts, you can begin making your very own patchwork quilt. Quilts are the perfect accessory to any home, used and loved by everyone.

We recommend checking out your local quilt shop for holiday quilt bundles. Great options when you want to create a patchwork quilt, and don’t have the scraps, are browsing charm bundles, jelly rolls, and mini-charms! Also, don’t forget to grab batting for your quilts and have fun by bringing texture to the surface using free-motion quilting techniques.

Some great tools to have when quilting is your Open Toe Quilting Presser Foot, Quilting Rulers, and a ¼” Presser Foot for finishing.

Costume Cape

The perfect addition to so many costumes, a cape can be used for various characters ranging from royals to superheroes. To use this cape multiple times, create your piece using basic colors like white, red, or black so you can enjoy this project through the years.

For creating a cape, we recommend having fabrics like stretch velvet, fleece, or wool! Usually, you’ll use about 2 yards of fabric for an adult cape and 1 yard for a child’s cape. This is an excellent apparel project for a beginner to try their hand at. For more advanced sewers, you can add features like trims and a hood for a more finished and professional look.

We recommend having a Cording Foot on hand if you plan to attach a string inside for the cape hood. Also, use a Decorative Stitch Presser Foot to add designs on your cape’s ends for extra personalization!

Spooky Placemats and Table Runner

Decorate your home with a spooky table runner and matching placemats! A fun and easy home project, you can accessorize and personalize your kitchen and dining table with fun fabric designs and colors.

When creating placemats and table runners, we recommend having some tools on hand. Inside your placemats and table runner, you’re going to place a fleece or batting; this will stabilize your project. Spray glue is an excellent adhesive for this! Once you’ve pieced together your mat, you can choose to leave it as is or add designs with free motion quilting.

For yardage, we recommend 2-3 yards of fabric. With one yard, you can create up to 8 basic-sized placemats, and with your other yards, you can create your table runner depending on your table length! Keep a ¼ presser foot on hand when you’re ready to complete your project, so you can quickly finish the edging.

Halloween Garland

Decorate your archways and doorways with a fun garland! Easily created with less than a yard of fabric for the hanging pieces and string, this décor piece is the perfect touch. For the hanging details, we recommend using backing fabric for stabilization.

For this project, keep your ¼” presser foot nearby! Perfect for creating a clean edging on each hanging piece and the edging on the hanging string, this accessory can be the only foot you need for the project.

Trick–or–Treat Bag

Lastly, don’t forget to have your trick-or-treat bag ready! Wishing you a happy spooky season, download our free instructions for our see-through trick-or-treat bag here. With a finished size of 14″ x 16″, this bag will carry all those treats home!

Happy Halloween, JUKI Lovers!