5 Bags You Can Create with JUKI!

So many sewists love bag-making! Whether they’re creating beautiful handbags, fun beach totes, or designing team bags, this is a fun project any sewist can start doing, no matter their skill level. From simple tote bags to more complex purses, bag-making is an excellent project for those who want to learn new skills and up their sewing game. Today’s blog covers five different types of bags you can create! We cover the basics of starting your bag-making journey, from their level of expertise to the sewing feet and notions you’ll need.

Tote Bag

Level: Beginner
If you’re new to bag making and want to try your hand at a fun and easy project, look into patterns for tote bags! Whether they’re simple with a few panels or a little more fun with optional pockets and different handle styles, the tote bag is one of the best projects for beginners. Tote bags are great for their versatility as well! Use this project for the beach, grocery shopping, farmers’ markets, etc.

If you’re making tote bags, we recommend checking out these fabrics for the outside: canvas, denim, and twill, and for your bag’s lining, cotton, all-purpose muslin, and broadcloth all work. Use firmer fabrics to add the structure and shape you want your bag to take. For a lighter feel, use fabrics like cotton.

You can either use leftover fabric from which your bag was created or webbing for a firmer handle to create a handle.

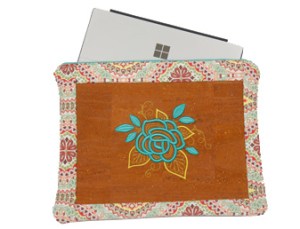
Electronic Carrier Case

Level: Beginner to Intermediate
Here is where we start testing our skills! You’ll want to add zippers for storage and safety for an electronic carrier case. You’ll need to learn how to use specific feet to attach zipper closures for this bag, like an invisible zipper foot. We recommend using online resources like YouTube to learn your new skill and purchasing a pattern to learn the process and understand the pieces it takes to create your project.

For electronic cases, we recommend looking into soft padding options to place inside to keep your electronics from hitting one another. The case can be created from any fabric, making this a fun project to personalize to your style! From vinyl leather to cotton, you can get creative with the design of your carrier.

Features you can add to your project are:
• Pockets for your electronic chargers
• Different closures like magnetic buttons or velcro
• A strap as a wristlet or bag
Level up: Test your skill with mesh netting fabric! The best way to sew and attach this fabric piece to your projects is to use a ballpoint needle or Universal machine needle size 70/10-80/12 with a strong polyester thread. These are great for the outside of carrier cases and add more storage space for details like headphones, iPad pens, and more.
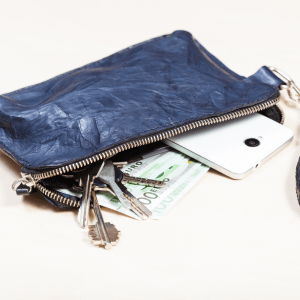
Wristlet Wallet

Level: Beginner-Intermediate
Fun and perfect for those family day trips or nights out, a wristlet is a great way to raise those sewing skills and try something new! Some skills you can pick up while creating wristlets are adding in pockets, attaching zippers, and creating straps. You can also learn to attach closures like buttons, clasps, and velcro.

For outside fabric options, we recommend leather, cotton, or synthetic. If you want to add durability to your projects, attach inner linings using fabric like polyester or nylon to reinforce the structure.

Level up: A fun way to add to your skill set is using clear vinyl! Placed in wallets to make certain pockets visible, like your ID, you can sew this in to add that professional touch. When using clear vinyl, make sure you have a clean and free workspace; this will reduce the chances of your vinyl smudging or scratching. Use a non-stick foot, a leather needle size 90/14 or denim needle size 90/14, and if you can, a strong, 100% polyester thread. Slow and steady wins the race with clear vinyl, so keep that in mind when creating!

Hand Bags

Level: Intermediate – Expert
If you’re ready for a fun and more challenging project, try your hand at creating a handbag! Think of those purses you love seeing for events and going out. These bags come in many styles, from large to small and extravagant to everyday use. Research different patterns and see what options out there catch your eye.

Fabrics for handbags vary depending on their use. Creating for everyday use? Look into fabrics like leather and vinyl for a classic and long-lasting look! These fabrics offer a protective layer that won’t allow liquids to fall through, longer-lasting color, and durability from usage. On the other hand, if your handbag is for travel use, look into fabrics like tweed and canvas! These fabrics are easy to use, come in various colors, and offer that stability when placing some weight in your bag.

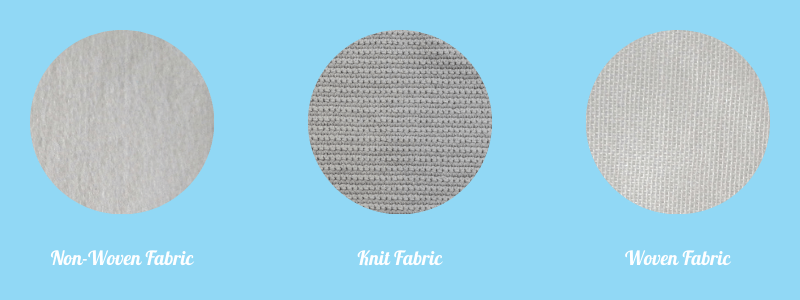
Put your skills to the test and add in features like organizational pockets, zipper closures for the bag and pockets, and placing a flat bottom. Look into interfacings and stabilizers to stiffen your bag and create structure. Some interfacing we recommend are woven, non-woven, decovil, fusible fleece, foam, or felt.
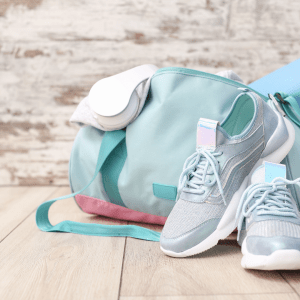
Duffle Bag

Level: Intermediate – Expert
Are you a gym-goer? Is your child in sports? Then, try your hand at a duffle bag for your traveling needs! Perfect for those weekend trips and sports games, you can design your duffle bag specifically for your needs. Add pockets for sports equipment, a water bottle pocket, space for your travel-size toiletries, and more.

You want to keep in mind bag weight, usage, and durability when selecting fabrics. Choices like leather, vinyl, nylon, and cotton are standard picks for duffle bags. Look into webbing fabric for creating the handles, as this will help handle the weight. Don’t forget to purchase lining fabric to structure your duffle bag and create shape!

Features you can include are inner and outer pockets, zipper closures, and zippered pockets. Focus on what you need and create pockets for your cleats, toiletries, snacks, books, electronics, and chargers.

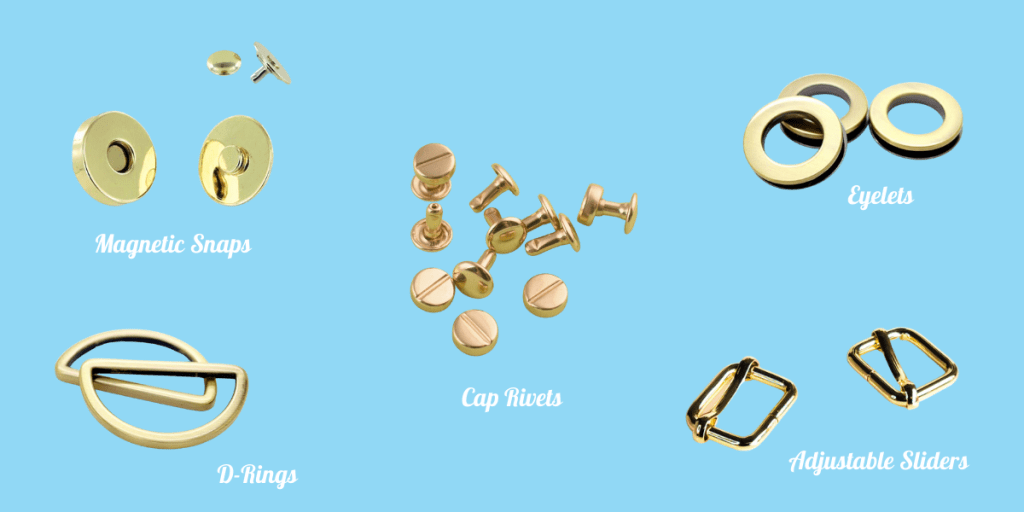
Level up: Add bag hardware pieces like D-Rings and Hooks to your duffle bag handles to adjust the strap depending on the user comfortably. This is great for bags that will be shared with family members and friends, making it comfortable for everyone to use. We recommend using basting tape to keep the D-rings and hooks in place while stitching.

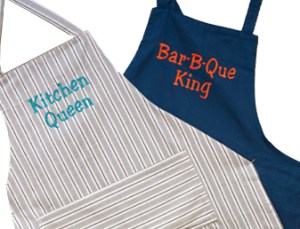
Don’t Forget to Personalize!
Whether you’re a beginner or an expert, adding a personal touch to any bag is easy by using an embroidery machine or direct-to-garment printer. Embellish bags with your name, team names and logos, and art designs. Using a machine like the Tajima Sai, you can easily embroider up to 8 color designs at once with a touch of a button.

Using a direct-to-garment printer like the RICOH Ri 100, you can create your fabric and use this for your next bag project. Then, add your artwork, Photoshop designs, family and memory photos, and more, quickly making something uniquely ‘you!’

Get Started Today!
We hope this gave you some ideas you can implement on your next bag project! Whether you’re new to sewing bags and starting small with a tote or wristlet, or an advanced sewer looking for ideas, these projects are great for challenging yourself and building up your skills. So which bag would you create first? Let us know down below!

JUKI’s Tips and Tricks to Bag Creating!

In today’s blog, we’ll be introducing you to some tips and tricks to keep in mind when you start your journey in bag creation! Whether you need help deciding on which foot accessories to keep in your arsenal or what fabrics are best for your tote bag projects, we’re here to get you started on the basics. So follow along below as we cover hardware, interfacing, and more!

When new sewists join the sewing world, one of the top projects we recommend trying your hand at is bag making. Bag projects offer sewists a chance to learn foundational skills like manipulating fabrics and testing new techniques for zipper attaching or button closers. Bag creation can also be quick projects, like tote bags, which are fun and versatile, perfect for beach days and market shopping.

If you find yourself loving the process of bag creation or want to try your hand at it, we’ve put together a selection of tools and tips to keep in mind!

The first thing to know when creating is what type of hardware you’ll want to use on your handbag. Some bags won’t need many pieces, while detailed ones could require multiple hardware options to create pockets, adjustable straps, etc. Below we’ve listed some of the more common hardware pieces bag makers keep on hand.

Bag Making Hardware:

  • Magnetic snaps come in a range of colors and sizes. They are easy to insert.
  • Cap rivets are used for finishing and reinforc­ing leather and bag details.
  • D-rings are D-shaped metal rings used for fastening handles to bags.
  • Adjustable sliders are used to thread a strap and to adjust the length.
  • Eyelets are small round metal pieces used to finish and reinforce fabric holes.

Once you’ve decided on which hardware pieces you’ll use, the next step is determining your strap! The best part about creating your own bag is the opportunity to choose every detail. Handles can be made from countless fabrics, and bags can have multiple straps depending on your style and bag type.

Some options for bag straps can be webbing tape, leather strapping, or chains! Whether you’re looking for durability, like a webbing tape strap, or a classy touch like leather and chain, you can get creative in dressing up your bag with the right strap! There are different ways to attach handles to your bag, so we recommend researching other techniques and seeing which one will match your bag design best. You can also use techniques for adding adjustable straps, which are perfect for those travel bags and heavyweight!

The next step you want to focus on is choosing your interfacing material. When you want your bags to have a defined body and shape, using interfacing is perfect for creating that look. If your bag still looks sagging, feel free to double your stabilizing fabric and layer, as this will help you create a stiffer body. Remember, always apply interfacing to the back of the fabric before you start stitching, so this will not be visible. Keep in mind that you also have options on fusible and non-fusible interfacing, depending on whether you choose to sew the interfacing with your fabric or iron-on.

Interfacing options:

  • Woven: Stiff material that looks like fabric,
  • Non-woven: These interfacing fabrics are compressed fibers, with one side covered with adhesive
  • Knit: Need some stretch? Knit fabric can accomplish a tight stretch for those projects!

Before you start constructing your bag, let’s cover tips that can create a clean finish for your purse, wristlet, and more. In addition, these tips can assist you in adding a more professional touch to your projects.

  1. Attaching your handles

We recommend basting your handles before attaching them to your bags so that the fabric is hardened and firm. A fun tip for sewing is taping down your handles so that you can seamlessly sew over the fabric and attach your handles with ease.

2. Seam Allowance

Don’t forget to trim and clean up those seam allowances for a clean, finished look in your bag projects.

3. Boxed Corner

A technique that’s easy and quick to learn, adding a corner boxing can create more space in your bag and a professional bottom look. Using the 90-degree method, fold the corner flat, matching up the two side seams once you’ve cut out your fabric. The side seams should lie directly one over the other. Then stitch and backstitch to reinforce the closing.

Don’t forget to have the right feet on hand! Below we’ve listed our top 3 choices for bag creators to have in their kits. These feet options allow you to sew on unique fabrics, attach zippers and create clean finishes.

  1. Smooth Foot: Work on fabrics like leather, vinyl, suede, and more with ease using the smooth foot. This will allow you to use these types of fabrics without causing the material to stick to your foot like a metal one would.  
  2. Piping Foot: Reinforce your lines and enjoy a clean finish on your projects.
  3. Zipper Attaching foot: Attach zippers for pockets and bag closures using the zipper attaching foot.

When creating your bag, other ideas to keep in mind are what features you wish for it to have! Additional options for your bag designs include placing pockets, card slots, bag flaps, phone holders, etc. These additional pieces are perfect when trying new techniques and allow you to test your skills by attaching zippers, bag closers, pockets…

Don’t forget to have suitable needles and thread on hand. Your needle should be strong to handle thick fabrics when you begin layering your bag pieces. For thread, focus on finding heavyweight thread types that can keep your seams strong and together.

We hope this has helped you find the pieces you need to create your next bag project! Whether you’re an expert who has been creating for years, or a new sewist trying your hand at bag making, these projects are a great way to step up your technique game! So, are you a bag creator and want to share your favorite tips with new bagmakers? Let us know down below!

5 Projects You Can Create on Your Embroidery Machine

When you own an embroidery machine, you can accessorize, personalize and decorate just about anything you can get your hands on. So whether it’s the denim jacket you’ve wanted to revamp or personalize your quilt, embroidery is another form of design taken to the next level!

While embroidery machines are not new to the home sewing world, their technology advancement has passed bounds for those who want to start a small business. Starting your small business is easier than ever with the ability to find top-speed and high-quality machines for home use now. Now that the machine is in your grasp, what can you start creating to sell for your small business?

Follow along below for 5 ideas you can bring into your small business that is fun and easy to complete.

Bags and Purses

Perfect for any season, everyone uses some form of carrier. Whether it’s a tote bag for groceries, a beach bag for toys, or a purse for going out, there are so many options when it comes to personalizing bags! You can place fun sayings, eccentric artwork, or beautiful designs and create a new and fun product for bag lovers.

Monogrammed products

Never out of style, people love owning and gifting monogrammed pieces! Newlywed couples, or those celebrating an anniversary, can enjoy gifts like monogrammed robes, towels, and more. Sports enthusiasts can enjoy having monogrammed sweaters with their favorite teams to cheer on at the games. Readers can find comfort in monogrammed blankets for nooks! The possibilities on who can enjoy this are endless, being a perfect niche to jump into.

Embroidered Pillows

Embroidered pillows from a small shop are an excellent idea for those who love to spruce up their home with fun and exciting décor pieces! Different from those in stores, think of how your designs can bring personalization into buyers’ homes, letting them share their passions in colors, designs, and more. 

Baseball Caps & Other Apparel

Whether you’re creating hats to support sports teams, your city, or your brand, baseball caps are favorites for many. Think of designing pieces with local area code numbers, fun sayings, silly designs, and more so others can show off their personality with your work! A classic go-to, baseball caps are always in style and can be worn by everyone. T-shirts, sweaters, and other apparel pieces are always popular, a classic to create and work on! Allow your creativity to flow as you create pieces with original designs, fun and sassy quotes, and more. Look into different types of clothing like jean jackets, uniform shirts, and more to get a better idea of what you want to create.

Pet Accessories

Pets are like family, so it’s no secret why creating for pets is a fun niche to jump into! Create pieces like pet beds, clothing, food mats and so much more for those furry friends. Simply embroidering pet names can be a big selling point for those who want personalized pieces, and a way to express their style in their homes. Not sure what to create? Check out our business page here for ideas!

What Will You Create?

There are so many things you can customize and create with your embroidery machine. From pieces, we talked about to other exciting ideas like jewelry, ornaments, and more, the possibility of what you can create is up to you! So keep up with JUKI as we share our project ideas through the year that you can create on an embroidery machine and others. What project would you be most excited to create on an embroidery machine?

Trick or Treat Yo’ Self with JUKI!

Get into the spirit with JUKI this October! Join us this month as we go over our HZL machines that get every job done!

Our HZL-F300 will exceed your sewing expectations! Equipped with 106 stitches including 16 professional buttonholes, 3 lettering fonts, and a wide variety of included accessories this machine is perfect those complex projects you want to create. it has an ability to handle heavy duty fabrics and layers, perfect for your quilting and home décor projects.

Check out the HZL-F400 is perfect for creating your clothing pieces you want to show off! With Halloween round the corner, this machine is perfect for designing that costume you’ve been driving of. create beautiful seamless quality projects, add buttons holes and more, we know how important it is that your machines fulfills your needs!

Don’t forget to create beautiful patterns on your quilts using the HZL-F600! Incorporating JUKI’s industrial sewing machine technology, you can create pieces with beautiful stitch quality. offering a range of functions, this machine can assist you on your next quilting project or clothing pieces. feel at ease with the electronic buttonhole function, exclusive advanced thread trimming, complete control and on-board guides, and more!

Whichever machine youre looking at, check out your nearest JUKI dealer for the oppurtunity to see it in person and get more information!

Click here for our JUKI Vendor Finder.