JUKI’s Social Media Tips for Sewers

Promoting your small sewing business has never been more exciting! With social media sites like Instagram, Pinterest, YouTube, Facebook, and TikTok, you have a world of opportunities to showcase your talents, connect with potential customers, and grow your brand right at your hands. Whether you’re sharing creative project ideas, offering tutorials, or promoting your latest designs and products, these platforms provide exciting ways to make your business shine!

In this blog, we’ll explore ways to promote your sewing brand and business online. From crafting viral videos on TikTok to building inspiring Pinterest boards, we’ll talk about actionable tips for turning social media into your secret weapon. Let’s dive into how you can make your sewing business stand out and thrive in the digital age!

1. Instagram: Build a Strong Presence

Instagram is the perfect platform to showcase your sewing creations through visually appealing photos, Reels, and Stories! Popular and used worldwide, it allows you to connect with a community of like-minded individuals and share behind-the-scenes glimpses of your sewing process. By using Instagram’s features like carousels and hashtags, you can attract followers, engage with your audience, and build a strong brand presence. Below are tips on features Instagram offers that we recommend!

  • Photos and Carousels: Post high-resolution images of your sewing projects, showcasing close-ups of intricate details, finished products, or behind-the-scenes moments from your workspace. Instagram carousels (multiple images in one post) allow you to share step-by-step photos of your sewing process, which can engage followers and showcase your skills!
  • Stories & Reels: Stories are perfect for behind-the-scenes content, like showing how a project evolves from idea to completion. Reels are great for quick, engaging tutorials or time-lapse videos of your sewing process. These short-form videos often perform well and can go viral, drawing in more followers. These can also be previews for long-form videos on other platforms, like YouTube.
  • Hashtags & Captions: Use relevant hashtags (#sewingcommunity, #lovesew) to increase visibility. Think about your captions, too! These can tell your story, share tips, or highlight your sewing process, encouraging interaction and building connections with your audience.
  • How to Promote: Post consistently, engage with your audience through comments, and collaborate with other sewists to tap into wider communities. Use Instagram Insights to track what type of content resonates most with your followers and adjust your strategy accordingly!

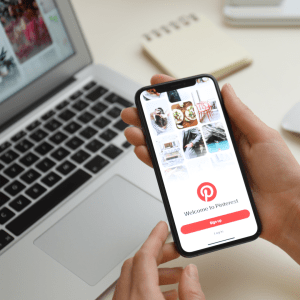
2. Pinterest: Drive Traffic & Inspire

Pinterest is a valuable tool for promoting your sewing brand by curating beautiful boards filled with inspiration, tutorials, and finished projects. It helps drive traffic to your website or Etsy shop through pins and keywords. By creating engaging content and joining relevant boards, you can inspire potential customers and grow your reach!

  • Boards & Pins: Create boards categorized by themes (e.g., DIY Sewing Projects, Sewing Tutorials, Holiday Crafts). Post and Pin high-quality images of your creations along with step-by-step tutorials and behind-the-scenes content.
  • Rich Pins: Use Rich Pins, which pull live updates from your website or Etsy shop, ensuring your pins remain relevant and drive traffic back to your store.
  • Keywords & Descriptions: Optimize your pin descriptions with relevant keywords so your posts appear in searches. Use keywords like “beginner sewing tutorial,” “DIY sewing projects,” or “how to sew clothes”! These are popular search quotes.
  • How to Promote: Pin regularly, join group boards, and collaborate with others in the sewing community! Use Pinterest Analytics to track which pins are driving the most traffic, and create more of what performs best.

3. YouTube: Build Trust

YouTube is perfect for sharing in-depth sewing tutorials, product reviews, and “sew with me” sessions! It allows you to establish yourself as an expert in the sewing community while building trust with your audience, and long-form videos are encouraged, unlike Instagram and Tik-Tok. Creating inspired content and engaging with viewers helps grow your subscriber base and attract a dedicated following!

  • Tutorials & DIY Videos: Create step-by-step sewing tutorials, product reviews, and “sew with me” sessions. Cover topics like how to use machine features, fabric recommendations, or beginner-friendly techniques. Establish yourself as a go-to resource for sewing tips!
  • Thumbnail & Title: Your video thumbnail and title play a key role in attracting viewers. Create visually appealing thumbnails with clear, catchy titles that describe the content (e.g., “Sewing Machine Review & Tips for Beginners”).
  • How to Promote: Optimize your videos with SEO-friendly titles, tags, and descriptions. Engage with your audience by responding to comments and encouraging them to like and subscribe for more content. Don’t forget to promote your YouTube channel across your other social media platforms!

4. Facebook: Build Community

Facebook is a great platform to build a community around your sewing business and brand, whether through a business page or dedicated groups. You can showcase your latest projects, host live videos, and sell products directly through Facebook Shops. Engaging with your followers and using targeted ads helps drive sales and build brand loyalty.

  • Business Page & Groups: Create a business page to share updates, highlight new products, and interact with followers. Join Facebook groups related to sewing and crafts to engage with people who share your interests. Go live to showcase your latest projects, share sewing tips, or host live.
  • Facebook Shops: Set up a Facebook Shop to sell your products directly. This feature allows customers to browse and purchase your creations without leaving Facebook.
  • How to Promote: Post consistently, engage with your community and use Facebook ads to target specific audiences. Highlight customer testimonials and showcase your products to encourage sales.

5. TikTok: Build Authenticity

TikTok is perfect for creating short, fun, and creative videos that showcase your sewing skills! By leveraging trending sounds, challenges, and authentic storytelling, you can reach new audiences and go viral. The platform encourages creativity and short-form videos, making it ideal for engaging with younger demographics and growing your brand.

  • Short, Creative Videos: Post short videos showcasing quick sewing hacks, tutorials, or behind-the-scenes looks at your creative process. Trends like challenges, DIYs, and catchy sounds can help your videos go viral. Incorporate popular sounds or create your own to boost discoverability.
  • Authenticity & Storytelling: TikTok thrives on authenticity. Show your personality, share your story, and let your creativity shine. Connect with your audience by sharing your sewing journey and the inspiration behind your creations.
  • How to Promote: Post consistently, engage with trending content, and collaborate with other TikTok creators. Track what resonates with your audience and continue to refine your content strategy based on engagement and feedback.

By leveraging these platforms you have the tools at the tip of your fingers to effectively promote your small sewing business! Each platform offers unique features that cater to different types of content and audiences, helping you showcase your creativity, drive traffic, and build a loyal community.

By staying consistent, engaging with your audience, and utilizing the strengths of each platform, you’ll be well on your way to growing your brand and achieving success in the digital sewing world!

What is an Even Feed Foot?

If you’ve ever struggled with sewing slippery or thick fabrics, you’re not alone! Many sewists deal with puckering, uneven stitching, or fabric that seems to have a mind of its own. The Even Feed Foot is a game-changing accessory designed to overcome these challenges, allowing you to sew with ease and leave those struggles behind! But what is an Even Feed Foot, and how can it transform your sewing experience? Let’s dive in and explore its features, history, and incredible benefits!

The Even Feed Foot is a specialized sewing machine attachment that ensures fabric feeds evenly under the needle. Unlike a Standard Presser Foot, it has built-in feed dogs that work in tandem with your sewing machine’s feed system. This dual-action feeding mechanism prevents shifting between fabric layers, making it ideal for quilting, matching patterns, or working with challenging materials like vinyl, leather, and silk.

The Even Feed Foot was developed to solve common sewing challenges when working with multiple fabric layers or slippery materials! Traditional presser feet often cause fabrics to move at different rates, causing misaligned seams or puckered stitching. This was particularly seen in quilting, where precise alignment is crucial, and in garment construction, when sewists used delicate or sticky fabrics.

Benefits and Uses of the Even Feed Foot

Now that we know why the Even Feed Foot was created, let’s talk about the benefits of putting it to use. Its primary benefit is its ability to handle slippery fabrics like silk, satin, and vinyl! These materials often shift or stick under a regular presser foot, leading to uneven stitches or puckering. The Even Feed Foot eliminates these issues by feeding the fabric layers evenly, ensuring smooth, professional results every time.

If you’re a quilter, you’ll find the Even Feed Foot indispensable! When working with multiple layers of fabric and batting, achieving alignment can be a challenge. This foot will ensure that all layers move together without shifting, resulting in beautifully aligned quilt tops and precise stitching. It’s also perfect for handling thick materials or layered seams, like denim or canvas.

Another benefit we’ll mention is the ability to help with pattern matching. Whether you’re working with plaid, stripes, or intricate prints, aligning patterns perfectly at the seams can be daunting! The Even Feed Foot’s dual-feed mechanism allows you to keep fabric pieces in place, making it easier to achieve seamless transitions and professional-looking garments or home decor items.

Tips for Using the Even Feed Foot

  1. Choose the Right Needle: Pair your fabric with the correct needle type, such as leather or ballpoint needles.
  2. Adjust Stitch Settings: For thicker fabrics, lengthen the stitch for better results.
  3. Use Clips Instead of Pins: For materials like vinyl or leather, avoid pinholes by using clips to hold layers together.
  4. Test on Scrap Fabric: Always test your settings on a scrap piece to ensure everything is working smoothly.
  5. Clean Regularly: Keep your foot and sewing machine feed dogs clean to maintain optimal performance.

Project Ideas Using the Even Feed Foot

Lastly, let’s talk about the projects you can now create with more ease using the Even Feed Foot. For quilters, it is the perfect tool for crafting quilted placemats or patchwork blankets! The foot ensures that all layers of fabric and batting remain perfectly aligned, resulting in a polished finish and precise decorative stitching. These projects are not only functional but also great opportunities to showcase your quilting skills.

If you love working with vinyl or leather, the Even Feed Foot is a game-changer! Consider making a vinyl cosmetic bag that is durable and stylish or a leather tote bag with clean, professional seams. These materials can be tricky to sew, but the Even Feed Foot makes it possible to achieve high-quality results without the frustration of sticking or shifting.

For sewists working with delicate fabrics, projects like silk pajamas or satin pillowcases become much easier! The Even Feed Foot glides smoothly over these materials, ensuring flawless seams that enhance the luxurious feel of your finished pieces. Whether you’re sewing garments or home decor, the Even Feed Foot allows you to work confidently with materials that might otherwise be challenging.

With the Even Feed Foot, you can confidently tackle a variety of creative endeavors, all while enjoying smoother and more efficient sewing. The Even Feed Foot is more than just an accessory—it’s a game-changer for challenging sewing projects. Ready to try the Even Feed Foot for yourself? Visit your nearest JUKI dealer to explore this versatile accessory and see how it can enhance your sewing experience!

JUKI’s Valentine’s Date Night

Love is in the air, and Valentine’s Day is the perfect excuse to get creative! This year, ditch the store-bought gifts and add a personal touch with handmade creations that will make your celebration extra special. Whether you’re crafting gifts for your significant other or decorating for a romantic evening, these DIY project ideas will bring a touch of magic to your date night.

From embroidered sneakers that scream “personalized perfection” to heart garlands that set the mood, we’ve got the perfect projects to spark your creativity. Let’s explore vibrant fabrics, timeless Valentine’s motifs, and thoughtful designs to make this holiday unforgettable. In this blog, we’re diving into five easy-to-make projects, with machine recommendations, fabric tips, and design ideas to help you create something truly memorable!

1. Embroidered Sneakers

Our first project is our customized sneakers with embroidery! This is a fun and stylish way to add personality to your Valentine’s outfit or gifts. The Tajima Sai 8-needle Embroidery Machine makes it easy to embroider complex designs on canvas or leather shoes. Popular Valentine’s motifs include hearts, roses, and initials, which can be stitched in red, pink, or metallic gold threads. Use stabilizer sheets inside the sneakers to ensure clean, precise stitching. These personalized shoes are not just a great fashion statement but also a thoughtful gift for your special someone.

  • Recommended Machine: Tajima Sai 8-Needle Embroidery Machine
  • Fabric Choice: Canvas sneakers for easy stitching or leather for a luxe look.
  • Design Ideas: Embroider hearts, initials, or love-themed patterns like roses or cupids. Use vibrant red or metallic threads to highlight the Valentine’s theme.

2. Embroidered Initial Sweater

Next, stay warm with an embroidered sweater! This project adds a cozy, personalized touch to your Valentine’s Day wardrobe, or can be the perfect personalized gift. Using the Tajima Sai, you can stitch initials, romantic quotes, or decorative motifs like arrows and hearts onto cotton or fleece sweaters. Choose pastel tones like blush or cream to match the season or opt for bold red for a striking look. A fun tip is adding satin stitching around the embroidery to give the design a polished and professional finish! Whether as a gift or a matching outfit for date night, these sweaters are sure to spread the love.

  • Recommended Machine: Tajima Sai 8-Needle Embroidery Machine
  • Fabric Choice: Fleece or cotton sweaters in classic Valentine’s hues like pink, red, or cream.
  • Design Ideas: Try a small monogram over the wrist or a larger motif like intertwined initials with a decorative border.

3. Heart Garland

Add a touch of love to your space! A heart garland is the perfect way to create a festive atmosphere for your Valentine’s celebration. With our Sewing Machines, you can easily stitch hearts in different sizes and fabrics like felt or quilting cotton. Alternate red, pink, and white, or use pastels like candy hearts, for a classic Valentine’s palette! You can also have fun and mix in patterned fabrics of hearts, flowers, and more for a playful twist. Decorate by hanging the garland across a mantle, along a table, or in a doorway for a charming decorative touch.

  • Recommended Machine: TL Series Sewing Machines
  • Fabric Choice: Felt or quilting cotton in an assortment of Valentine hues.
  • Design Ideas: Use different heart sizes and layer contrasting colors for depth. Add decorative stitches, such as zigzag or scallop, around the edges for a professional look!

4. Booboo Pouch

This cute little pouch is perfect for helping with those little booboo’s we all get, especially for kids! It’s a thoughtful and functional Valentine’s Day gift that provides comfort and care. You can fill the pouch with rice or flaxseeds to make it versatile—heat it in the microwave for 30 seconds for warmth or store it in the freezer for a cold pack. Use soft, cozy fabrics like cotton or flannel in Valentine’s patterns to make it festive and fun. Stitch it up with precise, neat edges, and add a decorative topstitch for an extra touch of charm.

  • Recommended Machine: DX or HZL Series for detailed stitching
  • Fabric Choice: Valentine’s Day-themed prints like tiny hearts or florals, paired with a coordinating solid fabric for the lining.
  • Design Ideas: Embroider the word “Love” or include a small heart motif. You can also use contrasting thread for a decorative topstitch to highlight the seams.

5. Embroidered Tea Towel

The Now and Forever Tea Towel is a sentimental yet practical gift for Valentine’s Day! Embroider the phrase “Now and Forever” or any romantic quote with valentine motifs using the Tajima Sai or your DX Sewing machine. For fabric, choose linen or cotton in soft pastel shades that complement your kitchen décor. Add scalloped edges with your trusty Serger to give the towel an elegant finish. Whether used in the kitchen or displayed as a decorative piece, this tea towel is a loving reminder of your thoughtfulness!

  • Recommended Machine: Tajima Sai for embroidery or DX series for Decorative Stitches.
  • Fabric Choice: Linen or cotton in pastel tones like blush or cream.
  • Design Ideas: Embroider phrases like “Now and Forever” or “Be Mine.” Add a scalloped edge or decorative stitching along the borders to elevate the look.

This Valentine’s Day, let your creativity shine and make the celebration truly unforgettable with these heartfelt projects! From unique gifts to romantic decorations, each creation is a labor of love that will leave a lasting impression. With JUKI’s reliable machines and your imagination, the possibilities are endless.

Ready to start crafting your perfect Valentine’s Day? Visit our JUKI Project Page for step-by-step instructions and even more inspiration. Let’s sew some love this season!

Date Night with JUKI: Make This Valentine’s Unforgettable!

Valentine’s Day is the perfect opportunity to create lasting memories with the ones you love. This year, why not make the occasion even more special by combining creativity, craftsmanship, and a little bit of sewing magic?

This Valentine’s Day, we’re offering a special Date Night with JUKI promotion featuring three of our most sought-after sewing machines. These machines are perfect for creating custom gifts, home décor, clothing, or anything else that shows your creativity and love!

Tajima Sai 8-Needle Embroidery Machine

Want to take your embroidery to the next level? The Tajima Sai 8-needle Embroidery Machine is perfect for couples who want to create intricate, high-quality embroidery designs. Whether you’re personalizing clothing, making custom gifts, or designing something for your home, this professional-grade machine is your perfect sewing partner. Its multiple needles and fast stitching capability make it an ideal choice for couples looking to tackle big projects together. Imagine embroidering matching shirts or creating a one-of-a-kind wall hanging for your home.

KOKOCHI DX-4000QVP Expert Edition

If you’re looking for a versatile machine that does it all, the DX-4000QVP  Expert Edition is the answer. This sewing and quilting machine boasts a range of features perfect for crafting a wide variety of projects. Whether you’re piecing together a romantic quilt, sewing handmade clothing, or crafting intricate embroidery designs, the DX-4000QVP has the flexibility and advanced technology to bring your ideas to life.

TL-15: Precision Meets Simplicity

For those who want a machine that offers simplicity without compromising precision, the TL-15 is the perfect companion. With advanced features like precision stitching at high speeds, automatic needle threading, automatic thread trimmer, and a streamlined design, this sewing machine is easy to use but still provides the professional-quality results you expect from JUKI. The TL-15 is ideal for quick, simple projects such as creating personalized gifts, sewing clothing, or crafting decorative pieces that express your love.

Happy Valentine’s Day from JUKI—where love and creativity come together!

Quilting Your Memories with JUKI

Today, we’re going to talk about memory quilts and how they’re more than just cozy blankets but tangible pieces of our personal histories! Transforming old T-shirts, jerseys, and other sentimental clothing into quilts creates unique keepsakes that celebrate special moments and memories. In this guide, we’ll discuss the process of crafting a memory quilt, from gathering materials to the final stitches, and how to use the advanced features of JUKI sewing machines to bring your vision to life.

Many JUKI machines can help you create the perfect memory quilt, so here are a few of our favorites! For larger machine space options, the Miyabi J-350QVP offers a spacious work area up to a king quilt and precision stitching capabilities, which are ideal for handling large quilt tops and intricate designs. The Q-Zone Hoop Frame provides the stability and ease needed for quilting. It’s compatible with multiple JUKI machines and ensures your finished quilt will be beautiful and durable.

For smaller workspaces, the TL-18QVP offers the strength of our JUKI Industrial machines, with features like the automatic needle threader and float function for quilting. We also have computerized sewing machines like the F series and DX QVP series that offer various stitch options for decorative stitching and free-motion quilting.

Step 1: The Memories

Let’s start planning your memory quilt by deciding what pieces of clothing items have sentimental value! Think of your T-shirts from memorable events or team shirts from sports teams. Give these items a quick wash and check they’re in good condition, like stains or excessive wear.

If any pieces are damaged but meaningful, consider using the undamaged portions. Pay attention to the fabric type and weight; it will affect how you prepare and stabilize the fabrics. Understanding the differences will help you plan the quilt layout and choose the right material for your project.

Keep in mind the fabrics you select. You can aim to coordinate solids, patterns, or themed prints or make a theme like sports, traveling, or interests. Consider using neutral tones like white or black to frame and balance more vibrant pieces. At this stage, consider the backing fabric, ensuring it complements the front and is durable enough for regular use. Cotton is popular for its softness, but flannel or themed prints can add a personal touch. These additional fabrics will help unify the overall design and enhance the quilt’s aesthetic appeal.

2. Preparing the Clothing

Cutting: Start by laying your clothing items flat on a cutting mat; this will help ensure accuracy and consistency in your cuts. Using a rotary cutter, carefully cut the clothing into uniform squares or rectangles; 12″12″ is a common and manageable size for quilt blocks if you’re unsure where to start.

If your clothing items feature logos, graphics, or designs you want to highlight, center them within your cut pieces. Using a clear acrylic ruler to guide your cuts is also helpful, ensuring straight edges and precise measurements.

Stabilizing: Stretchy fabrics like those found in T-shirts require extra care to ensure they don’t warp or lose shape during quilting. To stabilize, apply fusible interfacing to the back of each piece before cutting it to size.

Fusible interfacing is a lightweight material that, when ironed onto the fabric, provides additional structure and reduces stretch. Once stabilized, these pieces will be easier to work with, allowing for more precise cutting and sewing. This will result in a quilt that lies flat and retains its shape over time.

3. Designing the Quilt Layout

Plan Your Layout: We recommend starting your memory quilt by arranging your pieces on a flat surface, like a large table or the floor, and experimenting with different quilt layouts. This allows you to visualize how the colors, patterns, and clothing designs will work together.

Balance the colors and the placement of significant items, like logos or graphics, to ensure they are well spaced out across the quilt. This step is key to achieving a harmonious and aesthetically pleasing design!

Create a Mock-Up: Once you’ve settled on a layout you like, consider creating a mock-up to finalize your design. You can use design software like Adobe Illustrator or quilt-specific programs to digitally recreate your layout, allowing for easy adjustments and precise planning.

If you prefer a hands-on approach, sketch your layout on paper, noting the position of each piece! This mock-up will be a valuable reference during the assembly process, ensuring that your final quilt matches your envisioned design. It also helps you spot any potential issues with spacing or alignment before you start sewing.

4. Assembling the Quilt Top

Sewing Pieces Together: Begin by sewing your fabric pieces into individual rows. Align the edges carefully as you sew to ensure even rows and minimize fabric shifting. Once your rows are complete, join them, matching the seams where they meet.

Pressing Seams: After sewing each row, pressing the seams is important to create a smooth quilt top. Depending on your preference and the thickness of the fabric, you can either press the seams open or to one side.

Pressing seams open reduces bulk and helps the quilt top lie flatter, especially if multiple seams intersect. Use a hot iron and apply firm pressure to set the seams, ensuring that the fabric lies evenly and without puckering. Properly pressed seams will make the quilting process easier and contribute to the overall polished appearance of your finished quilt.

5. Adding Batting and Backing

Choose Batting: Find a batting material that complements your quilt’s desired thickness, warmth, and overall feel. Batting comes in various materials, such as cotton, polyester, wool, or blends, offering different loft levels and insulation.

When making your choice, consider how you intend to use the quilt—whether it’s for warmth, display, or as a lightweight throw. Cotton batting is popular for its breathability and smooth finish, while polyester offers more loft and is lightweight!

Cut Backing Fabric: Once you’ve chosen your batting, it’s time to prepare the backing fabric. Cut the backing fabric slightly larger than your quilt top, typically adding a few extra inches on all sides. This extra fabric allows for any shifting during the quilting process and ensures full coverage. Lay the backing fabric flat and smooth out any wrinkles before cutting to ensure a precise fit.

6. Quilting with JUKI

Layering: Next, lay out the quilt layers on a flat surface. Position the backing fabric with the wrong side facing up, followed by the batting layer, and finally, the quilt top with the right side facing up. Carefully smooth out any wrinkles or folds in each layer to ensure a smooth surface.

Once aligned, baste the layers together using your preferred methods, such as safety pins, basting spray, or hand stitches. This step secures the layers, preventing them from shifting during quilting.

Quilting: With your quilt layers basted together, you’re ready to begin quilting! Choose a quilting method that complements your design, such as straight-line quilting for a clean, modern look or free-motion quilting for more intricate and personalized patterns.

Take your time to work evenly across the quilt, starting from the center and moving outward to avoid any puckering or uneven tension. Depending on the design, you should stitch in the ditch (along the seams) or create an all-over pattern that adds texture and visual interest.

7. Binding the Quilt

Trim Excess: Once the quilting is complete, trim the excess batting and backing fabric to match the edges of your quilt top. Use a rotary cutter and ruler to achieve straight, clean edges, ensuring the quilt’s perimeter is uniform.

Attach Binding: Attach the binding to the edges to finish your quilt. Binding seals the raw edges and adds a polished frame to your quilt! Start by sewing the binding to the front of the quilt, then fold it over to the back and hand-stitch or machine-stitch it in place. Take care to miter the corners for a clean, professional look.

8. Finishing Touches

Final Press: After attaching the binding, give your quilt a final press to smooth out any wrinkles and set the seams. Be sure to press both the front and back of the quilt, paying extra attention to the binding edges for a neat finish!

Creating a memory quilt is a heartfelt way to preserve and celebrate cherished moments through fabric. You can craft a beautiful quilt that tells a personal story by carefully selecting your materials, preparing your clothing, and following each step from layering to finishing.

For the perfect quilting machine to bring your projects to life, be sure to check out JUKIQuilting.com to find the right fit for your needs. Additionally, explore our JUKIHomeSewing YouTube page for inspiring projects and helpful tutorials. Take advantage of our detailed memory quilt project guide at this link to help you get started on your own special creation! Happy Sewing!