Know Your Quilt Terms!

This National Quilting Month, we want you ready to start your next project! One of the first things you should take a chance to learn are the quilting terms used in the community. Knowing your quilting terms will help you follow along to live projects and understand the instructions on your patterns better. To get you started, we’re going to cover 10 quilting terms every quilter should know! The next time you create, you’ll sound like a pro.

Quilting Terms

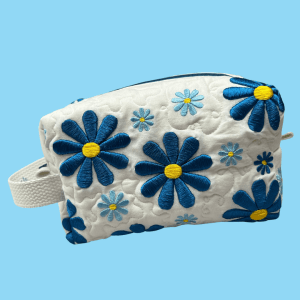
  1. Appliqué: Add motifs made of fabric by using your favorite machine! Add this to your base fabric by using a presser foot like our Applique Presser Foot or Open Toe Presser foot, which can help you accomplish this with ease.
  2. Backstitch: In this process, you’ll stitch over one or two stitches and secure them. You can use reverse stitching on your sewing machine and create projects like handbags, garments, and more with quality strength!
  3. Basting stitch: This step is done before your quilt layers are permanently joined! This stitch should look like a large, loose stitch that will hold together your layers of fabric and batting, allowing you to complete a clean-finished quilt.
  4. Batting: This material can be found between the quilt top and the quilt backing. Available in a variety of fiber contents, the purpose of batting is to help your quilt lay flat and display well on a bed, living room, or hanging on a wall!
  5. Binding: This step is the band of fabric that covers the raw outer edges of a quilt, creating a finished-looking project!
  6. Couching: This quilting process involves stitching thick threads, ribbons, beads, and other items to a surface for decorative purposes. Our JUKI Couching Foot is available in two size options, allowing you to use decorative pieces like yarn, thread, and more!
  7. Echo quilting: Create a fun look by stitching multiple lines that follow the outline of an appliqué or other design element, echoing its shape! We recommend using an Echo Quilting foot when you want to add this touch to your projects.
  8. Fat eighth: Perfect for quilting, a 1⁄8-yard fabric cut is cut crosswise from a 1⁄4-yard piece of fabric for a finished size of approximately 9×22″. Perfect for keeping your project designs versatile without needing to buy many different fabrics.
  9. Fat quarter: The 1⁄4-yard fabric cut is cut crosswise from a 1⁄2-yard piece of fabric for a finished size of approximately 18×22″. This set is also great for creating your quilt blocks and allows you to use a variety of fabric designs to create eccentric projects!
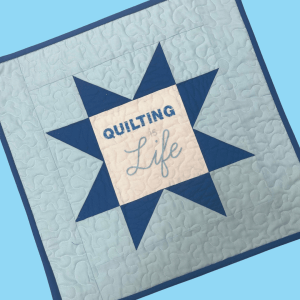
  10. Framed block: Create a framed block with fabric strips around it to give it the appearance of being framed. Use this technique when you want to unify blocks or adjust block sizes on your quilt.
  11. Free-motion quilting: This process of quilting is done with the feed dogs disengaged and using a free-motion presser foot so the quilt can be moved freely on the machine bed in any direction. There is a multitude of machines available that offer free-motion quilting, from semi-industrial to completely electronic, allowing you to find a machine model that works best for you! To see different machine options that offer free motion quilting, check out our site here.
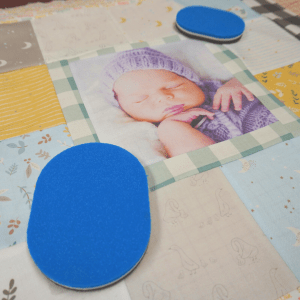
  12. Gathering stitch: This stitch is created with a long-running stitch that can be pulled to pucker up the fabric. Add this touch to your next quilt project by using a Gathering Foot, creating a fun and elegant look, perfect for a baby blanket project.
  13. In-the-ditch quilting: Define your quilt blocks and shapes by stitching in the seams on the quilt surface. Also called stitch-in-the-ditch quilting, it maintains those straight lines, and prevents distortion.
  14. Loft: This is the thickness of the batting, keep this in mind when you’re watching quilting live and they reference the project’s loft!
  15. Machine piecing: Piece your quilts together with a ¼” seam allowance while making your quilt top. The best way to create that seam is using a ¼” Presser foot, helping you keep that consistent stitch.
  16. Pivot: This process leaves the needle in your fabric when you raise the presser foot and allows you to turn the fabric when machine-piecing or machine-quilting. This process is useful when creating quilts, garments, handbags, and more!
  17. Quilt sandwich: When you hear someone reference a quilt sandwich, they’re talking about the three parts of a quilt! Layered together you’ll find the quilt top, batting, and backing. 
  18. Raw edge: This is an unfinished fabric edge on your projects. Some creators will use this as a decorative element on quilt tops, and others will complete the edge for a more finished look.
  19. Seam allowance: This is the distance between the fabric’s raw edge and the seam line. Typically the allowance is a ¼” space which can be done on your machine. You can keep that consistent stitch by using a ¼” Presser foot when you create.
  20. Stabilizer: Make sure to use this product beneath an appliqué foundation! This will help you eliminate puckers and pulling on the fabric when stitching your project on your machine. There are different options for stabilizers, and can be found as a tear-away (simply stitch and then tear the pieces outside of your stitching) or water-soluble (removed in the washing machine, or hand wash process) option for easy removal after stitching is complete!

Now that you know more about the basics of quilting vocabulary, you can join a quilting live, attend a quilting class or try creating alone at home with a better understanding of what you’re learning! We hope these definitions help you feel more comfortable the next time you’re creating a quilt project.

What quilting term have you recently learned? Let us know down below!

Happy National Quilting Month!

Join us this month as we celebrate National Quilting month with some of our favorite JUKI quilting machines. Whether you’re working in a studio, or on your kitchen table, we make sure to have what you need to start creating.

Check out this month’s top quilting machines and contact your local JUKI dealer here to learn more about our machine features and projects you can start creating today!

5 Ways to Personalize Your Projects

As creators, we love being inspired by other sewist and quilters, but how do we take their inspiration and personalize it? Today we will discuss five ways to personalize your sewing and quilting projects. From adding lettering to printing on designs, there are so many ways we can find a project and turn it into our style. So follow along and check out what machines and accessories we recommend for your personalization touches.

Adding Lettering

Whether you’re inspired to create a tote bag, or a sweater, adding lettering to your projects can be just the touch of personalization you need! Add your initials with your partners on a sleeve to create the perfect valentines gift, place your child’s name on their new school bag, or gift a quilt with a quote to your loved one using the lettering feature on your creations.

To add this personalization technique, you can use an electric computerized sewing machine that offers lettering, like the Kokochi DX-4000QVP! An electronic computerized sewing machine like the DX-4000QVP offers lettering stitch choices, ranging in different fonts, that will allow you to quickly and easily stitch in your child’s name, favorite quote, or number one sports team name!

Adding lettering is an easy way to personalize your next project and can be done with just a tap of your finger and a stitch!

Adding Embroidery Designs

Using a specialized embroidery machine, you can start adding your designs and bring texture to your projects by adding a touch of your personality! For example, add a cool design to sneakers, pet collars, or even a child’s teddy bear to create a project representing you or the gift receiver.

A machine like the JUKI/Tajima Sai 8 Needle Embroidery Machine is an example of a machine that can offer this feature! With 8 different color options, you can create beautiful flowers, animals, and a scenic view from your last hike. Art is limitless with what you can create on an embroidery machine. Adding embroidery can be an exciting art form when creating personalized projects!

Want to try your hand at embroidering and creating a makeup bag? Learn how to create this makeup bag with our JUKI Ambassador Nicole Moore here!

Designing Your Fabric

Have you found yourself wanting a specific fabric design? Been drawing some designs of your own? Then take the leap and design your own fabric! With a machine like a Direct-To-Garment printer, the options in patterns and designs for your projects are now endless, thanks to the ability to design your own fabrics right from your studio.

The RICOH Ri 100 can help you print your art designs and patterns onto fabric easily and quickly. From canvas fabrics for your tote bags to cotton for your memory quilts, enjoy the freedom of designing and creating anything for your imagination, and enjoy a material that no one else would have!

Try your hand at printing your own fabric with this east mini quilt project! Learn how to create your own with our JUKI Ambassador Nicole Moore here!

Adding in Photos

Whether it’s a family photo or a memory from your favorite trip with friends, adding a memory photo to a project like a t-shirt or a quilt is a great way to personalize your projects! Whether you’re embroidering designs with free motion quilting, using a Direct-To-Garment printer, or using an embroidery machine, there are limitless ways you can get to designing and including your photos in your projects.

Our favorite projects are memory quilts users create with photos! From sweet newborn gifts to anniversaries and holidays, a quilt created with personalized love is an excellent idea for your next gift project! Using a machine like our Direct-To-Garment printer, the RICOH Ri 100 can easily print and place your photos directly onto the fabric you’re creating, letting you put your focus on your quilt block designs.

Want to create your own memory quilt like the one shown for your loved one? Follow along here to learn more here!

Creating a Set

One of the best things about personalization is the freedom to be creative in what we embroider and print on. Personalize your next gift by creating a matching set! Whether it’s a set of make-up bags for traveling, or a matching set of t-shirts for the father and daughter duo, sets can be a fun gift that allows you to try different project ideas.

One of the best ways to create sets is to intermix your work! Print on your fabric, embroider your design and sew it all together to create something unique and different. Whether your project is small, like a glasses case, or large, like a king quilt, adding these touches of personalization will bring the whole idea together!

So the next time you create a project, add your name, embroider a design, or print on a pattern and show your personality when showing off your project!

Want to try your hand at creating a matching set? Check out our Daddy and Daughter duo set project here!

Want to personalize your next project? Then, visit us here today to find your nearest JUKI dealer!

JUKI Tip: Using The Micro-Lift on the TL Series

For this month’s JUKI Tip, we’re focusing on the micro-lifter feature that can be found on your TL series machines! Now, a common question we get is, “what is different about the Micro-lift feature from the presser foot pressure?” To show the difference, we’re going to use the TL-18QVP because it has two different locations for each feature.

Now the presser foot pressure, as it sounds, is the amount of pressure the foot puts on the fabric you’re sewing. For example, if you’re moving your project, the presser foot pressure is what will help you keep that nice straight seam. With the Micro-lift feature, your presser foot pressure will stay the same, but the height of the foot will change. Raised above the feed dogs, your foot will now have space to create using multiple layers of fabric, thick fabrics, complete binding easier, work on handbags, and so much more.

Our favorite part is not needing to adjust the presser foot pressure as often when using the Micro-lift feature, helping your project process become more simple.

As you watch the video, you’ll be able to follow along as our National Account Trainer Alba demonstrates how the Micro-lift feature looks when in use, and how easily the fabric you’re working on will go through. From 8 layers of denim to 15 layers of denim, you’re able to see how the fabric smoothly glides through; the needle easily sewing through the material.

We hope this video encourages you to try your hand at the Micro-lift feature on your machine and that it helps you create beautiful projects with quality style! What JUKI Tip are you hoping to see next? Let us know in the comments below!

JUKI Project: Valentine’s Day Printed Top

Join us for this month’s project as we create a printed fabric valentines top using the RICOH Ri 100, with a touch of texture thanks to the TAJIMA Sai 8-needle embroidery machine! For this project, our JUKI National Account Kelly will show us how she used the RICOH Ri 100 to personalize her top and make a love-filled gift!

With the direct-to-garment printer (RICOH Ri 100), you can complete a multitude of projects! From designing your own fabric, like you’ll see done in this project video, to placing images on already constructed bags and home décor, a machine like this will help you personalize your next dream project.

The first step when using a RICOH Ri 100 to print on your fabric is to cut out the blouse pattern from the fabric of your choosing. The reason we want to cut the pattern out first before printing on our fabric is so we can precisely place our designs, save ink, and save fabric!

Now that your pieces are all cut out let’s move on to the RICOH Ri 100 designer app that can be installed onto your laptops and computers. Depending on your material and project choice, you’ll set up the RICOH to understand the dimensions and print type you need before moving on to designing. In our project today, we’ll be choosing t-shirts and thin material since we’re working on a Knit jersey material. Keep in mind what tray you’ll be using because the program will ask!

Next is placing and choosing your designs. The best thing about printing is the ability to place almost any design on your material. In today’s project, we’ll be installing our own graphics, but keep in mind the selection of designs offered on the RICOH Ri program when first starting out. Place the designs as you’d like to see them printed. What you see on the screen is what you’ll see printed!

Once you’ve finished your design, you’ll pre-iron your fabric and then place it into the direct-to-garment printer. The time process depends on your designs; the more intricate and colorful, the more time for printing! Once your designs have been printed onto the fabric, go ahead and place your tray in the heater for finishing.

Having our completed fabric, we can now begin constructing our project and creating the blouse! Sewn on our MO-2000QVP and DX-4000QVP, Kelly puts together her pattern pieces to complete a beautiful Valentine’s blouse!

Lastly, if you’d like to add a special touch of personalization, we follow Kelly as she moves over to the JUKI TAJIMA Sai! This is our 8-needle embroidery machine which allows you to embroider a multitude of projects, including shoes, sweaters, hats, and so much more. To start off using the TAJIMA Sai, we’ll use the Writer Plus software that includes designs to choose from, as well as the ability to upload your own, like the RICOH Ri 100.

Like the RICOH Ri 100 software, you’ll choose your project type, material type, and segments that focus on how your stitching will look. If you choose to add embroidery, make sure to do this before constructing your project on the sewing machines.

Once you’ve completed your steps, you’re ready for a night out with your loved one in this cute blouse! We hope you enjoyed learning more about the RICOH Ri 100, and we hope this inspires you to begin making your own fabric and going the extra mile with personalization!