Welcome to our guide on sewing for warm weather and beating the heat! As summer’s golden rays bring us outdoors, it’s time to embrace the season with a wardrobe that’s both stylish and comfortable. Crafting garments for warmer temperatures requires more than just selecting the right fabrics. From ensuring breathability to incorporating clever ventilation features, mastering the art of summer sewing is essential for staying cool and chic in the heat.
In this blog, we’ll dive into practical tips and techniques to help you conquer the challenges of sewing for warm weather. Whether you’re a seasoned seamstress or just starting your sewing journey, our expert advice will equip you with the knowledge and skills needed to create lightweight, breezy garments that keep you feeling fresh and fabulous all summer long! So, grab your sewing machine, stock up on breathable fabrics, and let’s beat the heat together with style and flair!
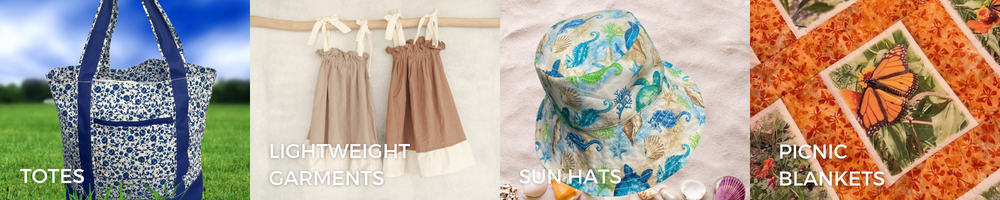
Choose the Right Fabrics
Choosing the right fabrics is paramount when creating summer wardrobes that keep you feeling fresh and comfortable. In the scorching heat of summer, breathability is vital to ensuring your garments remain airy and cool, allowing for ample air circulation to prevent overheating. Lightweight materials such as cotton, linen, rayon, and lightweight knits emerge as the champions of summer sewing, offering a perfect blend of style and functionality. Here are four fabulous fabrics perfect for warm-weather garments:
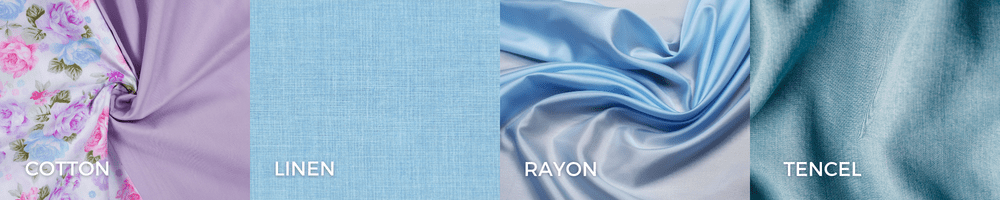
- Cotton: A timeless favorite, cotton is celebrated for its softness, breathability, and moisture-wicking properties. This natural fiber circulates air freely, keeping you cool and comfortable even on hot days. Whether you’re sewing breezy tops, lightweight dresses, or casual shorts, cotton is a versatile choice that never disappoints.
- Linen: With its crisp texture and excellent breathability, linen is a staple fabric for summer attire. Known for its ability to absorb moisture and quickly release it into the air, linen keeps you cool and dry in humid conditions. From airy shirts to relaxed trousers, linen garments exude laid-back elegance perfect for warm-weather days.
- Rayon: A synthetic fiber made from natural cellulose, rayon combines the luxurious feel of silk with the practicality of cotton. This lightweight and breathable fabric drapes beautifully, making it ideal for flowy dresses, blouses, and skirts. Rayon’s moisture-absorbing properties ensure you stay comfortable and stylish throughout summer.
- Tencel (Lyocell): Made from sustainably sourced wood pulp, Tencel is an eco-friendly fabric renowned for its softness, breathability, and moisture-wicking abilities. With its smooth and silky texture, Tencel drapes elegantly and feels cool against the skin, making it perfect for creating chic summer ensembles. Whether you’re sewing relaxed jumpsuits, airy blouses, or lightweight trousers, Tencel is a luxurious yet practical choice for warm-weather garments.
Use Lightweight Interfacing
When sewing summer garments, it’s essential to use lightweight interfacing to maintain the drape and breathability of the fabric. JUKI sewing machines offer a range of options for applying interfacing with precision and ease, ensuring that your garments retain their lightweight feel while still providing the necessary structure and support. When it comes to interfacing options for summer garments, we recommend the following lightweight choices:
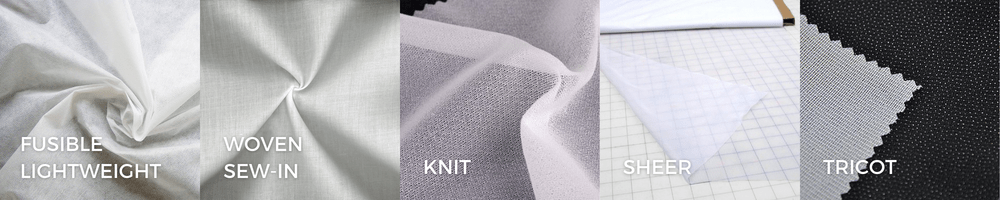
- Fusible Lightweight Interfacing: Ideal for a wide range of lightweight fabrics, fusible interfacing offers ease of application and a seamless finish. Look for options labeled as “lightweight” to ensure that your fabrics retain their natural drape and breathability.
- Woven Sew-In Interfacing: Woven sew-in interfacing provides stability and support without adding bulk to your garments. This option is particularly suitable for fabrics that may not be compatible with fusible interfacing, such as delicate silks or sheer fabrics.
- Knit Interfacing: Perfect for stretch fabrics like lightweight knits or jerseys, knit interfacing offers flexibility and ease of movement while providing the necessary structure. Choose a lightweight knit interfacing to maintain the fluidity of your fabrics and ensure a comfortable fit.
- Sheer Interfacing: For fabrics that require minimal support, such as chiffon or organza, sheer interfacing offers subtle reinforcement without altering the fabric’s texture or transparency. This option is ideal for maintaining the delicate look and feel of sheer fabrics while adding a touch of stability.
- Tricot Interfacing: Tricot interfacing is a lightweight option that provides stability without adding stiffness to your garments. This versatile choice works well for lightweight fabrics and offers excellent drape and breathability.
These interfacing options are compatible with JUKI sewing machines and can be applied precisely and easily, ensuring that your summer garments retain their lightweight feel and effortless charm. Experiment with different types of interfacing to find the perfect match for your fabrics and sewing projects, and enjoy professional results with every stitch.
Adjust Patterns for Better Airflow

In creating summer garments that prioritize comfort and breathability, adjusting patterns to enhance airflow and ventilation becomes paramount. By making strategic modifications to your sewing patterns, you can optimize the design of your garments to ensure optimal air circulation, keeping you cool and comfortable even on the hottest days.
Consider incorporating features such as princess seams, which add shaping and structure to your garments and create natural channels for air to flow through. Additionally, open-back designs offer a stylish and practical solution for maximizing ventilation, allowing air to circulate freely and preventing overheating in warm weather. Another option is to add side slits, which not only add visual interest to your garments but also provide additional room for movement and airflow.
With the precision and versatility of JUKI sewing machines, customizing your patterns to suit your individual style and comfort needs is a breeze. Whether adjusting seam allowances, creating new pattern pieces, or experimenting with innovative design elements, JUKI machines offer the precision and reliability needed to bring your creative vision to life.
Focus on Seam Finishes
Paying attention to seam finishes is important when creating summer garments that are both comfortable and stylish. Seam finishes contribute to the overall aesthetic appeal of your garments and play a crucial role in ensuring comfort against the skin. Opting for lightweight and breathable seam finishes is essential for minimizing bulk and irritation, allowing you to enjoy wearing your creations with ease.
Consider incorporating seam finishes such as French seams, flat-felled seams, or serged edges into your summer garments. With their enclosed edges, French seams provide a neat and polished finish that eliminates the need for additional seam allowances, making them ideal for lightweight fabrics. Flat-felled seams, commonly found in denim garments, offer durability and strength while reducing bulk, ensuring a comfortable fit. Serged edges, created with an overlock stitch, offer a clean and professional finish that prevents fraying and adds a touch of refinement to your garments.
With the precision and speed of JUKI sewing machines, achieving clean and professional seam finishes is a breeze. Whether you’re stitching delicate fabrics or heavyweight materials, JUKI sewing machines offer unparalleled accuracy and control, allowing you to easily achieve flawless results. With JUKI by your side, you can focus on enjoying your summer wardrobe to the fullest, knowing that your garments are stylish and impeccably finished for maximum comfort and wearability!
Sewing summer garments doesn’t have to be a sweat-inducing endeavor. Following these practical tips and techniques, you can beat the heat and create stylish and comfortable attire perfect for the warmer months! So, grab your fabrics, fire up your JUKI sewing machine, and get ready to sew through summer in style! Whether you’re whipping up lightweight tops, flowy dresses, or breathable jackets, these tips will help you stay cool and comfortable all season long.