Sun, Sew, and Sell with JUKI

Summer is the perfect time to get creative and craft beautiful projects that capture the season’s spirit. Whether you’re making lightweight garments, colorful accessories, or home decor items, there’s no shortage of inspiration for your sewing projects. And if you’re looking to turn your passion for sewing into a small business venture, selling your creations at your local market can be a rewarding experience. In this blog, we’ll explore some fun summer sewing projects and offer tips on how to sell them at your local market.

Summer Sewing Project Ideas

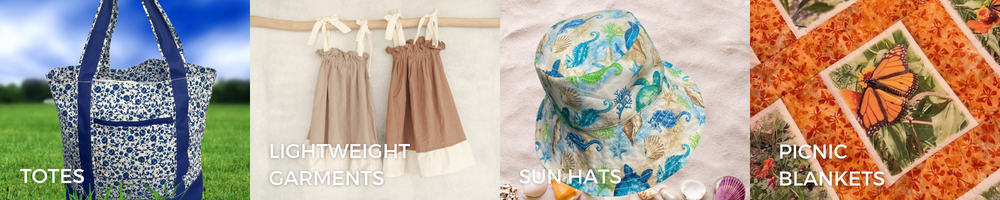
  1. Beach Bags and Totes: Create stylish and functional beach bags and totes using bright, durable fabrics. Add features like pockets, waterproof linings, and sturdy straps to make them perfect for carrying beach essentials.
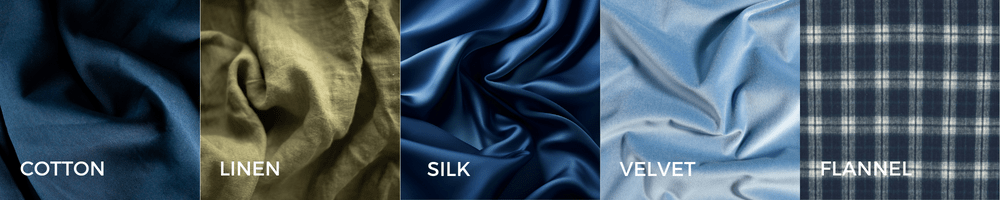
  2. Lightweight Garments: Sew breezy summer garments like sundresses, skirts, and lightweight tops. Choose fabrics like cotton, linen, and rayon in vibrant colors and fun patterns to create comfortable and stylish pieces for warm weather.
  3. Sun Hats and Visors: Protect yourself from the sun in style with handmade sun hats and visors. Experiment with different brim widths, fabrics, and embellishments to create unique designs that keep you cool and shaded.
  4. Picnic Blankets and Outdoor Cushions: Sew picnic blankets and outdoor cushions to add comfort and style to your outdoor gatherings. Use waterproof fabrics for durability, and consider adding handles or straps for easy transport.
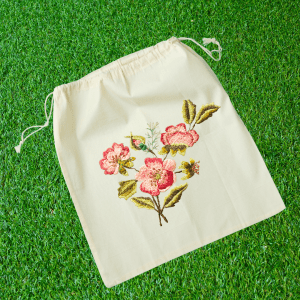
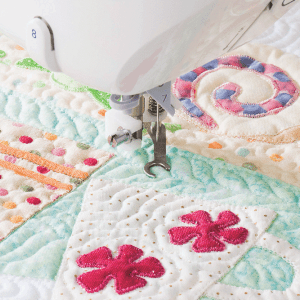
  5. Embroidered Accessories: Add a personal touch to accessories like tote bags, hats, and scarves with embroidered designs. Create intricate patterns inspired by summer themes like flowers, fruits, and beach scenes.

Tips for Selling at Your Local Market

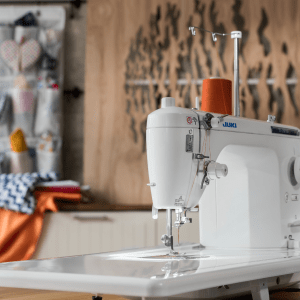
  1. Research Your Market: Before selling at your local market, take the time to visit and observe. Pay attention to the types of products being sold, the pricing, and the overall atmosphere. Understanding your local market will help you better tailor your products and approach to meet your customers’ needs and preferences. Plus, with the reliability and versatility of JUKI sewing machines, you can confidently create a wide range of products to suit your market’s demands.
  2. Create a Cohesive Brand: Develop a strong brand identity that differentiates you from other vendors. Your brand should reflect your style, values, and the quality of your products. With JUKI sewing machines and accessories, you can ensure that your products are crafted with precision and care, reinforcing your brand’s reputation for excellence.
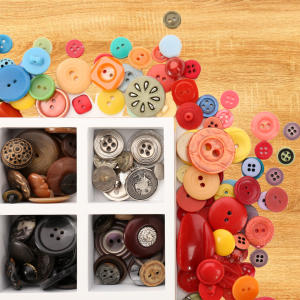
    • Use High-Quality Materials: Invest in quality fabrics and notions to create durable and attractive products.
    • Highlight JUKI’s Precision: In your branding materials, emphasize the precision and reliability of JUKI sewing machines to instill confidence in your customers.
  3. Set Up an Eye-Catching Display: Your display should attract attention and make it easy for customers to browse your products. Utilize tables, shelves, and racks to showcase your items effectively.
    • Showcase Your Craftsmanship: Display finished products prominently to showcase your skills and the quality of your work.
    • Interactive Demonstrations: Use your JUKI sewing machine to offer live demonstrations of your sewing process, engaging customers and showcasing the capabilities of your equipment!
  4. Price Your Products Appropriately: Determine the pricing for your products by considering factors such as material costs, labor, and market demand. With JUKI sewing machines, you can efficiently produce high-quality items, allowing you to offer competitive prices while still maintaining a healthy profit margin.
    • Offer Value: Highlight the value of your handmade products compared to mass-produced alternatives.
    • Special Promotions: Consider offering special promotions or discounts to attract customers and encourage sales.
  5. Engage with Customers: Interact with customers in a friendly and approachable manner. Be prepared to answer questions about your products, materials, and techniques.
    • Provide Personalized Recommendations: Offer personalized recommendations based on customers’ preferences and needs.
  6. Promote Your Presence: Utilize various marketing channels to promote your presence in the market and attract customers to your booth.
    • Social Media: Use platforms like Instagram and Facebook to showcase your products and announce market attendance.
    • Email Newsletter: Send out email newsletters to your subscribers with information about your upcoming market appearances.
    • Word of Mouth: Encourage satisfied customers to spread the word about your products and market presence.
  7. Collect Feedback and Adjust: Listen to customer feedback and use it to improve your products and sales strategy.
    • Feedback Forms: Provide feedback forms for customers to share their thoughts and suggestions.
    • Continuous Improvement: Regularly evaluate your products and processes to identify areas for improvement and innovation.

With these tips and the support of JUKI sewing machines and accessories, you can confidently sell your handmade summer creations at your local market, delighting customers with your quality craftsmanship and creativity.

Sewing and selling summer projects at your local market can be a fulfilling and profitable endeavor. Creating high-quality, appealing products and following these tips for selling at your local market can turn your sewing hobby into a successful business venture.

So get sewing, start selling, and enjoy the excitement of sharing your creations with others in your community!

Crafty Ideas for Crafty Kids with JUKI

Sewing isn’t just for grown-ups who stitch elegant dresses or fix up old clothes; it’s a world of creativity waiting for our pint-sized pals to explore! From banners that jazz up their rooms to coin purses and drawstring bags that become their new favorite accessories, let’s embark on a fun-filled journey through the world of kid-friendly stitch adventures.

A Banner for Everything

Decorating a child’s room with a homemade banner is a delightful and personal touch that can brighten up any space. This project is a great opportunity to introduce your child to the world of sewing and encourage creativity and self-expression. Here’s how you can help your child create a beautiful banner for their room using the best fabrics and personalizing it with decorative stitching.

Materials and Fabrics

  • Fabrics: Choose colorful, soft, and durable fabrics such as cotton or linen. These materials are easy to work with and provide a vibrant backdrop for your banner. You can mix and match patterns and colors for a whimsical look.
  • Thread: Opt for high-quality thread that matches your fabric choices. This will ensure your stitches are strong and blend seamlessly with your banner design.
  • Banner Template: You can create a simple triangular or rectangular template for your banner. Consider making it longer to accommodate more letters or designs.
  • String or Ribbon: This will be used to hang your banner. Choose a color that complements your fabrics.
  • Decorative Touches: If you can access a TAJIMA Sai Embroidery machine or a RICOH Ri 100 Direct to Garment print machine, you can add personalized designs and patterns to your banner.

Steps to Create Your Banner

  1. Cut the Fabric: Cut out your banner shapes from your chosen fabrics using your template. If you’re making a name or word banner, cut out as many shapes as you need letters.
  2. Personalize with Decorative Touches: Now comes the fun part! Use the TAJIMA Sai Embroidery machine or the RICOH Ri 100 Direct to Garment print machine to add personalized designs, names, or words to your banner. Experiment with different colors and patterns to make it unique.
  3. Sew the Shapes: Once your shapes are personalized, fold the top edge of each shape over your string or ribbon and sew it down. This will create a loop for hanging.
  4. Arrange and Hang: Arrange the shapes on your string or ribbon as desired. You can evenly space them or create a more random pattern. Once you’re happy with the arrangement, tie the ends of the string to create your hanging loop.
  5. Display Your Creation: Hang your banner on the wall or across a window in your child’s room. Watch as it adds a pop of color and a touch of personality to the space!

Lanyards: Keep Those Small Items Close!

Creating personalized lanyards is a fun and practical sewing project kids enjoy making and using. Lanyards are versatile and can hold keys, ID cards, or other small items. They also make great gifts for friends and family. Here’s how to create a customized lanyard with your child using the best fabrics and decorative stitching techniques.

Materials and Fabrics

  • Fabrics: Choose soft and durable fabrics like cotton, nylon, or polyester. These materials are comfortable to wear around the neck and withstand daily use.
  • Thread: Select a high-quality thread that complements your fabric choices. It should be strong enough to withstand regular wear and tear.
  • Hardware: To attach items to the lanyard, you’ll need lanyard hardware such as swivel hooks or keyring clips.
  • Decorative Touches: Utilize a TAJIMA Sai Embroidery machine or the RICOH Ri 100 Direct to Garment print machine to personalize your lanyard with decorative designs, patterns, or even your child’s name.

Steps to Create Your Lanyard

  1. Cut the Fabric: Cut a strip of fabric about 1-2 inches wide and long enough to comfortably wrap around your child’s neck. Fold the strip half lengthwise and press it to create a clean line.
  2. Sew the Edges: Sew along the open edge of the fabric strip to create a tube. Turn the tube right-side out so that the seam is on the inside.
  3. Personalize with Decorative Stitching: Using your embroidery or direct-to-garment print machine, add personalized designs to your lanyard. Embroider your child’s name and initials, or print fun patterns onto the fabric.
  4. Attach Hardware: Fold the lanyard in half, joining the two ends together. Insert a swivel hook or keyring clip into the loop and sew the ends together securely.
  5. Add Final Touches: Check your lanyard for any loose threads and trim them. Make sure the stitching is secure, and the hardware is firmly attached.
  6. Test and Use: Once the lanyard is complete, test it by pulling gently on the hardware and the fabric. If everything is secure, your child can use their new lanyard immediately!

A T-Shirt Design For Everyone

Creating personalized shirts using the RICOH Ri 100 Direct-to-Garment (DTG) printer is an engaging and creative project for kids. This method lets you print intricate designs directly onto the fabric, making it an excellent choice for designing custom T-shirts with your child. You can create unique DTG shirts using the RICOH Ri 100.

Materials and Tools

  • Shirts: Choose high-quality blank shirts in light colors and their sizes. Cotton shirts work best for DTG printing as they hold color well.
  • Designs: Use digital software to work with your child to create unique designs! Consider incorporating their drawings, favorite characters, or abstract patterns. You can even print photos from memories they love.
  • RICOH Ri 100 DTG Printer: This machine lets you print your designs directly onto the shirts.

Steps to Create Your DTG Shirts

  1. Design Creation: Work with your child to create or select digital shirt designs. You can use graphic design software or draw and scan designs for printing.
  2. Pre-heat: Make sure to pre-heat your blank t-shirt in the RI 100 Heat Press before starting printing!
  3. Load the Shirt: Place the shirt onto the printer’s plate, ensuring it is smooth and free of wrinkles. Position it correctly so the design will print in the desired location.
  4. Print the Design: Transfer the digital design to the RICOH Ri 100 DTG printer. Follow the printer’s instructions to print the design onto the shirt. This process may take a few minutes, depending on the complexity of the design.
  5. Cure the Ink: Once the design is printed, cure the ink using the heat press on the RICOH Ri 100. This step ensures the ink sets appropriately and is safe for washing.
  6. Enjoy Your Creation: The finished shirt is now ready to wear! Your child will love showing off their personalized creation and can even make matching shirts for friends and family.

Drawstring Bag for All Necessities!

Creating a drawstring bag is a simple and fun sewing project for kids. These bags are versatile and can hold toys, books, or other small items. They also make great gifts for friends and family. Here’s how you can create a personalized drawstring bag with your child.

Materials and Fabrics

  • Fabrics: Choose lightweight, durable fabrics such as cotton, linen, or canvas. These materials work well for drawstring bags and are easy for kids to handle.
  • Thread: Select a high-quality thread that complements your fabric choice. Choose colors that match your fabric or contrast for a fun look.
  • Drawstrings: You can use ribbons, cords, or fabric strips for the drawstring. Choose a color that complements your fabric.
  • Decorative Stitching: Personalize the bag with decorative stitching or embroidery using a sewing machine or hand.

Steps to Create Your Drawstring Bag

  1. Cut the Fabric: Cut two identical rectangles of fabric to the desired size for your drawstring bag. Make sure to leave enough space for the drawstring casing at the top.
  2. Sew the Bag: Place the fabric rectangles together, right sides facing each other. Sew along the sides and bottom of the bag, leaving the top open. Turn the bag right side out.
  3. Create the Drawstring Casing: Fold the top edge of the bag down about 1 inch to create a casing for the drawstring. Sew along the edge, leaving a small opening on one side for the drawstring to pass through.
  4. Add Decorative Stitching: Personalize the bag with decorative stitching or embroidery. You can add your child’s name, initials, or a fun design to make the bag unique.
  5. Thread the Drawstrings: Cut two lengths of drawstring cord, ribbon, or fabric strip. Thread one through the casing, starting from one end and returning to the same end. Repeat with the other drawstring on the opposite side.
  6. Tie the Drawstrings: Tie the ends of each drawstring together to prevent them from slipping out of the casing.
  7. Enjoy Your Creation: Your drawstring bag is now complete! Your child can use it to carry toys, books, or other small items or give it as a thoughtful gift.

Keep Your Coins Safe!

Creating a homemade coin purse is a delightful sewing project that kids will enjoy making and using. Coin purses are small, convenient, and practical, perfect for carrying coins and other small items. Here’s how you can create a personalized coin purse with your child.

Materials and Tools

  • Fabric: Choose a sturdy fabric like cotton, canvas, or denim for the exterior and a softer fabric like cotton or polyester for the lining.
  • Thread: Select a high-quality thread that matches your fabric choices for a cohesive look.
  • Zipper or Snap Closure: For your coin purse, choose a small zipper or snap closure. Match the color to your fabric, or choose a contrasting color for a fun look.
  • Decorative Stitching: Personalize the coin purse with decorative stitching or embroidery using your JUKI machine’s decorative stitches or the TAJIMA Sai Embroidery machine.

Steps to Create Your Coin Purse

  1. Cut the Fabric: Cut two rectangles of fabric for the exterior and two rectangles for the lining. The size of the rectangles depends on how large you want the coin purse to be.
  2. Prepare the Zipper: If you use a zipper, pin it to the top edges of the exterior fabric pieces, with the right sides facing each other. Sew along the edge to attach the zipper.
  3. Sew the Lining: Place the lining fabric pieces on the right sides together and sew along the edges, leaving the top open.
  4. Combine Exterior and Lining: Place the lining inside the exterior fabric (with the zipper already attached) so that the right sides of the lining and exterior fabric face each other. Sew along the top edges, attaching the lining to the exterior.
  5. Turn the Purse Right Side Out: Turn the purse right through the open zipper or snap closure. This will bring the lining inside the purse and the zipper or snap closure to the outside.
  6. Add Decorative Stitching: Personalize the exterior of the coin purse with decorative stitching or embroidery. Add your child’s initials, favorite patterns, or other designs for a unique touch.
  7. Finish the Purse: Check the coin purse for loose threads or unfinished seams. Trim any excess threads and press the fabric if needed.
  8. Test and Use: Once the purse is complete, test the zipper or snap closure to ensure it works properly. Your child can start using their new coin purse right away!

But why should kids have all the fun? Sewing together can be a fantastic bonding activity for parents and kids. It’s a chance to share skills, stories, and laughter while creating something unique. Plus, it’s an excellent way for kids to learn patience, perseverance, and the joy of accomplishment as they complete each project.

Sewing isn’t just about the end result; it’s about the journey – the laughter when the thread tangles, the high-fives when a seam turns out just right, and the proud smiles when they show off their handmade creations. It’s a skill that nurtures their creativity and problem-solving abilities while having an absolute blast.

So, to all the parents, guardians, and adventurous kids out there, grab those colorful threads,

pick out some vibrant fabrics, and dive into the world of kid-friendly stitch adventures! From banners that light up rooms to lanyards bursting with personality, from personalized shirts to handy drawstring bags and adorable coin purses, the sewing world is yours to explore. Get ready to stitch up a storm of fun and practical projects, and remember, the only limit is your imagination! Top of Form

Bottom of Form

Sewing Storage Made Simple with JUKI

For passionate sewists and crafters, sewing machines, fabrics, and accessories are prized possessions. Whether you sew occasionally or every day, proper storage is essential to protect your investments and ensure they remain in optimal condition. In this guide, we’ll explore the best practices for storing your sewing machines, fabrics, and accessories to keep them safe and well-maintained.

Sewing Machine Storage:

Your sewing machine is the heart of your craft, so safeguarding it is crucial. Here are some detailed tips for storing your sewing machine effectively:

a. Clean Before Storage: Before stowing away your machine, thoroughly clean it. Start by removing any visible lint, dust, and debris from the bobbin case, feed dogs, needle plate, and other parts using a soft brush or lint roller. You can check out our blog on machine maintenance here.

b. Cover It Up: Use your JUKI machine cover, invest in a dedicated sewing machine cover, or use a soft, breathable fabric to shield your machine from dust and sunlight. Ensure the cover fits snugly but is not too tight, allowing for adequate airflow. Avoid plastic covers, which can trap moisture and create a breeding ground for mold and mildew.

c. Store in a Cool, Dry Place: Choose a storage location away from direct sunlight, heat sources, and areas prone to humidity for your sewing machine. Extreme temperatures or moisture exposure can damage delicate components such as electronics, motors, and metal parts. Consider storing your machine in a climate-controlled room or closet to maintain stable environmental conditions.

d. Proper Positioning: When storing your sewing machine, ensure it is placed in a flat, stable position to prevent it from tipping over or being knocked around. If your machine comes with an original case or storage container, utilize it for added protection during storage. Alternatively, opt for a sturdy storage box or cabinet that provides ample cushioning and support for your machine.

By following these guidelines, you can ensure that your sewing machine remains in optimal condition between uses, ready to bring your creative visions to life whenever inspiration strikes.

Fabric Storage:

Fabrics come in various textures, weights, and fibers, making proper storage essential for preserving their quality and longevity. Here’s an in-depth look at how to store your fabrics effectively:

a. Fold, Don’t Hang: Resist the temptation to hang your fabrics, as this can cause them to stretch out of shape over time. Instead, opt for folding to maintain their integrity. Neatly fold fabrics and store them vertically on shelves, bins, or drawers. This method not only saves space but also prevents creases and wrinkles.

b. Protect from Light: Sunlight can be detrimental to fabrics, causing colors to fade and fibers to weaken over time. Store your fabrics in a dark or dimly lit area to shield them from harmful UV rays. Consider using opaque storage containers or covering windows with curtains or blinds to minimize exposure to sunlight.

c. Use Acid-Free Storage Containers: Acidic materials can accelerate the deterioration of fabrics, leading to discoloration and weakening of fibers. To safeguard your fabrics, opt for acid-free cardboard boxes or plastic bins for storage. These containers are specifically designed to maintain a neutral pH level, ensuring that your fabrics remain pristine for years to come.

d. Maintain Air Circulation: Adequate airflow prevents musty odors and mildew growth in stored fabrics. Avoid tightly packing fabrics together, which can restrict ventilation and create a breeding ground for moisture. Instead, allow some space between fabric stacks to promote air circulation. Consider using breathable storage bags or containers with ventilation holes to enhance airflow further.

With these tips, you can ensure that your fabric collection remains impeccable and ready to inspire your next sewing project with its vibrant colors and luxurious textures!

Accessory Storage:

Sewing accessories such as needles, threads, scissors, and rulers are indispensable tools for any sewing enthusiast. To ensure they remain organized and safe, we recommend these guidelines for storage:

a. Organize by Category: Start by categorizing your sewing accessories into needles, threads, zippers, buttons, and other miscellaneous items. Use clear bins, drawer dividers, or labeled containers to keep each category separate and easily identifiable. This organization system not only saves time but also prevents clutter and frustration when searching for specific items.

b. Keep Sharp Objects Secure: Sharp tools like scissors, rotary cutters, and pins pose a safety hazard if unprotected. Store these items in dedicated storage containers or pouches with secure closures to prevent accidental injuries. Consider using magnetic strips or pin cushions to keep needles and pins within easy reach while minimizing the risk of pricks.

c. Moisture Control: Moisture can wreak havoc on sewing accessories, leading to rust and deterioration, especially for metal tools. Protect your accessories by storing them in a dry environment away from sources of moisture. Add silica gel packets to storage containers to absorb excess humidity and maintain optimal conditions. Additionally, periodically inspect your storage area for signs of moisture buildup and address any issues promptly.

d. Regular Maintenance: Like your sewing machine, sewing accessories require regular maintenance to ensure optimal performance and longevity. Periodically inspect your accessories for signs of wear, damage, or corrosion. Replace worn-out needles, sharpen dull scissors, and discard any damaged items to prevent accidents during use. Additionally, clean your accessories regularly to remove lint, dust, and debris buildup, ensuring they remain in top condition for your next sewing project.

By implementing these comprehensive storage and maintenance practices, you can keep your sewing accessories organized, safe, and ready for use whenever inspiration strikes. Happy sewing!

Don’t Miss JUKI’s Summer Sale!

Summer is here, and so is JUKI’s most anticipated event of the year! For the entire month of June, sewing enthusiasts can revel in incredible deals as JUKI dealers nationwide roll out an array of top-tier machines at unbeatable prices. Whether you’re a seasoned quilter, a passionate home sewer, or just starting your crafting journey, this is the perfect opportunity to upgrade your equipment and bring your creative visions to life.

Stay tuned as we guide you through the highlights of JUKI’s Big Summer Sale, featuring exclusive discounts on a wide range of sewing, quilting, and embroidery machines. Don’t miss out on the chance to elevate your sewing experience with the quality and innovation JUKI is renowned for, all at a fraction of the cost. Ready to stitch your way into summer savings? Let’s dive in!

Investing in the Miyabi J-350QVP means embracing a world of creative possibilities and enjoying a quilting experience like no other. For avid quilters, the J-350QVP offers unmatched precision and ease of use, making it perfect for bringing intricate designs to life. The JUKI Smart Stitch Stitch Regulator system alone is a game-changer, providing peace of mind with every stitch, allowing quilters to focus more on their artistry rather than machine adjustments. This feature is particularly beneficial for those who love free-motion quilting, as it ensures consistent stitch quality regardless of speed or direction changes.

You can also enjoy the convenience of automatic thread trimmers and its user-friendly color touch LCD screen which adds significant joy to the quilting process! The ease of navigating through different settings and stitch options means less time spent troubleshooting and more time creating. Quilters will appreciate the expansive workspace, which seamlessly accommodates larger projects, making it ideal for creating bed-sized or detailed art quilts. With the Miyabi J-350QVP, every quilting session becomes an enjoyable, efficient, and highly rewarding experience, encouraging creativity and innovation in every stitch!

Choosing the MO-3000QVP means embracing a new level of efficiency and enjoyment in your sewing projects. For those who often work with a variety of fabrics, the easy air threading system is a game-changer, eliminating the frustration of manually threading the loopers and allowing you to switch between projects quickly and effortlessly! This feature alone can save you significant time and hassle, making your sewing sessions more productive and enjoyable.

The MO-3000QVP’s also comes with a chain thread cutter and micro-lift function, offering precise control and clean, professional finishes on every project. You can craft garments with intricate seams, work on home décor items that require durable edges, or create delicate rolled hems; this serger provides the versatility and reliability to handle it all. The machine’s advanced features simplify complex tasks, making it ideal for both beginners looking to expand their skills and experienced sewers seeking to streamline their workflow. With the MO-3000QVP, you’ll find more joy in the creative process, knowing you have a high-quality, user-friendly tool to bring your sewing visions to life!

The MO-2000QVP is another stellar addition to JUKI’s line of serger machines, designed to simplify and elevate your sewing projects. One of its standout features is the easy air threading system, which utilizes a powerful jet-air mechanism to thread the loopers effortlessly. With just the push of a button, you can say goodbye to the frustration of manual threading, making setup fast and hassle-free. Additionally, the MO-2000QVP offers a variety of features aimed at enhancing your sewing experience. Its user-friendly design includes a large, brightly lit workspace, making it easier to see your work and ensure precision.

The machine also provides a range of stitch options and adjustable settings, allowing you to tackle different fabrics and techniques with ease. Whether you’re creating clothing, home décor, or craft projects, the MO-2000QVP delivers consistent, professional results, making it an invaluable tool for both novice and experienced sewers.

The HZL-NX7 is the ultimate tool for enhancing your sewing, quilting, or crafting endeavors. Its intuitive color touch panel simplifies selecting and adjusting stitch patterns, streamlining your workflow for both beginners and seasoned sewers alike. With a generous 12″ throat space, quilters can effortlessly handle large projects without constant repositioning, while the JUKI Smart Feed system ensures smooth and even fabric feeding, even with multiple layers, preventing common issues like shifting or puckering.

Moreover, the HZL-NX7’s digital tension control guarantees impeccable stitches, eliminating guesswork and manual adjustments for professional-quality results every time. With the HZL-NX7, sewing becomes not just a task, but a joyous expression of creativity, allowing you to focus more on your projects and less on technical challenges.

The DX-4000QVP redefines sewing excellence with its 7″ color touch panel and expansive 12″ throat space, offering unmatched versatility and convenience for projects of all sizes. Seamlessly integrating the JUKI Smart Feed system and Bobbin Sensor, this machine ensures precise stitching and uninterrupted workflow, catering to quilters, fashion enthusiasts, and home décor lovers alike. During our summer sale, acquiring the DX-4000QVP secures exceptional value and unlocks a world of creative possibilities at an unbeatable price!

From intricate quilts to tailored garments, the DX-4000QVP empowers creativity with unparalleled precision and ease. Don’t miss this chance to elevate your sewing experience and explore new horizons this summer with the DX-4000QVP!

The DX-3000QVP is a remarkable machine, now available at an incredible price during the JUKI Summer Sale! Designed for both sewing and quilting enthusiasts, this machine features a spacious 12″ throat space, providing ample room for large quilts and bulky fabrics. Equipped with JUKI Smart Feed technology, it ensures consistent and precise fabric feeding, while the digital tension control allows for flawless results with adjustable precision. With a wide range of stitch options and settings, the DX-3000QVP is versatile enough to handle everything from delicate garments to heavy-duty home décor projects.

Quilters and sewers alike will love the DX-3000QVP for its ability to manage complex designs and large projects effortlessly. The combination of advanced features and reliable performance makes this machine a joy to use, inspiring creativity and confidence in every stitch. Don’t miss this limited-time opportunity to elevate your sewing experience with the DX-3000QVP during the JUKI Summer Sale.

The DX-1500QVP is the final featured machine in our JUKI June Summer Sale, and it’s an offer you won’t want to miss! Created for both sewing and quilting enthusiasts, this versatile machine boasts 157 stitch patterns and 3 fonts, providing endless creative possibilities for any project. Its programmable needle position and auto thread trimming features ensure precise and efficient sewing, saving time and enhancing accuracy.

Additionally, the DX-1500QVP is equipped with an industrial box feed system, offering superior fabric handling and ensuring even, high-quality stitches on various fabric types. Whether you’re creating intricate quilts or detailed garments, this machine’s advanced features make it a joy to use.

Take advantage of this limited-time offer and elevate your sewing and quilting projects with JUKI’s Sewing and Quilting machines by your side!

How To Create A Storytelling Quilt with JUKI

In this blog, we will talk about storytelling through the intricate art of quilting with the aid of JUKI sewing machines! Gather around as we unravel the threads of creativity, explore stitch options on your machines, and delve into the magic of quilted storytelling with JUKI by your side.

Choosing the Right Textures and Fabrics

Every quilted story begins with a canvas, and the fabric is our medium in the quilting world. The choices are endless, from the soft feel of cotton to the textured touch of velvet! When crafting a narrative within a quilt, think beyond colors. Consider the textures—the smoothness of silk for a serene river, the roughness of tweed for rugged landscapes, or the cozy warmth of flannel for a comforting scene.

Below are some popular options we recommend:

Cotton: When working with cotton, we recommend pre-washing the fabric to eliminate any sizing or shrinkage and then ironing it to ensure a smooth surface before cutting. A sharp rotary cutter and a cutting mat facilitate precise cuts, as cotton is generally straightforward to manage. Maintaining the standard 1/4-inch seam allowance and pressing seams flat contributes to achieving neat blocks.

Consider using solid colors as backgrounds for appliqué or embroidery and prints that evoke specific imagery or emotions related to your stories.

Linen: Preparing linen for quilting necessitates pre-washing to accommodate potential shrinkage and wrinkles, with preference given to softened linen for easy handling. When cutting linen, caution should be exercised, employing sharp scissors to prevent fraying and handling it delicately to avoid stretching. Seam allowances remain consistent at 1/4 inch, though reinforcing may be required due to the linen’s looser weave.

With linen, you can cut shapes or pieces from linen fabric to create appliqué motifs representing characters, objects, or scenes from your stories or to add depth and dimension to your quilt.

Silk: Silk fabric requires meticulous attention to its care instructions, as it may demand special treatment, including testing for colorfastness and shrinkage before pre-washing. Fabric scissors are preferred when cutting silk, and stabilizers can mitigate shifting during the cutting process. Maintaining a 1/4-inch seam allowance and reinforcing seams where necessary is advisable to prevent fraying.

For Silk, choose fabrics in rich colors and patterns to serve as accent pieces within your quilt design. The lightweight and translucent qualities can also overlay images or create subtle transitions between storytelling elements, adding visual interest and complexity to your composition.

Velvet: Working with velvet involves gentle pre-washing to prevent crushing the pile and cutting from the wrong side using a rotary cutter to minimize distortion. Adjusting the seam allowance to approximately 3/8 inch accommodates the thickness of the velvet pile and contributes to smoother sewing.

Consider using velvet for central motifs or focal points to draw attention and create visual impact. Velvet’s plush texture allows for intricate details and subtle shading, enhancing your quilt’s realism and visual interest. You can also use velvet as a background fabric or an overlay to add depth and richness to your storytelling elements.

Flannel: For flannel, pre-washing is essential to remove lint and mitigate potential shrinkage. Care should be taken to avoid stretching when cutting flannel, and a sharp rotary cutter should be used to handle it gently. Consistent adherence to a 1/4-inch seam allowance and careful pressing to maintain fabric integrity yields favorable results in quilting with flannel.

Use flannel as a background fabric or borders for your storytelling quilt to provide a soft and cozy backdrop for your storytelling elements. Combine flannel with other fabrics, such as cotton or linen, to create contrast and texture in your quilt design.

Exploring JUKI’s Stitch Options

JUKI sewing machines offer a treasure trove of stitch options that can elevate your storytelling quilt to new heights! The possibilities are as vast as your imagination, from straight stitches to intricate embroidery designs. Below are 8 examples of stitches found across our machine series.

  1. Straight Stitch: The straight stitch is a fundamental option for piecing quilt blocks and creating clean, precise lines. Use it to construct the framework of your quilt and outline key elements of your story.
  2. Zigzag Stitch: The zigzag stitch is versatile and can be used for appliqué work to outline and secure fabric shapes onto your quilt top. It adds texture and dimension to storytelling elements like characters, objects, or scenes.
  3. Satin Stitch: The satin stitch provides a smooth and polished finish, making it ideal for appliqué and decorative stitching. Use it to fill in and highlight intricate details in your storytelling elements, such as lettering, motifs, or embellishments.
  4. Blanket Stitch: The blanket stitch is perfect for appliqué and adds a decorative border around fabric edges, resembling hand embroidery. It can frame storytelling elements and add a charming, handmade touch to your quilt.
  5. Free-Motion Quilting: Explore free-motion quilting techniques to add texture and depth to your storytelling quilt. Stitch motifs, patterns, or scenes inspired by your stories, allowing your creativity to flow freely as you quilt.
  6. Stippling or Meandering Stitch: Stippling or meandering stitches create a quilted texture that can fill background areas and add dimension to your quilt. Use these stitches to evoke the mood or setting of your stories, such as swirling winds or rolling hills.
  7. Echo Quilting: Echo quilting involves stitching parallel lines around a central motif, creating concentric outlines that draw attention to storytelling elements. Use it to highlight characters, objects, or scenes within your quilt.
  8. Decorative Borders: Explore decorative border stitches, such as scallops, waves, or loops, to frame your storytelling quilt and tie together the theme. These stitches can add whimsy and charm to your quilt while enhancing its storytelling elements.

Selecting the Right Presser Feet

JUKI sewing machines come with various presser feet, each serving a unique purpose. The walking foot is a hero for quilting, ensuring even layers, and preventing fabric shifting. The free-motion quilting foot offers the freedom to doodle with stitches, letting your creativity soar as you quilt.

Experiment with different presser feet to achieve various effects. Use a piping foot to add a raised texture or a rolled hem foot for a delicate finish. With JUKI’s range of presser feet, your quilted story will have the precision and finesse it deserves.

Inspiration: The Spark Behind the Stitch

Behind every great quilt is an inspired quilter. Nature’s beauty, cherished memories, or even everyday encounters can inspire inspiration. A stroll through a forest might inspire a quilt depicting lush land, while a trip to the seaside could evoke scenes of crashing waves and sandy shores!

Look to art, literature, or personal experiences for inspiration. Let emotions guide your design. Perhaps it’s the story of a family reunion, a beloved pet, or a scenic adventure waiting to be quilted into existence. With JUKI sewing machines as your trusty companions, channel your inspiration into tangible tales through quilting.

In quilting, JUKI sewing machines stand as the faithful companions of storytellers. With their precision, versatility, and array of options, these machines empower quilters to weave narratives that transcend time.

So, dear quilters and aspiring storytellers, embrace the art of quilted storytelling! Dive into textures, explore stitch options, and let inspiration guide your hand as you craft tales with JUKI’s help. For in every stitch lies a fragment of a story waiting to be told, stitched together into a masterpiece of quilted wonderment.

Happy quilting, and may your stories be as rich as the fabrics you choose!