JUKI Tip: Air Thread Sergers VS. Traditional Manual Sergers

In this month’s tip, JUKI National Account Trainer, Alba, demonstrates the difference between an air threading serger and a non-air threading serger. The first serger we’ll showcase is the non-air threading serger, the Mo 114D. This is a non-air thread surger so this is a manually threading serger and the main difference is the way that the machine is threaded.

The other thing is that with a traditional serger, you must follow a specific order and usually it is an upper looper gets threaded first then the lower looper and then the needles in order; so there is a specific order that needs to be followed with this serger. When there is a thread breakage within this serger, it is often recommended that you start rethreading the machine from beginning to end.

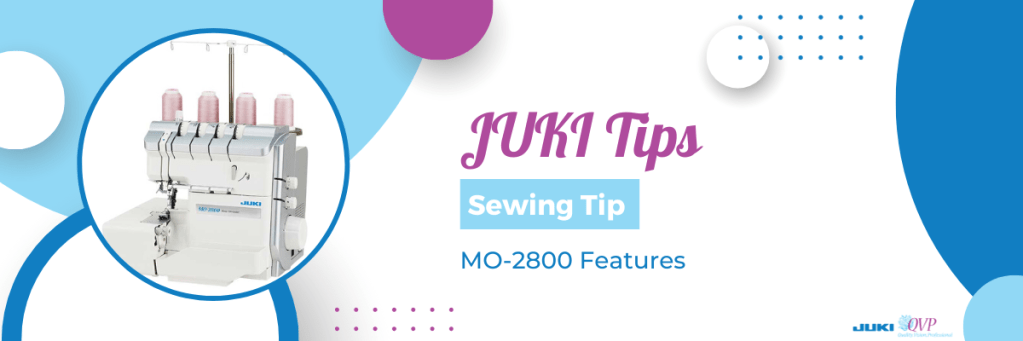
Now with the air thread serger, here we’re showcasing the MO-2800, we’re going to show you their differences. Now what the air threading capability is all about, is the mechanism on the inside of the machine and its tubes, allow that jet stream of air to go through. Now in order to activate or start the air thread process we need to flip one lever, shown on video, and it really is as simple as that!

I will be turning the hand wheel towards me and what that does is if you watch this action that tube closes and you hear that click where I am now ready to activate and use the air thread. What is really nice about an air thread serger is it does not matter the order that you thread in! So I am going to go in the opposite order of the one right next to me. Now, I get my thread, I hold it with the tweezers, and I am putting between half an inch and an inch of thread in there. I have 8 to 10 in of loose thread in front of me and that lower looper has been threaded. This is typically the one that takes the most amount of time to thread on a serger and you could see just how easily. Now in order to close the door you will have to lower the lever and that’s usually where I get the call where people will say oh my door isn’t closing and that’s exactly why.

Another feature I was so excited about is the needle threader! I left one needle unthreaded and I’m going to open up the door just to make it easier to see on video, and I’m going to lower my foot and I have a lever that goes right and left. I’m threading my left needle, I have it to that position on video, and I am going to lower my needle threader and I am going to place the thread right in.

There’s a little groove on your needle threader that hugs around your needle and the thread goes right in there. You’ll notice I left it really nice and loopy and when I raise that needle threader up it threads the needle quickly.

Those are some of the differences between a regular serger and an air thread serger! I hope you enjoy these updated features, stay tuned and make sure to hit like and give us your comments!

To learn more about our JUKI Serger, visit your nearest dealer by visiting here.

JUKI Tips: Celebrating National Quilting Month

As March unfolds, we at JUKI are thrilled to join hands with fellow quilting enthusiasts worldwide to celebrate National Quilting Month!
In honor of this special month, we’ve curated five invaluable tips straight from the Trainers at JUKI. Whether you’re a seasoned quilter or just beginning your journey into this beloved art form, these tips are designed to elevate your quilting experience to new heights. From learning the art of free-motion quilting to optimizing the performance of your long-arm machine, we’ve got you covered.

So, gather your fabrics, thread your needles, and prepare to embark on a quilting adventure like no other. Let’s dive into these expert tips and unleash the full potential of your quilting projects with JUKI!

In our first video tutorial, we dive into the world of quilting excellence with JUKI! In this demonstration, we unveil how to master the art of advancing your quilt on the JUKI Miyabi Long-arm machine while using the innovative QTC 5 program.

We’ll guide you through the steps to seamlessly progress your quilt, ensuring smooth transitions and impeccable results with every stitch. Whether you’re a seasoned quilter seeking optimization or a beginner eager to learn, this tutorial is your gateway to unlocking the full potential of your quilting projects.

In our next tip, we’ll explore an essential technique for unleashing your creativity: transitioning your TL Sewing machine into a free-motion quilting powerhouse!

With this tip, we’ll guide you step-by-step through the process of unlocking the potential of your TL Sewing machine, allowing you to embrace the freedom of free-motion quilting. Whether you’re a novice eager to explore new techniques or an experienced quilter looking to expand your repertoire, this tutorial will equip you with the skills and confidence to take your quilting to new heights.

In our next tip, we delve into a game-changing tip for maximizing your quilting potential: getting creative with our fabric clamps. With this technique, we’ll show you how to utilize every inch of fabric available on your long-arm machine, ensuring efficient use of materials and minimizing waste.

Whether you’re working on a large-scale project or a smaller piece, fabric clamps provide stability and control, allowing you to quilt with precision and ease.

Next up, we’re going to share a transformative tip for expanding the capabilities of your DX Sewing machine: transitioning to free-motion quilting mode. In this demonstration, we’ll walk you through the simple steps to unleash the potential of your DX Sewing machine, allowing you to explore the artistry of free-motion quilting with confidence.

Whether you’re a seasoned quilter seeking to push the boundaries of your craft or a newcomer eager to experiment with new techniques, this tutorial is your guide to unlocking the creativity within.

In our final tip for National Quilting Month, we’re diving into a crucial aspect of quilting success: JUKI bobbins. Watch as we explore the importance of identifying the right bobbin for your sewing machine and the impact it has on your quilting projects. In this video, we’ll guide you through the process of selecting the perfect bobbin for your machine, ensuring optimal performance and stitch quality.

Whether you’re quilting intricate designs or piecing together fabrics, having the right bobbin is essential for achieving professional results!

As we celebrate National Quilting Month, we hope you’ve enjoyed exploring five invaluable tips to elevate your quilting experience with JUKI! From mastering the art of advancing your quilt seamlessly on the JUKI Miyabi Long-arm machine using the QTC 5 program, to embracing the freedom of free-motion quilting and maximizing your fabric usage with fabric clamps, we’ve covered essential techniques to enhance your craft. We’ve also delved into the importance of selecting the right bobbin for your sewing machine, highlighting its impact on the quality of your quilting projects.

Thank you for joining us on this enriching journey, and we look forward to sharing more quilting tips with you in the future. Happy quilting!

JUKI Tip: Trimming Your Tajima SAI Thread

Don’t you hate when you’re about to start an embroidery and you have that thread tail hanging out? On this JUKI Tip video today we’re going to show you how quick and easy it is to trim that right up on the machine.

In the video above, you’ll see on the screen I am going to go to the icon that looks like four needles with arrows on either side. When you tap on this icon you can move to whichever needle you need to trim with ease, without disrupting your current project.

In our video you’ll see it’s set up on needle number one and needle number one is the one with the thread that we direct you to. You’ll see me press and hold the scissor icon, and it will cut and remove that thread from your needle.

We hope this quick and easy tip helps you the next time you’re creating on the TAJIMA Sai Embroidery machine! What tip do you want to see next? Let us know down below!

JUKI Tip: How to Get Started with Ruler Work

In this month’s tip, JUKI National Account Trainer Alba teaches us a fun and easy way to use our new JUKI ruler set in the Hearts and Wings collection! Showcased by Alba, check out examples of patterns you can create and an easy trick on how to plan out your designs the next time you’re creating.

Follow along below for a rundown of what Alba covers on today’s JUKI Tip!

Hello, all my JUKI friends my name is Alba and I am the national accounts trainer for JUKI Home Sewing! I’d like to welcome you to my home and today I’m really excited because this is almost like a double video for you. I am not only introducing a new product but I’m going to give you a tip on getting started with that new product. So let’s get right to it and let me show you the new product!

What I’m referring to is the hearts and wings ruler set. This is absolutely beautiful, you’re getting five different rulers that I have spread out on the video and they are clear rulers so I do have them down on white paper to try and make it easy for you to see them. As you could see, they give you five different shapes and really endless possibilities and a lot of people when they get started with rulers and quilting one of the first questions they ask is “so how do I get started?” And that’s exactly my tip for you today!

Now you notice I have no machine set up because really getting started with rulers or any free motion for that fact is on paper or a dry-erase material. So you can work on paper with pen, and I do recommend getting a pen that does not have a click on/off, because that pen will close on you as you are tracing those rulers or templates. You may hear this term, ruler or a template, and they refer to the same thing.

What I am going to do, is at my local Dollar General they have a dry-erase wallpaper and for me, I put this on the back of my cutting mat and it makes it really easy for me to audition and practice with my rulers. So the first thing I am going to do is I will be doing a border with this ruler here, and what I like about the JUKI ruler is, it doesn’t show well on camera, but there are a little dots of grips fabric grips on these rulers so it makes it really easy to start using them.

To start in the video I’ll draw a center line, and what I like about the dry erase is I can just erase if I’ve make a mistake and it makes it really practical on this dry erase material but remember to use a dry erase marker that’s especially made for this. Now with free motion it really doesn’t matter where you start at the beginning or at the end because you have full 360 movements; but for me when I start I like to start at the top of my fabric with the bulk towards me so as I move I’m moving into the machine and that’s exactly what I will be doing here.

I am going to place my ruler down and you will notice on the video all the cross markings, and these are indicator markings to keep you straight, plum and even. So I am going to line up, and when using rulers you want to put some of your fingers on the ruler and some of them off the ruler guiding it and having you keep it from moving or shifting. Now if this were my machine I would be following the edge and at any point stop because that is what will give you a nice beautiful point. Now I am going to move my ruler and line up and make sure that I am staying on those lines.

Now I’m going to turn my ruler around and go to the other side. I could either start from the top or the bottom and always when you’re doing this, pause at that corner. Im going to make sure I am lined up beautifully, and look at what a beautiful design this makes for a border!

As you play with this you could put a medium size one in between and audition but this is what I like about working with a dry erase area paper pen, you’re getting to play with it and really experimenting with the movement and the shape that you will create. Now by using the dry erase, it will be slightly larger because my foot does grip about A4 of an inch from that ruler base but this is a good way to get that general idea of how that ruler will take shape and also to play with it and trying create new and exciting shapes of your own.

I want to thank you for sharing this time with me! If you enjoyed this video and others that you’ve seen make sure to hit subscribe and make sure to leave comments as well on what you’d like to see. Please come back and show me your progress that you’re making with your rulers and again this is the new hearts and wings ruler set that I am playing with a five-piece ruler set so please reach out to your local dealer and get a really nice look at this set!

JUKI Tip: MO-2800 Features

In this month’s tip, JUKI National Account Trainer Kelly showcases how to use the features on one of our latest sergers, the MO-2800! From the useful air threader to safety features that keep sewing fun, follow along for Alba’s favorites.

Follow along below for a rundown of what Alba covers on today’s JUKI Tip!

Hello all my JUKI friends, my name is Alba and I am a trainer for JUKI America. Today I want to share with you one of the newer JUKI surgers and I’m going to be talking about the MO-2800. I’m going to go over some of the key features in that made me fall in love with this machine.

First of all,l you may notice that there is a knee lift on the machine. What the knee lift does as you’re sewing, is it raises and lowers the foot, which can be really handy when you’re working with corners or any other areas.

The MO-2800 is a two, three, and four-thread serger and it has that easy threading, our air thread capability. That means with a push of a button, and a jet of air, your lower and upper looper are instantly threaded.

I also love the fact that my tools that I require for the serger also have a spot and a home right on the inside cover.

One of the safety features in their machine you’ll notice is that the machine will not run if the front storage door is open or the foot is up. Isn’t that just absolutely wonderful?

Now, the one feature that I fell in love with, I’m going to be I’m going to be honest with you, is that needle threader. Now, in the video, I’m just going to turn the machine slightly so you can see that needle threader, and the feature threads your right and left needle. I absolutely love not having to fuss with tweezers, a magnifying glass, or getting an extra pair of glasses to thread my needles.

Now the other feature I want to show you is going to be a little bit difficult to show but hopefully you will be able to follow along in the video. I have a stitch width adjustment where I can move my knife to the right and to the left. Normally that would be the only way to adjust your stitches, but on the MO-2800 I have an independent adjustment to also move my stitch finger independently of my knife. This really allows for perfect stitches, especially on those super fine delicate lacy knits that I find such a hard time getting that perfect stitch on. JUKI has thought of it all!

Now a rolled hem is something that I do and this machine handles a very sheer fabric, to my home deck fabrics, so it could handle a wide variety of fabrics. But when I switch to a rolled hem, I have this quick easy tweak, that allows me to get that picture-perfect rolled hem as well, which you can see in the video.

Now that I’ve gone over some of the features on the MO 2800, please reach out to your local dealer and get a really nice look at this machine and test it out for yourself. I think you’ll love it as much as I do. Until next time, bye-bye!