What is a 1/4″ Guide Inch Foot?

This month we’re kicking the blog off with a JUKI Accessory focus! If you’ve ever tried to make a quilt or piece together a garment, you know how important it is to achieve perfectly even seams. Without the right tools, it’s easy to end up with misaligned pieces or inconsistent stitching. The 1/4-inch guide Foot is an essential accessory that takes the guesswork out of seam allowances, helping you sew with precision and accuracy. But what is a 1/4-inch guide Foot, and why should you use it in your sewing projects? Let’s explore its features, benefits, and tips for using it effectively!

What is it?

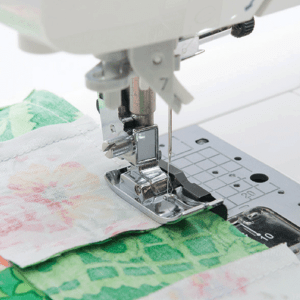
A 1/4 Inch Guide Foot is a specialized presser foot designed to help you sew a consistent 1/4 inch seam allowance. This is important for quilting, garment construction, and any project where precision is key. Unlike a standard presser foot, the 1/4-inch guide Foot has a built-in guide or edge marker that helps you maintain a consistent seam allowance throughout your project. This tool ensures that each seam is evenly spaced, giving your work a professional finish!

The 1/4-inch guide Foot was developed to solve a common problem that sewists face—achieving consistent seam allowances. Before the invention of this foot, sewists had to rely on measuring with rulers or marking lines on their fabric, which can be time-consuming and prone to errors. The 1/4-inch guide Foot eliminated this hassle by providing an accurate guide for every seam, making it easier to achieve uniform results without extra effort.

Benefits and Uses of the 1/4 Guide Inch Foot

Now that we understand the purpose of the 1/4-inch guide Foot, let’s dive into its benefits! The primary advantage of using this foot is its ability to help you achieve perfectly even seams every time! Whether you’re working on a quilt, constructing a garment, or piecing fabric for a home décor project, this tool ensures that your seams are always uniform, resulting in better-fitting garments and neatly aligned quilt blocks.

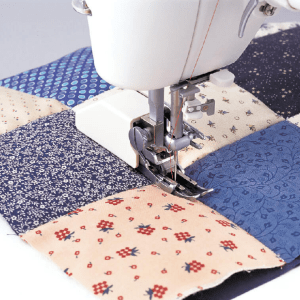
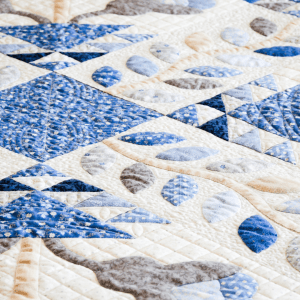
For quilters, the 1/4-inch guide Foot is a must-have! Quilting requires precise seams, and even a tiny discrepancy can throw off the entire quilt. With this foot, you can ensure that each piece of fabric is sewn with an accurate 1/4-inch seam, which is critical for proper alignment. This foot is also perfect for piecing together small blocks or creating intricate patterns with even spacing, making your quilting process faster and more accurate.

In addition, the 1/4-inch guide Foot can help with garment construction, especially when working with fitted designs or intricate pattern pieces. By maintaining a consistent seam allowance, you can ensure that all your pattern pieces fit together perfectly, giving your garments a professional and polished look.

Tips for Using the 1/4 Inch Guide Foot

  • Test Before You Start: Always test your seam on scrap fabric to ensure the foot is set up correctly and the seam is the right width.
  • Use the Edge Guide: The built-in guide is there to help you! Keep the edge of your fabric aligned with it for a consistent seam.
  • Adjust Needle Position: Some 1/4-inch guide Feet allow you to adjust the needle position. This is useful if you need to make tiny adjustments to your seam allowance.
  • Slow and Steady: Take your time when sewing, especially if you’re working with tricky fabric or a detailed project. The slower you sew, the more precise your seams will be.

Project Ideas Using the 1/4 Inch Guide Foot

Now that you’ve got the 1/4-inch guide Foot in your toolkit, what can you make? The possibilities are endless! If you’re a quilter, consider creating a beautiful quilt top with perfect seams and precise pattern matching. This foot will make it easier to sew together blocks, ensuring they line up perfectly for a polished look.

For garment sewists, the 1/4-inch guide Foot is great for creating garments with a perfect fit. Whether you’re making a dress, blouse, or pants, this foot helps maintain consistency in your seam allowances, ensuring a more accurate fit and professional finish.

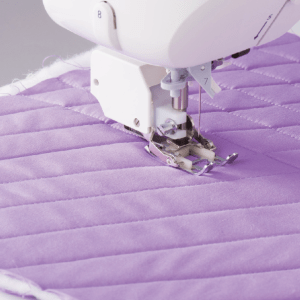
You can also use the 1/4-inch guide Foot for home décor projects like pillow covers or table runners. With this foot, you can achieve neat, straight seams that will make your home-made décor items look like they came from a high-end store.

With the 1/4 Inch Guide Foot, you’ll be able to confidently tackle your projects, knowing that your seams will be precise and your results flawless. Ready to add the 1/4-inch guide Foot to your collection? Visit JUKIQuilting.com or check out your nearest dealer here to explore this essential accessory for your sewing room!

JUKI’s Seasonal Cleaning Guide

Spring is here, and it’s the perfect time to refresh our sewing space and ensure machines are in top shape! Whether you use a sewing machine, quilting machine, or serger, regular maintenance is essential for smooth operation. Things like lint buildup, thread debris, and oiling can lead to performance issues. By taking the time to properly clean, organize, and check out a professional servicing with your JUKI dealer, you can extend the life of your machine and enjoy uninterrupted creativity in a clutter-free studio!

Each JUKI machine has unique maintenance needs. JUKI’s semi-industrial TL Series machines require regular oiling and manual cleaning, while the DX and HZL Series computerized machines have self-lubricating mechanisms and need careful electronic component care. Let’s dive into essential spring cleaning tips, professional maintenance schedules, and how to optimize your sewing space!

Cleaning & Maintaining Your Sewing Machine

Your sewing machine is the heart of your craft, and keeping it clean ensures clear stitching, smooth operation, and a long machine life! Understanding your machine’s maintenance needs will help keep it in top condition for years.

JUKI TL (Semi-Industrial Straight Stitch Machines) & Longarm Series

  • These machines require regular oiling, especially in the hook and the lubrication points shown in your manual. Use the machine oil. Without proper lubrication, you may experience skipped stitches or increased noise.
  • Use a lint brush to remove debris, especially after working with heavy fabrics like denim or quilting layers.
  • Since these machines are mechanical, periodic manual adjustments and cleanings help maintain smooth operation.

JUKI DX & HZL Series (Computerized Machines)

  • These models do not require manual oiling, thanks to their internal lubrication systems.
  • Avoid compressed air! It can push lint deeper into the machine. Instead, use a lint brush or vacuum attachment.
  • Because of their electronic components, avoid excessive moisture when cleaning. We recommend a soft, dry cloth to clean the machine.
  • Regularly update firmware (if applicable) and make sure your machine is plugged into a surge protector to avoid electrical damages!

JUKI MO Series (Overlock Sergers) & MCS Series (Coverstitch)

  • Regularly clean the loopers, feed dogs, and knife area using a lint brush or vacuum attachment to remove accumulated lint and thread.
  • Apply a few drops of sewing machine oil to the moving parts as recommended in your manual to ensure smooth operation.
  • Replace needles frequently, as serger needles dull faster due to high-speed stitching.
  • Check and adjust thread tension regularly to maintain balanced and professional-looking stitches.
  • Avoid using compressed air, as it can push debris into delicate internal components.

Regardless of your machine type, changing your needle regularly (about every 8-10 hours of sewing or every new project) and using high-quality thread reduces tension issues and lint buildup.

Professional Servicing: When & Why?

Even with diligent home maintenance, your machine needs professional servicing to ensure all internal components are aligned, lubricated, and calibrated correctly. Here’s a guide to when you should schedule servicing based on usage:

  • Occasional Use (A Few Times a Month) – Service your machine once a year to prevent internal wear.
  • Frequent Use (Several Days a Week) – Schedule servicing every 6 months to maintain peak performance.
  • Heavy Use (Daily or Professional Sewing) – A check-up every 3-4 months is recommended, as frequent use increases wear on moving parts.

Your JUKI dealer is your best source for professional servicing! They’ll inspect tension, replace worn parts, and ensure that your machine is operating at its best. If you notice unusual noises, skipped stitches, or thread tension problems, it might be time for an early tune-up!

Timing & Storage Tips

A clutter-free sewing space makes it easier to focus on projects and prevents dust from settling into your machines. Here are some tips on how to maintain a clean and organized studio:

  • Create a Seasonal Cleaning Schedule – Set aside time each season for deep cleaning. Empty out drawers, dust off surfaces, and reorganize tools!
  • Cover Your Machines When Not in Use – Use dust covers or hard cases to prevent lint and debris from settling inside.
  • Invest in Smart Storage Solutions – Clear bins for fabric, drawer organizers for notions, and labeled shelves for tools help keep everything within reach without clutter.

What to Do with Last Season’s Fabric Scraps?

If your scrap bin is overflowing, get creative or give them a new home! Here’s how:

  • Sort & Donate: Quilting guilds, local schools, and nonprofit organizations often accept fabric scraps for community projects.
  • Repurpose for Small Projects: Use scraps for appliqué, patchwork quilts, fabric bookmarks, or fabric baskets for storage.
  • Host a Scrap Swap: Organize a trade event with fellow sewists to exchange materials and refresh your collection.

Visit Your Local Dealer for Maintenance & Service

Your JUKI dealer is the best place to get expert servicing for your JUKI sewing machine. Regular maintenance ensures precision stitching, extends the lifespan of your machine, and prevents costly repairs. Contact your dealer here today to schedule your next tune-up!

By maintaining your machines, organizing your sewing space, and finding creative ways to repurpose fabric, you’ll start each season refreshed and ready to tackle new projects. Happy sewing!

What is an Even Feed Foot?

If you’ve ever struggled with sewing slippery or thick fabrics, you’re not alone! Many sewists deal with puckering, uneven stitching, or fabric that seems to have a mind of its own. The Even Feed Foot is a game-changing accessory designed to overcome these challenges, allowing you to sew with ease and leave those struggles behind! But what is an Even Feed Foot, and how can it transform your sewing experience? Let’s dive in and explore its features, history, and incredible benefits!

The Even Feed Foot is a specialized sewing machine attachment that ensures fabric feeds evenly under the needle. Unlike a Standard Presser Foot, it has built-in feed dogs that work in tandem with your sewing machine’s feed system. This dual-action feeding mechanism prevents shifting between fabric layers, making it ideal for quilting, matching patterns, or working with challenging materials like vinyl, leather, and silk.

The Even Feed Foot was developed to solve common sewing challenges when working with multiple fabric layers or slippery materials! Traditional presser feet often cause fabrics to move at different rates, causing misaligned seams or puckered stitching. This was particularly seen in quilting, where precise alignment is crucial, and in garment construction, when sewists used delicate or sticky fabrics.

Benefits and Uses of the Even Feed Foot

Now that we know why the Even Feed Foot was created, let’s talk about the benefits of putting it to use. Its primary benefit is its ability to handle slippery fabrics like silk, satin, and vinyl! These materials often shift or stick under a regular presser foot, leading to uneven stitches or puckering. The Even Feed Foot eliminates these issues by feeding the fabric layers evenly, ensuring smooth, professional results every time.

If you’re a quilter, you’ll find the Even Feed Foot indispensable! When working with multiple layers of fabric and batting, achieving alignment can be a challenge. This foot will ensure that all layers move together without shifting, resulting in beautifully aligned quilt tops and precise stitching. It’s also perfect for handling thick materials or layered seams, like denim or canvas.

Another benefit we’ll mention is the ability to help with pattern matching. Whether you’re working with plaid, stripes, or intricate prints, aligning patterns perfectly at the seams can be daunting! The Even Feed Foot’s dual-feed mechanism allows you to keep fabric pieces in place, making it easier to achieve seamless transitions and professional-looking garments or home decor items.

Tips for Using the Even Feed Foot

  1. Choose the Right Needle: Pair your fabric with the correct needle type, such as leather or ballpoint needles.
  2. Adjust Stitch Settings: For thicker fabrics, lengthen the stitch for better results.
  3. Use Clips Instead of Pins: For materials like vinyl or leather, avoid pinholes by using clips to hold layers together.
  4. Test on Scrap Fabric: Always test your settings on a scrap piece to ensure everything is working smoothly.
  5. Clean Regularly: Keep your foot and sewing machine feed dogs clean to maintain optimal performance.

Project Ideas Using the Even Feed Foot

Lastly, let’s talk about the projects you can now create with more ease using the Even Feed Foot. For quilters, it is the perfect tool for crafting quilted placemats or patchwork blankets! The foot ensures that all layers of fabric and batting remain perfectly aligned, resulting in a polished finish and precise decorative stitching. These projects are not only functional but also great opportunities to showcase your quilting skills.

If you love working with vinyl or leather, the Even Feed Foot is a game-changer! Consider making a vinyl cosmetic bag that is durable and stylish or a leather tote bag with clean, professional seams. These materials can be tricky to sew, but the Even Feed Foot makes it possible to achieve high-quality results without the frustration of sticking or shifting.

For sewists working with delicate fabrics, projects like silk pajamas or satin pillowcases become much easier! The Even Feed Foot glides smoothly over these materials, ensuring flawless seams that enhance the luxurious feel of your finished pieces. Whether you’re sewing garments or home decor, the Even Feed Foot allows you to work confidently with materials that might otherwise be challenging.

With the Even Feed Foot, you can confidently tackle a variety of creative endeavors, all while enjoying smoother and more efficient sewing. The Even Feed Foot is more than just an accessory—it’s a game-changer for challenging sewing projects. Ready to try the Even Feed Foot for yourself? Visit your nearest JUKI dealer to explore this versatile accessory and see how it can enhance your sewing experience!

What is a Walking Foot?

Have you ever struggled with layers of fabric shifting, puckering, or uneven seams that don’t cooperate? If you have, this month, we’re talking about an accessory you’ll love! The JUKI walking foot is your secret weapon for achieving smooth, professional-quality stitching on even the trickiest of projects.

The walking foot, also known as an even-feed foot, addresses a large challenge in the sewing world: the uneven feeding of fabric layers during stitching. It was invented as a specialized presser foot and designed to complement the feed dogs under the fabric to ensure a synchronized feeding motion. It does this by moving its own feed dogs in unison with those beneath the needle plate, eliminating fabric shifting and puckering.

This accessory was needed in the community! It helps sew multiple layers of fabric, tricky materials like knits or slippery satin, and make bulky quilts more manageable. This attachment is an essential tool for quilters, seamstresses, and hobbyists, helping you transform the quality and ease of your sewing projects!

Originally, this was developed for industrial sewing machines, but the walking foot was later adapted for home sewing machines like yours, making its benefits accessible to everyday sewists like you!

Benefits and Uses of a Walking Foot

Now, what benefits does the walking foot offer? Well, it has a wide range of benefits, making it a valuable tool for sewists of all skill levels! One of its primary advantages is its ability to provide even feeding of fabric layers, which is particularly important when working with thick or multiple layers, like quilts, denim, or canvas. Without a walking foot, fabric layers can shift and create puckering, leading to uneven seams. The walking foot eliminates these issues and produces professional-quality results.

The walking foot can also become essential for sewing slippery or stretchy fabrics like satin, silk, or knits! These materials tend to stretch and shift under a standard presser foot, which can lead to uneven stitches or distorted seams. The walking foot’s dual-feed system prevents this by evenly pulling all layers of fabric through the machine, ensuring consistent stitching and reducing the likelihood of fabric shifting or puckering.

Beyond quilting and clothing, the walking foot is also useful for home décor projects, like curtains, cushions, and upholstery! These projects often involve multiple layers of fabric, making it difficult to get those neat stitches. With the walking foot, you can ensure that all layers move smoothly through the machine, making topstitching, binding, and decorative stitching much easier.

Tips for Quilting and Sewing with a Walking Foot

  1. Use the Right Needle and Thread: For heavier fabrics like denim or quilts, use a larger needle (90/14 or 100/16) to avoid skipped stitches or damage. For delicate fabrics like knits or silks, a smaller needle (70/10) helps reduce distortion. Using the right thread—like a heavyweight thread for quilting or a finer thread for garment sewing—also helps to ensure better results.
  2. Set the Correct Stitch Length: The walking foot works best when using a longer stitch length, especially for quilting. It’s because the longer stitch helps the feed dogs move more smoothly and ensures that your stitches are more evenly spaced. For quilting, a stitch length of 2.5 to 3.0 mm is usually recommended but always adjust based on your fabric type and project!
  3. Practice on Scrap Fabric: Before taking on your main project, try to practice with your walking foot on scrap fabric! This will help you get a feel for how the foot moves, and you’ll be able to tune your tension settings, stitch length, and fabric alignment.
  4. Baste or Pin Layers Together: If you’re sewing with multiple layers of fabric, basting or pinning can help keep everything aligned and prevent shifting. The walking foot works best when layers stay even, so by securing your fabric with pins or basting stitches beforehand you can provide more control and prevent puckering.

Project Ideas Using the Walking Foot

We’ve talked about how the walking foot is a versatile tool that can enhance a wide range of sewing projects, so let’s talk about those projects you can create! One of the most common projects created with a walking foot is quilts. Quilting almost always involves multiple layers of fabric, quilt tops, batting, and backing, which often shift or pucker under a standard presser foot. With a walking foot you can ensure that all the layers are fed evenly, reducing the chances of uneven stitches and puckered seams. For quilt projects, especially those with complex patterns or layered fabrics like cotton, flannel, or even heavier materials like denim or canvas, the walking foot is perfect for achieving neat and professional results!

You’ll also find many sewists use the walking foot for garment sewing, especially when working with fabrics like knits or satin, silk, and rayon. The walking foot helps prevent stretch and shift by ensuring that the top and bottom layers move smoothly together, providing consistent quality. For projects like T-shirts, stretchy leggings, or flowy dresses, the walking foot helps keep those seams from being stretched out or puckered, giving you clean, professional-looking results!

Lastly, the walking foot helps create home décor projects. With projects like curtains, cushions, and upholstery, you’ll see thick or multiple layers of fabric. If you’re sewing with heavy-duty fabrics like canvas, denim, or home décor-weight cotton, a walking foot can help manage those thick seams and bulky layers. It will ensure even stitching when joining quilted cushions, adding padding to chair cushions, or creating decorative pillow covers! For projects like bags and totes, usually made from similar home décor materials like heavy canvas or structured materials, the walking foot also helps maintain uniform stitching, making your finished products look polished and durable.

The walking foot is a game-changer for any sewist, offering improved precision and control, especially when working with challenging fabrics! Whether you’re quilting, working on fashion, or creating new home décor, this tool helps achieve professional results with less puckering and more even stitching. You can find project ideas and inspiration by visiting us here!

When you master the use of a walking foot, you’ll elevate your sewing projects and gain the confidence to tackle a wide range of fabrics with ease! So, whether you’re a beginner or an experienced sewist, consider adding a walking foot to your toolbox—it’s sure to transform your sewing experience. Find out more by visiting your nearest dealer here!

JUKI Tip: Using the T-Gauge on Your JUKI

This month’s tip is all about using our T-Guage with Kelly, our JUKI National Trainer! If you like a consistent seam gauge for your seam allowances and use maybe one, or maybe even two seam allowances the T- Gauge is for you. What we’re going to do in our video below is set this up so we can follow a perfect quarter-inch seam or half-inch seam.

You’ll see this accessory can help with different seams and is easy to attach. We have a mounting plate right here on our TL-18QVP that we’re going to be working on.

To start we’re going to put the two screws in that come with our T-Guage. We’re going to put these in lightly so that we can tighten them after I put my gauge on the quarter-inch seam.

We love the accuracy of the gauge because we can use our fast speed on the TL-18QVP to sew and maintain a consistent seam every time. After you’re set-up, use your seam gauge to double-check the measurement from the needle.

In our video we’re working on the perfect quarter-inch seam! After you decide on spacing, you’re going to tighten those screws and check the accuracy again because it tends to move when you tighten that screw. Ours looks great! Now we will have a consistent 1/4 inch seam all set.

In our video you can watch as we guide our fabric right next to the seam and use the full speed setting on the TL-18QVP.

We hope you’ve enjoyed this tip on how to set up your T-Guage and when to sue it. The Haruka TL-18QVP with our T-Gauge gives you wonderful accuracy for seam allowances! thank you for joining us today and we look forward to seeing you next time on a tip or project with JUKI.

Happy holidays!