Sustainable Sewing and Quilting Practices with JUKI

In a world where environmental consciousness is becoming increasingly important, we must adopt eco-friendly habits in every aspect of our lives, including our beloved hobbies! Whether you’re a seasoned sewist or a quilting novice, embracing sustainable techniques can make a significant difference. Let’s explore how to make your sewing and quilting practices more eco-friendly.

Eco-Friendly and Sustainable Sewing Techniques

Adopting sustainable sewing techniques is about more than just choosing the suitable fabrics. It involves a holistic approach to your sewing process, from your equipment to how you plan and execute your projects. By integrating these eco-friendly practices, you can significantly reduce your environmental footprint!

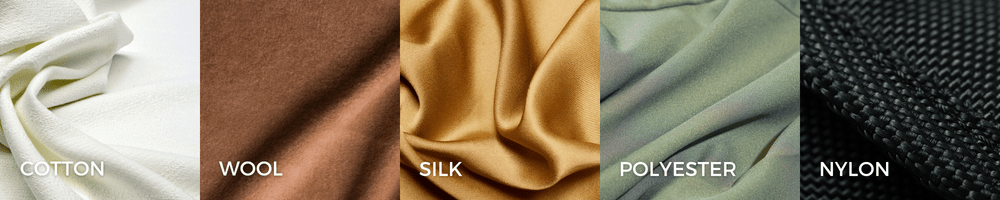
  1. Mindful Material Selection:
    • Choose natural fibers like organic cotton, linen, and wool, which are biodegradable and have a lower environmental impact than synthetic fabrics.
    • Look for certifications like GOTS (Global Organic Textile Standard) to ensure the fabric is produced sustainably and adheres to strict environmental and social criteria.
  2. Low-Impact Dyes:
    • Opt for fabrics dyed with low-impact or natural dyes. These dyes use less water, produce less waste, and contain fewer harmful chemicals, making them better for the environment and your health.
    • Support companies that use environmentally friendly dyeing processes and are transparent about their production methods.
  3. Reusable Patterns:
    • Invest in reusable, high-quality patterns, or create your own to reduce waste and save money over time! Digital patterns can also be a sustainable choice as they eliminate the need for physical packaging and shipping.
    • Join online communities to share and swap patterns with fellow sewists.
  4. Minimalist Sewing:
    • Embrace minimalist sewing by focusing on quality over quantity. Create timeless, durable, versatile pieces, reducing the need for constant replacements.
    • Plan your projects carefully to ensure you only purchase the necessary materials, avoiding excess consumption.

Sourcing Sustainable Materials

Finding sustainable materials is crucial for reducing the environmental impact of your sewing projects. By sourcing responsibly, you can support ethical practices and contribute to a more sustainable textile industry!

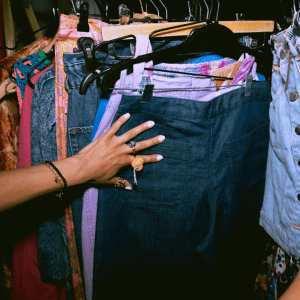
  1. Thrift and Vintage Stores:
    • Explore thrift stores, vintage shops, and estate sales to find unique and affordable fabrics. Repurposing old clothing and linens into new projects saves money and reduces waste.
    • Get creative with your finds, turning them into one-of-a-kind pieces with a story to tell!
  2. Eco-Friendly Fabric Stores:
    • Support fabric stores that specialize in sustainable and organic materials! Many online retailers offer a wide selection of eco-friendly fabrics, from organic cotton to recycled polyester.
    • Look for stores that provide transparency about their sourcing and production processes.
  3. Local Artisans and Producers:
    • Purchase materials from local artisans and producers to reduce carbon footprints associated with shipping and support local economies.
    • Attend local craft fairs and markets to discover unique, handcrafted materials that add a personal touch to your projects.
  4. Natural and Recycled Fibers:
    • Look for fabrics made from recycled fibers or those blended with natural materials. Brands like Econyl and Repreve offer fabrics made from recycled plastics, reducing waste and promoting circular economy practices.
    • Consider alternative fibers like hemp, bamboo, and Tencel, known for their sustainability and durability.

Reducing Sewing Waste

Reducing waste is a crucial aspect of sustainable sewing! By being mindful of how we use and dispose of materials, we can minimize our environmental impact and maximize our resources.
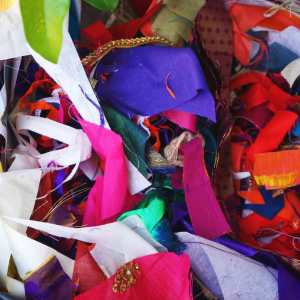
  1. Use Your Scraps:
    • Save fabric scraps for smaller projects, patchwork, or quilting. Scraps can also be used for stuffing pillows, creating unique fabric art, or even making small accessories like scrunchies and keychains.
    • Organize your scraps by size and color to make them easier to use in future projects.
  2. Zero-Waste Patterns:
    • Explore zero-waste patterns designed to use every bit of fabric with minimal leftover waste. These patterns often feature innovative cutting techniques and clever designs that maximize fabric usage.
    • Experiment with creating your own zero-waste patterns, challenging yourself to think creatively about fabric layout!
  3. Efficient Cutting Techniques:
    • Plan your projects carefully to maximize fabric usage. Use efficient cutting techniques to reduce waste, such as nesting smaller pattern pieces within larger ones and cutting on the fold.
    • Invest in a good-quality rotary cutter and mat to achieve precise cuts and minimize errors.

Promoting Responsible Consumption and Recycling

Promoting responsible consumption and recycling in sewing and quilting helps create a more sustainable community of crafters! By being conscious of how we use and dispose of materials, we can reduce waste and encourage others to do the same.
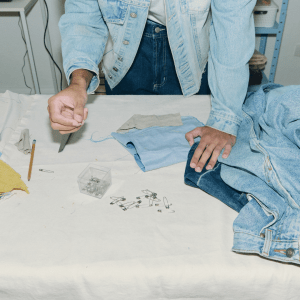
  1. Upcycling Projects:
    • Give old garments a new life by upcycling them into new creations. Transform outdated clothes into stylish new pieces, helpful household items, or gifts for friends and family.
    • Get inspired by online tutorials and communities that share creative upcycling ideas and techniques.
  2. Clothing Swaps and Donations:
    • Participate in clothing swaps to exchange unwanted items with others. Swaps are a fun and sustainable way to refresh your wardrobe without buying new items!
    • Donate unused fabrics and garments to charities or community groups, ensuring they find new homes and purposes.
  3. Repair and Mend:
    • Repair and mending clothing and quilts can extend their life. Learning basic mending techniques like patching holes and replacing zippers can save your favorite pieces from ending up in the landfill.
    • Invest in a small sewing kit to keep on hand for quick repairs and adjustments.

By adopting these sustainable sewing and quilting practices, you contribute to a healthier planet and create unique, high-quality pieces that tell a story. Every small step towards sustainability makes a significant impact!

JUKI Tip: Setting Up Your Swing Gauge (for TL Series)

Do you like using gauges for your seam guides? In this tip, Kelly showcases how to set up and use our wonderful Swing Gauge by JUKI! You can set up this swing gauge for two different seam allowances. For example, if you’re using a half inch and a quarter inch you can use this fabulous tool because what it does is you can set the first gauge up for a half inch and then the second gauge up for a 1/4 inch and then swing it away when you want to use the inch seam allowance.

First, in the video, we will attach it to the machine. The swing gauge comes with two screws for the mounting plate and we’re just going to set those but not tighten them because we’re going to adjust the gauge to the seam allowances we want.

The other thing you’ll want to use is a measuring device so you’re sure it is exactly where you want it to be when you sew the seam. In this video, we’re going to swing the first part back and set the first gauge to half an inch and we’re going to use a ruler down here. We’re lining the half-inch right up with the needle and then I’m going to tighten these screws. Make sure to check it again because this is going to move around! so

Tighten with your t- screwdriver.

If you’re following along the video you’ll see it looks great! Once that is all set you can swing the second one up and adjust it to a 1/4 inch. Remember to check the accuracy of the 1/4 inch. That looks great! So now we’re going to tighten the larger screw with our t- screwdriver.

As you watch you’ll see us try the half-inch seam allowance first and it’s beautiful! We love the accuracy. Next, we’ll swing our second guide forward for the 1/4-inch seam allowance.

If you like an accurate seam gauge and change seam allowances often the swing gauge is an excellent option from JUKI! Locate your JUKI dealer for this fabulous accessory by clicking here. thank you for joining us and be sure to follow! We look forward to seeing you next time on a project or tip!

From Fiber to Fabric with JUKI

Immersing ourselves in a new hobby may lead us to questions we never thought of asking! For example, at the heart of our beloved sewing and quilting projects lies fabric, the canvas upon which sewists and quilters weave their magic. But have you ever wondered about your fabric’s journey before it reaches your fingertips?

Here, we’ll cover the fascinating fabric creation process, where raw fibers transform into the vibrant materials that inspire our projects! Whether you’re a seasoned sewist or just starting, understanding this journey adds a new layer of fascination to your crafting experience.

Let’s Talk Fibers

Natural fibers, such as cotton, wool, and silk, are sourced from plants or animals. Cotton cultivation occurs primarily in warm climates where mature cotton bolls are picked from the plants and then subjected to ginning. This process separates the fibers from the seeds and other impurities.

Wool is obtained through shearing sheep. It’s followed by cleaning the wool to remove dirt and grease, carding to align the fibers, and optional dyeing for coloration. Silk production involves rearing silkworms, harvesting their cocoons, boiling cocoons to soften the sericin coating, and then reeling the silk filaments to produce yarn.

Then, we have synthetic fibers like polyester and nylon, made from oil-based chemicals. Polyester is created by combining small molecules from petroleum, a process called polymerization. These combined molecules are then melted and pushed through tiny holes called spinnerets to form long strands of fibers.

Nylon goes through a similar process where specific chemicals derived from petroleum are mixed to form polymers, which are then pushed through spinnerets and cooled down to create nylon fibers. Essentially, polyester and nylon are made by melting oil-based ingredients and shaping them into fibers.

These processes highlight the contrasting methods of obtaining raw materials for natural and synthetic fibers, each contributing to the diverse range of products available in the textile industry!

Spinning

After the fibers are harvested from natural sources or synthesized from petrochemicals, the next step in the textile production process is spinning them into yarn! The spinning process involves aligning the fibers and twisting them together, forming a continuous thread. This process is crucial as it imparts strength and coherence to the yarn!

Several methods of spinning are employed in the industry. One method is ring spinning, a traditional technique for producing fine, strong yarn. The fibers are drawn out, twisted, and wound onto a bobbin in a ring spinning.

Another method is open-end spinning, a faster alternative that results in bulkier yarn. In open-end spinning, the fibers are fed into a rotor that rotates rapidly, pulling and twisting them together to form yarn. Each spinning method offers distinct advantages and is chosen based on the final yarn’s desired characteristics and the production efficiency required.

Dyeing

Dyeing is the next process in textile manufacturing, where color and patterns are infused into yarn or fabric. This step is versatile and can be carried out at different stages of production!

Fiber dyeing, also known as stock dyeing, is a method in which the fibers are dyed before being spun into yarn. This approach ensures uniform coloration throughout the yarn and fabric.

Yarn dyeing, in contrast, involves dyeing the yarn after it has been spun. It is commonly employed for creating patterned fabrics using different colored yarns.

Lastly, piece dyeing occurs after the fabric is woven or knit. In this method, the entire fabric piece is submerged in a dye bath, allowing for the uniform application of color.

Each dyeing method offers distinct advantages in color control, efficiency, and flexibility, catering to various requirements in the textile industry!

Weaving and Knitting

Following the dye production stage for yarn, the process advances to transforming yarn into fabric, achieved through either weaving or knitting techniques.

Weaving is a method that entails interlacing yarns at right angles to form a fabric. Basic weave patterns such as plain, twill, and satin are commonly utilized. Each imparts distinct characteristics to the resulting fabric, including texture, durability, and appearance. The chosen weave directly influences the fabric’s properties, like its drape, strength, and surface finish.

Knitting involves interloping yarns to create fabric. Knitted fabrics, like jerseys and rib knits, are known for their elasticity and stretchability, which distinguishes them from woven fabrics. The knitting process offers versatility in fabric design and texture and variations in stitch patterns, allowing for the creation of diverse fabric structures and surface effects.

Each technique—weaving and knitting—contributes to the spectrum of fabrics available in the textile industry, catering to various applications and consumer preferences.

Finishing

After the fabrication process through weaving or knitting, the next stage is the finishing process, which enhances the fabric’s appearance, texture, and longevity.

Mechanical finishes use techniques like brushing, which raises the fabric’s surface fibers for a softer feel and enhanced texture. Calendaring involves the application of heat and pressure to smooth the fabric’s surface, creating a fantastic sheen and improving the feel when you pass your hand on the fabric. Embossing creates decorative patterns or textures on the fabric’s surface, adding an excellent aesthetic appeal.

We also have chemical finishes, including treatments to boost the fabric’s functionality. These treatments include applications for water repellency, ensuring the fabric repels water and remains dry in wet conditions. They also have wrinkle-resistance treatments that minimize creasing and maintain the fabric’s smooth appearance. Chemical finishes may also include flame inhibitor treatments to enhance the fabric’s resistance to ignition and combustion, making it safer for wear.

Together, these finishing processes are crucial in refining the fabric’s characteristics, making it more visually appealing, comfortable, and functional for its intended use!

Cutting and Sewing

Once the fabric is finished, it is prepared for the final production stage: pattern making and assembly into textile products. This phase begins with pattern making, creating templates for the desired item. These patterns serve as guides for accurately cutting the fabric into individual pieces. The fabric is then carefully selected to meet the project’s specific requirements. This involves considering factors such as fabric type, weight, color, and pattern.

Once the fabric is chosen, it is distributed to local quilt and sewing shops, where it becomes available for purchase by creators like you! These shops are hubs for enthusiasts and professionals, providing various fabrics, notions, and tools for sewing and quilting projects.

Understanding the fabric creation process allows you to choose the best materials for your sewing and quilting projects. Each step, from harvesting raw materials to sending the final product to your favorite dealers, plays a crucial role in the quality and characteristics of the final fabric. The next time you start a project, take a moment to appreciate the journey your fabric has taken to reach your hands. Check out your nearest JUKI dealer and see the fabrics available here! Happy sewing and quilting!

Creating Your Studio with JUKI

In this blog post, we’ll cover three different projects you can create today for your sewing studio! Whether you’re a seasoned sewist looking to enhance your workspace or a beginner eager to add unique touches to your sewing kit, crafting your sewing essentials is rewarding and practical. From handcrafted pincushions and customized pattern weights to personalized sewing machine covers, we’ll talk about how to create these indispensable tools with ease and flair.

These DIY projects help you tailor your sewing supplies to your specific needs and infuse your workspace with a sense of individuality and style. With the right materials and a reliable sewing machine like your JUKI, you can elevate your sewing experience and enjoy creating tools that are uniquely yours!

Pincushions have become indispensable tools for sewists over the decades, providing a convenient way to keep needles and pins close at hand during projects. Using a compact sewing machine like the JUKI HZL-F300, crafters can elevate these humble accessories into works of art. The HZL-F300 offers diverse stitch options so that you can decorate your cushions and precise stitching capabilities to make those intricate designs a breeze.

We recommend using the JUKI Standard Presser Foot to ensure smooth fabric feeding and stitch accuracy. Optimal fabric choices like medium-weight cotton or linen offer stability and versatility for crafting durable and stable pincushions. For the inside of your cushion, we recommend the following.

  1. Polyester Fiberfill: This synthetic stuffing material is lightweight, resilient, and retains its shape, making it ideal for pincushions.
  2. Crushed Walnut Shells: Natural and environmentally friendly, crushed walnut shells provide weight to keep the pin cushion in place and prevent it from sliding around.
  3. Emery Sand: Often used in combination with other filling materials, emery sand is abrasive and helps to sharpen and clean pins and needles as they are inserted and removed from the pincushion.
  4. Fabric Scraps: Some sewists use fabric scraps or trimmings as filling for their pincushions, especially if they want to add extra bulk or customize the weight of the pincushion.
  5. Rice or Sand: These materials can also add weight to the pin cushion, but they may provide less stability or durability than other options.

Ultimately, the choice of filling depends on personal preference and the desired characteristics of the pin cushion.

Modern sewists have also transformed pincushions from functional tools into personalized expressions of creativity. Sewists can infuse their pincushions with unique flair and character by incorporating customized touches such as embroidery, applique, or fabric embellishments. Sewists can take it a step further by adding a wrist attachment to provide a convenient way to wear the pincushion while creating, offering functionality and style!

With the right combination of materials and design elements, handcrafted pincushions become cherished companions for sewists, helping you create clean and organized projects.

Next, we recommend creating your own set of fabric weights. Fabric weights emerged as an alternative to traditional pins for holding the fabric in place during cutting and sewing, offering advantages like preventing fabric distortion, speeding up the process, and enhancing safety.

Fabric weights can be created for use on various fabric types, from delicate silks to heavyweight denim, and they have become an essential tool for both professionals and hobbyists seeking efficiency and precision in their sewing projects.

For those wanting to create their own set, the JUKI TL Series is a top option. Their robust motor and high-speed stitching capabilities effortlessly tackle multiple fabric and heavy materials layers. With the JUKI Even Feed Foot, this machine ensures consistent fabric feeding, preventing shifting and puckering during sewing. We recommend adding closures or decorative elements to your fabric weights with the JUKI Zipper Foot.

We recommend aiming for a weight of around 4 to 8 ounces (113 to 227 grams) per weight. This weight provides enough stability to hold the fabric in place without being too heavy or cumbersome to handle.

For fabric choice, opt for sturdy materials like canvas, denim, or upholstery fabric. Their weight provides ample stability for holding patterns and fabrics in place while cutting, ensuring accuracy and precision in every project. These fabrics also offer durability and strength, essential for pattern weights that withstand frequent use. With the right materials and equipment, DIY fabric weights can easily be created and become essential tools for sewists, streamlining the cutting process and enhancing the quality of your projects!

Last, we want to discuss creating a sewing machine cover for your machine. These protect your machine from dust, scratches, and potential damage. They also help to keep your workspace tidy and add a personalized touch to your sewing area. When selecting fabric for sewing machine covers, prioritize durability and longevity. Fabrics like twill, duck canvas, or denim offer superior protection while adding a touch of sophistication to any sewing space. Quilted padding or interfacing provides extra cushioning and structure, ensuring your sewing machine remains safe and stylish.

To ensure a perfect fit, measure your sewing machine’s dimensions carefully, including height, width, and depth. Add a few inches to each measurement for ease and seam allowances. This attention to sizing ensures that the cover will fit comfortably and securely over your machine, providing maximum protection.

Crafting personalized sewing machine covers is a breeze with the JUKI HZL-DX7 sewing machine. Its advanced features, including automatic thread trimming and customizable stitch settings, empower crafters to create professional-quality covers with precision and ease.

Pairing seamlessly with the JUKI Walking Foot, this machine effortlessly sews through multiple layers of fabric and thick padding, ensuring durability and sturdiness in every cover. You can also add decorative details with the JUKI Edge Stitch Foot. By combining the right materials and accessories with the JUKI HZL-DX7, crafters can create personalized covers that protect their sewing machines and elevate the aesthetic of their sewing area.

Having items like pincushions, pattern weights, and sewing machine covers in your sewing studio is essential for maintaining an organized, efficient, and aesthetically pleasing workspace. These tools enhance the functionality and ease of your sewing projects and add a personal touch to your creative environment.

By creating these pieces yourself, you can tailor them to your specific needs and preferences, ensuring they meet your unique requirements. Crafting your sewing tools allows for size, fabric choice, and design customization, making them practical and reflective of your personal style! Making these items can be a rewarding and enjoyable experience, further connecting you with your craft. With the right materials and the help of reliable equipment like your JUKI, you can create high-quality, personalized tools that will serve you well in all your sewing endeavors!

JUKI Tip: Adjusting Your Ruler Foot

Welcome to another tip with JUKI! Presented by our National Account Trainer Alba, we’re going to talk about quilting and our JUKI Ruler Foot for the TL Series.

In this video, we’re working on the JUKI TL-18QVP Semi-Industrial Sewing Machine and using our optional accessory the Ruler Foot. In this tip, we’re going to show you how to adjust that ruler foot for perfect stitching. You may notice that when you put your ruler foot on your machine it’s really high above your fabric and you never want to do that.

You really want the height of a credit card, a hotel key, or a thin plastic sheet and as you watch the video, you’ll see there’s a lot of height to start us off with, but the ruler foot has a screw on the side that you can turn and that will raise and lower your presser foot. Using your hotel card, or thin plastic sheet, will help you get that height you need and you’ll want to be where that credit card barely skims the bottom of that foot.

What this does is, as the needle goes up and down it prevents the fabric from bouncing and gives you those perfect stitches you want on your free motion quilt projects.

What tip do you want to see next? Let us know in the comment below!