Meet JUKI Ambassador Amanda Gerard

Today, we’re excited to introduce our newest JUKI Ambassador, Amanda Gerard, the talented founder and owner of SewBestie LLC, located in the heart of Oceanside, California! With over 20 years of sewing experience, Amanda has turned her passion for textile art into a thriving business that serves the San Diego and North County communities. SewBestie LLC offers a variety of classes designed with beginners in mind, making the art of sewing accessible and enjoyable for both children and adults.

Amanda’s journey began at 11 when she first noticed her mother repairing and hemming clothing on her sewing machine. Though her mother was not an expert sewist, Amanda’s curiosity was piqued, and she asked to learn more. With a simple introduction to the basics from her mother —how to turn on the machine and thread it—Amanda’s started learning through trial and error! Her first major project, a Renaissance Noble costume, proved to be both a challenge and a revelation. Despite the difficulties of working with upholstery, satin, boning, and grommets, Amanda finished the costume and discovered her love for textile art.

Creativity is at the core of Amanda’s work! She deeply loves bright colors and high-contrast designs, often gravitating toward rainbow palettes that bring her strong imagination to life. When designing custom garments and accessories for clients, Her favorite projects are those where clients give her creative freedom! With a theme and budget, Amanda can explore new techniques and push the boundaries of her craft. In recent years, vinyl has become one of her preferred materials, particularly in bag-making, where she enjoys experimenting with clear and smooth varieties. Collaborating with independent designers has been especially fulfilling for Amanda, as she’s loved helping bring their unique visions to life.

When asked about the fabrics and patterns she enjoys most, Amanda shouted out her love for vinyl! Transitioning from clothing to bag-making was a significant shift in her creative journey, but one that she was excited to embrace. Working with vinyl, particularly in the form of backpacks or makeup bags, has opened up new avenues for her creativity.

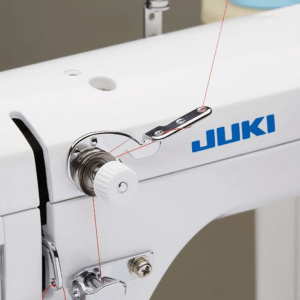
To further enhance her skills, Amanda has attended various workshops over the years, with one class elevating her journey to new levels she hadn’t touched before. A few years ago, she attended an industrial machine workshop with Ann Benvenuto of Simple Artful Stuff in Dallas, Texas. This experience introduced her to the world of industrial straight stitch machines, specifically geared towards bag making! The workshop, which focused on crafting leather bags, provided Amanda with invaluable knowledge about working with leather and the tools and machines required for the process. This experience led her to invest in JUKI’s Industrial 1541 and 1341 machines, which have become essential in her leather crafting and larger vinyl projects. Since then, Ann has continued to be a mentor and source of inspiration for Amanda, whose skills and passion for sewing have continued to grow since that pivotal workshop.

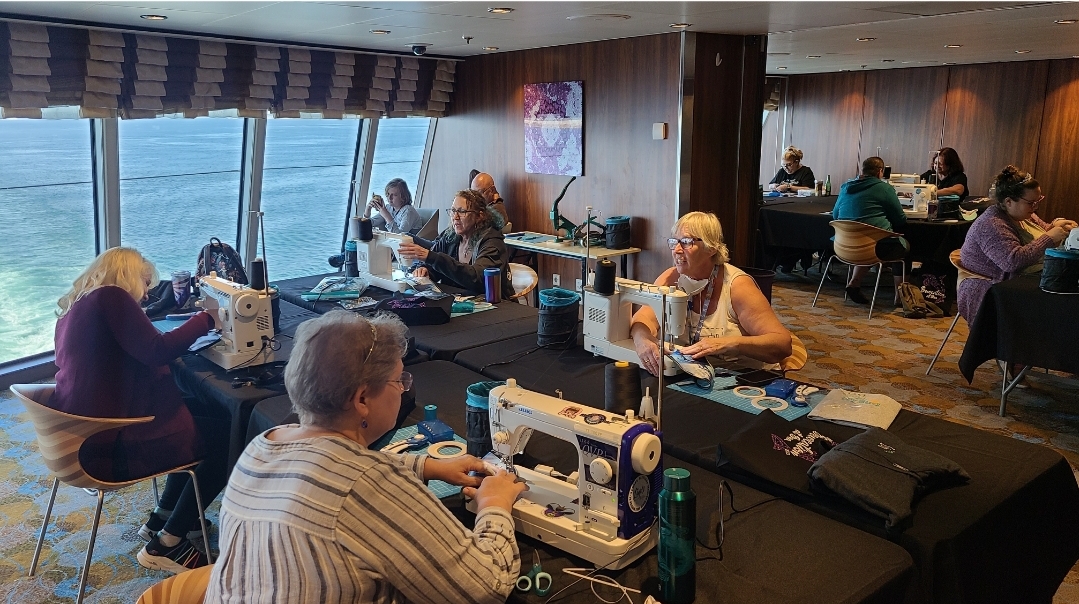
Amanda’s love for sewing goes beyond creating, and now she shares her knowledge of the hobby she loves. Opening her first sewing classroom in 2018 was an exciting and nerve-wracking experience for Amanda. In discussing her plans with her husband, she realized there were no similar classes or workshops available in their area of South Carolina. While her husband worried that this indicated a lack of interest, Amanda believed it was because no one had yet filled the gap. And her instincts proved correct!

The community’s response was overwhelmingly positive, with children and adults eager to participate in her classes. Today, SewBestie’s classes boast a roughly even split between kids and adults, reflecting the widespread enthusiasm for sewing that Amanda has helped cultivate. However, some challenges came with tackling this new venture.  

“I didn’t think that I had enough knowledge to share with other people… Once I started sharing my knowledge and walking people through the basics, I realized how much I knew.”

One challenge Amanda faced when she first started SewBestie LLC was imposter syndrome and questioning whether she had enough knowledge to share with others. Amanda pushed forward, even with these doubts, and surprised herself with the knowledge she had accumulated over the years of sewing. She’s gone on to develop foundation projects for her students, designed to build their skills progressively. Each project builds upon the last, allowing students to grow confidently as they learn.

While Amanda’s classes have continued to succeed, she admits that she still contends with imposter syndrome and believes it’s important to remain humble and open to learning every day.

In the long run, teaching others to sew has become one of the most rewarding aspects of Amanda’s career. She thrives when watching her students, particularly adults, overcome their fear of trying something new. Children, she notes, tend to be fearless, while adults are often more cautious. Seeing the moment when a student has a breakthrough—when something finally clicks—it’s that light bulb moment she loves to witness. She consistently encourages her students to trust the process, even if they’re unsure how everything will come together.

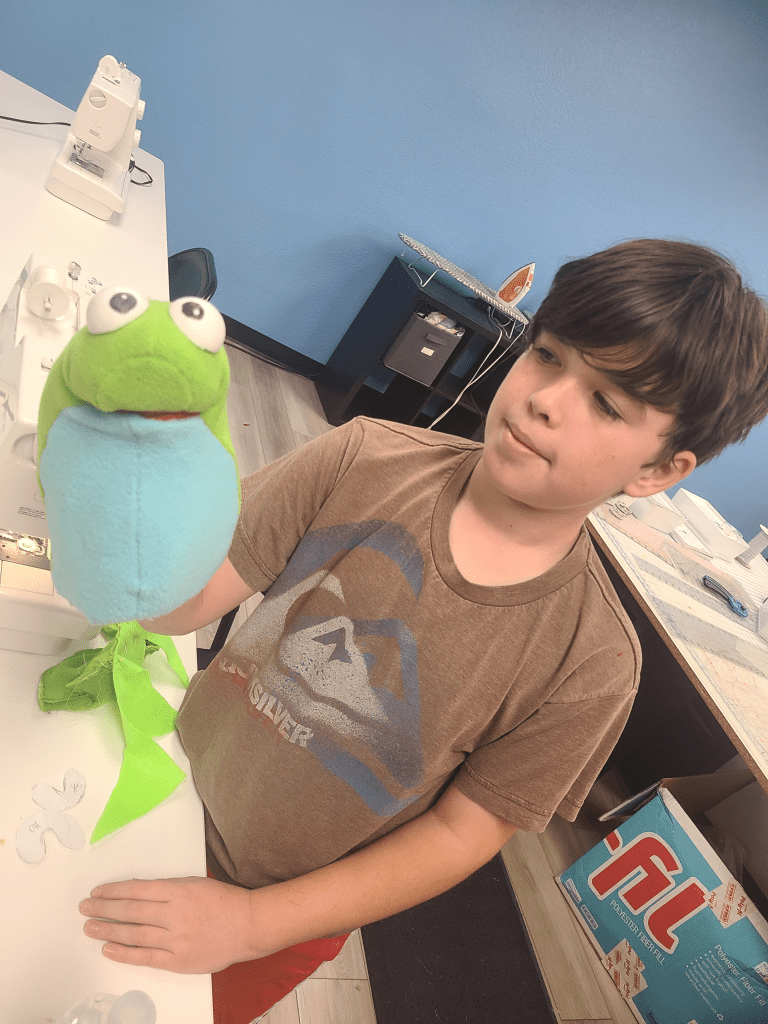
Since opening her classes, Amanda’s most memorable teaching moment has been with a student named Ryan, who has been a student at SewBestie for a few years. Ryan, a young student, once brought in a hand-drawn picture of an animal monster and, with Amanda’s guidance, turned it into a stuffed animal within two hours, impressing her with his passion! Because of his passion, Amanda has helped Ryan explore the world of heavier fabrics with the JUKI TL.

As Amanda looks to the future for SewBestie, she is excited about expanding their lessons by including retreats and events and continuing to work on their YouTube channel. With a goal of reaching 10,000 subscribers, Amanda is eager to continue sharing her love for sewing with an even wider audience! You can learn more about SewBestie’s YouTube by visiting here.

For aspiring sewists and entrepreneurs, Amanda’s advice is simple: Don’t stop learning and always keep your passion at the forefront. She says, “When you enjoy your passion, it shows, and the business will come.”

Amanda Gerard’s journey from self-taught sewist to successful entrepreneur and JUKI Ambassador is a testament to the power of passion, perseverance, and creativity. We’re thrilled to have her as part of the JUKI family and can’t wait to see how she continues to inspire and teach others in the years to come!

“Don’t stop! Learning is not something that happens overnight; it’s a process that takes time and practice.”

JUKI Tip: Gathering On Your MO Series

Discover a simple and effective technique for gathering fabric on your JUKI MO Series serger without using the gathering foot! In this quick tip video, JUKI National Account Trainer Alba demonstrates how to achieve beautiful gathers using the MO-2000QVP. Whether you’re working on garments, home decor, or craft projects, this method is a must-know for any sewing enthusiast.

In this tip, we’re talking Sergers! Here we will show you how to gather so beautifully with nothing but what came with your serger.

Now, in order to create a gather on a serger it’s all about changing certain settings and the first one we’re going to talk about is the differential feed. The differential is how quickly those front-feed dogs move. We’re setting that to 2 so my front feed dogs are going to move at twice the speed of my rear feed dogs. My Stitch length I want to be a little bit longer so I’m at a 3 and a half. We’ll set it between the three and the four.

Now we’re going to talk about the needles and the loopers. My needles are all the way tight, so the highest number on the machine, and my loopers are set to the lowest number on the machine. This means that the threads are going to fight each other creating a gather.

Now my tip for creating a really really tight gather is putting your finger on the back of the foot and forcing that fabric to move even slower and bunch up even more. In the video you’ll see the difference between where we held our fabric and where we did not.

If you want a gentle gather you don’t want to hold that fabric back but if you want a nice tight gather you do want to hold that back!

I want to thank you for joining us and I hope you take out that serger! I hear so many people tell us their serger is still in the box, that they’re afraid of it, so please take that out and start making projects and include some really cute gathers. Let JUKI see some pictures of what you create and we’re just so glad you were able to join us, until next time bye-bye!

Introducing JUKI’s TL-18QVP Collector’s Edition

Attention all sewing enthusiasts and quilting lovers! We are thrilled to announce the release of the TL-18QVP Collector’s Edition, now available in a stunning platinum finish. Let’s dive into the remarkable features, accessories, and endless possibilities.

The TL-18QVP Collector’s Edition

The TL-18QVP Collector’s Edition boasts various features designed to enhance your sewing experience. Its high-speed straight stitch capability allows up to 1,500 stitches per minute, making it perfect for high-volume projects and detailed quilting. The machine is built with industrial-grade components, ensuring durability and precision for all your sewing needs.

One of the standout features is the automatic thread trimmer, which allows you to save time with a simple foot-controlled operation, streamlining your workflow. The knee lift lever is another convenient addition, allowing you to easily lift the presser foot without using your hands, which is particularly useful for intricate sewing tasks that require precision and control.

The TL-18QVP also offers adjustable presser foot pressure, allowing you to customize the pressure to accommodate different fabric types and thicknesses. This ensures that you can work with a wide range of materials, from delicate silks to heavy-duty denim, with ease and accuracy.

Overall, the TL-18QVP Collector’s Edition is a powerful, versatile machine that combines speed, durability, and precision, making it an excellent choice for advanced quilters, fashion designers, and home decor enthusiasts!

Why People Love the TL-18QVP

Our customers rave about the TL-18QVP’s reliability, precision, and advanced features. It has earned a reputation for making complex sewing tasks simpler and more enjoyable. The high-speed capabilities, combined with user-friendly controls, make it a favorite among both professional sewers and hobbyists.

What You Can Create

The creative possibilities are endless with the TL-18QVP! Here are just a few ideas:

  • Custom Quilts: Design and create unique quilts with intricate patterns and professional finishes.
  • Fashion Projects: Sew clothing, from everyday wear to couture pieces.
  • Home Decor: Craft beautiful pillows, curtains, and upholstery that reflect your style.
  • Gifts: Make personalized gifts, such as tote bags, scarves, and table runners, that your loved ones will cherish.

Don’t Miss Out!

The limited edition of the TL-18QVP Collector’s Edition is available for a short time only. Elevate your sewing experience with these premium machines and exclusive accessories. Visit your local dealer to secure your limited edition today!

 Click here to find your local JUKI Authorized Dealer.

Personalize Back-to-School Gear

As the back-to-school season approaches, there’s excitement in the air for students and parents alike! This time of year often comes with the hunt for the perfect school supplies. But why settle for ordinary when you can make their school items uniquely theirs? Enter the TAJIMA Sai 8-needle embroidery machine from JUKI, a game-changer for personalizing back-to-school gear with intricate and vibrant designs! In this blog, we will cover ways you can bring a personal touch to your child’s school gear with the TAJIMA Sai.

Transform Those School Essentials

Whether it’s a laptop sleeve, sneakers, binder zipper bag, or pencil bag, the TAJIMA Sai allows you to add a personal touch to all your child’s school items. The versatility and precision of this machine mean that you can create detailed embroidery on various fabrics and surfaces, turning everyday items into something extraordinary.

Laptop Sleeve: Keep your child’s laptop safe and stylish. With the TAJIMA Sai, you can embroider their name, initials, or favorite quote on their laptop sleeve. Choose from a wide range of fonts and colors to match their personal style.

Learn how to create your very own laptop sleeve here! Using the TAJIMA Sai, you can easily elevate this project with your touch of personalization.

Sneakers: Stand out in the school hallway with customized sneakers. Add patterns, icons, or your child’s favorite sports team’s logo. The possibilities are endless, and with the TAJIMA Sai’s 8-needle system, you can mix and match colors seamlessly!

Design your very own sneakers by visiting here!

Binder Zipper Bag: Organize your child’s school supplies in a personalized binder zipper bag. Embroider their name, class schedule, or motivational words to inspire them throughout the day. It’s a perfect blend of function and flair.

Create your own binder zipper bag by visiting us here and learning more about the Writer Plus program below to add that touch of personalization!

Pencil Bag: Always keep your child’s pencil bag intact. With custom embroidery, you can add their name, favorite hobby icons, or even cute designs that reflect their personality.

Learn how to personalize your pencil bag with the TAJIMA Sai by visiting here!

TAJIMA Writer Plus Program

The TAJIMA Writer Plus program is your gateway to endless creativity. This software comes pre-installed with various design options that you can easily apply to your projects. Here’s a closer look at what it offers:

Pre-Installed Designs: The program includes a rich library of pre-installed designs, such as floral patterns, geometric shapes, animal motifs, and more. These designs are perfect for quick projects and adding a touch of fun to your child’s school items.

Custom Design Creation: Feeling creative? The TAJIMA Writer Plus program allows you to create your designs from scratch! You can draw inspiration from your child’s interests, hobbies, or favorite themes. Whether a complex pattern or a simple monogram, the software gives you the tools to bring your vision to life.

Easy-to-Use Interface: Even if you’re new to embroidery, the TAJIMA Writer Plus program is user-friendly. The intuitive interface makes selecting, customizing, and embroidering your designs easy. Plus, the program supports various file formats, so you can import and work with external designs effortlessly.

Design Ideas for Your Embroidery Projects

Names and Initials: Adding your child’s name or initials is a classic way to personalize their school items. Choose from different fonts and thread colors to make it truly theirs.

Favorite Sports Teams: Show off their school spirit or support their favorite professional sports team by embroidering their logo or mascot. It’s an excellent way for your child to connect with fellow fans and display their loyalty!

Hobbies and Interests: Whether they love music, art, science, or sports, you can reflect their passions on their gear. Embroider icons like musical notes, paintbrushes, basketballs, or telescopes showcase what they love.

Inspirational Quotes: Keep your child motivated with inspirational quotes or affirmations. A few words of encouragement on their pencil bag or laptop sleeve can go a long way in keeping their spirits high!

Fun Patterns and Icons: From cute animals and whimsical patterns to edgy graphics and abstract designs, the TAJIMA Sai allows you to experiment with various styles. Mix and match designs to create something uniquely theirs.

Back-to-school season is the perfect opportunity to express your child’s individuality through their school supplies. With the TAJIMA Sai 8-needle embroidery machine and the TAJIMA Writer Plus program, you can quickly transform everyday items into personalized masterpieces. Whether adding their name, showcasing their interests, or simply having fun with different patterns, embroidery brings a touch of uniqueness to everything you create. So, head back to school in style and make this year your child’s most personalized one!

Achieve Perfect Tension with JUKI

Achieving the perfect stitch on your sewing machine often boils down to one crucial factor: tension. Whether you own a machine from the TL series or the DX series, understanding how to set and adjust tension can make a difference in your sewing projects. In this blog post, we’ll explore how to balance tension on your sewing machine, offer tips for working with different fabrics, and address common tension issues. Plus, we’ll guide you to our YouTube page, where you can find detailed video tutorials to help you along the way.

Understanding Sewing Machine Tension

JUKI TL TENSION

Tension refers to the amount of pull on the thread as it passes through the machine. Proper tension ensures that your stitches are even and secure on both sides of the fabric. Both the TL and DX series come with easy-to-adjust tension settings, but knowing when and how to tweak these settings is key.

The TL series typically includes a manual tension dial on the front panel. This dial allows for precise adjustments of the upper thread tension. It’s ideal for sewers who prefer tactile feedback and incremental changes, which are crucial for delicate fabrics and intricate stitches.

On the other hand, the DX series features digital tension settings through an intuitive interface. This system provides preset tension levels for various fabrics and stitches and allows manual overrides to achieve exact tension requirements. This digital precision is beneficial for consistent stitch quality across different sewing projects.

Proper tension on these machines ensures even and secure stitches on both sides of the fabric, reducing issues like puckering or loose stitches. When adjusting your sewing machine’s tension, remember that it’s built to reduce tension fluctuations while sewing, resulting in smoother and more professional-looking finishes. When you need to adjust the tension, consider these points.

Tips for Adjusting Tension on the TL Series

  1. Test on Scrap Fabric: Always test your tension settings on scrap fabric that are similar to your project material. This helps you make adjustments without affecting your actual project.
  2. Adjust in Small Increments: Turn the tension dial in small increments and test after each adjustment. A small change can make a big difference.
  3. Check the Bobbin Case: For the TL series, the bobbin case tension might also need adjusting. Ensure the bobbin thread pulls out smoothly with slight resistance.
DX SERIES TENSION SETTINGS ON SCREEN

Tips for Adjusting Tension on the DX Series

  1. Digital Adjustments: The DX series often features digital tension settings, making precise adjustments easier. Use the machine’s manual to navigate the digital interface.
  2. Preset Tension Settings: Utilize preset tension settings for different types of stitches and fabrics. These presets are optimized for common sewing tasks.
  3. Manual Overrides: For specialized projects, manually override the presets to fine-tune the tension.

Tension for Different Fabrics

Different fabrics require different tension settings:

  • Lightweight Fabrics (silk, chiffon): Lightweight fabrics are delicate and prone to puckering if the tension is too tight. To prevent this, reduce the tension on your sewing machine. Lowering the tension allows the thread to flow smoothly through the fabric without pulling too tightly, resulting in even stitches and a smooth finish.
  • Medium Fabrics (cotton, linen): Cotton and linen are versatile and commonly used for various sewing projects. A medium-tension setting usually works well for these fabrics. Medium tension balances the thread pull, ensuring stitches penetrate the fabric evenly without causing puckering or loose stitches.
  • Heavy Fabrics (denim, canvas): Heavy fabrics require more tension to properly secure stitches. Increasing the tension on your sewing machine helps to ensure that the stitches are strong and durable, capable of withstanding the thicker layers of denim or canvas. Adequate tension prevents skipped stitches and ensures the thread forms tight, secure stitches.

It’s essential to adjust the tension settings when transitioning between different fabric types. For example, suppose you’re sewing a project involving lightweight silk and medium-weight cotton. In that case, you must adjust the tension dial when switching fabrics to maintain consistent stitch quality.

How Needles Affect Tension

The needle plays a significant role in the sewing process, influencing how the thread interacts with the fabric and affecting tension in several ways. The needle size is crucial: for lightweight fabrics such as silk or chiffon, using a smaller needle size (e.g., size 9 or 10) is recommended. Smaller needles create smaller puncture holes in delicate fabrics, reducing the risk of puckering and allowing the thread to glide smoothly. Conversely, heavy fabrics like denim or canvas require larger needle sizes (e.g., size 16 or 18) to accommodate the thicker threads and layers. Larger needles penetrate heavy fabrics more effectively, ensuring secure stitches without strain on the machine or fabric.

Different fabrics may benefit from specialized needle types that optimize tension and reduce fabric damage. Ballpoint needles are ideal for knit fabrics as their rounded tip slips between the fabric’s fibers without causing snags or runs. This reduces tension on stretchy fabrics like jersey or spandex, maintaining elasticity and preventing skipped stitches. Sharp needles, or universal needles, have pointed tips designed for woven fabrics like cotton or linen. They penetrate the fabric cleanly, ensuring precise stitches and minimal tension adjustments.

Proper needle selection and maintenance contribute to consistent tension control. A worn or damaged needle can cause uneven tension, poor stitch quality, and potential fabric damage. Therefore, replacing needles regularly is crucial for maintaining optimal sewing performance! Always match the needle size and type to the fabric and thread you use to ensure smooth stitching and prevent unnecessary tension adjustments. Before starting a project, testing the needle and tension settings on scrap fabric is wise to ensure they produce the desired results. This practice allows you to fine-tune settings without affecting your main project.

Common Tension Issues and Fixes

  1. Looping Stitches: If you see loops on the bottom of the fabric, the upper thread tension is likely too loose. Tighten the upper tension dial slightly.
  2. Tight Stitches: If the fabric puckers and the stitches are too tight, the upper tension is too high. Loosen the upper tension dial.
  3. Uneven Stitches: Check that the machine is threaded correctly. Incorrect threading can often cause tension issues.

Visit Our YouTube Page

For more detailed guidance, visit our YouTube page here, where you can find step-by-step video tutorials on setting and adjusting tension on both the TL and DX series machines. Our videos cover everything from basic tension adjustments to troubleshooting common issues, providing a visual and practical aid to mastering your machine!

Balancing tension on your sewing machine might seem daunting initially, but with practice and the right resources, you can achieve professional-quality stitches on any fabric. Happy sewing!