
Sewing isn’t just for grown-ups who stitch elegant dresses or fix up old clothes; it’s a world of creativity waiting for our pint-sized pals to explore! From banners that jazz up their rooms to coin purses and drawstring bags that become their new favorite accessories, let’s embark on a fun-filled journey through the world of kid-friendly stitch adventures.
A Banner for Everything
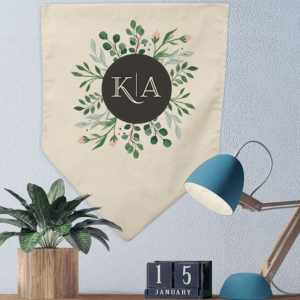
Decorating a child’s room with a homemade banner is a delightful and personal touch that can brighten up any space. This project is a great opportunity to introduce your child to the world of sewing and encourage creativity and self-expression. Here’s how you can help your child create a beautiful banner for their room using the best fabrics and personalizing it with decorative stitching.
Materials and Fabrics
- Fabrics: Choose colorful, soft, and durable fabrics such as cotton or linen. These materials are easy to work with and provide a vibrant backdrop for your banner. You can mix and match patterns and colors for a whimsical look.
- Thread: Opt for high-quality thread that matches your fabric choices. This will ensure your stitches are strong and blend seamlessly with your banner design.
- Banner Template: You can create a simple triangular or rectangular template for your banner. Consider making it longer to accommodate more letters or designs.
- String or Ribbon: This will be used to hang your banner. Choose a color that complements your fabrics.
- Decorative Touches: If you can access a TAJIMA Sai Embroidery machine or a RICOH Ri 100 Direct to Garment print machine, you can add personalized designs and patterns to your banner.
Steps to Create Your Banner
- Cut the Fabric: Cut out your banner shapes from your chosen fabrics using your template. If you’re making a name or word banner, cut out as many shapes as you need letters.
- Personalize with Decorative Touches: Now comes the fun part! Use the TAJIMA Sai Embroidery machine or the RICOH Ri 100 Direct to Garment print machine to add personalized designs, names, or words to your banner. Experiment with different colors and patterns to make it unique.
- Sew the Shapes: Once your shapes are personalized, fold the top edge of each shape over your string or ribbon and sew it down. This will create a loop for hanging.
- Arrange and Hang: Arrange the shapes on your string or ribbon as desired. You can evenly space them or create a more random pattern. Once you’re happy with the arrangement, tie the ends of the string to create your hanging loop.
- Display Your Creation: Hang your banner on the wall or across a window in your child’s room. Watch as it adds a pop of color and a touch of personality to the space!
Lanyards: Keep Those Small Items Close!

Creating personalized lanyards is a fun and practical sewing project kids enjoy making and using. Lanyards are versatile and can hold keys, ID cards, or other small items. They also make great gifts for friends and family. Here’s how to create a customized lanyard with your child using the best fabrics and decorative stitching techniques.
Materials and Fabrics
- Fabrics: Choose soft and durable fabrics like cotton, nylon, or polyester. These materials are comfortable to wear around the neck and withstand daily use.
- Thread: Select a high-quality thread that complements your fabric choices. It should be strong enough to withstand regular wear and tear.
- Hardware: To attach items to the lanyard, you’ll need lanyard hardware such as swivel hooks or keyring clips.
- Decorative Touches: Utilize a TAJIMA Sai Embroidery machine or the RICOH Ri 100 Direct to Garment print machine to personalize your lanyard with decorative designs, patterns, or even your child’s name.
Steps to Create Your Lanyard
- Cut the Fabric: Cut a strip of fabric about 1-2 inches wide and long enough to comfortably wrap around your child’s neck. Fold the strip half lengthwise and press it to create a clean line.
- Sew the Edges: Sew along the open edge of the fabric strip to create a tube. Turn the tube right-side out so that the seam is on the inside.
- Personalize with Decorative Stitching: Using your embroidery or direct-to-garment print machine, add personalized designs to your lanyard. Embroider your child’s name and initials, or print fun patterns onto the fabric.
- Attach Hardware: Fold the lanyard in half, joining the two ends together. Insert a swivel hook or keyring clip into the loop and sew the ends together securely.
- Add Final Touches: Check your lanyard for any loose threads and trim them. Make sure the stitching is secure, and the hardware is firmly attached.
- Test and Use: Once the lanyard is complete, test it by pulling gently on the hardware and the fabric. If everything is secure, your child can use their new lanyard immediately!
A T-Shirt Design For Everyone
Creating personalized shirts using the RICOH Ri 100 Direct-to-Garment (DTG) printer is an engaging and creative project for kids. This method lets you print intricate designs directly onto the fabric, making it an excellent choice for designing custom T-shirts with your child. You can create unique DTG shirts using the RICOH Ri 100.

Materials and Tools
- Shirts: Choose high-quality blank shirts in light colors and their sizes. Cotton shirts work best for DTG printing as they hold color well.
- Designs: Use digital software to work with your child to create unique designs! Consider incorporating their drawings, favorite characters, or abstract patterns. You can even print photos from memories they love.
- RICOH Ri 100 DTG Printer: This machine lets you print your designs directly onto the shirts.
Steps to Create Your DTG Shirts
- Design Creation: Work with your child to create or select digital shirt designs. You can use graphic design software or draw and scan designs for printing.
- Pre-heat: Make sure to pre-heat your blank t-shirt in the RI 100 Heat Press before starting printing!
- Load the Shirt: Place the shirt onto the printer’s plate, ensuring it is smooth and free of wrinkles. Position it correctly so the design will print in the desired location.
- Print the Design: Transfer the digital design to the RICOH Ri 100 DTG printer. Follow the printer’s instructions to print the design onto the shirt. This process may take a few minutes, depending on the complexity of the design.
- Cure the Ink: Once the design is printed, cure the ink using the heat press on the RICOH Ri 100. This step ensures the ink sets appropriately and is safe for washing.
- Enjoy Your Creation: The finished shirt is now ready to wear! Your child will love showing off their personalized creation and can even make matching shirts for friends and family.
Drawstring Bag for All Necessities!
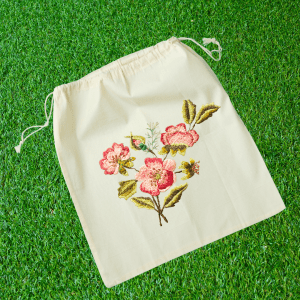
Creating a drawstring bag is a simple and fun sewing project for kids. These bags are versatile and can hold toys, books, or other small items. They also make great gifts for friends and family. Here’s how you can create a personalized drawstring bag with your child.
Materials and Fabrics
- Fabrics: Choose lightweight, durable fabrics such as cotton, linen, or canvas. These materials work well for drawstring bags and are easy for kids to handle.
- Thread: Select a high-quality thread that complements your fabric choice. Choose colors that match your fabric or contrast for a fun look.
- Drawstrings: You can use ribbons, cords, or fabric strips for the drawstring. Choose a color that complements your fabric.
- Decorative Stitching: Personalize the bag with decorative stitching or embroidery using a sewing machine or hand.
Steps to Create Your Drawstring Bag
- Cut the Fabric: Cut two identical rectangles of fabric to the desired size for your drawstring bag. Make sure to leave enough space for the drawstring casing at the top.
- Sew the Bag: Place the fabric rectangles together, right sides facing each other. Sew along the sides and bottom of the bag, leaving the top open. Turn the bag right side out.
- Create the Drawstring Casing: Fold the top edge of the bag down about 1 inch to create a casing for the drawstring. Sew along the edge, leaving a small opening on one side for the drawstring to pass through.
- Add Decorative Stitching: Personalize the bag with decorative stitching or embroidery. You can add your child’s name, initials, or a fun design to make the bag unique.
- Thread the Drawstrings: Cut two lengths of drawstring cord, ribbon, or fabric strip. Thread one through the casing, starting from one end and returning to the same end. Repeat with the other drawstring on the opposite side.
- Tie the Drawstrings: Tie the ends of each drawstring together to prevent them from slipping out of the casing.
- Enjoy Your Creation: Your drawstring bag is now complete! Your child can use it to carry toys, books, or other small items or give it as a thoughtful gift.
Keep Your Coins Safe!

Creating a homemade coin purse is a delightful sewing project that kids will enjoy making and using. Coin purses are small, convenient, and practical, perfect for carrying coins and other small items. Here’s how you can create a personalized coin purse with your child.
Materials and Tools
- Fabric: Choose a sturdy fabric like cotton, canvas, or denim for the exterior and a softer fabric like cotton or polyester for the lining.
- Thread: Select a high-quality thread that matches your fabric choices for a cohesive look.
- Zipper or Snap Closure: For your coin purse, choose a small zipper or snap closure. Match the color to your fabric, or choose a contrasting color for a fun look.
- Decorative Stitching: Personalize the coin purse with decorative stitching or embroidery using your JUKI machine’s decorative stitches or the TAJIMA Sai Embroidery machine.
Steps to Create Your Coin Purse
- Cut the Fabric: Cut two rectangles of fabric for the exterior and two rectangles for the lining. The size of the rectangles depends on how large you want the coin purse to be.
- Prepare the Zipper: If you use a zipper, pin it to the top edges of the exterior fabric pieces, with the right sides facing each other. Sew along the edge to attach the zipper.
- Sew the Lining: Place the lining fabric pieces on the right sides together and sew along the edges, leaving the top open.
- Combine Exterior and Lining: Place the lining inside the exterior fabric (with the zipper already attached) so that the right sides of the lining and exterior fabric face each other. Sew along the top edges, attaching the lining to the exterior.
- Turn the Purse Right Side Out: Turn the purse right through the open zipper or snap closure. This will bring the lining inside the purse and the zipper or snap closure to the outside.
- Add Decorative Stitching: Personalize the exterior of the coin purse with decorative stitching or embroidery. Add your child’s initials, favorite patterns, or other designs for a unique touch.
- Finish the Purse: Check the coin purse for loose threads or unfinished seams. Trim any excess threads and press the fabric if needed.
- Test and Use: Once the purse is complete, test the zipper or snap closure to ensure it works properly. Your child can start using their new coin purse right away!
But why should kids have all the fun? Sewing together can be a fantastic bonding activity for parents and kids. It’s a chance to share skills, stories, and laughter while creating something unique. Plus, it’s an excellent way for kids to learn patience, perseverance, and the joy of accomplishment as they complete each project.
Sewing isn’t just about the end result; it’s about the journey – the laughter when the thread tangles, the high-fives when a seam turns out just right, and the proud smiles when they show off their handmade creations. It’s a skill that nurtures their creativity and problem-solving abilities while having an absolute blast.
So, to all the parents, guardians, and adventurous kids out there, grab those colorful threads,
pick out some vibrant fabrics, and dive into the world of kid-friendly stitch adventures! From banners that light up rooms to lanyards bursting with personality, from personalized shirts to handy drawstring bags and adorable coin purses, the sewing world is yours to explore. Get ready to stitch up a storm of fun and practical projects, and remember, the only limit is your imagination! Top of Form
Bottom of Form
