JUKI Tip: Adjusting The Bobbin Tension On Your Longarm

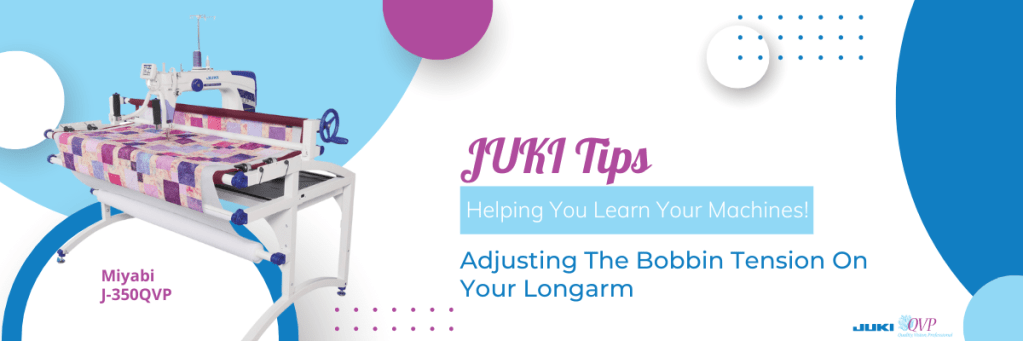
For this month’s JUKI Tip, we’re focusing on adjusting the bobbin tension on your longarm machine like our Miyabi J-350QVP! A common question we hear from sewists and quilters is, “how do I adjust the tension for my bobbin on my longarm?” We’re going to start off today’s JUKI Tip by covering what bobbin tension is, how to get true good tension for your next project, and a tool we think all quilters and sewists can benefit from having in their tool kit!

Follow along below as our JUKI National Account Trainer Alba demonstrates setting the bobbin tension for her Miyabi J-350QVP Longarm machine and how she finds the perfect tension for her project needs.

The first thing we cover is what our bobbin case and bobbin look like. For our JUKI longarm machines, you’ll need an M-Class bobbin and bobbin case. Inside the bobbin case, you’ll find its spring, which prevents backlash as your bobbin turns inside. Always check on your spring when changing bobbins, confirming its blue color to ensure it’s good to go! If you notice the blue haze diminishing, it’s time for your spring to be replaced.

Now it’s important to take care of your bobbin case! Handle with care to ensure that the metal doesn’t receive any bumps or bending from drops. This will affect your tension in the long run and how the bobbin pulls on your thread.

Starting off with a full bobbin, we’ll place the bobbin thread inside the bobbin, ensuring to pull the thread to the right side, before placing the bobbin in the bobbin case and stretching the thread to where the slit is so that it falls right into that tension area. That area is what holds the thread tension when you’re creating. Now the two screws you see on the side can be used to adjust the tension. By turning the screws in 15-minute increments, as opposed to twisting it fully, you’ll be able to adjust your tension slowly to your goal tension number. Remember, lefty loosey and righty tighty!

There are two ways to test your tension. One way to test your tension is by hand. You can do this by setting the bobbin on your palm, making sure to face the bobbin away from you as it normally would in the machine, and then pulling on the thread. You’ll want to make sure you can pull the thread up, slowly lifting it from your palm without the bobbin releasing from the bobbin case. The second way, a technique that offers more precise measurement, is using a tool like the TOWA Guage.

The TOWA Gauge is a tool quilters will love because of the assistance it can offer when you’re trying to get that perfect tension. The goal place our trainer recommends is between 180 and 200. However, her favorite is a little lower at 150. On a longarm, you want your tension to be able to handle multiple layers of batting and fabrics, so you’ll want your top thread and lower thread to meet right in the middle of your batting for good strong tension.

Following along on our youtube video, you’ll notice how inserting the bobbin into the TOWA Gauge is like inserting the bobbin into your longarm machine. Make sure to listen for a click as your setting your bobbin to ensure it’s placed in properly. Next, stretch the thread and run it along the bottom side of the first wheel and up and around to the top; here, you’ll begin to notice the gauge move. As your thread goes into the thread guide and out to the side, pull steadily and even to measure the tension. From here, you’ll be able to decide if you need to adjust the tension number to your preferred goal tension.

Once you’ve finalized your perfect bobbin tension, you can focus on your needle and thread combination. Having the right bobbin, needle, and thread is what will help your projects finish successfully and beautifully, but we’ll cover those combinations soon!

Thank you for joining us in this month’s JUKI Tip, where we focused on how to adjust the bobbin tension on your longarm machine. What JUKI Tip do you want to see next? Let us know in the comments below!

Know Your Quilt Terms!

This National Quilting Month, we want you ready to start your next project! One of the first things you should take a chance to learn are the quilting terms used in the community. Knowing your quilting terms will help you follow along to live projects and understand the instructions on your patterns better. To get you started, we’re going to cover 10 quilting terms every quilter should know! The next time you create, you’ll sound like a pro.

Quilting Terms

  1. Appliqué: Add motifs made of fabric by using your favorite machine! Add this to your base fabric by using a presser foot like our Applique Presser Foot or Open Toe Presser foot, which can help you accomplish this with ease.
  2. Backstitch: In this process, you’ll stitch over one or two stitches and secure them. You can use reverse stitching on your sewing machine and create projects like handbags, garments, and more with quality strength!
  3. Basting stitch: This step is done before your quilt layers are permanently joined! This stitch should look like a large, loose stitch that will hold together your layers of fabric and batting, allowing you to complete a clean-finished quilt.
  4. Batting: This material can be found between the quilt top and the quilt backing. Available in a variety of fiber contents, the purpose of batting is to help your quilt lay flat and display well on a bed, living room, or hanging on a wall!
  5. Binding: This step is the band of fabric that covers the raw outer edges of a quilt, creating a finished-looking project!
  6. Couching: This quilting process involves stitching thick threads, ribbons, beads, and other items to a surface for decorative purposes. Our JUKI Couching Foot is available in two size options, allowing you to use decorative pieces like yarn, thread, and more!
  7. Echo quilting: Create a fun look by stitching multiple lines that follow the outline of an appliqué or other design element, echoing its shape! We recommend using an Echo Quilting foot when you want to add this touch to your projects.
  8. Fat eighth: Perfect for quilting, a 1⁄8-yard fabric cut is cut crosswise from a 1⁄4-yard piece of fabric for a finished size of approximately 9×22″. Perfect for keeping your project designs versatile without needing to buy many different fabrics.
  9. Fat quarter: The 1⁄4-yard fabric cut is cut crosswise from a 1⁄2-yard piece of fabric for a finished size of approximately 18×22″. This set is also great for creating your quilt blocks and allows you to use a variety of fabric designs to create eccentric projects!
  10. Framed block: Create a framed block with fabric strips around it to give it the appearance of being framed. Use this technique when you want to unify blocks or adjust block sizes on your quilt.
  11. Free-motion quilting: This process of quilting is done with the feed dogs disengaged and using a free-motion presser foot so the quilt can be moved freely on the machine bed in any direction. There is a multitude of machines available that offer free-motion quilting, from semi-industrial to completely electronic, allowing you to find a machine model that works best for you! To see different machine options that offer free motion quilting, check out our site here.
  12. Gathering stitch: This stitch is created with a long-running stitch that can be pulled to pucker up the fabric. Add this touch to your next quilt project by using a Gathering Foot, creating a fun and elegant look, perfect for a baby blanket project.
  13. In-the-ditch quilting: Define your quilt blocks and shapes by stitching in the seams on the quilt surface. Also called stitch-in-the-ditch quilting, it maintains those straight lines, and prevents distortion.
  14. Loft: This is the thickness of the batting, keep this in mind when you’re watching quilting live and they reference the project’s loft!
  15. Machine piecing: Piece your quilts together with a ¼” seam allowance while making your quilt top. The best way to create that seam is using a ¼” Presser foot, helping you keep that consistent stitch.
  16. Pivot: This process leaves the needle in your fabric when you raise the presser foot and allows you to turn the fabric when machine-piecing or machine-quilting. This process is useful when creating quilts, garments, handbags, and more!
  17. Quilt sandwich: When you hear someone reference a quilt sandwich, they’re talking about the three parts of a quilt! Layered together you’ll find the quilt top, batting, and backing. 
  18. Raw edge: This is an unfinished fabric edge on your projects. Some creators will use this as a decorative element on quilt tops, and others will complete the edge for a more finished look.
  19. Seam allowance: This is the distance between the fabric’s raw edge and the seam line. Typically the allowance is a ¼” space which can be done on your machine. You can keep that consistent stitch by using a ¼” Presser foot when you create.
  20. Stabilizer: Make sure to use this product beneath an appliqué foundation! This will help you eliminate puckers and pulling on the fabric when stitching your project on your machine. There are different options for stabilizers, and can be found as a tear-away (simply stitch and then tear the pieces outside of your stitching) or water-soluble (removed in the washing machine, or hand wash process) option for easy removal after stitching is complete!

Now that you know more about the basics of quilting vocabulary, you can join a quilting live, attend a quilting class or try creating alone at home with a better understanding of what you’re learning! We hope these definitions help you feel more comfortable the next time you’re creating a quilt project.

What quilting term have you recently learned? Let us know down below!

Happy National Quilting Month!

Join us this month as we celebrate National Quilting month with some of our favorite JUKI quilting machines. Whether you’re working in a studio, or on your kitchen table, we make sure to have what you need to start creating.

Check out this month’s top quilting machines and contact your local JUKI dealer here to learn more about our machine features and projects you can start creating today!